MacroFab Engineering Podcast #230
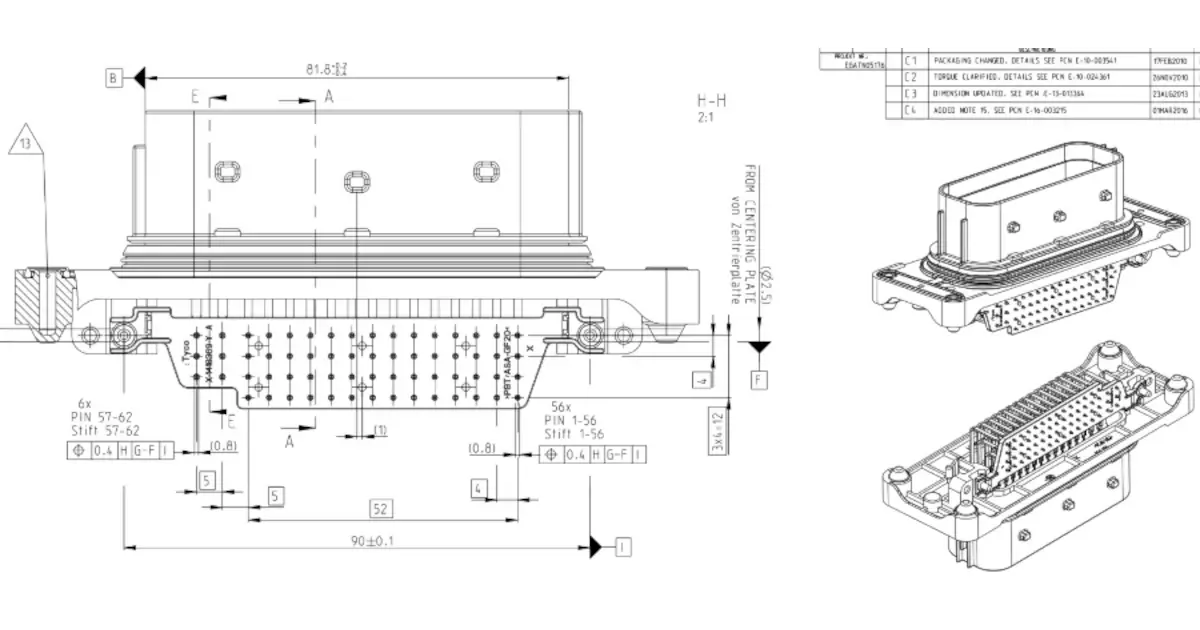
Why is there such a disconnect between component datasheet drawings and EDA footprint layout tools? Stephen and Parker dive into this on this podcast.
The quest for the right connector for a project! The right of passage for any hardware electrical engineer starts with a connector catalog.
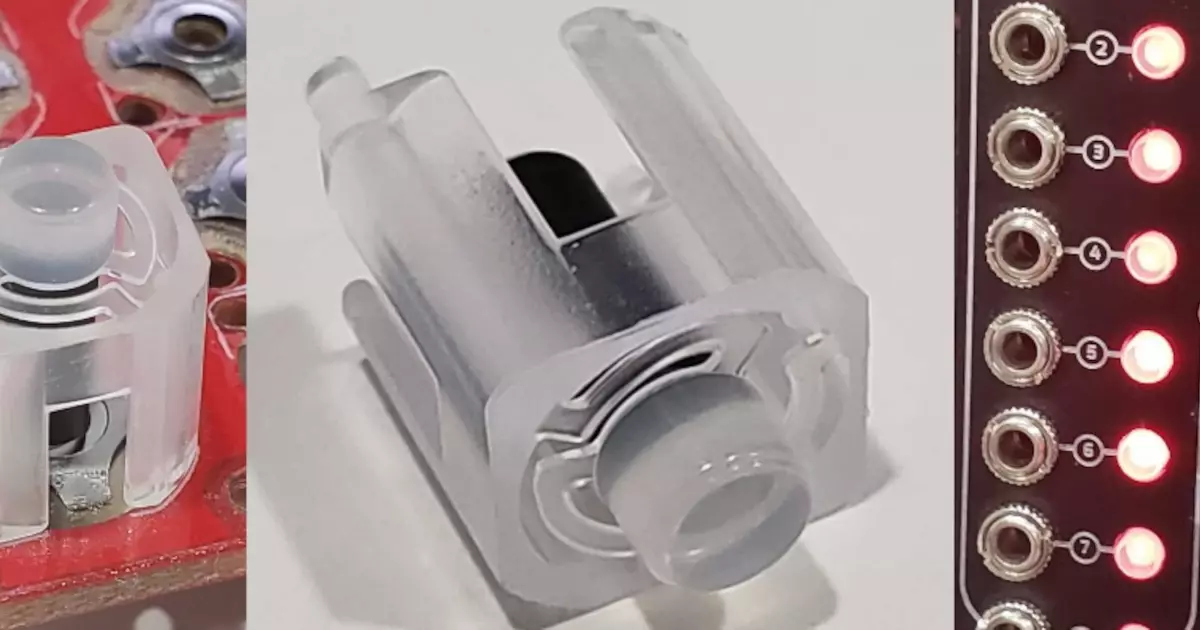
This is the last installment of Stephen's 'Adventures in Injection Molding'. We are going to recap the entire two year sage and close the book on it.
Parker
Stephen
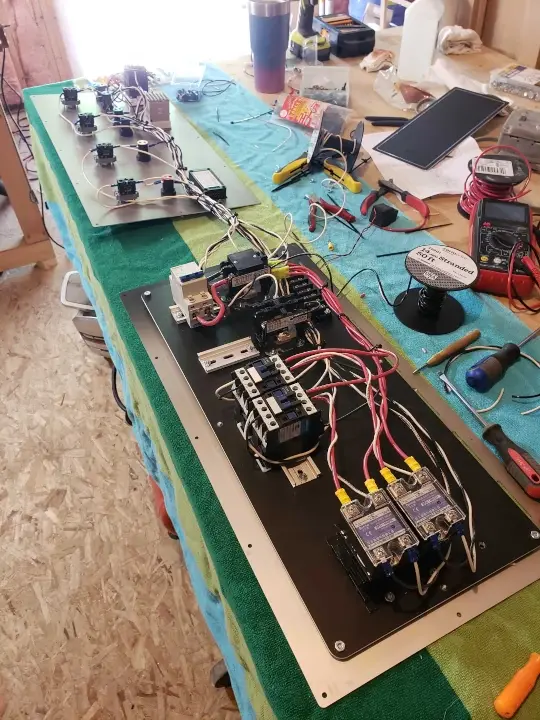
The guts inside Stephen’s control panel for his brewery.
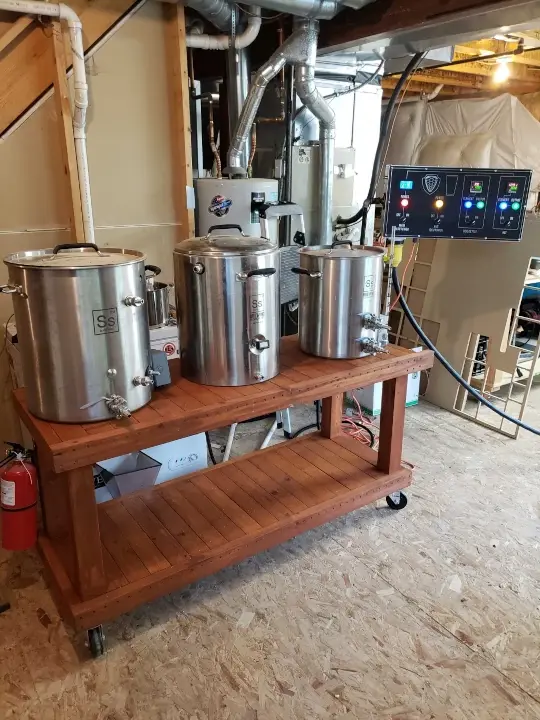
Stephen is almost ready to brew this weekend!
Parker is an Electrical Engineer with backgrounds in Embedded System Design and Digital Signal Processing. He got his start in 2005 by hacking Nintendo consoles into portable gaming units. The following year he designed and produced an Atari 2600 video mod to allow the Atari to display a crisp, RF fuzz free picture on newer TVs. Over a thousand Atari video mods where produced by Parker from 2006 to 2011 and the mod is still made by other enthusiasts in the Atari community.
In 2006, Parker enrolled at The University of Texas at Austin as a Petroleum Engineer. After realizing electronics was his passion he switched majors in 2007 to Electrical and Computer Engineering. Following his previous background in making the Atari 2600 video mod, Parker decided to take more board layout classes and circuit design classes. Other areas of study include robotics, microcontroller theory and design, FPGA development with VHDL and Verilog, and image and signal processing with DSPs. In 2010, Parker won a Ti sponsored Launchpad programming and design contest that was held by the IEEE CS chapter at the University. Parker graduated with a BS in Electrical and Computer Engineering in the Spring of 2012.
In the Summer of 2012, Parker was hired on as an Electrical Engineer at Dynamic Perception to design and prototype new electronic products. Here, Parker learned about full product development cycles and honed his board layout skills. Seeing the difficulties in managing operations and FCC/CE compliance testing, Parker thought there had to be a better way for small electronic companies to get their product out in customer's hands.
Parker also runs the blog, longhornengineer.com, where he posts his personal projects, technical guides, and appnotes about board layout design and components.
Stephen Kraig began his electronics career by building musical oriented circuits in 2003. Stephen is an avid guitar player and, in his down time, manufactures audio electronics including guitar amplifiers, pedals, and pro audio gear. Stephen graduated with a BS in Electrical Engineering from Texas A&M University.
Special thanks to whixr over at Tymkrs for the intro and outro!
Welcome to the macro fab engineering podcast. We are your host, Steven Gregg and Parker Dolman.
This is episode 230.
Oh man, I'm sweating
it nasty out there.
It's a little swampy.
It's pretty hot up here.
It's Houston in the summer now it's actually officially summer, right? Yeah.
Well, yeah. I mean, the difference. The difference is like my version of cooling is a swamp cooler. Like, that's all I have for my shop. And it doesn't okay job.
Yeah, yeah. We can't use swamp coolers because that it's already swamp. Yeah. But no, the reason why is, so I was driving home from the office today, HQ. And I was noticing that my voltmeter on my wagon was not doing what it should be doing. Usually, when the all the battery system in the wagon is all good. It's almost pegged at 14 volts from the alternator. But I was noticing it was like it was just a tad above 12. But you can definitely tell it was like, it was like limping above 12. And I was like, Oh, that's not good. So basically, that means alternator starting to go out.
Quick, quick question for the non car people around. I'm raising my hand here. Yeah. Okay, so I know this is maybe a perhaps a ridiculous question. But maybe it's not at the same time? Where is the voltage actually read? Is it read directly at the alternator? Or is it read at the battery?
The pens? Okay. It depends on the manufacturer and where the voltmeter is actually set up on on old school style cars. It's usually actually just read out the gauges. And, and the ideal world. It's at the end of all your power stuff. And so it's like, after all the voltage drops. That's what it reads.
Oh, okay. I mean, but but really, I mean, most of the time, it's some pretty damn big gauge stuff, you shouldn't get any voltage drop,
it starts to thin out as you like, go through your your windows and go through all your accessory stuff. So it's basically at the farthest. The best spot for it is at the farthest end of everything.
Well and right. The gauges is just the gauge. It's not like a controller. It's purely just telling you the voltage, you'd like the computers not reading the gauge and being like, I need to do something about this.
No, no, no. That's usually done in the alternator itself. And that's where it's regular. Well, old alternators have an external regulator, and then they put them inside of them. I don't know when and like the 70s 80s, something like that. Used to be you can replace the regulators would just go bad. And so you would just replace the regulator. And then electronics got good enough in cars where they were like, oh, yeah, let's just put it in the alternator. Now to save some costs. That's that's how
it was with my old motorcycle actually. The regulator was actually it was full on like a separate unit. But that's because it had giant air fins and you would mount it underneath the bike. Yep, motorcycles are different, I guess.
Okay, continue. No, no, they have large fins on cars, too. It's the same thing. Yeah. Anyways, it was starting to dip. And I'm like, okay, so I pulled over and, and called up four wheel parts. And I'm like, Hey, you have a alternator for my full size Jeep, which is the wagoneer. And they're like, Yeah, we got one. Rebuilt, actually, it's not rebuild. So brand new one, made new are made from USA parts, blah, blah, blah, blah, blah. It says Made in USA in the box. Whatever, it's probably half at least is assembled, right? And checked. Like when I opened it up. It has like, like, like, a actual has a testing card from whoever tested it. And they actually write like, what the amperage is that like at certain rpms. And what the regulator's set
to Oh man, it's not just the bureaucratic stamp testing. Oh, it's actually like it's
written in pen. Oh, my tester actually in the testers signed it to
is there a picture of the tester like hugging it before they put it in the box? Isn't it like a baby he's like, I hope you go off to a good home.
But anyways, so I get home and spent 35 minutes just replacing it that pupper just ripped out the old one, put the new one back in. There was a couple of issues during that. One is the back of the alternator was clocked differently. And what I mean by clocked is on the front of it's got two ears, one's threaded and one's a through hole. So the through hole is where the alternator swings on. And the threaded part has a bolt that goes through through a clamp basically, so you can set the tension on the belt. Now, on the backside, you have a ground lug and you have a power plug. So the power law goes to your battery, and the ground lug goes to your ground with the car on on the Jeep. Those have to be in a certain spot because the bracket and doesn't have a battery, it doesn't have a negative cable. It has a negative bracket, a steel bracket that actually like shunts it over. It's like a bus bar and what shunted over to the engine, and that has to be in the right spot relationship to the two years on the front. And so I had to unscrew the four screws of the case and then rotate it 180 and then put it back together.
Oh, so So whoever assembled it did they not know
it's that's how they're designed from factories. Just when AMC designed this engine, it was with a different alternator. And so in like the 80s they switched to this style alternator, and they just made it work by doing that. And so basically this is more of like a it's a generic alternator. It's called. I can't remember the brand, the main fissure Denso something like that Dusko I think it's Denso. But it's a it's a. It's like a case style that a lot of manufacturers use car manufacturers it's their like an OEM the style a case. And so I pulled it apart. And I've done this before, but you're supposed to like pull it out just by like about an inch and then you can rotate it and then put it back the other. Well, it was binding on something. I'm like, I don't know what that is. So just
I'm just gonna yank on it. Yeah.
And then, of course, somebody goes out of it. Oh, no, it was just the brushes. Oh, yeah. I've never actually like reassemble. I've reassembled like brushless motors and brushed motors before. And I've never done an alternative before. So I'm like, Hmm, how do I get the brushes back in because they're sealed behind like all this metal. There's a little tiny pinhole. So what you do is you you put the spring in, and then you put the brush and you push the brush in. And then from the back of the case you can put a a nail in the hole the brush down and so it's pre loaded. And then you can slide the front of the case in and then you remove the pin and the pressures go into the rotor.
Man. That sounds like some automotive bullshit, right? I replaced the alternator on my truck and I had to do some similar finagling to get it to work.
Yeah, well, at least I didn't have to like drill. Like I've done this before on other alternators is like oh, you know, I need a bigger hole for bolt. So you drill the case out? Hey, it is what it is. But um, yeah, the great thing is with older cars, like this is you. I knew my alternator was failing before it completely died out on me. Like because I noticed that it was still charging but it was not adequate enough to keep the battery at 14 volts or 13.7 or whatever it set to the system is but Yeah, cuz I noticed that if it wasn't charging at all, it'd be like an eight. So it was it was certain to fluctuate. And that's the problem with with modern cars is you don't know until you're actually like stuck on the side of the road and then the cars like oh, yeah, alternators not working.
You know? Did you look at the old otter alternator and potentially diagnose like, what went wrong with it?
I have it on the bench. I mean, I still have it. Yeah. So yeah, okay, probably take it apart and look at it, but I it was really the only thing I because I had to take the pulley off of it and put the pulley on my new one. And I noticed that the shaft was a little crunchy. So I'm going to bet you is actually a bearing starting to go on it. And it probably was making intermittent contact with the brushes. That's why I guess is that shaft was not concentric anymore. That's right. I guess it's old. It's old. It's yeah, really old actually. Yeah, that was all good. The good thing is, you know, I got home and it was like 530 ish. And I was just able to swap that pupper out and this thing is for old parts wanted like $200 or something like that to replace it. And I'm like yeah, I can do that. And my you know, my sleep.
You know, it's funny, kind of similar story with with coils. Not this weekend, but the weekend before my AC. My wife and I were We were sitting on our couch we were just while I've seen TV on Sunday. And she leans over to me she's like, Do you smell that? I'm like, wait, what? And I started sniffing and it's just like, the room just stunk. Like, it was awful. And I got my nose down by the AC vent and and just like this horrible smell was coming out of it. So I shut off my AC. And we go through this whole like, I don't know, we're searching for all kinds of stuff. And then and then I think about it I'm like, that's got to be the smell of dyeing varnish on a motor you know, like, that's the smell. I because because you know what, the only reason I know that is because I've destroyed
motors before. Yeah, they've been around destroyed motors. Yeah,
yeah. So in a similar in a similar fashion to you. Like, I call up an AC guy. And I was like, you know, what, what is it going to cost for you to do this for me? And the guy over the phone, you know, obviously he's like, Well, I can't tell you if that's the exact problem but like, if it is, you know, this is going to start at like seven 800 bucks and I was like, click I found I found one of the one of the I found that motor in town. Actually it's funny because that the blower motor and my AC is what died and I found that five minutes from work there's like a there's like a heater shop and they had it and of course it's like 360 bucks, but you know, slap that on and that's actually the reason why I asked you if you had diagnosed your alternator because I took out the motor and it was felt like vindication because you could see in the back of the blow blower motor and there's like all this nice like copper wound up and there's these big like zebra strikes of black through where like clearly one of the three coils just bit the dust and
one of the one of the one of the lines is windy Yeah, one of the set of windings there's probably a certain word for a set of winding in there. But um, no, it looked fine when I pulled it out and it wasn't smoking or anything but I was definitely when i i Because I use impact to pull the pulley off. And and I pulled the pulley off and then I spun the shaft and I'm like, huh, it's supposed to be freewheeling. Yeah. Which is interesting. All the alternators I've destroyed or gone bad on me my life. It's always been bearings. It's never been like they stopped putting juice out. It's usually like, the bearings start going on. And they either make this one didn't make any noise though, because usually they start making awful screeching noises like crazy screeching noises before they like when the bearings go. But yeah, it's a catastrophic failure. This could be just, uh, you know, it was just wobbling so that the the bushings weren't making good contact.
You know, when my alternator went out in my truck last summer. I got I I'm so ridiculously lucky at this. I was actually out buying a pizza. And I was I was like, I had my truck. Like I got the pizza and and I go to start my truck and I was like, Man, this is running really freaking hard. And like it was had a lot of trouble starting and I I'm driving it home and I can feel like I'm losing power. I'm like, Oh, this is not good. And and then I like pull into my driveway and my truck just dies. And like it just died like straight in the in the driveway. So and luckily it was like a Friday night. I got a pizza because my wife was at a town. I was like I'm bachelor weekend. No, it's time to change an alternator. But the all this said is like I pulled my alternator and it was a bearing failure. Mine I've actually seized like mine it but it's funny because it seems like right at the last minute when I got into my driveway. I couldn't even turn the shaft. One of the bearings just became like oblong and the shaft just said nope, I'm not doing this anymore.
Now the I've had one in my red Jeep fail, and it actually broke the housing. Wow. So the boat was like you're still spinning. fractured the housing. Wow. Didn't get my didn't get my Yeah, I win core core change on that one. Okay, so NASCAR stuff. Yeah. Brewing back on to brewing. Yes. Which we've been. We've had we had a guest on Route brewing, and we're finalizing our breweries right now. It's kind of interesting.
I think it's serendipitous. That could be I think, I think it kind of sparked some some Well, I got sparks from you. And like all these topics about it. Like, I don't know, we're just we're just into it. So last week, we talked about this coming Saturday, which let me let me look at you know what? Yeah, the 27th 27th Parker and I are both planning on brewing.
I had to look you actually knew. So yeah, we're both planning on brewing. So question is update, are you? Are you ready to brew on Saturday?
So last night, I filled up the brewery. And it was air quotes, because people can't see me calibrated my sight gauges.
And then I auto calibrated your sight gauges by sight by sight.
Yes. And I st man. That's the target and everything. Yeah. And then kids. And yeah, that's all I've done. So why need the next? That's what I've done?
How did the auto tuning go?
I mean, I set it to auto tune that let it run.
And it did it.
Right. It's like, there's not much to it.
You know? Okay, so I have the same PID controller.
And I autotuned, a few years ago, on on my boil kettle, I would be interested to compare RPI and d values to see if if like, even with different setups in different parts of the country? Do we have PID values? The same? You know, I think I think that'd be interesting.
Yeah. The only other thing I did is I, I took a cue from you, because you said you were like, actually seeing if your PID controllers with the RTD was actually like, accurate enough. And I did that I took my one that was actually is a calibrated thermal couple thing. Temperature reader actually has, actually does
have a bed at the top of the NIST report, thing,
temperature thing. It actually has a certificate and all that good stuff. And it was like within error of like, both units like the I looked up, I can't remember what the error rate of the PID with that RTD was, but it was like, plus minus like half a degree or something like that. It's what's supposed to be and then this thing is like plus minus, like, point five degrees. No, point one degree. And so then they were within each other's error. So I'm like, Okay, that's good enough for me. Yeah, it's worth knowing now, you know, yes, it's worth knowing. Actually,
if you look at the manual for those PID controllers, they say, do that once a year. Or just just check back because you never know it. So I did the same thing with my system last night. I because I have two different PID controllers. In fact, one of my PID controllers is exactly the same as Parker's. And that one when I checked it against a thermo pen that I have, it's like dead spot on. And then the cheapo Amazon, one that I have as my second PID actually needed a nine degree offset, which, that seems excessive. But when I read online, like other people are like, yeah, you need to check these ones. And I checked it against room temperature, and like 170 degree water and attract fine. So I think it's just like a DC offset effectively.
Yeah, basically, the extra money you pay someone put in that nine degree offset already.
Right, right. They have they have a glass of iced tea and a glass of like, boiling tea, and they just put a probes in both of them and check.
If it was in Texas, yes,
yeah, yeah.
Yeah, the Why didn't notice is because I have one of those PID controllers on to thermocouples. So it has a switch. And I didn't notice that basically, like, the I gotta set the, it's got a it's like a smoothing effect on the output. I guess it's probably like a moving window average of like, what the output actually is. And if you switch the temperature, and the temperatures between the two probes are actually quite different. It does take a while for that reader reading to get up there. So I gotta go in there and basically say, You know what, I don't really care how much jitter the output has. I need a more instantaneous, like, give it to me. Yeah, yeah. So I got to play with that. But that's really the only issue I had last night testing all this was like, hmm, that kind of sucks because you'd like you'll turn it over, like so you're, you're heating up your hot liquor tank, right? And then you switch over to your, the mash tun reader, thermal RTD not thermocouple and then it will like jump up because like you just disconnected it because it's a make it's a break before make connection. Yeah. I didn't want to short out any anything. And so it switches over or it basically gets a wildly different temperature. And so it will like it will undershoot. And so it will think the controller thinks, hey, I need to turn this element on. I'm like, No, you're actually like, over temp right now because you put 170 degree water and supposedly 150. So I got to play around with that. Yeah, I'm pretty happy with it so far. Besides a couple of issues I talked about last week, I want to do version two, you know,
I was reading the manual, which the manual for both of the PIDs that I have, and even the one you have, just sucks, I mean, they're not very good. It's not good. And if you go on, like forums and try to like figure things out, people are just like, we'll just set this to this. And they don't say why. And they don't see what it means. Like the the I'm using air quotes. The crappy PID I have, has a setting that's called DL. And it stands for digital filtering. Don't know why it's called DL and things values from zero to 20. But it doesn't tell you what any of that means. It doesn't tell you what, like, what the impact of so well, digital filtering like, well, if I want things to be well filtered, should I put it at 20? Just like, you max it out. But like, does that mean it goes slow? Does that mean I'm gonna get erroneous readings or something? Or like what is? I don't know, like, online, we're like, five is good. So like, oh, okay, I'll just do that. I hate that. Like, you need to be a little bit more clear. But frankly, for the price of these things, like, I don't know, it's excusable, that you can get away with really garbage manuals on that. So.
I want to find my manual. This is the, quote, nice one that's $40 instead of $20. Yep.
Yeah. Hey, 25 get it right. Right. 25
is still not very good. But at least when you're looking at like, the, the menu options actually kinda tells you what you're setting. Like, What the Oh, yeah, here's, it's called p underscore f t on this controller. Okay, digital filter strength, zero to 66. I don't know why the top end 66. Okay. The default is 55. Which is in the higher range.
What when does that mean that 55? Is more filtering or 55? Less filtering?
Yeah. 55 is more filtering. So one through 30. It's funny is the default is 55. Okay. Okay, which is almost at the strongest the digital filter can be one through 30. is normal filter strength. If your default is not normal. What, what does that mean? I had no idea. Yeah, here it is, the greater the value is, the stronger the filter strength will be stronger filtering strength, increase the stability of the readout, but causes more delay in response to changes in the temperature. So I want I probably want to turn that to like, super low for this one.
Well, uh, yeah, I'm gonna give it a shot. Who knows? Because I mean, okay, well, the question is like, does that mean that your sample rate changes? Or does that mean that like, you get like, you get bouncing temperatures all over the place? Because you see on the crappy PID, I have, the filter is set to off, like by default, like it just read out, just dealing with the readout still, like one update a second. So the thing is under the hood, I have no clue what it's doing. Yeah, the readout is correct. I mean, it's showing the right value. And I set the I tried 05 and 20, which is like the rain, nothing, 20% and 100%. And I didn't notice any changes in anything. So I don't
know, everything doesn't do anything. Yeah, it might not.
Maybe half of the things don't do anything.
Yeah. I think these are, these manuals are. They're technically correct manuals.
I mean, if that was the goal to be, well, that's our
goal is everything. But it would be nice to be like, if you like having like an application documents. Yeah. Like you want to do X. So here's how you do it. standpoint, instead of being like, Okay, I need to I want like, I wouldn't even know if that was a thing, unless you had to read every single letter on this paper. Right? That the digital filtering affected the readout speed. Like, you wouldn't know that unless you read this entire thing, which I don't think is very good design. No, it's very good documentation.
Yeah, but but I think it all comes down to what we said before. Like, he's things are really cheap. So
yeah, yeah, I do like how they have a huge like, I always have like a whole half page to the auto tuning. And basically in the end is you set auto tune and then you you walk away, you walk away. So yeah, once it like, get to the desired temp, you let it run for like five more minutes. You're like, okay, that's done. That's enough.
Well, it will, it's supposed to end but on its own. It's supposed to, you know, stop when it thinks it's done. Yeah. So I don't know, like, basically, mine took about five minutes afterwards and then finally clicked off. Yeah, right. Right. Right. Well, yeah, the one that you have actually has like an auto tune led, and it tells you when it's doing Yeah,
it says 80. Yeah, it blinks it when it's auto tuning. Yeah, it's just like, Why have? Like, there's like charts and stuff like how it works. It's like, I don't want to, why do I care about that? I'd rather have more description about the digital filter shrink.
You know, this is funny. Yeah. Because like with the auto tune, the one thing that you have zero control over, they have tons of description. Yes. How it works? Yeah. Because like, honestly, like, when you hear like digital filtering, you're like, oh, that sounds like it could be good. It sounds like I could get rid of noise inside of my control box, or, like spurious readings or something like that. But oh, who knows?
Yep. There's only so much you can do with four or three buttons on the front of a, you know, little box that costs 20 bucks.
But apparently, it's got like, 40 menu options.
Actually, you know, to be honest, that's what I really like about the cheapo one, it only has four menu options. And underneath each one of those, like, if you enter into that option, then you have to set all the values within that option, or not have to, but like you can scroll through them. But every time you go into the menu, it's only two layers deep. The top one is, you know, your four major things, input, output, auto tune, you know, that kind of thing. And then like values, and the the more expensive one has like secret menus and all these other things you can get into, like, depending on how like long or how fast you press buttons and things. Yep. Yeah. If you thought that, that setting the time on your VCR was difficult. Try changing a PID controller.
There's no standard. Yeah. Okay, so what do you need to do Steven? Before 27?
Well, okay, so last weekend, in fact, last podcast, I said, like, it was my goal for the weekend to get my control box done. And I see and seed an entire box and wired a box from scratch last weekend, and like I totally knocked out of the park and got it done. Like everything amazing is work. Yeah, it's freaking, it's freaking cool. And it was a little bit wobbly yesterday. So or at the end of the weekend, there was like, Okay, so my mounting system I did like black iron pipe to mount it to my, my blue card. And I did very millennial thing. So yesterday, I went to Home Depot and got a second fitting and welded that on. And it's like Skookum. Now, it's really awesome. So I finished up my box, my box is done. So what I need to do, there's kind of like two major things before the weekend, I need to tear all of my pots apart and clean the living bejesus out of them. Because they haven't been touched in years. And I looked at my elements, and they they're just they have like a crust of minerals on them. So I need to do that. And then I need to run the auto tune on my pots also, I've already run it once. But the thing is, like, given that I ran all of my auto tunes for the pressures and humidities of Texas versus Colorado means just guaranteed that those values will not work here.
I think you should go into the PID controller and get the values that it set itself to and see that actually change. Yeah,
that's a good idea. I actually haven't done that yet. If you know it's super weird on the on the crappy PID controller I have. If you look at the manual, the one piece of paper that comes with it, it doesn't talk about auto tune, but if you go like search the internet, there's a lot of people are like, Here's the menu on how to get to auto tune. So it's kind of like oh, that's cuz like if one of the menu options in the crappy PID is just called PID, and you enter into it, and there's a value for p value for i and d. And there's a handful of people online that are just like here are just generic values that get you there. And I was talking about This last podcast, most of the people say, Okay, here's another really confusing thing. The value is zero is like a reserved value, it's a special value. So zero doesn't mean nothing in this PID. Zero means something special needs everything. Like, so don't do that. But But
it starts I mean, we're talking about it up in the PID Loop. Yeah.
Like the matrix is just starts coming out of it. We're talking about like pots of like, many gallons of water here. In terms of like, action, nothing happens fast. So most of the time, the d value in the PID Loop is like, a value of one or two, like, you don't want this PID to do anything rapidly, because it's not going to happen, you know, because as soon as you start raising that d value, it's going to oscillate like a freakin madman and go nuts. Because it's just like, I don't know what to do. Let's do something fast. But it's like, the thermal mass of 10 gallons of water is not doing anything fast. Exactly. Even with even with 5500 watts of power going into it, like it ain't doing nothing fast.
Yeah, actually, that's one of the when I was working on all this last night, that's actually one thing I added to my list of improvements. Oh, my system is boil Cal needs two elements. Oh, it's not fast enough for you is not fast enough for 10 gallons. Really? Yeah. Because you actually have like, you know, about 12 gallons in there. And it takes quite a while. I'm used to also you gotta remember, I'm used to like, propane. Gets it there pretty quick. Yeah. Appropriate. And Max Max burner. It's it's pretty cooking. Like you can get what was it? seven gallons to boil in, like, under 10 minutes? Yeah, that sounds about right. And this was definitely I didn't time it. But I'm like, Man, this has taken quite a while now. It was more volume. I probably shouldn't actually, there were the timer. But I'm like, Yeah, because I have 50 amp service to this rig. I can run two at once. You can watch out 1000 blocks into? Well, that's what I'm thinking is actually I could set up the controllers to where if is if the hot liquor tank is on elements on then make sure the the, the secondary boil one is off? Yeah. And so the basically, the output in the hot liquor tank is turned on than the one the second one is off. But then when you're just on the boil finally, then you can just have both turned on because the hot liquor tanks turned off.
Right? Yeah, just do some simple logic on the inside. Yeah, yeah. Yeah. But again,
goal is this brewery has to get through season one.
You know, okay, so here is one one thing to consider about that. That is cool. But recall, you were trying to potentially test going from room temperature to boiling. When it comes time to go from from the mash up. From 150. You're going from 150 to 212. And you were it was too slow? Yeah. Cheese, okay. Like usually, what happens is, I put my first runnings from my mash into my boil kettle, and I get it started. Like, oh, yeah, that's what I was doing. Yeah. So almost by the time I'm done with my sparge, which is the second step, kind of have everything. I'm almost already boiling, like, I've got it down to like, I don't want to waste time on this crap.
Yeah, no, and I actually already do that because I think letting the letting it sit at that temperature is a detriment to to your wort, basically, let it sit at 170 or whatever your mash out temperature was like you should be heating that up as fast as you can to boil the because you're still fighting you know, enzymes being converted at that point, like the whole point of the mash up. So in when you're mashing you're converting all these enzymes to the and sugars into this nice tea called warts. And and when it's called mash out, you put hotter water in and sporogenes stops inside it's supposed to stop the enzyme but then when you put it into your boil kettle, and so Steve and I do what's called batch sparging, which is basically you do one batch of water and then you fill your mash tun which has all your grains in it again with water and let that soak for a bit more so you get more sugars out you really basic. Yeah, you're rinsing it out. And then so that first runnings goes into the brew kettle, and the that cools down Oh, it can actually start the enzyme start processing again. And so you want to, so the way to counteract that is like, go ahead and just start your your, your kettle and start boiling it. It could be because I, it could have been Steven, I was just not even paying attention to the time. And I was just like, the only thing I didn't have a beer to keep me occupied. So I was just watching basically a number on a PID controller go up.
You're watching paint dries what you're telling me basically, you know, I've seen I've seen larger breweries that do like 123 barrel stuff, have two or three elements, you know, and frankly, they probably have bigger elements. But yeah, but in some cases, they don't some cases they use the standard 5500 watt. So keep that in mind. Yeah.
All so if I ever go to bottom drain, what if the elements were pointing straight up, like a nuclear reactor?
The really bad part about that is if they ever become exposed to the air, then they just look just like a nuclear reactor. Yeah. Chernobyl parts is what you got. You got three parts Chernobyl, Three Mile Island and Fukushima, right? Yeah.
That'd be great. Okay, so we were still on what we need to do before, per day.
You know, I just got a cheapo pump that arrived from Amazon like a $20. Pump. Because I it's been, it's actually been a few years since I brewed. One of the things I totally forgot my efficiency of my coil from my hot liquor tank, in terms of like transferring heat into the ward is garbage. It's absolutely horrible, because I don't actually move the water around. And so like I don't convection, basically. Yeah. Right. Right. Like I basically what I had to do is defeat the whole purpose of doing everything electrically because I'd have to sit with my hot liquor tank and spin it with a spoon.
You're laughing because you're like, oh, that's garbage. So I just bought a little cheapo pump because the water that's in my hot liquor tank, I just use it for cleaning. I'm not touching it for anything. So I don't care what the pump is. So I'm just going to use a an aquarium pump effectively to recirculate the water and just make sure that it moves. And I have new hot, new fresh hot water flowing over by coil, which will make my PID so much happier than having to like fight like, it's like, I'm just raising the temperature and nothing's happening. You know, that's what might be it was doing before. So how about you? What do you got left to do?
I've got to clean it. So I'm probably going to like this is like getting rid of all manufacturing fluids off of it, right? Like scour the pots and pans. And then run a lie cleaner through it to make sure there's no organics and then I need to run. I need to get out I need to get that acid. So I need to go to one of my brewery friends and be like, Can I have some acid in this Growler?
Just bring one of those orange Homer buckets from Home Depot. There you go,
mainly because it has to be I have to know it's really clean the vessel. And that's the thing about people using those buckets. So this is like the Home Depot buckets. Like some people actually like brew or ferment their beer. No, no, don't do that. But some people do. Because technically, they are food safe.
Actually, there's two different buckets that Home Depot sells one is food safe and one is not like the orange one that they have like stack five hot the 100,000 tall by the door. Those are not food safe. Do not use those.
But the thing is at Home Depot, the food safe ones you don't know what someone put in that bucket before you bought it.
What do you think people are just walking around the store like putting random crap in it?
I've I've used buckets at Home Depot. And so they don't have like carts or not carts, baskets. Use the bucket as the basket.
You know, funny enough, I was at Home Depot just the other day. And I always run into the issue where like I go to Home Depot and I'm like I'm gonna buy two things. And then I have like 18 things in my hands. And I was like, this still isn't big enough to justify a cart. But like I feel like an idiot walking around with 40 things in my
hands. But then you walk down every aisle and everyone's doing the same thing. Yeah, exactly. We're all idiots together on this planet.
You know cheers?
Yeah, cheers. So yeah, I gotta clean it. And then I want to do a mock birthday. With all the whitewater basically like, do without the grain be like okay, I got set up my hot liquor tank, get up to temp transfer the first, you know the first runnings worth and the mash tun. And like just do it all time to like, set it all up. And then that way I can kind of figure out where my inefficiencies are. In the transfers, yeah. Is because going through it all, I only really had like, like to gallons total of waste in the mash tun, and brew pot, even though I'm not, I don't have a side draining out of the pots and I don't have a kick down inside are a siphon inside of them. It's basically a hole in the side of the pipe. It's like, you know, inch and a half off the bottom. So it's actually not that bad of a loss and the end because you don't want all the stuff out of your kettle anyways, because it's like, you know, stuff that falls out. And then at the end of your mash, you just can't get everything because it's, you know, in your in your grains. By way the the shot back worked amazing. Getting all the rest of that stuff out.
It's like shiny metal after you're done with the shot back.
Yeah, Roz gave me that idea. I think I mentioned this last week on the podcast, but if I didn't have Ross gave me the idea. Because I'm like, I don't know how to get all this liquid out. I might have to get some big sponges and raw just like shot back. I'm like, oh, yeah, it's awesome. By the way, though, make sure the water is cool. beforehand. I think I might have ruined a hose on my shop. warlin water. That's great. Because they like collapse on itself because it heated up. And it's like so I had to go check the hose probably after this podcast and make sure it's still structurally sound or I had to buy another hose for it's always something always, always something. Yeah, once I do that, then go get ingredients and get some oh, I want to test the cooldown, too. Because that's something that I did the calculations on, it should
work according to my calculations.
Well, it's just the thermal difference because like, how does how, because you have a plate chiller, and I have a plate chiller. But what I'm doing is I basically my idea is in my hot liquor tank I'm using as my vessel for my cold, my water and my ice. So basically, the idea is you fill the hot liquor tank up full of ice, and then that pumps to the cold side of the plate chiller and then the hot side, of course is the is what's on your boil kettle. And I calculate it out. I'm like, Okay, that's enough. Cold to get the boil down to like, no room temp.
Yeah, I have a vessel full of cold.
Yes. And just how much cold do you need? Right?
You know, I have to admit, I I cheat on this side. Because I live in Colorado. Even in the summer, my groundwater is cold. So like, I've just got to pump my hose through it. And it's like 60 degrees. And that's plenty.
Yeah, here though. It's like 78 No, it's more than that. Now the ground your groundwater is like 90, and it doesn't cool with crap. No, it doesn't do anything. Yeah. So I'm gonna try the ice. I want to try that too. So I gotta get a pod. Try it on Wednesday night, Wednesday, I'll probably do my mock brew, because I had to go to the gas station get like ice chest for ice. Yeah. And they get 15 gallons with ice I think 15 gallons of ice. I think when I did the calculation will will cool. Like 10 gallons of wort.
Okay, I got a challenge for us. I think what we need to do is, so my blue day is typically like, all day, like it takes it takes all day. I usually get up in the morning and start at like seven or eight. And I'm done by like, seven or eight. So I'm gonna be posting pictures in the Slack channel all day. I want to see you post pictures in the Slack channel.
So you get done first. Well, I'm brewing two batches. So while I'm doing I'm brewing two batches at the same time.
You'll be done before me. Actually, you know what, we'll probably be done at the same time.
Probably because I have never brewed with this rig at all. So it's gonna be a big learning experience.
Yeah, for sure. Yeah. All right. So check it out on Saturday in the Slack channel. We'll have some competing pictures of hot liquid. Yeah. So So I got I got somewhat of a separate topic like a completely way like 190 degrees topic here. But we've talked about brewing enough here.
I got I actually wanted to talk to you about some EDA workflow, stuff so, so like your workflow for EDA tools. And what's it what kind of spam This is, I was talking to a buddy of mine the other day, who had actually emailed me and was like, Hey, I've got a I've got a PCB. Would you mind taking a look at it? Just before I order? And I was like, Yeah, sure, why not. So I look at this board. And it's, it's a beautiful board, it looks great. And it's got all this through hole over it, because this person wanted to do hand soldering, which is totally cool. But there was like, three or four surface mount parts on it. And I was like, you know, there's no need for these to be surface mount, especially if you're already doing everything through hole. Like for consistency sake, you could go through whole, like, why did you? Why did you make these and they were just diodes. They were like one and 4148. They were just like, okay, really generic diodes? Like, what's the purpose? And the person was like, oh, because I had the footprint for it. That was their entire reason for it. And and I kind of was like, ah, like, That's not. That's not necessarily, in my opinion, the best reason to do that, but like, I get it, I get it. And so I was like, okay, cool, fine. They ordered the boards, they had a lot of trouble soldering those surface mount parts. In fact, some of the parts fell off because they didn't do a great job. And then they went and changed them to surface mount, I mean to throw and reordered the boards and had to rebuild them. And, and I don't want it to be like I told you so thing, because it's certainly not that, but that's not what I'm going at here. But I do want to talk real quick about EDA workflow. And, like, when do you choose to use someone else's footprints versus never your own? Never, never, never, never really? Use a 100% of your parts.
I make 100% of all my footprints. I whenever Eagle because eagle has a whole bunch of built in ones. Yeah, the first thing I do on every single update is I go into that directory, and I delete all that stuff. I want my 10 megabits back of hard drive space. Yeah. And so I delete all that. And no, I make all my footprints every single one.
You see, okay, we've we've talked about this before. I'm a I'm almost 100% year camp, I make probably 99% of my footprints. i There's, there's a few footprints that I don't make, or I'm willing to use default footprints. And that's only because like I've tested them and I was like this works. I'm okay with this. And that's a T sock package. Like I've used dip traces default T SOP and it works. And the SOT 23 Three package, I've used that and it works. And then they have some through hole caps that I trust, although in their most recent update, they deleted all of those. So like, whatever. Okay, fine. I'll make my own, I have no problem making my own. But you know, another thing is like, I've been kind of like trolling the trolling is not the right word lurking on the drip trace forums. And there's a lot of people who are like,
when dip trace reaches out and says like, hey, what can we update? Or what can we, you know, improve about this software? A lot of people were like, please add footprints for these parts. Yeah. And they just give like four random parts, you know? And it's like, Wait, Shouldn't that be what you are supposed to do? Like, why is that dip traces responsibility to make footprints for you? And at the same time, like, what was the mistake? You know? Yeah, it
puts the librarian trace.
Yeah. Yeah. I don't know. Like, I fit firmly into the camp of like, if you are going to use someone else's footprint, the very first thing you do is you import it and you check it, like, yeah, top to bottom, like, yeah, and even even then, like, if you as Parker and I to make a diode footprint, they would look different, because we have different ways of doing it. Like pick any part we wouldn't do it differently. And so like, I don't, I don't like the idea of basing your design off of the ease of using someone else's stuff that they made. It's not as simple as that, you know.
Now I have chosen parts based On the fact that I already had them designed myself. Sure, I can see I could have done like, I could have been like, oh, I can save a buck here, if I just redesigned this part, but I'm only building one of them. So, yeah, I'm just gonna use the more expensive part.
Well, but Okay, so what's okay? The question is, what's the difference, though? Like, how long would it take you to design a footprint? And how much is your time worth? versus, you know, just, I'm making one of these. And so it's a buck more who cares, right? Yes, the way it boils down to me. And frankly, this is informed by diff traits. But I think that this is basically true of every EDA tool. Every EDA tool has four different aspects to it, there's schematic, which is like obvious, and then there's layout, which is obvious. But then there's two sub, I guess you could call them modules that go in there, there's a thing that makes what the schematic looks like. And then there's a thing that makes what the layout looks like.
And then footprint editor and then a symbol editor. Exactly. And in DipTrace, they call them component editor and Pattern Editor. Which same thing for symbol and, and footprint, but like, you have those four, and every EDA tool has those four, even if they don't break them up into those four. You know, they're always, they're always there. And, and I think, one misstep that a lot of people make is they look at EDA tools, and they're just like, Oh, it's a schematic, and it's a layout. And I just, you know, they've already given me all the parts and I just select them and I go in like, no, like, you don't start in schematic half the time you start in the components, or you start in the footprints, and you know, 90%
of my layout is if it's a brand new thing, and I'm using all new parts 90% of it is done in the editors, the layout and schematic editor, right, I mean, symbol symbol and and component editor,
is that what you who calls them,
calls them matter what the the symbol is, for the schematic symbol is like the is for the schematic side. And then layout side is called, I think it's
actually called package. Yeah, yeah, that makes sense.
package and symbol. And then those go together into your library to make a device. I think it's called device,
you know, okay, so that's one thing that I'm super jealous about eagle that I think Eagle just knocks out of the park. And frankly, I don't, I haven't seen as many EDA tools do it as well as eagle in my opinion,
a lot of people don't like how Eagle handles libraries. And I'm like, this is perfect Eagles
Eagles ability to have like variants is so awesome. Oh, yeah, like that is so killer. Like with dip trace. One part is one part. Like they make it super pure. Like if, if you want like the 32 pin version of something, and then you want to change to the 48 pin version. Good luck, you're gonna have to create both of those from scratch. But with with ego, you can kind of flip flop in between and I kind of like that. Super nice. It is nice if you want to make like a family of parts did. Eagle is so nice about that. Yeah. So I think I think what it kind of what a lot of this boils down to, in my mind is if you're getting an EDA tool, if you're starting to learn an EDA tool, or even if you're starting to learn like just electronics in general, like, keep in mind that all of this is is bigger than just schematic and layout. And I think it's really important to know that like, you're going to spend a lot of time need making footprints and schematic symbols. And that's a good thing. And don't just go asking for other people to make those for you. It's really important to know how to read a datasheet. And, and just as much knowing how to like read a dimensional drawing in order to create a footprint. It's also nice to be able to adjust your schematic symbols so that it's readable for someone else. Like does it make sense to put your power and ground where you put them? Well, maybe not. Maybe it makes sense to put them on a different axis on your schematic symbol. Who knows, you know, so like, I don't know, it always kind of irks me when someone's like, well, I already had this thing because I downloaded it from this random weird website. Are you sure that's gonna work dude knows, you know, and so on. As a side note, there are footprints standards for components. J DEC is is one of the big ones that has like, this isn't Oh 603 You know?
And in the most recent dip trace, release they have this big like, auto footprint generator thing that they've released that like, tries to interpret data and create J deck standards from it. I gotta admit, I don't care, because I'm going to make it myself anyway, like, I don't want I don't want an AI trying to think of what I'm going to do I want to do it myself. And then No, it's right. Because even if a computer does it, that's not good enough.
Yeah, I think a lot of those, like auto generation for print stuff is people are making it a bigger problem than it actually is. In the end. Yeah. It doesn't take that long to design these things know, by hand. Yeah, cuz there's, I think key cards got like a wizard, and it still gets stuff wrong, right? Because you still have to interpret what you put into the wizard, you still have to go look at a datasheet and then infer the measurements of all the pins and pitch, pad size, all that good stuff, which is like, if you can do it, that you already did it, you can just manually put it down.
Well, and at the same time, like, Great exam,
saving time, if you're doing like BGA days, but I think mostly
labels, maybe, you know, like big Asterix may be on there. You know, one of the things that work, we know our manufacturing line, because we've been working with this line for years and years. And we know that if we do particular things will have parts tombstone, so we don't do that. And our footprints are tailored for our manufacturing line. They're not tailored for whatever random thing we downloaded, we found out from some trial and error that like if we do XYZ, it's going to be good, or it's going to be bad. And, and I think that's something really important, like if you're designing a product, and your manufacturer comes back and says like, hey, we ran your boards, and these footprints are causing all kinds of errors, you need to go and fix them. Well, like what happens if you wouldn't download someone else's footprints, you don't even know how to
fix them. Now you go and tweet that guy and call them out and say, hey, you need to fix your footprint. Well, but the problem is, maybe
maybe that guy's footprint isn't even bad, you know?
Yeah, could have been designed for hand soldering, like, let's say, a hand solder, oh, 805, which would have a lot more pad area. But during reflow Hey, that's gonna make it pull off the pad and tombstone. Actually, you know,
it's funny, I had a customer hit me up last week. And they sent me Gerber's for some stuff that they wanted us to work on. And they had a QFN package that had one of those thermal pads underneath the, you know, the part and it was a big, like a giant rectangle. And their paced aperture was the full size of the thing. So it would have been like a peanut butter jelly sandwich worth even floating there. Yeah, like it would have been like a full gram of solder underneath this one part, the ice would
be on a big, big inner tube just floating around.
And I wrote the guy an email, a nice email saying like, hey, you know, we should probably adjust these apertures. And he was like, Oh, I had originally downloaded this, you know, this, this part. And I was intending for this to be hand soldered, so I didn't even adjust that. But like, he didn't tell me that I just looked at your stuff. I was like, Good lord, like, this is gonna be like $5 worth a paste on justice bar. So, you know, not this is not to like dig on anyone. But But all I'm really getting at is like, if you're gonna get deep into EDA did stuff like just, like, learn how to do the the parts learn how to do the footprints, because you're going to need to anyway, one, one,
it's a good skill.
It's yeah, it's a good skill. And, you know, the biggest thing I remember we were talking with Alicia white with the embedded FM, Ed shoot, just like it blew her mind that we were like, Yeah, we make every part or nearly every part.
Well, I think that's was the big difference we found between hardware engineers and software engineers, is a lot of this is when I do code as well as like, I don't write everything. No, like you would leverage modules and libraries a lot. Whereas in hardware, man, it is hard to trust. You find online.
Yeah, if someone screws up, I want it to be me.
Yeah, I mean, it's just the, it's just having control. Whereas this, I think we talked about this on that podcast is in software at the module doesn't work. Let's say it's Python. So you have modules and said libraries, and the module doesn't work. You found out in five seconds. Yeah. That didn't work. And it didn't ask you much. It didn't cost you that much besides your time and you have to go research and blah, blah, blah. Whereas if that footprint is incorrect, oh man that can that will ruin your month. It ruins a month.
Yeah, yeah, for as simple as apart like a one and 4148, which costs a 10th of a cent in quantity like, that could ruin your board, you know, for the difference of going from, you know, an Assad 123 surface mount package to making your own custom Do you know, 35 package that you could do in two minutes? Just do it, you know? Yep.
Just do it. Okay, so I have one more thing before we sign off. So the brewery besides us brewing on on Saturday, I mean, season one of the brewery's done, I'm calm seasons. Cool. Okay, so basically, next season is started is like May next year, right? Okay, that's where I'm gonna work on all the improvements we talked about last last week. But now I need another have another project for the podcast. That was my podcast project. And I'm putting a stamp that is done. It hasn't made beer yet. But it will I boiled water.
Do you want me to go through the list of unfinished projects and picky one.
So I am, I'm gonna do I might pick some stuff from that list eventually. But I'm going to start doing some projects, I know I can get knocked out within like, three weeks. Okay. And so the first project I'm going to work on is a device that makes sure my cat does not get fed more than once a day. And it's gonna be all this stuff's gonna be simple. Basically, what happens is like, I'll feed my cat, and then my cat will eat all the food. And then go bug my mom or my dad, my dad's home. And Meow, meow meow gets fed again. So I want to have like, a function that goes on like the food bin that has a red or green light on it green light is you can feed the cat red light is don't feed the cat. And I want to run off just like a battery. So you don't have to worry about you know, plugging it in or anything like that. Doesn't need IoT connectivity, let Twitter know the cat's been fed, that doesn't have doesn't matter
what your your scope controlling this already
scope control, all these projects can be scope control, oh, but they're all going to have something interesting that I haven't done before. And circuit layout and or design. So this one is going to be like power efficiency. So it needs to be able to like I pop a battery in and I don't have to worry about this thing for you know, a year or two longer longer is better. So AAA battery probably run it off of I don't know
yet. So we do have a guest next week. But But after that, I guess we can get an update on this.
Yeah, I'll probably have a board layout by then at least, I hope fingers crossed code. If I have a dev board that work, because I am going to run a microcontroller. Because I do want to have like some accuracy and time. And just power efficiency. It's like hard to do a lot of counting for timewise with an analog circuit power efficiently
who you should challenge yourself to do it.
Because you would have to use like a decade counter. And last I looked those were CMOS device. Maybe their power efficient, I think good luck. That would be nice. If you just had a counter that you would just a big big counter. And then a really slow clock. And it might be power efficient.
I think you could do it. Yeah. Well, it
doesn't flip flop state for the LEDs have equal. And then the Nolan thing is it has no if you fed the cat or not and I thinking like like you just press a button on it.
Yeah, press a press a button on it and it goes green to red, as in don't feed and then it resets every 24 hours.
I was thinking about reset like every 18 Okay.
Yeah, that makes sense. Yeah, you give us a little window. So so just pick whatever bit that that happens on in the decade counter. You could do it analog. Yeah.
When we say analog, it's a decade counter, which is a digital device.
Yeah, it's it's the analog side of things. That like, where computer doesn't get involved, you know?
I guess a decade count was a computer as well.
Now you're getting right on the verge of things. All right thing up. Yeah, I think that's about it. So that was the macro fab engineering podcast. We were your host, Stephen Craig
and Parker, Dolman. Let everyone take it easy.
This is the last installment of Stephen's 'Adventures in Injection Molding'. We are going to recap the entire two year sage and close the book on it.
The quest for the right connector for a project! The right of passage for any hardware electrical engineer starts with a connector catalog.
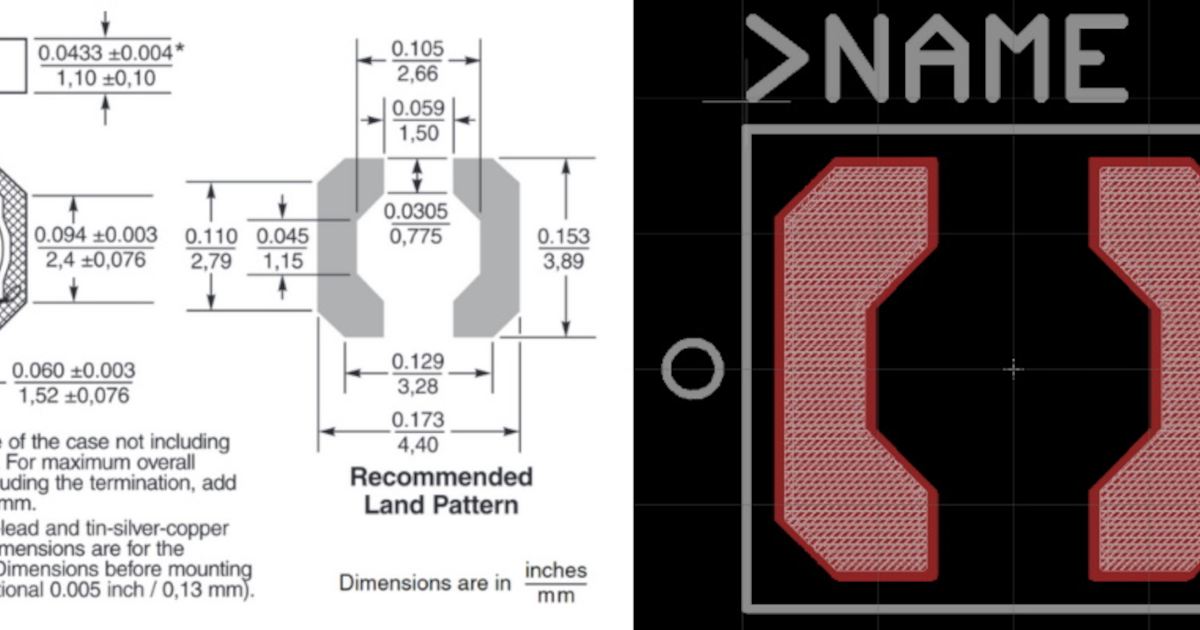
Why is there such a disconnect between component datasheet drawings and EDA footprint layout tools? Stephen and Parker dive into this on this podcast.