MacroFab Blog
This article will cover the hardware aspect of using the EFM8 series , a Silicon Labs microcontroller. We will start from the basics of what is needed to get started with the EFM8 and how to program the EFM8.
Why use a Silicon Labs EFM8 MCU
The great thing about the Silicon Labs EFM8 microcontroller line is that they’re very inexpensive. A look at Mouser will show that the EFM8BB10F2G in QFN20 is the lowest cost MCU on the market in singles and in-quantity for the average engineer and maker. It is very hard to beat the EFM8BB10F2G with 16 GPIOS, built in configurable 12bit ADC, 4 16-bit timers, comparators, UART, SPI, 2kB of program space, 256 bytes of ram, and on-chip debugging. Also, the EFM8 line is very easy to get working as it needs very little support hardware. And for a few cents more, you can get even more ram and program space.
Prerequisites for the EFM8
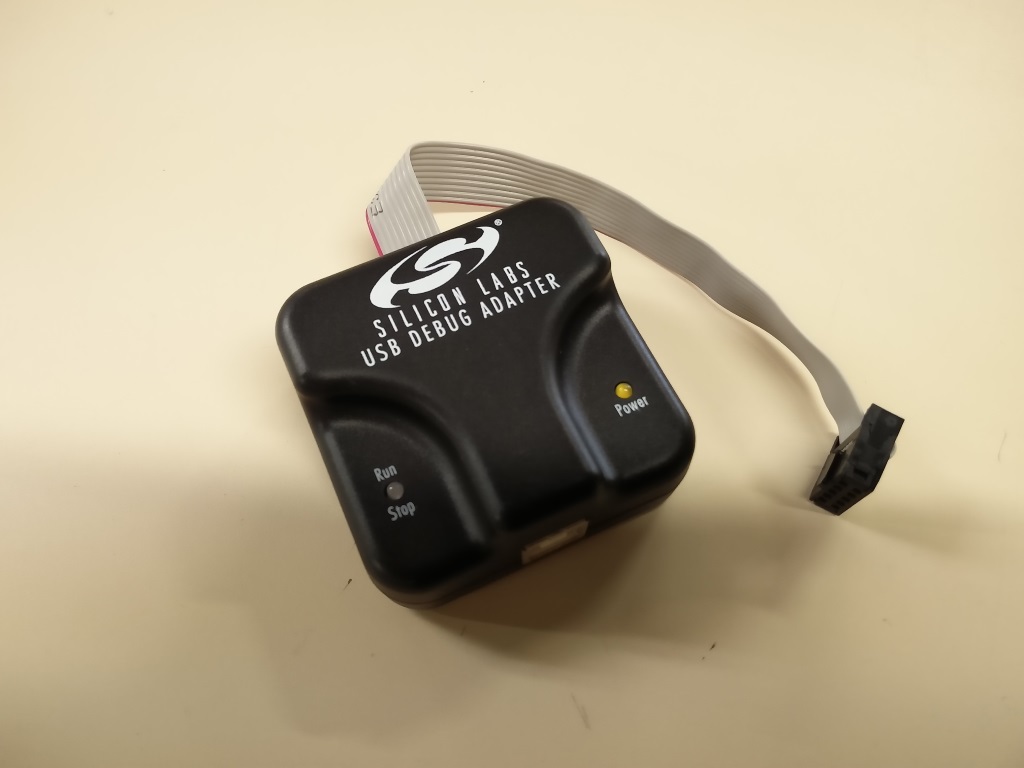
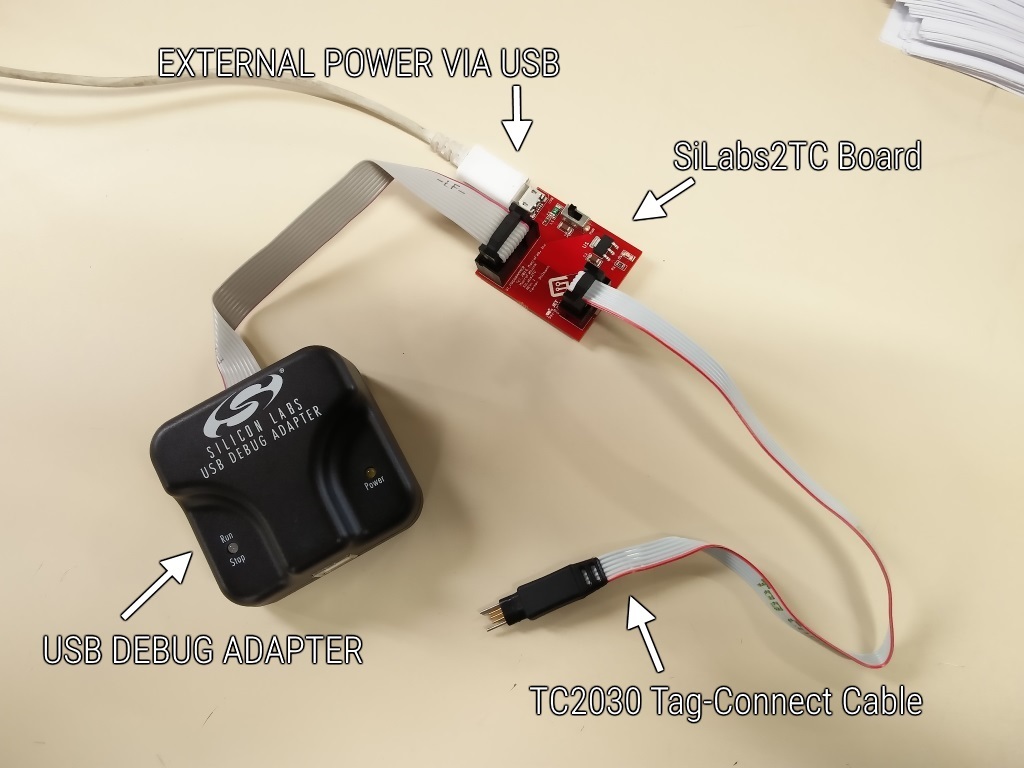
To program the EFM8 chips you will need a USB Debug Adapter for C8051 MCUS from Silicon Labs (See Figure 1). Mouser also stocks this adapter for $35 (at the time of this article). Since I am a fan of Tag-Connect cables, I will be using the SiLabs2TC board. Figure 2 shows how the SiLabs2TC board works. This board connects the USB Debug Adapter and an external power source to a Tag-Connect TC2030 cable. I will be designing the EFM8 example board with the SiLabs2TC board in mind. There is a factory bootloader but we will cover that at another time.
IMG 20160811 141715
Figure 1: Silicon Labs USB Debug Adapter DEBUGADPTR1-USB
IMG 20160811 141828
Figure 2: SiLabs2TC Board configuration. Uses external power from USB.
Example board for the EFM8
Most EFM8 MCUs just need two bypass capacitors of 1μF and 0.1μF and a 10K ohm pull-up on the reset line to get it working. The internal oscillator clocks at 24.5 MHz with a ±2% accuracy which is fine for most applications. For the board, I decided to go as minimalistic as possible. The board has just 1 extra LED and resistor to provide an on-board debug LED. Figure 3 and Figure 4 show the schematic and board layout for the example board.
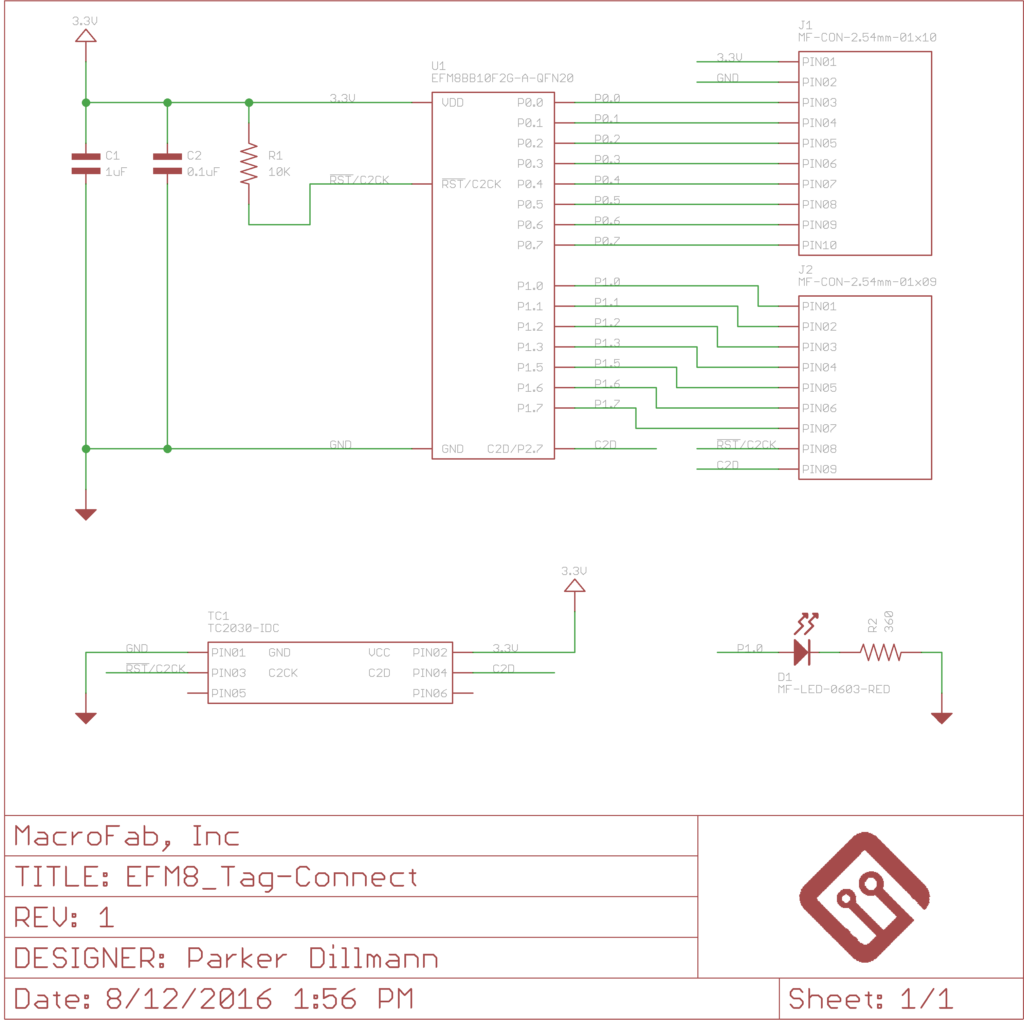
Figure 3: Schematic for the EFM8_Tag-Connect example board.
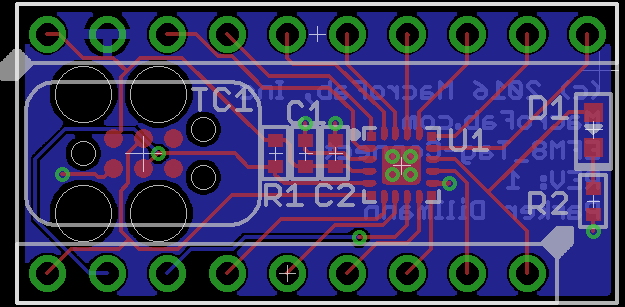
Figure 4: Layout for the EFM8_Tag-Connect example board.
I designed the example board to fit on a bread board. The spacing between the rows of headers is 400mils which is the standard for most DIP IC packages. You can download the files for this board at this GitHub repository.
Using the EFM8_Tag-Connect example board
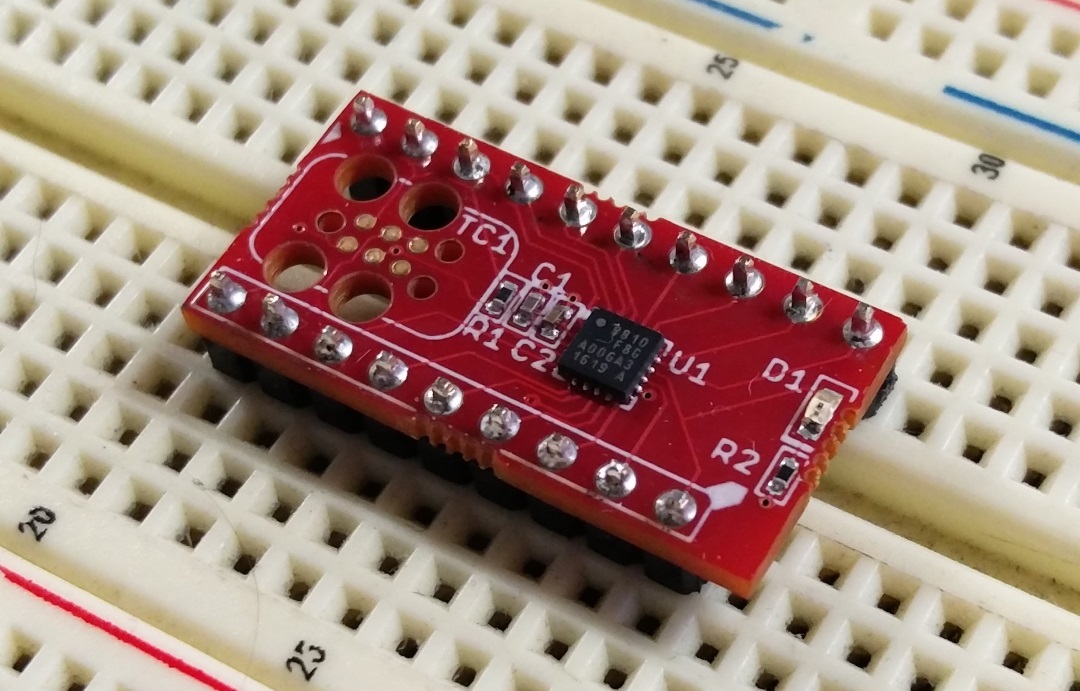
IMG 20161003 130503 1
Figure 5: EFM8 ready for prototyping!
Whats next?
That will conclude the basics of getting an EFM8 based MCU project working hardware-wise. The next article in the series will be on how to use Silicon Labs Simplicity Studio to get the built on LED on the EFM8_Tag-Connect example board to blink.
Related Topics
Getting Blinky going for EFM8.
The last article and this one should be able to get a EFM8 project up and running with the bare minimal hardware and code.
About MacroFab
MacroFab offers comprehensive manufacturing solutions, from your smallest prototyping orders to your largest production needs. Our factory network locations are strategically located across North America, ensuring that we have the flexibility to provide capacity when and where you need it most.
Experience the future of EMS manufacturing with our state-of-the-art technology platform and cutting-edge digital supply chain solutions. At MacroFab, we ensure that your electronics are produced faster, more efficiently, and with fewer logistic problems than ever before.
Take advantage of AI-enabled sourcing opportunities and employ expert teams who are connected through a user-friendly technology platform. Discover how streamlined electronics manufacturing can benefit your business by contacting us today.