This week we are talking about Breadboards. Is breadboarding a circuit or design still applicable in today's SMT component dominated world?
What lore have you discovered in component datasheets? On this episode, Parker talks about how he picks electrical components and risk management.
Ever have PCBs that solder just will not wet and solder to? You probably thought it was improper soldering technique but that was probably not it!
Visit our Slack Channel and join the conversation in between episodes and please review us, wherever you listen (PodcastAddict, iTunes). It helps this show stay visible and helps new listeners find us.
Vox in a Box Schematic – Page 1
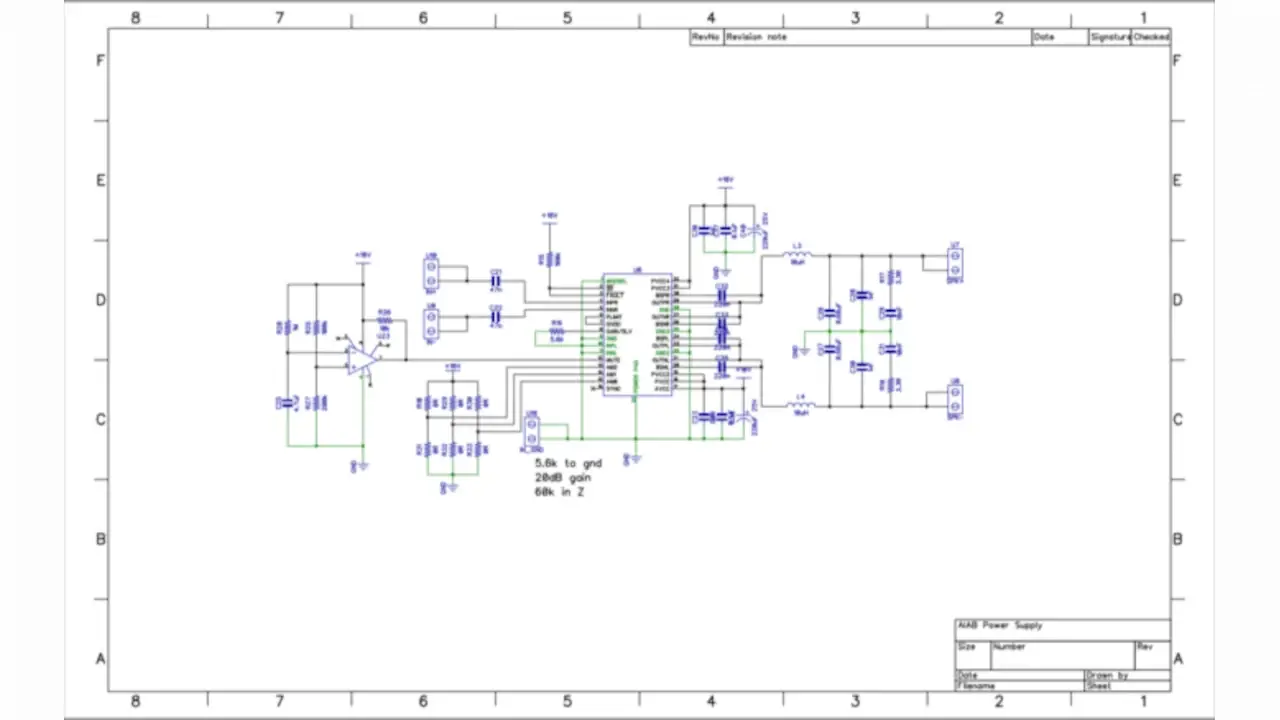
Vox in a Box Schematic – Page 2
Vox in a Box Schematic – Page 3
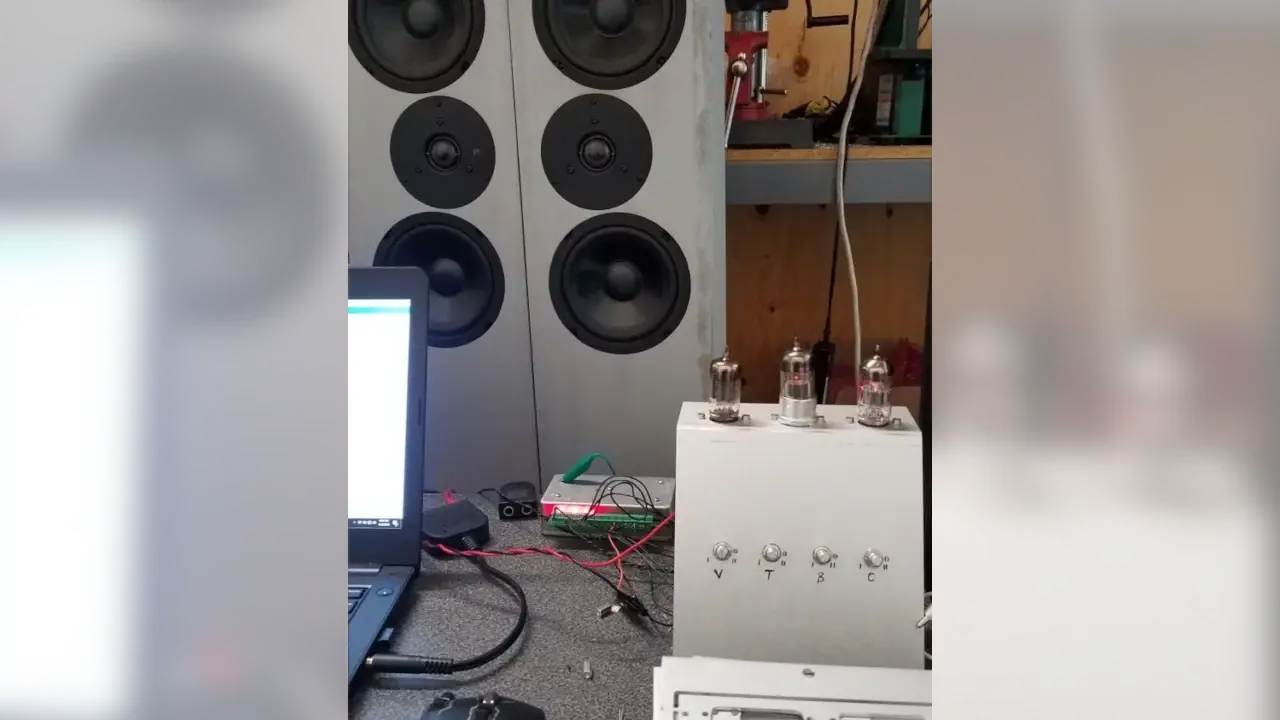
The Vox in a Box driving the VOX AC30 Tube preamp and speakers!
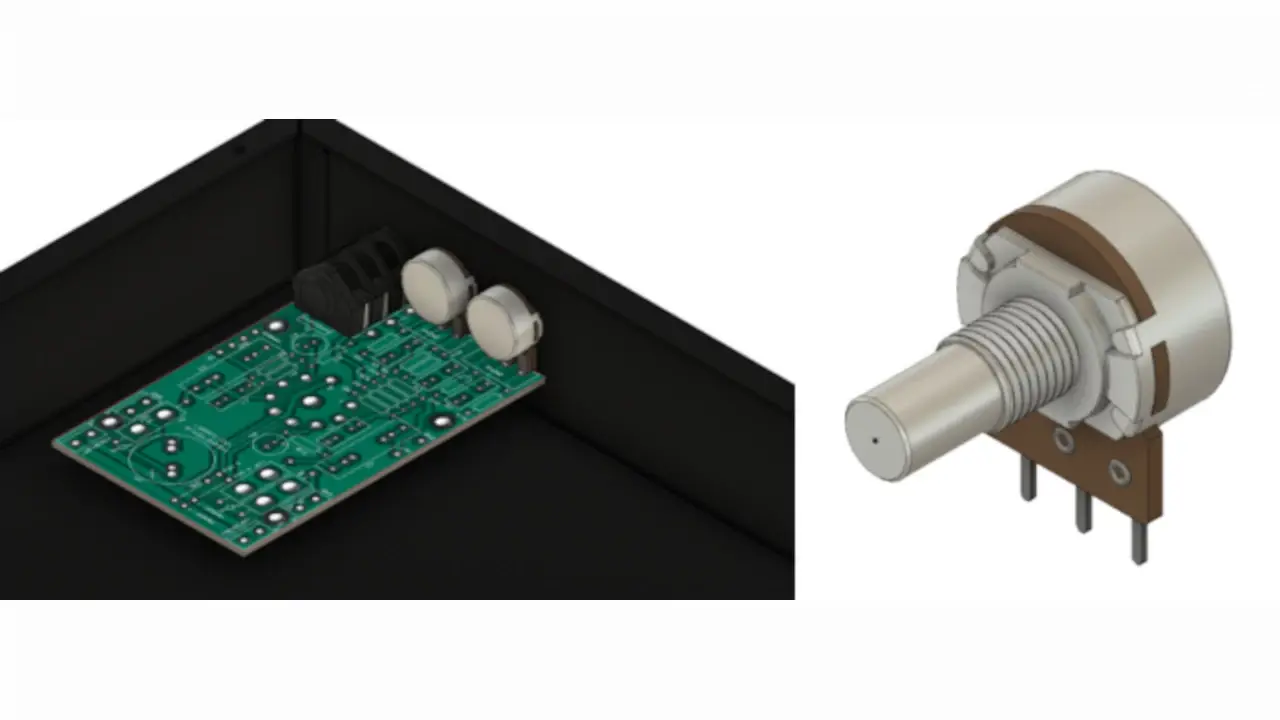
Stephen has also been modeling parts in electronics in Fusion 360!
Parker is an Electrical Engineer with backgrounds in Embedded System Design and Digital Signal Processing. He got his start in 2005 by hacking Nintendo consoles into portable gaming units. The following year he designed and produced an Atari 2600 video mod to allow the Atari to display a crisp, RF fuzz free picture on newer TVs. Over a thousand Atari video mods where produced by Parker from 2006 to 2011 and the mod is still made by other enthusiasts in the Atari community.
In 2006, Parker enrolled at The University of Texas at Austin as a Petroleum Engineer. After realizing electronics was his passion he switched majors in 2007 to Electrical and Computer Engineering. Following his previous background in making the Atari 2600 video mod, Parker decided to take more board layout classes and circuit design classes. Other areas of study include robotics, microcontroller theory and design, FPGA development with VHDL and Verilog, and image and signal processing with DSPs. In 2010, Parker won a Ti sponsored Launchpad programming and design contest that was held by the IEEE CS chapter at the University. Parker graduated with a BS in Electrical and Computer Engineering in the Spring of 2012.
In the Summer of 2012, Parker was hired on as an Electrical Engineer at Dynamic Perception to design and prototype new electronic products. Here, Parker learned about full product development cycles and honed his board layout skills. Seeing the difficulties in managing operations and FCC/CE compliance testing, Parker thought there had to be a better way for small electronic companies to get their product out in customer's hands.
Parker also runs the blog, longhornengineer.com, where he posts his personal projects, technical guides, and appnotes about board layout design and components.
Stephen Kraig began his electronics career by building musical oriented circuits in 2003. Stephen is an avid guitar player and, in his down time, manufactures audio electronics including guitar amplifiers, pedals, and pro audio gear. Stephen graduated with a BS in Electrical Engineering from Texas A&M University.
Special thanks to whixr over at Tymkrs for the intro and outro!
Welcome to the macro fab engineering podcast. We're your hosts, Parker, Dolman.
And Steven Craig.
This is episode 145. So we have switched to a new podcast hosting service, let us know by emailing us tweeting us at McWrap or letting Steven and I know in the Slack channel, if there's any delivery problems, there shouldn't be, the redirects are working.
Yeah. And the Slack channel is continuously growing. We get new people all the time on that. In fact, I think we had someone just crop up today and say, Hey, how's it going? Yeah. So it's, it's been a couple weeks since we've been able to, you know, give an update on our projects, because we know everyone is so interested in hearing our personal projects. No, actually, I was I was a little bit bummed because I've been I've been trying to be on the ball with finishing projects. And then I, I finished projects, and then we like stacked a bunch of guests, all of it on around, it's like, okay, well, I guess we're not talking about some completion of projects and stuff. But today, we get to, and in fact, yeah, I've got a bit of a chunky one today, in terms of what I've got done. So the last time we spoke about these projects, I was working on the box in a box, which is a as a recap, it's it's basically a tube guitar amplifier, that's all in a pedal enclosure. So a lot smaller. The main purpose of this was to not have like bulky transformers and not have to have it plugged directly into the wall.
And kind of kind of protect yourself from the voltages and stuff like that.
Yeah, exactly. And we call it a box in a box, because we chose the Vox AC 30, which is a classic guitar amplifier. We wanted to replicate that, but put it in a much more complex or complex, small enclosure. And so by doing that, it we are required to effectively make switch mode power supplies for the high voltage rails and the heaters and all of that stuff. And so I think the last time we talked, I was right in the middle of building it, or I had received parts I just hadn't actually assembled it.
Yeah, I think you had just gotten parts, right.
So since then, I have actually built the entire thing up. I actually milled a small enclosure at work and got everything all you know done up nicely, because it is high voltage normally. Normally with a project like this, I would build it just as like the raw board that I can test on a table. But since its high voltage, I wanted to make sure that it was safe from the get go. So I started with like a milled enclosure while I was building the boards. So I could have it all nice.
No no USPS boxes with grease stains on it.
No, no, not this time around. That one actually has. That one's that one was lower voltage but a lot more current.
Oh yeah, a lot more power.
Well, yeah. This one is Excuse me 60 watts max and that one was 5000
I think yeah 5000 watts
or something. So I'm happy to say that I've got everything assembled and the box in the box is working like a champ. Everything is actually fired up very nicely the first time we turned it on, which was which was a fun adventure because we were just like, Who Who knows if this is all gonna work out the only way you find out is you just kind of power it up. And everything everything fired up the amplifier came on no issues, the high voltage supply which is the one I was you know really scared of that that fired up. And I love when this happens the high voltage supply fired up and was exactly where I calculated it to be. There was right at the right voltage, oh, like spot on, like absolutely spot on. And I've got a little trim pot that allows you to select the voltage and I calculated that trim pot to adjust the voltage between 230 volts and 350 volts. And I swept the entire range and it goes from 234 volts to 350 on the nose. So like Okay, great. And the actual like the the absolute value of that power supply is not critical. It's just really nice when you do a calculation and then tested in the real world and you're like, pretty close. Very on.
Yeah, nice. And you might even be within like taller and so that potentially ometer
Oh, probably Yeah, cuz that's probably not a great potential. It is. It's one of those 25 turn, you know, the little top guys. Okay. And so those those are nice, you can get theoretically infinite accuracy, right? We're laughing about that because I actually found a data sheet that had that written on there on a potential.
Yeah, we talked about that on like episode four. The fourth thing
I think that was a really early one. But it's been a running joke with Parker and I. Yeah. So So yeah, the the the high voltage fires up great. And the Vox AC 30 runs at a 320 volt power supply. So that's plenty enough, I had brains to be able to set it in there. And I actually milled a little tiny hole in the top of my enclosure where the potential ometer head sticks out so I can adjust the voltage on the fly.
I like how you said you milled out a hole. And so just like boring or journaling it? Oh,
I mean, I think the technical word is mill. That's it was on a mill. Yeah, it was on a mill and I did a milling operation on it. I guess I could have just chucked up a bit, but a drill bit and drilled it out. But whatever. So that
you had that distinction there
has a certain it has some gravitas to it right? It does. It's different than I just drilled a hole in it. Yeah, cuz you could do that by hand or by hand. Yeah, yeah. Well, in one, actually, I could have done the whole box by hand, one of the reasons why I chopped it up on the mill and spent the time to program it. In fact, not only did I spend time programming it, I cut three faces on a box, which, and I made two boxes, one for myself and one for the other guy who's helping me with this. So that's six separate program runs, and six separate zeroing operations. So it's not like it's not a five minute job when you're going to do something like this. Especially because I didn't jig it up or anything like that. I chucked it in the vise and I used a wiggler to find zero on all the all the faces and stuff. So I think I went in on a Saturday and spent like an hour and a half, two hours or something like that. But the whole reason why I chose the mill for this is because the way I design this board is the board is suspended inside the enclosure with hex standoffs. But I milled a slot in one of the faces of the enclosure such that the PCB sticks out of the slot. And right where it sticks out, I put a whole bunch of terminal blocks. So you can just wire directly in to the terminal blocks. So those terminal blocks are the only area where I voltage is exposed. And really only one terminal block has high voltage on it. And I did the it's a four layer board. So I actually routed the high voltage on one of the inner layers out to the
US. So you can't like if the solder mask got scratched? Yeah, it's not going to conduct the case. Well, except for the fact
that the terminal block is a through hole pin. So there's still pins underneath that
stick out. Yeah, but I'm saying like your case can't get conducted.
That's right, the case can't. And that was the big thing. I didn't want to have a chance of arcing from the PCB, you know, to the case where it's coming out of that slot.
You know, wonder what this is a bit of a tangent, what is the voltage isolation of that layer of Fr for?
Like, what is fr fours dielectric breakdown?
Yeah, like, what, what, what voltage do you need to break basically, like, in your case, like, if you had a ground plane, and that 400 volts, or how much voltage would you need for that trace to just drill a hole right through that fr for one spark over.
So, fr four is very likely a lot higher than air to break down and air is 100 volts per thousandths of an inch. I believe that's the standard, it's probably different. It's probably higher where I'm at where the air is dry and, and, you know, thin, and it's probably a lot less where it's thick and wet where you are.
But I think the average is 100 volts per mil. And, and a mil is a thousandths of an inch.
So I looked up fr for voltage breakdown and there is a just a like a e web.com thing that says voltage breakdown of three kilovolts will not break down 20 mils of our for between the planes. So you're probably completely fine then. Yeah, cuz
because what would happen it was he would have to from in the inner plane, it would have to break to the top of the board and then it would have to arc across air. So a few 1000 volts would would likely do it. But uh, you'd have way bigger problems. Yes. No, before that happens. So So yeah, no, that ain't gonna happen. Regardless, I still did it to the internal plane because I'm just trying to knock it shocked by it as much as possible. No, no, I
think that's the best way to do it on the backside of those terminal blocks. I haven't done this yet. But I want to just run a bead of like hot glue. Snot. Yeah, some hot snot across there. I haven't bumped it or anything like that. But there there's the the opportunity. It's still it's alive.
Let's just put it that yeah, it's 400 volts AC, right? A
DC DC. DC hurts like hell?
Well, yeah, cuz you you can't let go
it doesn't jiggle you it. No, it doesn't. It just keeps going. It. Yeah, it hurts pretty bad.
Yeah, it just makes all your muscles lock up. Whereas AC will kind of just like throw you
the thing that's crazy bad AC is you could feel the frequency would you get hit? No jiggles like, Oh, yeah. It kind of makes that noise. Yeah,
yeah. And your brain now. No one else can hear but it's in your brain.
Everyone else just hears you scream?
No, you're just going.
Yeah, we've been shocked enough. Okay, so yeah. Okay, so back to back to the project. Got everything got everything built up, got everything tested in terms of without a load the heater, which is a switching buck converter, that switches from 18 volts down to 12.6 volts DC for the heaters. Because you can with the tubes that I'm using, you can run them 6.3 volt DC, or 6.3 volt AC. Same with DC 12. But I'm sorry, same with 12.6. You can do AC or DC, just depending on how you wire up the pins. I prefer to do 12.6 If possible, because then you have less current draw and less current means less chance of noise bleeding over from, you know switching or AC or whatnot. So I did the 12.6 volt. And that was a TI web bench. Just like special special just give me every part. And I will do it exactly the way you tell me to. And exact part numbers. Yeah, and it just works. I love. I love that. And honestly, a buck converter like that is really not that hard to design. Nowadays, when you just look at a datasheet it usually just says just do this. And it works. Yeah. But But I went even further and had ti i had ti intelligence. Just tell they
optimize the ESR, the capacitors and all that stuff. Yeah,
yeah, yeah. And so there's not really any issues with that it holds 12.6 volts, even with the full load of three tubes on there, which that is 450 milliamp continuous draw on 12.6. The The funny thing is, though, I'll jump into one issue, I kinda have a few issues that cropped up. Maybe Maybe this isn't an issue, but it's sort of is in a way. I one thing I didn't take into account is that the low draw from a heater on a tube is not consistent. And it's a I'm sorry, I apologize. It's very consistent, but it's not consistent when it is cold. When it hasn't been turned on. It's like a filament and a light bulb. Yeah, ramps down. That's right. It has what has it has very little impedance when you first turn it on. So 450 milliamps is the draw at steady state from this switch mode power supply. But when you first turn it on, it is a lot more than it's almost like it's almost like a short. Yeah, yeah, it's almost like a short and and so what's funny is I have an LED on the output of the 12.6 volt. And I put an LED on the output of all the power supplies just to see if any, like if it's off than I know there's a problem. Yeah, it's just a binary on off thing. So when you first turn on the thing, if the tubes are all hooked up, that led is very dim. And you could like you could see that it's struggling to turn on. Yeah, that switch mode is like 100% duty. Oh, that yeah, that switch mode is just hammering the tubes as much as possible. And then what's funny is like they reached this certain point where the switch mode like finally is able to latch on to it and connect. And then the LED turns on everything kind of like latches into a nice state. And the tubes slowly heat up. So for like two seconds when you first turn it on, it's just basically giving it 18 volts.
Now I got a question. Have you tried running audio through it when it's in that two second warm up state?
I've got some things about that. So yes and no. Okay. Okay. So in fact, we'll touch on that with the next section. Okay. Regardless, the heating of the tubes all works fine. What I might do, I'm not sure if I if I'm really if I really know what the full impact of what that is. I'm not even sure if that's necessarily detrimental to the tubes to, you know, hit them hard at the beginning. It probably is in some way. So I may add a slow start circuit that goes in between The switch mode and the tubes that basically just for that initial startup, it kind of just leaks through some voltage, like a MOSFET. And a giant resistor, basically. Yeah, basically, until until they pull the right amount of current, then that that circle of just switch off and in MOSFET opens up and allows full current through. Yeah, that's right. That's our Yeah. And that's probably a really cheap and easy way of fixing that. I was thinking of other solutions. An inductor could potentially do some work, but it would, excuse me, it'd have to be huge. So that's not necessarily the best way of doing it. So I'm thinking yeah, just like a slow start circuit that turns off. Yeah, I
think you could do a, what you could do, there's like a two watt SMD resistor in series right with your heaters. And then in parallel to that resistor, put a boss FET. And it's gate is tied to a voltage cut off or something, right. So when the voltage hits that certain level, it opens up the MOSFET and allows full current to go through. Yeah, basically,
it basically a circuit that would limit the current to, you know, you pick some things, if I know that my steady state is 450. With, I don't know, let's say 20% tolerance on that. Have it set for like 550 milliamps, and it'll only let 550 milliamps through. And then once it drops beneath 550, who cares? You know, that's just this is working the way there's
actually some parts I've used that are called E fuses that ti makes. Yeah. And they have current current active current limiters in it. And that could work too.
Yeah, I guess they just burn everything away as heat.
I think they work with, I think they have built in like MOSFET like analog. It's like an analog thing. Oh, okay. Well, that might work. I've used them on pinball controllers for slow starts, and they seem to work fine. They're not the cheapest thing. So and you'd have to redesign your board?
Well, I'm gonna have to redesign the board. Anyway, this is this was just a testbed thing. The next goal is to kind of combine everything into one box. Because everything I'm describing right now that's inside of my little test box right now is the power supply. And the power amp, but not the preamp. I built the preamp separately.
Guess what? maxium makes a part for you. Oh, Max 20 313 is a half amp to six amp adjustable current limit switch. Oh, use that part? Yeah, I just drop it in. And it's got a 10 micro or mille ohm on resistance once on. Okay, yeah, that's fine. All right. might only it might not work at the voltage you need. But there's parts out there looks like
yeah, there's there's probably plenty of solutions to this issue. I don't even like I said, I don't even know really how much of an issue this is. But I'll talk about something that creeps up with this in terms of like a startup thing. So So let's go on to the next section. There's the power amp, which I've discussed before, this was actually funny enough, the easiest part of everything.
And this was like the what we thought might be the hardest because we both have never designed this kind of amplifier before. Exactly.
Yeah, so I used the TPA 3116 Class D amplifier from Texas Instruments. And this little chip by itself can control 230 Watt channels without a heatsink, or it can do 150 watt channel without a heatsink. And if you add a heat sink, you can do 250 Watt channels or one 100 watt channel by itself with a little heat sink. And actually, what's kind of cool about it is the heat sink is just a part that you can buy right off of Mouser. It's designed like for this or this Yeah, it's pretty cool. And this, this amplifier has its thermal pad on the top of the chip.
So you can actually sink through or you so you don't have to sink through the board. Yeah, but you don't have to sink to through the encapsulation material
yet, if you you basically it's like a flip die. It's like the bottom of the die right there. So you can put thermal paste on it and drop your heatsink right on top of the chip. It's kind of neat that way. And I actually funnily enough, I screwed it up. I wasn't, I guess I just didn't notice that it was on the top of the chip. So I designed the thermal pad underneath the chip. And then I got the chip and I was like oh it's on the top. That makes a lot of sense. So it's sitting on top of a pad like an exposed pad right now but whatever that's fine I don't care. I went through a lot of trouble to make that like that pad that pad I like did like via stitching and everything whatever you know that it may be doing something I don't know. But ya know, so the thermal pads on the top. So the coolest thing is that chip, their their app notes are pretty good for TI their data sheets really good. And it's, it's pretty, they hold your hand pretty hard in that data sheet, where it's just like, hey, do this, and it works. And here's part numbers and make sure you bypass the power supply this way. And, you know, the only thing that I might complain about, not that I need to complain about anything, but their their layout example is a little bit how you doing? And could use a little bit, maybe a little bit of help, because their layout example is like their evaluation board. It's not Oh, that's how they usually are. Yeah, yeah, but but it I don't know. Regardless, it all worked out, I basically followed that with a little bit my own touches in there, like how I was delivering power into that subsection of the circuit is different than the way they did it, because they're just using these giant banana jacks that plug into their board. So obviously, we have to do it differently. But the idea of like having multiple ground planes, and a ton of via stitching, I mean, I had the every half a 50 1000s either every 50,000 servers like that, or 1000s Yeah, they're everywhere. And, you know, great, it works. And the very first time I turned it on, like, I mean, I just plugged a speaker into it and plugged. I plugged my computer directly into that chip, effectively. I mean, the only thing that's in between that computer and that chip is just a capacitor and bad just fired up, like no issues whatsoever. And, and I took it, I pretty much immediately took it to 30 watts. And it was and it just gave it to me. So I'm like, okay, cool, great. This is what's funny is almost immediately afterwards, I was like, Well, if you can give me 30 Watts, then you can probably give me 60. So like a short period of time, right? Well, yeah, pretty much. And so I got I grabbed the second speaker and I just plugged it in parallel. So I went from eight ohms to four ohms and still just cranked the volume to the same level. And it gave it you know, it just spit it out. So that was that was pretty it's pretty happy when you when you just turn something on and it just works. You know? It's like the it's like the Apple thing, but when you do it, it just works.
It just works all the time.
But I have done some tests where I've well I shouldn't say some test. I've done a lot more than some test I've for the past couple of weeks. This thing is pretty much been going nonstop at my desk, just playing music at all volumes. All kinds of
just plain meatloaf cause I love it.
I have not played meatloaf on it yet I
love it. Love by the lights of the dashboard. How about
something like no I haven't played any i the loaf has not been coming through the speaker said i Tomorrow will have to be a loaf day.
I've been doing a lot of dashboard lights. That's it. Yeah, that's it.
Your partner and I used to listen to a lot of meatloaf we got in trouble for listening to do much
much meatloaf
so so I really what my goal has been is like can I brutalize this thing? Can I will it just put up with my crappy music not everything. Yeah, eight hours a day every day for music and all volumes and it's it's just, it's taken. I had a buddy of mine actually. He was placing a Mouser order the other day and he bought me a an eight Ohm resistor. That's a 50 watt eight Ohm resistor. And I'm just going to juice the whole thing like just max volume have it sweep from like 20 Hertz to 20 kilohertz up and down all day and just hammer it didn't you used to have one of those? I do
but it's in a storage facility somewhere. Somewhere
it's an area 51 That's that top men are looking at it
you know we put on our tinfoil hats are listening. So yeah, so I I'm gonna have this thing just dump into the load but but regardless, like I mean it's been working for I think
they're just sick of your music
probably. Yeah. Yeah, but you can only play meatloaf if it's into a purely resistive load.
Okay, so one of the things that with the power amp that I thought of, because this is going to this, this board or this little box I made is was going to or is interfacing with a tube preamp. I had the thought that if you turn on the amp right away, and that 18 volts that comes into the box, just flips the amp on but the 300 volt power supply hasn't turned on and the heaters haven't heat up. And so there's a fairly high likelihood of a giant pop that goes down the circuit. And I wanted to avoid that. So what I did was I added a mute circuit into it. That was it's basically just a comparator with a charging capacitor circuit. And I put a resistor divider on one side of the comparator. So once it charges past a certain limit, then it flips on our it flips off the mute effectively. So it holds up. It's a one shot comparator. Yeah, yeah, it holds the the class D amplifier in mute mode, basically. And I set that for about five to 10 seconds.
So wide range of doubt. A it's a charging capacitor.
So it just depends on temperature. Well, yeah, depends. Well, according to our our friend that we talked to the other week, it would depend on practically everything, everything. Yes. So in fact, it probably would, it probably depends on the voltage itself as it's charging, right? The phase
of the moon and sun. Oh, yeah, yeah, no, all the planets are live or retro or pro grade.
That's, that's right. So you, that's why Yeah, that's why it has a huge range, it just needs to hold it off. Does so that it doesn't pop. And that totally works. Cool. Another thing that I added into the board, I actually haven't tried this yet. But with that TPA 3116 amplifier, there's multiple pins on it, there's three pins that if you select there, it's like a binary code. If you select if they're shorted to ground or not, then you can change its switching frequency that it spits out. And so I'm having it run at its lowest speed right now, which 400 kilo hertz. It can you can select things all the way up to 1.2 megahertz. You know, I think a lot of that has to do with if you're running it in conjunction with other switchers and other things, you can kind of fine tune where it sits in the band. And with Yeah, yeah. And I mean, we're talking about guitar here. I just, it's not critical. And so I haven't even tried the other frequencies. But maybe I will, I don't know, I think it would be really hard to tell a difference. Yeah,
it's for one of our listeners knows about Class D amplifiers. And there it there is, was it the sampling frequency? Or is it this?
That's the that's the output PWM switcher switch the output if
they if you know why you have this option to change the frequency? Let us know.
Yeah, yeah. Come on the switch at the switch channel, the Slack channel, and come and tell us Yeah, I would love to know, and and tell me what I should run it at. I mean, it's running fine right now. So I'm probably not going to change it.
So so my question about the tubes powering up was not related to the mute circuits. I'm assuming that's where you're going with that.
Well, okay. So this is actually so when the when the heater. Okay, I actually did run this thing without the mute thing active. And if your heaters are dead cold, and you turn it on, and the amp fires up, which it fires up in almost instantaneously, yeah, but those heaters are drawing tons of current, and that that buck converter is just hammering itself stupid, then you get this awful sound that comes out of the speakers it leaks through. Because What's basically happening is the 18 volts that comes in is just going wacko. And everyone's reference to that. So the mute basically prevents that from leaking through to the speakers.
Yeah, but is it that I'm just what I'm saying is? Are you trying to play audio through it at that point?
If you do, you won't hear anything.
Interesting. Yeah. That might be the sound people are looking for.
Just starvation, sound, starve starve your electronics? Yep. No, that's, I can tell you that's not the sound that people are looking for.
But yeah, so I mean, that sound is pretty awful when the buck converters trying to it's trying for everything it possibly can to heat those tubes up for the first couple seconds. And so that's why the five to 10 second thing was chosen just to get past that point. And then after that, the tubes actually, they're not at their full temperature yet they still have some time to heat up. So the volume even if you have the volume cranked on the thing. It slowly opens up you can kind of hear the envelope as it opens up.
So if you this is another tangent on tubes, because I don't know. Yeah, a lot about tubes too much. So if you could ruled tubes down, that closes that envelope down. So if you're running them, so it's like, let's say you dumped your box in a box and to liquid nitrogen. And it's somehow it doesn't just immediately shatter the tubes, right? Yeah, yeah. Like sub Arctic tump temperatures actually affect the sound.
The tubes run more efficiently when they're cool, as do most everything. But but you would just break the glass. That's all that would happen. So so so okay, the, the short tangent on the way tubes work. The heater itself is a piece of metal that's coated with some stuff. I don't know the composition, but it's coated with some stuff that aids in what's called thermionic emission. So once you get that stuff hot enough electrons legitimately boiled off. Yeah, they bounce off of it. And you create what's called an electron cloud, where it's literally just electrons floating in free space. It's a vacuum, go figure vacuum tube, there, it's just electron floating in there. And we learned back in, you know, high school physics that if you put electrons in an electric field, they move. So yeah, depending on how you control that voltage, you can control how the electron beam, which is just go over electrons flow nicely,
if you had a, if you just cooled it down, it would just stop. It would just stop working because there's no electrons moving. Yeah, right. No, electron cloud inside of it.
Exactly. And the thing is, there's a lot of thermal mass in that heater. So it would be very difficult to get it to sit in a spot where it's not fully on or not fully off. Because you'd overshoot or undershoot a lot. You know, that'd be that would be a really hard PID loop to program if you Yes, me. And, and it would be very different for every tube because that turn on curve is very different. But the turn on spot where they're fully on is not very different. It's just how each one turns on is how each one ramps in Exactly, exactly. So okay, cool. Yeah. Big tangent there. Hey,
I knew. So I guess I guess one of the other things is that high voltage power supply. That was that whole design was based off of a TI app note that I found or reference design, actually. Yeah, it was a
design that was like cobbled together. And that was like,
I love it. I love it. Because mine looks so much more professional than his does. So much more. On gi website to Oh, yeah, no, it was very clearly cobbled together and built by hand, and it does not look up to TI standards. And when I first saw that, I was like, Yes, I have to build this. It's so great.
The best thing about that is you go because they haven't listed there's a part number for it. Yeah. But you can't buy it.
And actually, you cannot find that board layout. Probably because there isn't one. There isn't one. Yeah. Because like it's literally a dude with a soldering iron, who just slapped it together. In turn. Yeah, but you know, probably, you know, if anyone actually knows, I would love to hear the story behind that. Because, you know, kudos to whoever did that if you were an intern who worked at TI and slept this thing together, like, way to go, that's awesome, dude, super not gonna be
some like, like 60 year old gray beard vet a TI Hey, way to go on you to.
The cool thing is what so what this what this whole thing is is just a regular boost converter, where they added on the output a capacitor, diode ladder, Voltage multiplier ladder. So, so if we know we have 300 volts, or 350 volts on the output, and this ladder is specifically a seven stage ladder, you divide the 350 by seven, and you end up getting 50 volts, and you get or get around 50 volts, you get so the actual switcher is just trying to switch on 50 volts, but it just gets multiplied seven times and then brought back in a feedback loop. So it's a pretty cool way of getting higher voltages from a lower voltage and from just a regular switching controller. That was one of the biggest deals with this design is I did not want to do like a transformer flyback blah, blah, blah. Those are really efficient and they're really great and you can get high currents out of them but I didn't want to those transformers are not small. No, they're not small. They don't they don't fit in a small box and it's not like they're never an off the shelf thing you have to get someone to wind you a transformer or buy some Eco cores and start lining coils yourself. And I just didn't want to deal with that. So this runs off with just a small surface mount inductor and a capacitor diode ladder. And the thing is, it's it only has a maximum output capacity of 10 milliamps. But that's plenty for what I'm going for I need voltage, I don't need current out of this power supply. So works out fine. In fact, I
think my total draw is like 6.8 to eight milliamps,
so I'm not even maxing it out. Maybe, maybe, maybe I might be if I'm really hammering a hot signal into it. But I haven't done a whole lot of testing, because it just, it's been given me everything. So I'm cool with that. One of the things that I learned with though, with this kind of design, so those capacitor diode designs, since they're not phenomenal at delivering current, they can droop in certain situations, most of the time, not during like steady state run, if you you know, if it's already locked into a voltage and you ask for like a step in current, it usually handles that well. It's the startup that really confuses those things, because basically, it has a really, really crazy ratio on its feedback, you know, you have a really high resistance and a really small resistance in your feedback, voltage divider. So the circuit tries to freak out initially to get that voltage up such that they can latch on to its feedback. Loop, right. And so it kind of freaks out. And the thing that I learned is, if you have too much capacitance on the output of this, it, since that's such a low load or not low, I apologize, since that's a really heavy load. In other words, it's demanding a lot of current to charge those traps. The, it detects that as a like a like a fault mode, and it won't ever charge the caps. And the funny thing is in these in these kind of more vintage tube designs, they have pretty hefty caps on the power supply rail. The thing is, those caps are there to basically regulate the load. I don't need that because I actually have a regulated power supply this switch that's active. Yeah, it is regulated. So I thought about that for a second. I was like, oh, yeah, and I just D soldered all the caps on the power supply. And it worked. It was totally fine. And there's no like, you can't hear that. And usually if you get rid of those caps, you get terrible frequency response issues. Not in this case. And it just like as soon as I D soldered those caps and turned it on it locked under 320 volts, like immediately. So it's like okay, well, great. i In other words, I don't have to have bulky expensive caps in my design, I can just rely on the switcher to do it. So right now I'm running that entire preamp on one micro farad worth of output capacitor, it's just to get rid of some extra noise. And normally these, these preamps will run on, you know, 100 or 200, micro farad or something like that, that don't need it. That was that's a nice thing to find out.
Oh, yeah. Cuz you have a active controller looking at the voltage and regulating that. Right. Right, right.
So I am cool with that. So and then let me let me touch on the layout real quick, just to kind of close the loop on everything. So the layout is just, I used a small little four layer board, one of the one of the main things I was really shooting for is kind of like flexibility. Because this is a tester and prototype, I wanted to be able to try a bunch of different things. So I made a bunch of different sub circuits. So like the switches, the two switches are each independent of each other, they both have independent ground returns, they both have independent powers, not like I did not use power planes or anything like that I sent them all power individually. The whole class D amplifier has its own section of the board, it's set apart from everything else. It also has its own ground return path. So I also start grounded all of them together at one of the mounting studs. So everything connects together at one point and i gave eight different connections that all run a wire to that star point. So if I wanted to test a what is you know, what is the noise when I have this part of this circuit connected to the star? Or what if I have this connected to the high voltage ground section, I can just plug in wires differently. And what I've actually found out that's kind of nice is the thing is really quiet. I mean really, really quiet. So I haven't really been routing. It is yeah, it turned out to be really good routing, even with the fact that I built the preamps separate from this box. It's pretty much dead silent. Now, I get a ton of noise through the speakers, but that's because my guitars not quiet It's picking up a lot of noise. But it's you know, as soon as you if you unplug the guitar and just crank every knob on this thing, there's barely even a hiss out of the amp. So basically all the routing in the in the the soldering and wiring and everything is was done pretty well. So it's pretty dang quiet. As soon as you plug a guitar into it, you hear that kind of stuff.
And a lot of that has to do with the fact that right now I have my guitar plugged into it through alligator clips, not
like a quarter inch jack. Yeah, so
I mean, I already knew this, but I've just proven it for the umpteenth time. Alligator clips do not prevent noise from leaking into your system into your
system. Yeah, really, really, you will pick up 60 hertz minimal.
Well, and you know what's funny, this thing doesn't have 60 hertz running through it. So I just get a whole bunch of high frequency hash going through, it's all like switcher noise that's leaking out of the box, you know. So it's all that just like real high, just like no kind of sound. So that's, that's all that so I gave. I put a schematic up in the Slack channel a while back. I'll throw another schematic up here. That's a little bit more of the finalized, I should say. Image. And I think I also put up some layout stuff, which I'll put in the Slack channel again. And you can find all this information on the show notes that guess that smack fab.com/podcast and go to Episode 145. And you can find all the information on this
slash blog slash podcasts.
Oh, I apologize. Did you guys change that? It used to be slash podcast right? Oh,
maybe that works. I let me try.
Yeah, let's find out. Learn a new things every day. If
not, I can make it that. It's not a hard thing to do. Well, okay. Oh, that works by the way. Okay. It does redirect to blog podcast.
I thought I thought it worked. Yeah. Okay. So macragge back comm slash podcast or if you want to type more slash blog slash podcast. And so yeah, that was that was a bunch of fun. I'm glad that's working. So going forward. What I'm going to do is take the whole preamp that I built, which I didn't mention it but I built an entire preamp in on a hunk of aluminum that was a scrap piece of aluminum lying around. I just drilled a bunch of holes, put some tube sockets and put some potentiometers in there. And then now
that sounds shoddy because you use drill. I apologize.
I actually did program that mill that
Sinhala sounds more fancy and artisan
end. Okay, so So okay, I found not found we had some scrap aluminum laying around that was a blemish from a previous mistake that had been made. But the but the piece was good. I wasn't just going to throw it away. So I milled tube socket holes at Mill, potentially ometer holes, but we have drill Mills at work that have a 90 degree tip on the end of it. And I plunged those into the aluminum halfway through the through the aluminum and so I V scored the aluminum. And that bent the aluminum on those V scores and made like a little, I don't know, like little chassis basically. Yeah, and it holds the tubes up and has a little spot for the potentiometers that's just a cute little design I did, I wanted something so I could just easily wire up the AC 30 preamp, which I'll you know I'll post an image of the AC 30 preamp. Well you know the the schematic and what I've built, it's not a lot of magic. There's not a whole lot going on there. So you know look at the schematic. You can take a look at it. There's a lot more interesting in the the power box and the box in a box part. Yeah, so the next phase of this project what I want to do is take all of what I've done and compress it onto one maybe two boards and put all of it inside of one box and make like more of a product I
guess you could say more of a in a box thing.
Yeah, fully in a box. That's that's the new one box fully in a box. Yeah. So I'm happy
with that box in system.
Ooh, v is
v is like us from last week's podcast or the Vox in package right. Yeah, Vox and package
well and actually so one of the things
I wouldn't be a box pack if you put the enclosure together right and just like squirted like potting material so
then it's all just urethane to the the hell out of that then
is one thing right? Yeah,
I guess so. I guess you have you have
no, I've had bad nightmares with urethanes in the past. I don't like using them if I can avoid it. So but you know the thing is because I've got this the VOCs in the boxes. It doesn't matter what preamp goes into it. I'm actually going to build some other preamps input it into it and see what it's like. Because the preamp I have right now the Vox AC 30 is very, very treble heavy. So it's really bright, super bright. And it was originally designed to go into a not as bright power amp. But now I have, I'm putting it into like a very modern business switcher Class D amplifier, that is totally fine with producing all the highs, given Yeah, all of the high frequencies, and it doesn't vary very well. And so you could, because I have tone controls on it, I can dial out the highs, but I, you really, really have to dial out the highs to get it to not be so sharp. So I you know, I need to adjust some things on that. But it is what it is that tone shaping is. If your circuit works to the point where the way you fix it is by shaping the tone, you're like, 90% of the way there, like everything's working, it just doesn't sound how you want it to. Okay, that's just swapping caps in and out and things like that. And that's,
I like that as fun, fun stuff. So I'm happy that that is where we are currently at.
Cool. Yep. So we'll have pictures and all that stuff up on the macro blog, Twitter. Stephen has a new Twitter account. I guess it's not new anymore. But
at analog and, yeah, and that's right.
Yeah. So and you got something here about fusion? 360. So yeah, just
just a quick also a side note, because I've done a lot in the, in the past few weeks, when we've had guests that I'm just like, I've done a lot, there's gonna be a lot to talk about. So yeah, we get to I've talked about fusion 360 A couple times in the past, but we've actually purchased a license for fusion 360 At work, and we're now using it for a lot of our CAD work. And actually, almost all the milling that I've talked about I've done through fusion 360 Because they have a whole cam package that goes in there, but in an attempt to get up to speed with these 360 Because frankly, I you know, I'm I'm kind of the guy at work that uses that the most.
I I've kind of set forth a little bit of a project for fun in Fusion 360 where I'm actually in 3d design, designing an entire guitar amp, like the whole thing. I want every single part. I want everything to be dimensionally accurate. I
want it all to
assemble. Are you going to do the resistors with the little tiny curly, like
the J legs? No. J legs? Yeah, no, no. Well, I
do want to model the resistors because I want the resistors I want you to actually see it on the porch. So So actually, so I got dip trace to I designed a board a preamp and and use dip trace to export a STEP file of the board. So I have, it kind of sucks. It's cool. But it also kind of sucks with dip trace. It's export of step files, it'll export the board, and I'll export all the holes in the board. But it won't export anything that's on the board. So you just get this green rectangle. So you don't get the traces or the silkscreen or anything like that. Ah, you know, that's it's not the end of the world. But
because I've done some rendering that takes Gerber's and turns those into like step files, yeah, or, or whatever. And then you can extrude out like the layers of copper and solder mask and stuff. Yeah. And so you get this kind of like three dimensional looking board. It's kind of cool.
I you know, and I might do something of that sort. As of right now. I'm fine with just a STEP file,
I'm fine with it just looking like a green rectangle. Because I because ever all the dimensions are right. And that's what matters, really. And yeah, and I'm modeling the capacitors and the resistors. And all that stuff that I can plug into the board, you don't necessarily need to see the traces, it just kind of looks cool. So regardless, I've already exported that board, and I've installed potential geometers and jacks and switches and things. And what's cool, as you know, I already have a chassis modeled up that I think we may have talked about the chassis previously, it's just one I bought off a Mauser. But it's really nice to be able to see like, Okay, if I place my board in this location, and I slide my pots and my switches here and there, then I can, you know, they, they pop out of the chassis at this point, and you can really fine tune exactly where every component goes and see what it's going to look like. So it's been a lot of fun, getting up to speed with 360 And frankly, it's really easy to use once you get past, like the nuances. It's fusion 360s kind of particular in the way that it likes things to be. It's,
it's kind of like fusion 360
It makes you do everything and I'm using quotes because you can't see here but it makes you do everything properly. You know, like there's a proper way to do it and a non proper way to do it and fusion three, three He's like, you are gonna do it the proper way. And that's the only way I'm gonna let you do it. But yeah, and then that's okay, I'm fine with that. It's just sometimes it's really, sometimes the button clicks. And, you know, you have to click enter and do these things at times, you're just like, Ah,
I wish I could just like Google SketchUp doesn't make me do this, you know. But I get why, like, a lot. It's actually in a lot of ways. It's like Eagle where, you know, in order to do something, you have to be very explicit. You're like, I'm clicking this, and I'm telling it to do this. And I'm telling it to go here. And then I'm acknowledging that it's there. You know, it has that kind of Yeah, to it. Yeah, it was, it doesn't make me as pissed off as Eagle. So I'm cool. And then the last note is that this next revision of the box in a box, I'm actually going to model it up, because I want to see where the tubes are actually going to fit inside the box. Because I want to mill Hey, I'm gonna mill again, gonna Milson windows, so you can see the tubes inside the box.
That's all what's about right. Seeing the tubes. Oh, yeah, yeah, absolutely. Yeah, I think when we get where we finally get to do the wagon radio project yet, is we had to have like, tubes, audits,
you know, I have a whole bunch of old tubes that just don't work. We should just like install, like
20 of them is Yeah. And just heat the heaters
up or no, don't even do that. Or just have the minute you know, like, that's it. Just, they're, they're there. Right. They're just each one adds that much more weight factor. Weighing factor
to it. Yeah, that's kind of such a wide dash. You could put like, 40 tubes in there.
Yeah. And you know, it's really funny if you if you talk to, especially guitars, this is very, very much in the guitar realm. It's it's so goofy, but the the number of tubes that are in your amp is like, wow, it's like a wow factor thing. It'll be like, say, Hey, your martial it's got three preamp tubes, right? Well, my my marshals got four. So yeah, it's It's better. It's better. Yeah. Like, it's, I mean, and that fourth one could do a function that you literally never ever ever use. But yeah, got four. So Dad's got definitely better.
Definitely better.
Definitely. Yeah. No, it's It's fun. Yeah, so that that's all my updates will have to do a Parker special.
Yeah, when we finally not have. We have guests next week and the week after that, and then I think we're free.
Yeah, maybe you can talk for an hour about a jeep. Oh, no
one wants to hear that. Hey, hey, we
found out in the Slack channel that cows are more aerodynamic than Jeeps?
Exactly. Yes. Now they're not in cows are
tastier cows are tastier. Yeah, yes. And cows are cheaper than a G. Maybe, maybe, actually, maybe.
Okay, so on to the RFI RFP. We have one RFR this week, and it is a shout out to Chris gamble. He gave a talk at this. I actually I could say this week's Supercon Hackaday. Super, because it happened last weekend. It was about improving your circuit toolbox. And it's a bunch of little tiny circuit designs that he has that that every electrical engineer should know about. And just so you can just be like, oh, yeah, I know how to do that and just grab, like, this comparator circuit, or this indicator of style LED and stuff like that. So there's a video up on his blog and go watch it, though.
I love that kind of stuff. That's so great. And I really wish there was a class in college where it was just like this, if it was circuit toolbox, you know, for senior
level design that's like, this is just stuff that gets used a lot.
And it would in I would love that. I mean, it would make so much more sense. If you know, you still did all the really in depth analysis of the circuit that you had to do for everything else. Oh, yeah. But at the same time, like, the whole point is like, yes, do the in depth analysis. But there's a good chance you're going to use this, you know, yeah, if someone just told me that, I would be like, Oh, great, this I'd love to do the analysis. This would be fun, as opposed to just like why am I doing this?
Yeah. And on the side note is all the Supercon videos are online now. So go check. I've been watching them because I didn't get to go and I'm like, this is pretty pretty. Pretty awesome. Oh yeah. Yeah, I'm gonna have to try to go next year macro fab was a sponsor there, right? Yes, we were. Yeah.
You guys were I saw laid the badges I saw a lanyard with the macro fab logo on it.
Yeah, we helped Hackaday out on building the badges sweet. Yeah. So
I would it would be fun to make our way out there some year. Yeah, maybe next year, we'll see, we had an opportunity to potentially put in a proposal for a talk there. But
we can like I said the pasal and that I did not get accepted
did not get accepted as in like, did they just not tell you? Or did they say like, well, so
they sent me an email saying, you know, thanks for sending me today and blah, blah, blah. And, you know, but, you know, they're more interesting talks, because I was gonna talk about design for manufacturability. And like, I'm looking at all the other talks and like, all these talks are so much more interesting.
Well, I think the design for manufacturability is a great talk. It's very practical.
I love talking about that kind of stuff. So so that was the Mac fab engineering podcast. We're your hosts Park dome and Steven gray. See you later guys.
Take it easy. See I didn't forget the
outro that time cheers Thank you. Yes, you our listener for downloading our show. If you have a cool idea project engineering topic or circuit toolbox that you want us to look at. Tweet us at Mack crab or email us at podcast at Mack Feb calm. Also, check out our Slack channel. If you're not subscribed to the podcast yet, click that subscribe button. That way you get the latest episode right when it releases and please review us wherever you listen as it helps the show stay visible and helps new listeners find us
Ever have PCBs that solder just will not wet and solder to? You probably thought it was improper soldering technique but that was probably not it!
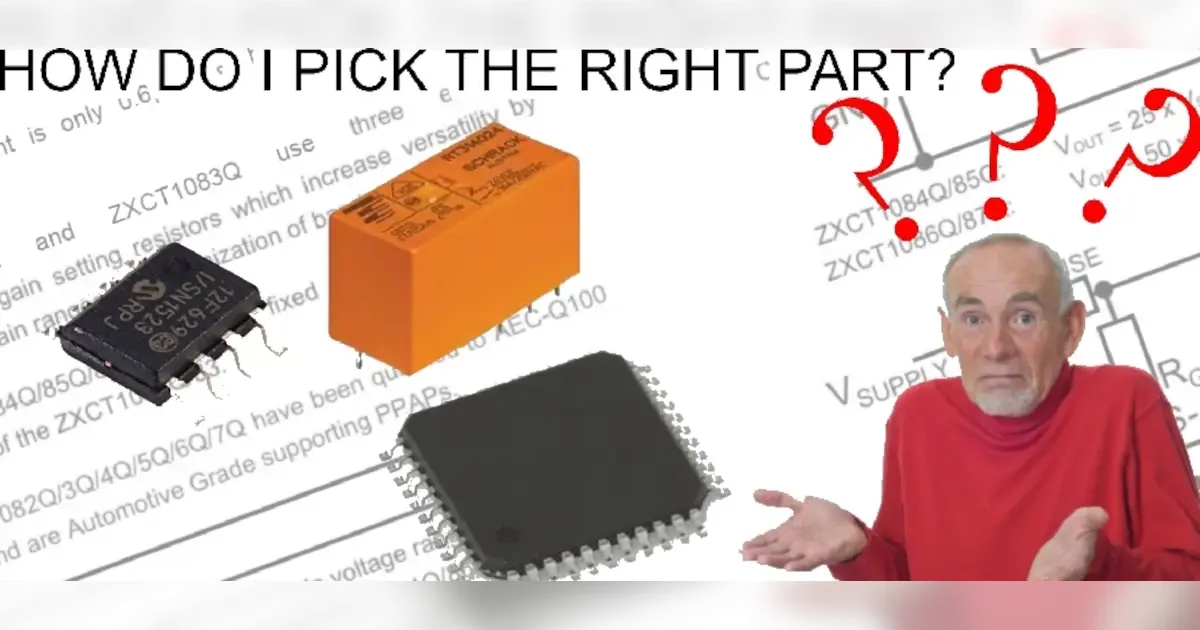
What lore have you discovered in component datasheets? On this episode, Parker talks about how he picks electrical components and risk management.
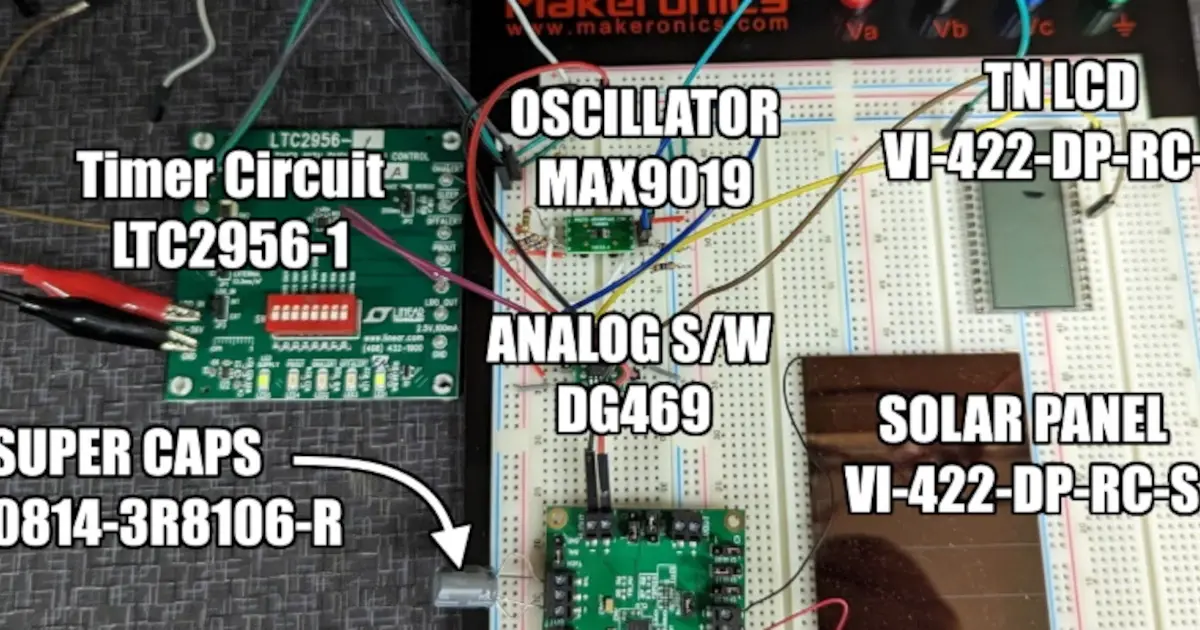
This week we are talking about Breadboards. Is breadboarding a circuit or design still applicable in today's SMT component dominated world?