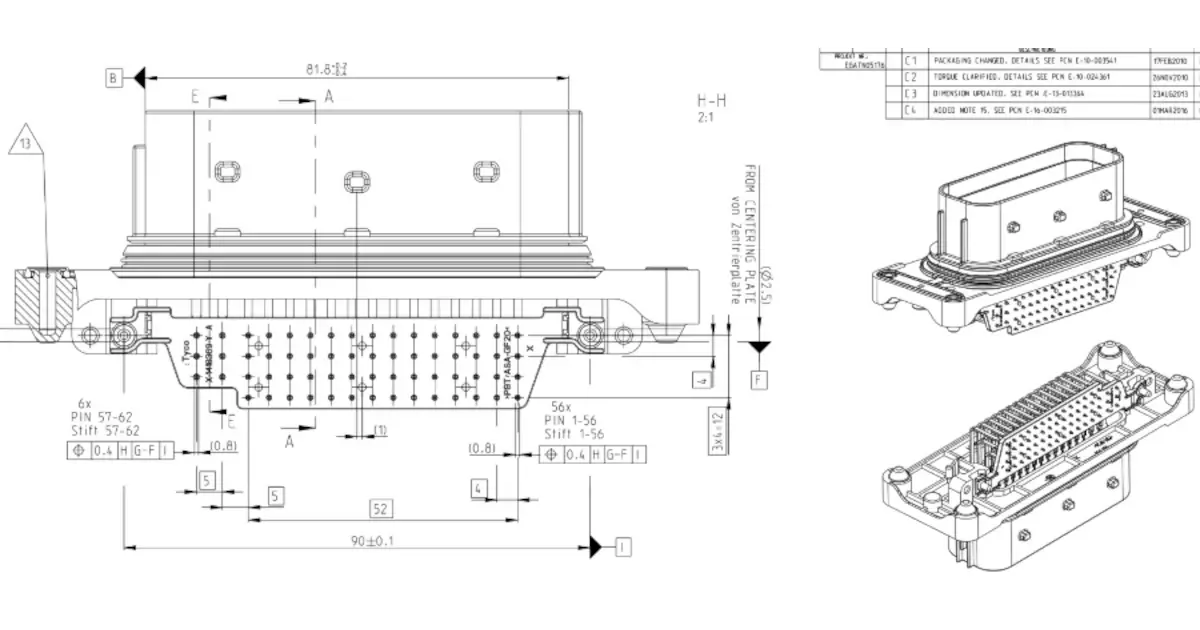
The quest for the right connector for a project! The right of passage for any hardware electrical engineer starts with a connector catalog.
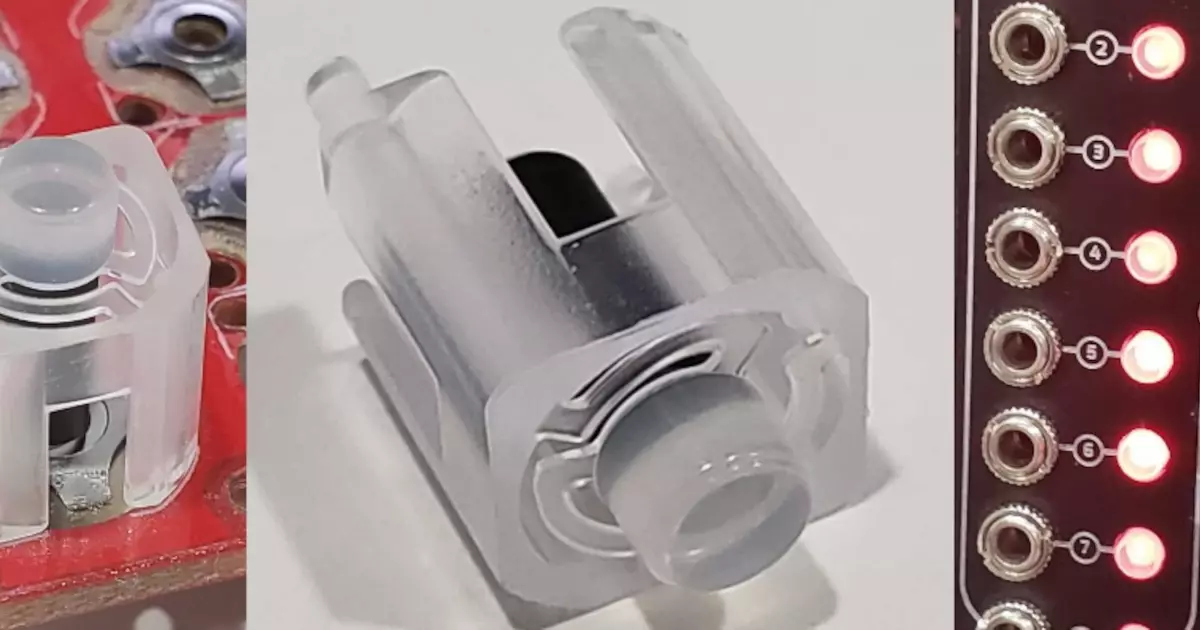
This is the last installment of Stephen's 'Adventures in Injection Molding'. We are going to recap the entire two year sage and close the book on it.
The Jeep Prop Fan project rides again! Well some iteration of it at least. Lets design an open source PCM (Power Control Module) for automotive apps!
Stephen
Parker
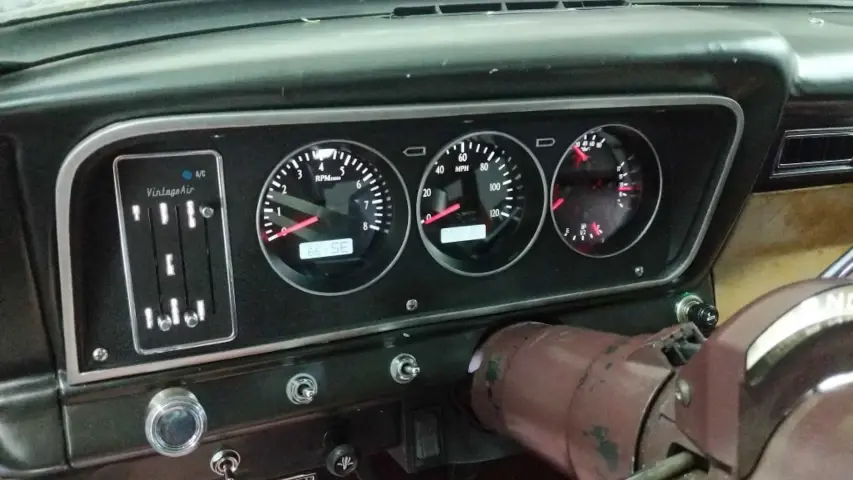
Refinished dash Parker restored and installed new gauges into.
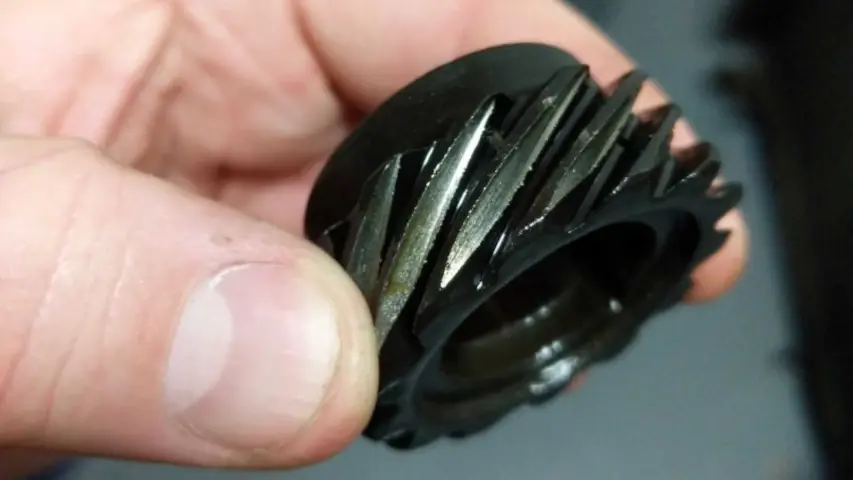
Gears are not supposed to be shiny and sharp! Cam distributor gear is all chewed up.
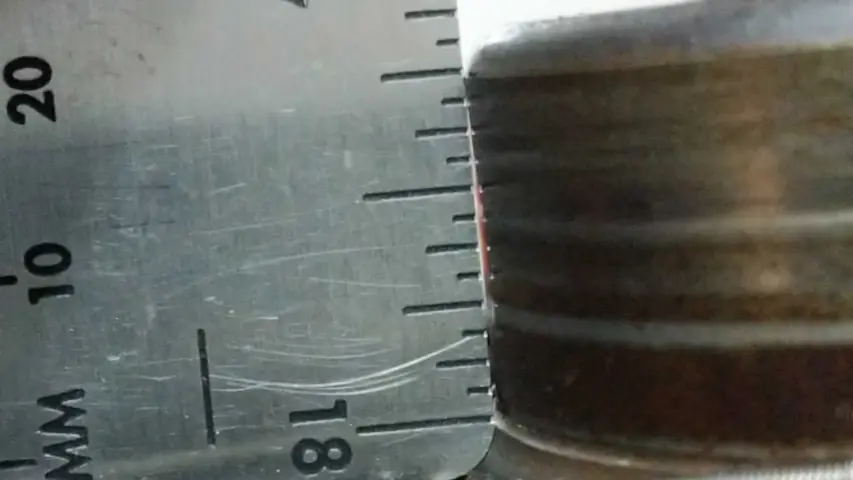
Oil seal surface on the harmonic balancer. Supposed to be flat…not dished and grooved.
Parker is an Electrical Engineer with backgrounds in Embedded System Design and Digital Signal Processing. He got his start in 2005 by hacking Nintendo consoles into portable gaming units. The following year he designed and produced an Atari 2600 video mod to allow the Atari to display a crisp, RF fuzz free picture on newer TVs. Over a thousand Atari video mods where produced by Parker from 2006 to 2011 and the mod is still made by other enthusiasts in the Atari community.
In 2006, Parker enrolled at The University of Texas at Austin as a Petroleum Engineer. After realizing electronics was his passion he switched majors in 2007 to Electrical and Computer Engineering. Following his previous background in making the Atari 2600 video mod, Parker decided to take more board layout classes and circuit design classes. Other areas of study include robotics, microcontroller theory and design, FPGA development with VHDL and Verilog, and image and signal processing with DSPs. In 2010, Parker won a Ti sponsored Launchpad programming and design contest that was held by the IEEE CS chapter at the University. Parker graduated with a BS in Electrical and Computer Engineering in the Spring of 2012.
In the Summer of 2012, Parker was hired on as an Electrical Engineer at Dynamic Perception to design and prototype new electronic products. Here, Parker learned about full product development cycles and honed his board layout skills. Seeing the difficulties in managing operations and FCC/CE compliance testing, Parker thought there had to be a better way for small electronic companies to get their product out in customer's hands.
Parker also runs the blog, longhornengineer.com, where he posts his personal projects, technical guides, and appnotes about board layout design and components.
Stephen Kraig began his electronics career by building musical oriented circuits in 2003. Stephen is an avid guitar player and, in his down time, manufactures audio electronics including guitar amplifiers, pedals, and pro audio gear. Stephen graduated with a BS in Electrical Engineering from Texas A&M University.
Special thanks to whixr over at Tymkrs for the intro and outro!
Welcome to the macro five engineering podcast. We're your hosts, Parker, Dolman.
And Steven Craig.
This is episode 224. That was just to throw off Josh because he's gonna listen to that and be like, what is up with the audio?
Thanks for everything you do, Josh.
Thank you, Josh. No problem. Alright, Steven, what have you been doing for the past couple weeks since, you know, COVID has been happening. We've had a couple of guests podcasts, what's going on?
You know, it's funny because we had a string of not guest episodes. And every time that that happens, like, in the beginning of those string of episodes, I'm always like, Oh, I got all these things to talk about. And then it starts to go downhill. Because I'm like, Oh, shit. Every week, I have to, like, do more stuff to talk about more stuff. So it's always nice to when when there's a string of guest episodes, because I can recharge my my topics, your backlog. My backlog? Yeah, I can I can talk about projects, I still have not done.
No. So it's actually kind of funny, because in this this last few weeks, I've been doing a ton of design work, and a whole bunch of testing, which is really fun. So the first job I had at a college I did, I was a, you know, a testing lackey, basically, for quite a bit of stuff like FCC testing, CEE testing, all of our product validation. I did halt and Hass testing, I did all kinds of stuff. I would say, a good chunk of my job was testing. And the good thing is I actually really like it. It's a ton of fun. There's, there's something like, I don't know, there's something really gratifying about sitting down, like devising an experiment, taking a bunch of data, going back to your computer, and then doing statistics on that data to find out. Did you? Did you get what you wanted? Or are you going to have to do it all over?
The all over again? Part that always gets me?
Yeah, yeah, well, I
think the all over part, again, is the part that like people don't even do the testing initially, because they're so worried about that Gotcha. Where, in my opinion, that do it all over again, is a very valid solution to finding all that data, like you find all the data and you go, Okay, now I know, I gotta go do it again. Or you can take all the data and like, Hey, this is great. Like, I don't have to do it all again. So well, just as an example, one of the things that work that I've been doing is doing temperature stability testing, and anyone who's ever done temperature testing, probably sighs pretty hard when you hear that, because nothing happens fast with temperature, like ever. It's like the slowest testing you could possibly do. And we, there's a lot of circuits that we have tested at work for, you know, over a decade now from just being in the field, which is a perfectly valid test, right, like, build the product, sell it, see how it does kind of, like, that's what startups do. Yeah,
yeah, it's totally valid, you get you get data based off of like, what you learn from making a good or a bad product.
Just don't do that with airplanes. Boeing, no, no, no, like,
yeah, what would you know, startups, and obviously, as your technology grows, you get better at making better design decisions. But there's a lot of there's a lot of temperature stuff that we haven't done at all on our products at work. So, you know, for non critical things like temperature drift, or frequency drift, and oscillators and things like that. We've empirically found it but we haven't actually sat down. So I've been doing that in the past couple of weeks. So I built up by a little heat chamber because we don't have like a thermal tronics or a or a Gosh, what do they call those? The big hot boxes. There's one brand process oven, a presence oven, but there's one there's like the creek, the Kleenex of process ovens. I can't remember thermal Tron or something like that. Regardless, I built my own ghetto version of that with with some
I got on board, the heat automatic.
I liked that too. Actually, I named mine the superduper heat testing box, or something like that. I can't remember I wrote it in Sharpie on the box and I put I drew a radioactive symbol on the side. And like, the first time my boss saw it, he was just like, Really, dude, but like, I've been doing a bunch of testing and he's like, Hey, this is great. So a whole bunch of gaff tape and some some of that pink foam you can buy from Home Depot like instict stuff. Oh, yes, yes, yes. Yes. So I've been throwing our products in that and basically, let them honestly what I've been doing is let them sit overnight. I fire them up. I put them in like a nice I'm an old condition, and I leave them run all night long. So I know that like their stable temperature inside of a semi sealed box is like when I get there in the morning, that is their temperature, I take all my readings. And then I actually just use a hot air gun. And I cook the box, and I raise it by unknown amount. And then I sit there and I just soak them for like 30 minutes at that, at that temperature, take all my readings, and then do that all throughout the day. And so far, it's been really eye opening. There's been a lot of, you know, it's funny, we haven't had like, significant like, oh my god, we got to change this product, because everything is horrible. In reality, what we've been finding is like, wow, okay, so all of our like gut feel about temperature designs, we've actually been doing really good without testing. So that's been pretty fun. And, and it kind of bleeds over into a project I've been doing personally, I actually have a linear DCS power supply that I've been designing for a foreign amp that I'm making with Josh Rocha, who has been on the podcast a handful of times he was on, what, three weeks ago, something like that.
Yeah. And you say handful, which is actually correct five times. Yeah. For
a full head. Yeah. So even I've been developing an app. And one of the things, the design requirements that we've been putting, is that we really, really want it to be bulletproof. In fact, it's funny, because most of the design requirements that we've put on this amp haven't been related to its, like playability or to sound. Yeah, no, they've all been like, we want it to be small, we want it to be light, we want it to be portable. And we want it to last a hell of a long time. And we want it to be bulletproof. And off the back of the truck. Exactly. In fact, we put all of those design requirements in our schematic page that we work together such that like, as we're working on something, we can look up and be like, oh, yeah, I just added a big transformer, and that violates the weight, or whatever. So you know, regardless. So, you know, I've been designing a small DC heater power supply for this thing, and it's just a old fashioned Joe Schmo linear power supply. So it's nothing particularly special there. However, we want it to kind of fit all of those requirements. And the big one for me is that I want it to last a long time, I don't want this to be something that craps out in, I don't know, three years, it would be great if I could have like, with regular use a decade worth of it, just handling regular use, and which, which, frankly, it should be able to do quite a bit more than that. But like my target right now is a decade. And so sort of the the big challenges with doing something like that, or the fact that this is a low ish voltage, high ish current supply, which the challenges that come in in with that is when you start trying to spec transformers and and like hit specific targets, it gets really difficult because of the the regulation on smaller transformers, especially off the shelf stuff that you can buy the so you're not getting custom transformers. A lot of times you're trying to find a transformer on like Mouser DigiKey. They don't even include the regulation. And your ripple current or the current that you're pulling out of the transformer doesn't match any of the the currents that are on Mauser, like for instance, the the one that I've got, I think I'm pulling somewhere in the 1.6 amp range out of a 12 volt transformer. Well, Mauser has a one amp transformer and a two amp transformer. So I'm somewhere in between. That's no problem. But if I don't know what the regulation percentage of the transformer is, I don't know what my DC voltage is going to be. And if I don't know what my DC voltage is going to be, then how can I predict the warrior? Outboard the power dissipation stuff?
So how much does your your LDL How much does how much Max voltage doesn't need it? Except
bingo? Yeah, so honestly, in fact, I'm gonna, I'm gonna hold up a couple here. I've got one transformer, I've got another transformer right
here. I've got a third one right here. I have a handful of test boards over here that have other transformers, I ended up just buying a handful of transformers and testing them so I can find their regulation find which ones work out well for this application, and when it comes down to this where you know, I'm not buying in high quantity.
A lot of times this is just sort of the best way of doing it is like you just purchase and then validate, which, in my opinion, that's a really valid way of designing where, you know, you find what's on the shelf, and you start weighing things like how much it cost, what the quantity is, what its lifespan is. You weigh those things equally with its performance values. You know, I think in so many ways, like we can get caught up in the In all the hefty performance values of a component or a design and forget that like, oh, you actually have to buy it, you know, it actually has to be available.
Gold plated transformers. So,
yeah, so this, this particular linear supply is just a 12.6 DC output at 550 milliamps, which ends up being about seven watts of power. So, nothing particularly special there. But I didn't want to use a, like an LM 7812 regulator or anything like that, because those things have a dropout of a minimum of two volts. And if you if you have a minimum of basically, if you have greater than two volt, drop out on the on a regulator like that, and then you multiply that by the current through it, that thing boils off a ton of heat. And that's absolutely not what I want from this one. Specifically, because of that, that 10 year kind of span that I'm looking for this power supply to have. So I ended up going and searching for LDA O's. And when another another kind of stipulation with this is I want it to be hand solderable. Right now, I don't want to do surface mount with this. Finding LDMOS is a lot harder than you think it's well, okay, I should say LDMOS in the voltage range I'm looking at and the characteristics I'm looking at, like finding a finding an LTO, that's intended for the three point threes or the two point fives or stuff is a little bit easier. And and most of the time, you're not dealing in half an amp with a current with those things. Also, you're dealing with a bit less, so you don't have to juggle a lot when it comes down to trying to do 12.6 volts, which I accomplished by doing a 12 volt with a diode in the ground pin to raise it by point six volts. So when it comes to finding LDLs with like that, man, I spent a whole Saturday just reading data sheets. And when I say oh, hold Saturday, I was like six or seven hours of like, I had spreadsheets off of like this one has this characteristics and this characteristic. And if you know this, this one claims this much drop out voltage, which would equate to this much heat dissipation. And I don't know it was a it was quite a bit of work. And I ended up coming down to the conclusion of the LM 2940 Ti dash 12 That seemed to have the best characteristics out of the datasheet that I could find. The only thing that I mean, well, not the only the funny thing about it is in comparing all the data sheets of the LDS that I found, there was not one data sheet that included the entire package. In other words, every data sheet was missing some critical point of data and I call it critical even though it might not be. But like some point of data there was like man, I wish I could know this, like some some data sheets would say this is the dropout voltage at 25. C and not include any information of what is it at 50. I don't know, what is it? 70? You know, there's no, there's no chart, there's no nothing. Or they would say like the nominal voltage is 12. Or the typical voltages is output regulation voltage is 12. But it could be as much as 12.6. Okay, well, what's a histogram? Like how many out of 1000 are going to be at 12.6? I don't know, like, it could be all over the place. So it's really hard to design the front end of a rectifier for alpha transformer to be low voltage and hit specific targets if those targets are moving all over the place, you know. So luckily, this lm 2940 t seem to have the tightest values on the datasheet even though it like there was still some more I'm like I just, I'm gonna have to test it. And that's what I've been doing is I bought a handful of PCBs that I can just build these circuits up with whatever transformer I find. And then I can I can just, you know, beat the hell out of it and measure values. Because I'm taking I'm taking all kinds of stuff into account here I'm going to be doing I haven't done it yet, but I'm going to be doing some temperature cycling on these on these LBOs. I already have one that I've clocked 55 hours of runtime on to it. I'm hoping to just let it run for I don't know a few weeks, I would love to see it. pump out 1000 hours of just, you know, continuous operation. And that should be really easy for it. It's just I want to see it do that. I ended up buying a little relay circuit that connects to an Arduino. So my plan is to turn turn the device off for 20 seconds and then just hammer it on for 20 seconds and just keep oscillating that for I don't know, hours on end to simulate somebody turning on this product over and over and over and see, is there any degradation to the components from in rush over and over and over like that. So I like for something as simple as a little power supply, I really want to test the living snot out of this because I never want this to go bad. And really, I'm hoping to kind of make a generic power supply that I can use in other products to where it's just like, oh, we we've tested the living bejesus out of this, we know it works, just plop it in, and it's good. So one of the things I was messing with just yesterday, actually, is that, so the kind of topology I chose for the power supply, it looks just like a regular regulator power supply. But I did the, what did they call it bootstrapping, where you, you basically put a transistor in parallel with the regulator. So the regulator does the work of actually regulating the voltage, but the transistor will share the load handling. So you don't have to pass all the current through the regulator, you can give a portion of the current to the transistor. And what's nice about that is by varying some resistor values in front, you can actually fine tune it since each one is sharing half the power. So they dissipate half as much heat. Even though they're dissipating the total amount of power between the two, you're spreading the heat further across. And there's a good chance that these are going to be inside of an enclosed box. So I'd rather spread the heat further as opposed to having like a single point source of two watts of heat, you know, Oh, that makes sense. Yeah. So I ended up doing that. I put a tip 42 pnp transistor, that's just a big beefy PNP in a to 220 package, put that as a in a bootstrap configuration. But I was thinking about it because off this 12 volt transformer I got after it's rectified. And you take into account all the losses I get right about 16.2 volts. I've actually tested this in multiple locations on you know, I've taken it to work and I've plugged it in my my basement, and I've done a handful of other places to see mains variation. You know, because technically the mains in America are their tolerance is plus minus, no, I'm sorry, I think it's plus 6% minus 10% on voltage. So if you're designing something, even with an LDL, you still have to take into account that if it's on its low side is your LDL is still going to regulate. And if it's on its high side, are you just going to burn a ton more power?
Or smoke?
Right? Right. Right, right. So in fact, at in my basement, here, I have 123 volts is what I've been measuring. And I read about point two to point three volts more than my outlets at work, which are reading closer to 120, I get about 16.2 volts. So to get that 12.6 volts out, and I have a 16.2 volts in, you know that, that differential there ends up being about two watts of heat that I'm having to just dump. And so I kind of I kind of came to the conclusion that if I just selectively placed some some resistors in there, I can actually lower the dissipation of the both the transistor and the regulator by basically bringing the voltage closer to the the actual load regulation voltage, and then just burn some extra heat in the in the resistors. So even more sharing that two watts. So I haven't actually built it up yet, but I did some simulations and Lt spikes, and I can get about 250 milliwatts of dissipation in both the regulator and the transistor. And then just throw a couple, like a watt and a half at some resistors around. Well, I'm using one watt resistors for this whole thing, and I only need three of them. And I can give each one of them about half a watt and then give the regulator and the transistor about a quarter of a watt, maybe a little bit more. Such that, you know, spread the heat around, everyone's happy and it'll work out well. So hopefully I'll have a PCB running up on that soon. I mean, I already have three of these PCBs running I just haven't done them with like the heat sharing. So right now, in the in the situation I have the my regulator and my transistor are doing most of the work and they're dissipating about 750 milliwatts each, which they're fine doing that into ambient temperature. They sit about 80 degrees Celsius, which I would like them to be cooler than that, but it's there. plenty fine doing that right now. But in terms of hitting that 10 year remark, I wouldn't want them to be 10 years that ad decrease? Let's see, it's like that's a good way to. I don't know, screw the pooch on that one.
Have you thought about, you know, resistors tend to drift, especially with temperature a lot?
Yes, actually, I have in fact, I was looking at some data sheets earlier today, I was actually picking out some resistors that have a low temperature coefficient. And they have a low long term drift based off of temperature. There are some specific vishay ones that have that characteristics. And they were like, I don't know, 14 cents or something like that. They were they were pretty cheap for doing power applications. So yeah, I'm trying to take that into account. Also. The thing that's nice about resistors is they usually are a lot. They're a lot nicer sitting at higher temperatures than silicone silicone gets a little grumpy when it when it sits at high temperatures for long time. But metal film or wire around resistors are kind of just like, Yeah, whatever. It's just a little bit of warm in here. So yeah, that's that's kind of I've been doing just a boatload of testing. And I've got a ton more if I want to take these circuits to 1000 hours, you know, that's 41 days of testing, testing, you know, so I've been basically I take the circuit home, I plug it in at home, and I monitor it throughout the day. And then I take it to work every day, and I plug it in, and I'll measure the voltage once or twice throughout the day.
So Episode 229, we'll know the results.
You know, that'll be fun. Yeah, I'll let you know. And the results are probably going to be like, yep, still working, you know, probably the big mains, the main reservoir capacitor that I picked is 1200 micro farad. And it's 105 degrees C cap. And it has plenty of ripple current capability. And I've been monitoring its temperature, and it barely raises temperature at all. I mean, obviously the core is going to be hotter than the actual like skin of the capacitor. Yeah, but like, it's barely noticeable that it even warms up. So I don't, you know, I measure it actually just sort of back calculated, it's ESR. And it's like 50, Milla ohms it's a pretty nice little cap. So I'm pretty happy with these and that, you know, the only thing that sucks about these kinds of circuits is that, that regulator that lm 20 2940 t you know if that ever goes out of if that ever becomes obsolete, like, all of my data becomes obsolete. And really, if that cap goes out, I should probably retest also. But yeah, I find this stuff really fun anyway, so don't just buy a whole reel of it. Yeah, and then be done with it. You know, the regulator is not that expensive. It's like a buck or something like that. I did actually on one of my boards, I had one of the one of those regulators go bad. But I'm not going to be that guy that's like, Oh, I saw one thing go bad. Therefore, all of these things are bad forever and eternity. You know, I really, I don't know, I really dislike it when people do that. Great example, my parents bought a pizza from Domino's in like 1987. And it was a bad pizza. And they still to this day think that Domino's is the worst pizza chain ever known demand ever. You know, and I'm like, You guys haven't had a pizza of their 30 something years. Like how do you know it's bad? So
it's up there though.
It's or down there. But regardless, so So on top of that, I don't know why that ice went bad. So I'm going to chalk that up to I probably screwed something up or maybe I shorted something or ESD or Yeah, so and it died like pretty quickly in in my very first test. And so I was poking around with with probes and stuff. But this other one. This other board I have has been chugging along for 50 Something hours so I think I'll cut them some slack.
It's probably fine. Yeah. So the well I've been doing these past couple of weeks is no electronics actually. Well, a little bit of electronics 12 volt electronics, I guess. So I've been taking this time to basically get the wagon, the Jeep Wagoneer all up to snuff back to daily driver status, which is nice. You can have your daily driver just torn apart right now because you can't drive anywhere. Right? It's perfect time. Perfect time. And so why what basically my big thing was like fixing leaks on it. That was the big thing because like it drives fine. It gets okay gas mileage eight for now it gets 11.8
It's a way how many hose clamps are on it now?
Less now. Oh, fewer. Okay, yeah, fewer hose clamps. Yeah, the whole thing was like fixing leaks so that I basically didn't have to top up fluids so much. And it, you know, its nickname was the Valdez because it just like oil, like you drive it into because I've because now I have epoxy floor in my garage. Right? Right. So now you can see how much stuff leaks on stuff on the floor. Oh, yeah. So I'm like, Okay, I gotta fix that. So the first big thing was oil magnifier. Yeah, exactly. The first thing was fixed oil leaks and transmission, the transmission pan was leaking, replaced that that fix that. And then the shift linkage, basically like, how do you tell the transmission Dimech transmission to be from like Park to drive, right. And in most transmissions, it's actually just a shaft that rotates? Well, what happens is that the shaft gets corrosion on it, then it's the, the the seal there. And so the seal starts leaking, because the seal is below the level of the oil, or the transmission fluid that's in there. The great thing is Chrysler, who developed this transmission of the TorqueFlite, 727. They made it so you can replace that seal without having to drop the transmission out. Because they knew. Yeah, they knew well, it's actually a really common failure is the seal on like almost any automatic transmission. Like, eventually the seal fails.
Yeah, in my wife's car, the seal is, hasn't failed, but it's like on its way I can see it.
Yeah, because my, it starts leaking a little bit. And then when it fails, it's just like, you can't keep fluid into the transmission anymore, because it's just just dumps it all. And so you get this special tool that basically goes on top of the seal, and then you like, turn it and it like digs into the seal, and then you can yank it out. And then the new one just slips in, and then you use a little socket, the tap it in. Perfect. So that was all good. So I'm like, Oh, that's awesome. Like I got I fixed. Basically like 90% of the fluid drop, I fixed with just that. And I'm like, Okay, I'll fix the seals in the transfer case, because I could do that without taking it out either. That's where the like the yoke switch connects to the drive shafts, you just pull the yoke off, pull that seal, put new one on back together, only took like an hour to do that, get that all done. And then I noticed that the radiator or it was leaking radiator fluid, which is unusual, it's never done this before. For some reason it started doing it. So I started looking where it's at. And I'm like, oh, it's got to be coming from like top of the engine, because you can't really see on the front of old engines, especially when you these old engines that have become modernized with like air conditioning. Because they basically took these old engines that were never really designed to have accessories and they Cluj and then they just kept piling brackets and brackets on brackets on brackets. And so you get this like, it's like 400 pounds of brackets on front of these engines. So you can't really tell what stuff's leaking from. So I first did the thermostat housing wasn't that did the water pump wasn't that sounds like there's no other things on the front that deal with coolant, except the timing cover. So on a Jeep Wagoneer they have an AMC 360 engine, which is a big 5.9 liter V six V eight engine. The timing cover is what the water pump mounts to and also like the distributor, which does the timing for the engine and the oil pump. So basically, actually oil and coolant go through this cover that goes on the front of the engine and it's made out of aluminum. Well, at about 150,000 miles, the thermal expansion of the aluminum and the thermal expansion of the iron block are different. And that sealed eventually starts to fail. The seal takes all the brunt of it moving right yeah, of moving. Yeah. Especially since you have steel bolts, which have a different thermal expansion rate as well. I think they're actually stainless bolts. So they have a different thermal spenserian of everything else. So yeah, that seals got to take up that flex. Well, over time that it will eventually fail. So you got pulled the timing cover off in place to replace that. So okay, let's do that. So I took it all apart, pulled it apart. It's not a hard job to do if you have basic, you know, hand tools plus a torque wrench is like all you need. So I got I'm getting down in there, pull it all apart. And when like basically while you're in there, you should do some maintenance because it's basically you're pulling off to get into the deep reaches of the front of the engine. So you replace everything and refresh everything as you build back out. So I'm like okay, it's got a new water pump on there. Let's do a new timing chain. That's always a good thing to do. You and then refresh all the seals, you're good to go. Right. So I'm starting to reassemble. And I noticed that the the first thing was the distributor gear, which is so you had the camshaft, which moves the valves up and down, is at the end of that snout is a gear that then meshes with another gear. It's basically almost like a worm gear on. Ah, no, it's not a worm gear. It's a It's too hilly 90 degree gears, it's kind of weird. I'll just take a picture of it's easiest way to explain it. But the camshaft gear drives the distributor round and round around around. Well, it's a really hard spot for the oil to get to. And what happens on AMC 360 engines is the, the hardness between those two gears are very important. And if not really close, one gear starts to get eaten up by the other gear, because not a lot of oil gets there. And that's what happened mine basically doing it apart. Yes, chewed itself apart. So I'll take a picture of it. But basically like a gear with 190,000 miles on it should be smooth. Okay, not sharp. Mine was sharp and shiny, which means the distributor gear was eating the camshaft gear,
if you got you get teeth, they're eating each other, then the actual position of them starts to get
off. Yes, yes. And so your timing starts to drift. And so I saw I went online, I bought a new distributor gear and a new camshaft gear from the same manufacturer. So they have probably the set right hardness the close enough. So they won't eat each other alive. Right? That's That's the hope. I haven't actually I just drove it to Galveston and back this last weekend. So I'm thinking about this week, pull the distributor and see if it's shiny or not. If it's shiny, then that means Well, time to open it a little back up again.
Did you notice any any difference in performance
I did with the timing chain. So the old timing chain is probably was the original one for that engine is it stretched out. And it was so stretched out that the deflection in the chain that was only six inches long. So between the gears, it's about six inches long, had an inch left and the inch, right. So that thing's just wobbling around and
it was fish flapping may make you never know maybe it was like flinging oil onto those gears that it was actually doing your favor.
So I put a new timing timing set on it, which was a timing chain, new gears in there for the distributor and a camshaft and then putting it all back together, got a new seal on there torquing everything down, got everything all nice, go to put their chronic balancer on. And I'll look at the old harmonic balancer, and the oils that the oil seal for the front of the engine rides on a machine surface on the balancer. And so I'm just like, you know, just like because I was gonna put assembly lube on it. So I when I press the harmonic balancer in, it didn't tear the seal up, right? So I'm leaving it up. And I'm like, huh, I could feel a groove through my glove, which is not a good man through a glove. Yeah, through through a rubber glove, you could feel a wear mark basically in that harmonic balancer. So that harmonic balancer, basically the old a old seal, what had eaten at that, that machine surface. So ordered a new harmonic balancer, new one came in, put that paper back on. And you had to let all like the seals dry overnight, because they require like a coating on them. So everything seals up. But fluid back in it fired right up, bam, ready to go. Nice. But it took like, that was like three weeks of work. Because it was you get to one spot. And you're like, Oh, I gotta order this part now. And then it takes, you know, five, six days for that part to show up.
You know, we typically measure jobs and beers. That's like a couple of cases. Right?
It was like a couple of cases. And and while I was doing that, I was also finishing up some interior stuff like I built a center console. So now it has cupholders. Ooh,
did you three cupholders. No, I
got some nice stainless ones from Amazon. But it's got like a it's got like storage so you can like put stuff in it. But your sunglasses it's actually exciting to have a daily driver with cupholders now. What else did I do on the it's oh yeah, the dash so I redid the whole dash instrument panel, put modern gauges in it. So it's not the old analog stuff anymore. All modern stuff so I can have I have like a compass now. Oh, and like external temperature, you know, you'll never get lost again, never get lost again. But actually, the nice thing about it now is I have a tech ometer now, so I can actually see what the RPM is. And also like my air fuel mixture ratio pipes into this now, so like it can record all that information, and also has I have it set up so it can warn you, like, if you have low oil pressure, it will go warning, low oil pressure, do something about it. Same thing with like over temperature, stuff like that. What is that engine idle at? 650. Okay, actually I set it for. So it's got three idle speeds, basically, you have what's called fast idle, which is right when you started up. Yeah. And you set that to about 1000. And basically it stays at that too, it gets warm, or Till next time, you've you wide open throttle it that trips off, and then you have unloaded and park idle. And I have that set to about 750. And then I have what's called loaded, idle, which is when you're in drive and air conditioner on sounds like max load at idle is that those two things happening in Drive in with the hook down on the on the break. And that's like 650 basically at the set your unloaded idle to be high enough so when you load it, it's above 606 50 seems to be where it's happy. On under load like that. reads that too low it stumbles set too high it wastes gas, but makes the air conditioning super cold. Because printing that compressor faster. Yeah. So you had the next next step on it is I drove where I drove down the Galveston. It was now I actually know like with that new gauge cluster, I actually know how hot it's running. Because before like the temperature is like Oh yeah, it's just like in this it's between the blue mark and the red mark. Right? You don't really know what that? Yeah, supposedly, who knows what the 30 year old Gage, right. But this is actually all digital. So it has an analog output. But you can actually like toggle in the menu to see oh, what's the actual value of that? And if you're driving 60 miles an hour or under, it's perfectly happy. Like it never doesn't overheat it gets up to 180 degrees Fahrenheit, which is where the thermostat opens up and it stays there. Go 61 miles an hour and all hell breaks loose and it just overheats like crazy. Really? Yeah. I say overheat like crazy guys to get up to 230 and just stays there. That's a pretty hefty jump. Yeah, it goes from 180 at 60 and that's 60 Basically if you go 65 is what it will just go like it'll slowly climb the 230 and sit there
it's a is it still between blue and red I
don't know on this to get this guy doesn't have that. It just has numbers now. So I'm gonna do a new radiator for it. I've I've rebuilt this radiator twice so far. And it's just all clogged up and and nasty inside of it like you open up and it's just like sludge it's like rusty sludge. So I'm going to flush the whole engine again put a new radiator in it and
should be good. It never never ends right
never ends. Well I want to be able to be like my other vehicle my red Jeep where you guys can be in stop and go traffic 110 degrees outside and the ACS frosty an engine doesn't overheat right now. I don't trust that to do that. I want to make it so I can do that. So
that's that's a requirement in Houston. That is a requirement
for Houston. 110 degrees stop, go traffic. AC 40 degrees out of the vents. Oh yeah. It can do it. It can blow 40 degrees when it's 100 out. It's just the engine. Whoa, he do it. Yeah, it's pushing really hard. Yeah. But hopefully with a new array. I'm basically gonna put the same radiator I have in my red Jeep into this into this car. So it should be fine. It's just a bigger version of it because the bigger engine Yeah.
I you know, I always I actually always like hearing you talk about your car adventures? Not because I'm IndyCars I'm not really but but because I love hearing something like you're an electrical engineer by trade. You went to school for electrical engineering, but yet you still really dig into the mechanical stuff and the nuts and bolts and the Yeah. And all the alternate turning. And that's one thing that like, it's certainly not exclusive to engineers, but I've seen that happen quite a bit with engineers is like, you learn one thing in engineering and it's sort of stuck was to just seep into every part of your life, you know,
everything, you start treating everything like that, too. Yeah. Like doing this whole timing covers thing is, is going into looking at it as an engineer and, you know, making it better or are assembling it correctly. That's one thing is, I just like, when I took it apart, I just took all the bolts out willy nilly, because usually that's fine. And some old school like, mechanic has probably listened to us and just like hit his head on his palm, because I'm a MC 360. Pretty much every single bolt that goes into the timing cover is a different length. Oh, God. But the great thing is, it's like, you can tell it's not to like, Yeah, cuz like, you can just basically, I wide is once I realized that like, oh, well, you know, I've done that before and figure it out later, as you or I did I what I do is I ordered the bolts, largest to smallest. And then you just look at all the I guess mounts and you just pick the one that's farthest away from the block is the longest bolt and just go in that pattern that tends to sort itself out. The trick is when you start tightening up everything if you you hit the end of the block, and the bolt is not snug down onto the or they all blind holes. No blind holes, okay. Yeah, except for some reason one of the bolts on the fuel pump is not blind.
Well, like he said, they just closed a bunch of stuff, right? It just
goes into the block. And it's an open hole. And so, and the factory service manual doesn't say anything about that. And I'm like, That is probably why my fuel pump leaked so much oil, because it's open to the oil galley. Yeah, just straight open. So oil just slapped slash sloshes around in that timing cover. And just going onto that bolt and just leaks out. So I'm like, I put a little bit of a, you know, small pipe sealer Loctite on it and put it in there so it wouldn't leak. So yeah, it's getting there. It's getting there.
Sounds like fun, man. Yep.
So you've been doing a lot of design work. And then new EDA tool. Oh my gosh, released a new version.
So I am super, super excited about this. Did trace 4.0 is finally here. DTrace tends to release a new version. Well, okay, they were on 2.0 for a long time. And then they did 3.0 A year and a half ago. And I've been waiting around for 4.0 now because it's just been a matter of time until they fixed a bunch of like goofy stuff with it. But 4.0 feels so good. Because they finally like, they listened to everyone on the forums. And they started like actually fixing some underlying bugs. And some really some features that would make people roll their eyes being like, wow, it still doesn't have this. But like, the funny thing was with dip trace, I mean, it's you know, everyone knows I love the program. It's great. I not only is it like kind of serendipitous that like I used dip trace, like, I found one company out there that does what I love to do, and I got a job there because they use dip trace, you know, it just worked out super nice that way. And so the thing about defects that kind of stuck to it for a long time, they were focusing on doing what I like to call flashy, up upgrades and updates and things like that. So they spent god awful amount of time adding differential traces to, you know, the thing and updating the auto router and things that are like people are pulling their hair out living like, can we get circles before you give us differential tracing. And of course, defrays had circles forever, but they did not have circles that you could register or aligned to the center of the circle. You know, simple things that like mean, when you say
you have to do like on like an arc base no circles where
circles were bounded by a square. So you had to basically think of a circle as like fitting inside of a square. So you had to you should see Parker's face, right? Yeah, no, I, hey, I totally admit it. There was some really, really bad stuff about IP rights. But it sounds like they went back. And instead of doing all like the flashy bling bling stuff, they were like, We need to go back to our basics and fix some things. So I wrote down a list of a handful of things that have changed in 4.0. And feel free to laugh when I say that this is a new thing for any of these. So now there's finally snapping and aligning things. Snapping was always like snap to grid was always a thing. But now You can snap to like the edge of a thing. Or if you have text, you can say, like left justify to an edge or something like that, which is kind of nice. And then there's an align tool. So it's kind of like, you know, CorelDraw, or something like that, where you have, hey, I want to say, put, I want that put the top left corner at these coordinates. And it'll do that now. Whoa, super, I'm
thinking about aligning is like, you can select like a whole bunch of resistors and say, align this on the same axis.
DipTrace has actually had that for a while. That's nice. Yeah, that is kind of nice. But but in terms of like saying, like, click a circle, say like, I want you to align the center of this circle to a very particular coordinate, it'll do that now, which is awesome. In fact, what's what's cool is it it draw a dip, trace now draws circles as operands, which, at first seems a little weird, but it's kind of nice now. So like, if you draw a circle, and a circle is still, you know, fits within a square in Detroit. So if you draw a circle, you draw a square, and it puts a circle in it. But if you make it a rectangle, it ends up being a rectangle with rounded edges. So those are both the same tool, which is actually kind of convenient, in some ways. Okay, next thing, circles and arcs actually have a center now, which, okay, so anytime you've learned anything about circles, in any mathematical coordinate system, it's a center and a radius, right? Like, that's how you define a circle. Well, that dip trace never did that dip trace, you know, like I said, it's just a circle in a box. But now like when you select a circle, you can see the center. But also, if you select an arc of any radius, it'll show you the center plus its radius, which is pretty nice. It'll also show you a dark, too. So that's really convenient. If you draw a line now, it'll show you the length of the line that you drew. And if you draw a line that is not, you know, zero or 90 degrees, it'll show you the dx dy of the line to which is convenient. I like that. Okay, this this one is, this one's really, really funny. And I never, I never once I've been using dip trace for almost a decade. Now, I never once ran into this problem until like three months ago. And it was almost a soda showstopper. Dip trace now allows you to pick any angle for a pad in the footprint editor. Previously, you could only have 90, and zero degrees for your your pads. So say if you had a pad that was you know, a rectangular shaped pad, it could only be vertical or horizontal. Now you can arbitrarily pick the angle of that pad. So the reason why that came up as a problem is I actually had a customer who was having me design a board for them. And on this board, they had a part where it had the port was square, and it had pads all around the edge, but one of the pads was on a 45. And in one of the corners, it was physically incapable DTrace could not make a 45 pad, because it also had to be a slot the cutout for it. So I couldn't make a 45 indep trace with the footprint editor which I could totally do now. Get this, here's how I got around that problem. This is so so ghetto and so goofy. I ended up making two parts for that footprint, two separate footprints for the part. What Yeah, and I put them on top of each other. And then I rotated one by 45 such that it fit. I even got fancy and I made the schematic symbol look like one schematic symbol, even though there were two parts connected in it, but it took me half a day to figure out like, wow, I really I couldn't do, I couldn't actually make this part in dip trace. So go figure. Now we can. There's one really cool button that has been added. Now you can press a single button and it automatically removes all silkscreen from any pads. So it's one thing that's actually really nice about that is say you have a component that's circular, where the pads for the components are, you know, on the same radius as the the outline of the component, you can just draw a circle for the outline draw the pads and say remove and it pops all the silkscreen off of it which that's kind of nice. There is no a progressive search for components. So if you're in a schematic or or actually if you're in any of the modules, but say schematic and you want to find I don't know ELO seven to op amp, you can go to the part libraries and you can say search for TLO. Seven two. Well it used to be if if you would search for a component in dip trace, and you told it to search across all of its libraries, you told it to just do master find anything with this name, dip trace would get to like it had a little scroll bar, it would get to 50%. And then it would have a seizure. And it would go freakin nuts. And it would freeze for like a handful of seconds. And then it would find the part. And it wasn't like a big ordeal. Like the first time it happened. I was like, oh man did the did it crash and no, but it happened every single time. So like, in fact, it was funny because Roz Josh rose, or my buddy was using DTrace the other day, and he started searching for a part, I was watching him over a Google Hangouts, it was all man it froze, I was like, Nah, hang on, didn't pop up there, they found that. So they fixed that. But above and beyond fixing that, you don't have to wait any more for it to actually search through all of its libraries, and then post its results. It progressively searches and it shows you as soon as it finds parts, that's nice. Three more quick things. There is now a single button that allows you to export all manufacturing files in a single zip, so you can pop it and there you go. The trace used to be you had to do every single file individually one at a time, which is fine, because there's usually not that many files. But now you can just set it up, press one button. The next thing is teardrops are now available, which That's badass, I really love Do Drops. For people who don't know what their drops are. Basically, when a when a trace hits a pad of any sort, like a via circular pad or rectangular pad anything. It can make sharp corners there, right at where the interface where it makes that where it meets the pad, teardrops makes the trace actually fan out into the width or whatever width you choose into that pad. We should post a picture of it because like, as soon as you see it, you're like, oh, okay, yeah, it makes all your your pads look like teardrops, basically. And kind of one of the nice aspects of that is it increases the strength of the pad, so you have less chance of it ripping off if you ever have to do rework. So that's really nice. In addition to that, it also does rounded and curved corners. Like if you ever have a tee joint where you join two traces together, it'll round those edges, which is super nice. It's really nice. And it'll do that automatically to auto. It does everything auto.
I do that manually in Eagle right now. Yeah.
And then there's one thing, one more thing that I think is really, really, really awesome. Even though it seems not seems it's kind of useless. But it's awesome, because we talked about it here on the podcast. And we were like someone should do this. And I stumbled upon it. And it was like holy crap, if trace does this now, I don't really care but the trace does. So when when you're creating a new PCB now, say you've you're done with your schematic and you're ready to make a fresh PCB. You basically there's a button in depress called convert to PCB, you just press that it opens up the program, and it dumps all your parts in. It used to be that it just would arbitrarily crap all your parts, wherever now, it actually dumps your parts in the same way that your schematic is drawn. So basically, like, you know, yeah, yeah, we've, we've talked about this in the podcast, I think you and I talked about on text I don't remember us talking about,
okay, because I know we talked about that as a as a feature in EDA tool needs to have,
right? Yeah, no, that's what I was talking about. Yeah, sorry. We talked about it as a feature, but we haven't but but I had never seen it. And I stumbled upon it the other day, because I created a new PCB industry. 4.0 and I was like, Man, this is weird. This doesn't look like the normal chaos that it normally does. And then I and then it dawned on me, I was like, Holy crap, it put the parts in the same way the schematic is. And I say it's kind of useless, because it just doesn't like, I don't really care.
No, I want that as a thing that I would love that.
It is it is kind of nice for bypass caps. If you ask me. Yeah, like it puts bypass caps, where you put them on the schematic. So it makes it easier in terms of saying like, Oh, you 11 Has C 56 nc 275. You know, for it. I'm really anal about that. When it comes to schematics. If I have a cap on a part, like for a bypass, even though they're all like, interchangeable, I put those numbers with the one that I was very intentional about. It takes extra time, but I feel like no, it reduces what I
always do to its proper,
proper. So I know that was a mouthful, and and it's kind of funny. I'm just super excited that now like ooh, it's finally like It feels done. Yeah, it feels like I can finally do stuff now. So I'm excited about difference. 4.0 Go check it out and see if you like it too. Yeah, comment like
and subscribe. Hit that bell so you know when we have when you were talking about building your, your, your heater box, right? I'm actually working on the I wasn't gonna mention this but I'm actually working on a very similar project. But during the exact opposites
all reverse Michael wish.
I wish guy cool down that hot Domino's Pizza, right? No is so like, a year and a half ago. My mom bought a ginormous wine chiller. Like cabinets on Craigslist for super cheap. Okay. And I'm like, there's gotta be something wrong with this. Because these things like sell for like brand new, like $8,000. Yeah. And it was like, I think it was like 500 or 600 bucks. Okay. And so we show up there. And my mom was like, y'all had spelt the size of refrigerator. This thing is like three frigerators. Wow. And I'm like, so I had to disassemble the whole thing. Lay it on its side. Like I had to take the like the compressor unit comes out. And I'll put that in back in the wagon, lay the whole thing down over whatever, get down the Galveston where they want it. Set it all back up. Well, it took like a whole year for them to like clear the space where it needed to go. Right. Of course, like he was supposed to like they're converting like one of the guest bedrooms to a winery? Sure. I think it's alcohol storage. And so we set it all up. Guess what? Doesn't work doesn't work. And so I'm like, Well, it's a year and a half later is no way you get your 600 bucks back from that random dude on Craigslist. Yeah. And so I pulled the unit out. And I remember you talking about a long time ago about a kegerator that you fixed by getting a little a because I basically I took it all apart and I plugged it in, and the compressor would get warm. And it would blow little cool air but it wasn't a lot. And the the condenser was getting hot too. So I'm like, Okay, it's actually is moving the refrigerant around. And so I'm like, Okay, I need to put gas in this thing. And I remember you were talking about using like a piercing tool that you could add a, a basically an opening on the low side, right? Yep, a reach. So I bought it so I can recharge it. So I bought one of those sanded the copper. And I put a little bit of a sealant on it. And I put it down, put it all back together, put some charge in it, right. And it started cooling a bit more. I'm like, okay, good. You know, this, this might work. A couple days later, it's not doing it anymore. It's not cooling anymore, like Ah, great. And so I got another one of those piercers, put it on the high side, and then hooked up my gauges, my AC gauges, so I can actually see what was going on in there and put some more, put some more gas in it. And this time I put it with some leak stopping it. Because I'm like, okay, maybe the compressor is a little worn out. And the seals have gone a bit. And so this will keep it from leaking, leaking the refrigerant back out, did that. And it would actually be cool again, but it was only making about a 2x differential on the low and high side. And it shouldn't be making like three 5x Depending on the compressor model, of course, but three, it should be making three to 5x. So like, if it has 100 pounds on on the high side, it should be like 20 to 30 pounds on the low side. And it was just like, like 50 100 is what I was doing. So I'm like okay, this is why it's not cooling. So basically the compressor on it is shot. And so I'm like, Okay, let's find the like old replacement box like the, the the whole unit like it's got like a WhisperKool 2800 I think is what the model is. You plug that in things like two and a half $1,000 Like oh, this is why these wind chillers are eight grand right? Because just the refrigerant part is half that almost half that and so I'm like okay, let's replace the compressor. So I looked at the compressor model. I get them on eBay for 300 bucks. That's not too bad. But that involves a lot of cutting re soldering of the we sweating I guess the pipes and those are tiny pipes to they're kind of a pain. Yeah, they're like they're quarter inch diameter pipes. Yeah. But OD, tiny, tiny guys. And I'm like, Man, that's gonna be like a pain in the butt with just like a torch and flux. Because then you can't get any flux inside of it. Because it's going to vapor Yeah, mess things up. So I'm like, You know what, what if I took $100 window AC units gutted the inside of that and put it inside of this box, and then made my own duck Dean with pink foam and, and hot glue.
No, don't W did that.
That's what I'm working on right now. That's so great. Yeah, because I have one of those little tiny little units. I have one of those one little window units for my entire garage, almost three car garage. And it can when it's 100 degrees outside. It can keep that garage at 75
it's gonna it's gonna it's gonna cool it so low that or freeze alcohol.
Well, what I did is I put a thermometer in my unit, it blows out 45 degree air. Okay, so I'm like, Okay, I know I can get down to 55. And I'll just use like an STC was at 100 sec. 1000 it's what we use for doing fermenters for homebrew. Oh, the temperature regulators. Yeah, yeah, that's I'm gonna use one of those to control the temperature. Yeah, because because these really inexpensive wall units are all mechanical. So I'm basically gonna set max low max everything. And there's have this SEC just cycle on and on and on. Yeah. Nice. Should work. I hope.
Let everyone know if it doesn't work. You got to take some you got to take some in progress pictures of this. Oh, yeah. Yeah.
I can't wait. Because it's like, for basically, it's like, it used to be 150 bucks in the in the fix everything.
And yeah, we'll see what happens. Why won't it work? I have no, it should work. Right.
So where's the window unit mounting?
Oh, I'll put it inside the old I'm gonna gut the Whisper cool box of its compressor and all its coils and stuff and its fans. And then because it's almost the same size as the window unit. Got and then I'm gonna basically got the window unit. So I take all its plastic and outside off, put it inside there because it's actually smaller. And then build ducting out of pink foam and hot glue. So like it can use the same exhaust and intake as the WhisperKool system.
You know when you're done with this, you need to get that expanding foam in a can and just foam the hell out of every foam that inside of Oh yeah. Yeah, but but but but you got to be classy about it because you foam everything and then you go back with a knife and you make sharp edges.
So it should work. I don't see any reason why it won't work. It might be a little redneck, but you won't actually talk it's gonna be inside of another box.
But aren't you concerned that it might heat the room a whole lot?
No, no, the WhisperKool does the same thing. Okay, and heats the room. It works like a refrigerator it heats the room while cooling the inside. Okay, but I'm saying it has a it might heat inside resorts and then has an outside basically like the the evaporator is inside circulating the air inside the cabinet. Right. And then the condenser is circling room air. Yeah. And heating up the room.
Yeah, but what I'm saying is like it might heat the room a lot.
Same energy that you're removing. It's actually it's like double the BT EU as well. So I think the WhisperKool is actually 2800 v2 in a window units 5000 v2. So actually it'll be it'll be able to cool down faster than the old one. Yeah. So the main thing is, is the sound difference the Whisper cool is in its name it's actually really quiet when it runs $100 window units are like super loud but again it's in its own room no one sleeps in there or anything yeah the matter I'll let everyone know how that project
Yeah, keep keep us posted. That's that might be one of the best projects that had
it shouldn't be done this weekend because the I think the window unit arrives like tomorrow. Nice. And now start gutting everything and make sure everything fits. What should I measured my wall unit should fit inside that box if not a grinder but a cut off wheel can totally make anything fit in anywhere.
Now you're getting real redneck.
Yep. The interesting thing is actually the construction of those really cheap units like the compressor has. I think it mines built like this, if I recall right is the compressor has is a shaft that comes out it's like it's like one motor does everything. It drives the compressor and the fan for the evaporator and the fan for the condenser. So that's gonna be the tricky thing is this WhisperKool has like big computer fans for everything. And then the compressors, it's got three different fans systems or three different motor systems. That's gonna be the only weird thing is like making that work with the preexistent that's I'm thinking like pink foam, I can cut it with razor blades. Hot glue it all together to make all the ducting should work,
you know, hot tips from the map. Don't use super glue on pink foam. It don't work.
Does it just just this is just dissolve it eats it.
But But one thing that actually does work really well is liquid nails. Liquid Nails. I mean, you gotta wait a long time for it, but it works really well on foam. I'm just gonna hot glue. Hot glue is plenty fine for your application. Yeah. So well with
that interesting project. I think it's time to wrap up this part. So too. Yeah, so that was the Mac fab engineering podcast. We're your host Sparky Dolman. Steven Greg. Lady, everyone. Thank you, Daisy.
This is the last installment of Stephen's 'Adventures in Injection Molding'. We are going to recap the entire two year sage and close the book on it.
The Jeep Prop Fan project rides again! Well some iteration of it at least. Lets design an open source PCM (Power Control Module) for automotive apps!
The quest for the right connector for a project! The right of passage for any hardware electrical engineer starts with a connector catalog.