Parker finds his lithium charger IC and Stephen works on the 2nd longest running project on the MEP!
Podcast Transcript
Host 2
Welcome to the macro fab engineering podcast. We're your hosts, Parker,
Unknown Speaker
Host 2
This is episode 163. This week, we have no announcements.
Unknown Speaker
So you got some stuff done this week, right?
Host 2
Yeah. Over the weekend, I got a lot of work done on the parallax propeller development stick. I had liked last time we talked, I was looking for a lithium battery solution. I was going to use that one ti chip that I had already designed and kind of just like, grafted on to the existing board. Wait, wait, wait, you opted to not do that? Exactly. actually designed a new part this weekend? Oh, my God, the footprint at least in symbol. Not the whole silicon the solution?
Unknown Speaker
Wait, wait, what made you what made you choose to switch?
Host 2
So the thing was, I was trying to find a solution that would play happy with my power mux that TPS 2113 Which like switch between USB power in and like a DC power pack, right. And so I was trying to figure out a good solution that would work with that. And I couldn't really make that work with the lithium battery manager circuit that I already had designed. And that chip. And so I went and peruse T eyes catalog looking for like dual input lithium battery chargers, and I found a BQ 24165. Chip. And it has it's actually pretty cool. It has it supports USB input, right? And it also supports DC input. So it basically combines a power mux and a lithium battery management circuit. Ah, so you replaced it because it's all in one. Yes. It's all in one. And it solves a couple of the like, handshaking between chips issues that was running into with the previous design. And so instead of having like, three ICs? Well, two ICS plus like a p channel MOSFET. Now I just have one IC nice handles at all? Yeah. Is
Host 1
Host 2
And it is when you look at like what it replaced. It's like five bucks. Oh genius, which is like, it's kind of pricey, but the thing is that replaced like a $2.50 cent power marks that replaced a $3 what the other lithium battery circuit would have cost that replaced, you know, 50 cent MOSFET. So it's like a wash price wise. Yeah, but but in terms of layout, you get a lot of benefit, a lot of benefit, and the fact that it handles everything internally in the reduction in error, basically, for me implementing the solution will go down. So what, what kind of packages are coming? I think it's a Q F, it comes in the BGA. But I'm not using that one. I'm using the QFN like 28 I think it's what it does, you know?
Host 1
Sorry, I know I'm jumping a bunch of side questions here. But how often does macro fab do BGA is now I think almost every single day? Yeah. Basically, basically every panel has a BGA on it. Pretty much. Yeah, yeah,
Host 2
I didn't do that because the what is the pitch with on the BGA it's a QFN 24 is what it is. Okay. I mean, see what the BGA
Host 1
I think you should I think you should change the BGA just to make it look clean. It is a point four millimeter BGA Oh, point four is right on the edge of Mac fabs capability right?
Host 2
Well not a sim it's right on the edge of the trace with three mil three mil. Well you have to do you'd have to go smaller than three mil trace with to do a point four or you have to move the V and pad and both of those are pricey
Host 1
okay so via in pad when doing BGA is not necessarily a good thing, especially when dealing with that smaller pad
Host 2
well when I mean V and pad V and pad then epoxy Phil Kaplan.
Host 1
Oh, good God. No, you don't. So funny enough. Macro fab has articles written about all of those? Yes,
Host 2
I'm actually about to release a vn pad article that deals with capping them, right. Like this week that article come out.
Host 1
Right and and a long time ago, I
Host 2
wrote an article about escaping PGAS and solder mask and non solder masks to find pads, dog boning and things like that. Yeah, that's a subject you shouldn't like just blindly Google is dog boning by the way.
Host 1
Yeah, Doug boning in what we're talking about is how to properly place a via within a BGA package. Yes.
Host 2
And our marketing director was in for quite a shock when when that guy Googled.
Unknown Speaker
Host 2
what is dog boning? And I'm like yeah, it's a point four millimeter BGA. Which I don't want to spend a ton of money on the PCBs. So I went for the the QFN. Yeah, it's something I can build with the normal. six mil six mil spacing. Oh, no. five mil, five mil spacing. Oh, it's
Unknown Speaker
moved to five, five mil? Yeah, we
Host 2
got it over the five minute five for now, is the standard.
Unknown Speaker
Host 1
Do you do you do five, five, just as a default, though, on your boards,
Host 2
I usually do 1010. Okay, unless I need to go smaller. And I usually do at six. In less than then I go one more step and finding you go smaller. So I go 1010 6655 is usually what I do.
Host 1
Got it. I've kind of gotten in a groove now where I'll do 1212 trace with with 22 via. And then I'll do if I've got like E's as a ginormous. It's a pretty it's a pretty big via Yeah, but but a lot of times I'm dealing with like oscillators and stuff like that, where I want the inductance to be pretty low. So I'll do that. And I'll do like four or five V is in like a stitch pattern. But if I've got something like a digital trace that just flips a switch or something like that, I'll run that as a six.
Host 2
Yeah. May I run like 10 Mill drills, like all the time, unless it's like I know it's power?
Host 1
Yeah, yeah. So well, most of most of the 20 tools I do are popping up a positive or a negative 12 volt rail to an op amp. Okay, yep. You need some power there. Yeah, a little bit. Yep.
Host 2
So hopefully by the next podcast, I have that board or routed basically, I designed the part, it took me like, basically half a day on on Saturday, just looking at parts, I was looking for that right part, that would be the solution I needed. And also it does like current limiting, depending on there's like an ice set. So like a current set resistor. But even more so is it also implements like the standard currents that USB devices have like 100 mil amps 500 mil amps, and it goes actually support some USB 3.0 stuff like the 900 mil amp standard, and stuff like that. And you just twiddle some of the bits on on on it's, it's got like a three pin configuration set up. So you get eight choices.
Host 1
You know, you know, it'd be really fun. I would love to hear if any of our listeners want to jump on the Slack channel, and jump, I guess, do this in either the map or the general channel in within the slack. Tell us what is the longest you've ever taken to find a chip? Not not like stumbling upon a chip, but like something you knew you wanted? And you were searching for it. How long did it take for you to be like, this is the one?
Host 2
Yeah, so do we half a day for that one.
Host 1
I remember an engineering manager I worked under once. He spent him and his team spent an entire month looking for the right processor for a project. No, it's like this. This was like a multimillion dollar project where they wanted it to be like absolutely flawless. So they took an entire month. But like, what's the longest anyone has taken? I'd love to hear some war stories about that.
Host 2
Can you imagine basically reading MCU data sheets for whole month like all 500 pages of each
Host 3
one? Oh, that makes you'd go cross eyed. Like what like and having arguments with like the firmware team versus the hardware team about the merits of each one? And like picking Okay, so like finally everyone's like happy with like, Okay, this one has an IDE I'm happy with this one has like, the tool chain I'm happy with but then like, once you find a family then you have to pick like how much memory are we gonna get and all this Oh, God, that sounds terrible. And then you pick
Host 2
the pick the right chip, and then like the next day, that company releases and irata forte, just like throws it all out the window.
Host 1
Oh, are they they're like, Well, this is going obsolete in the next six months or something like that. And by six months we mean tomorrow,
Host 2
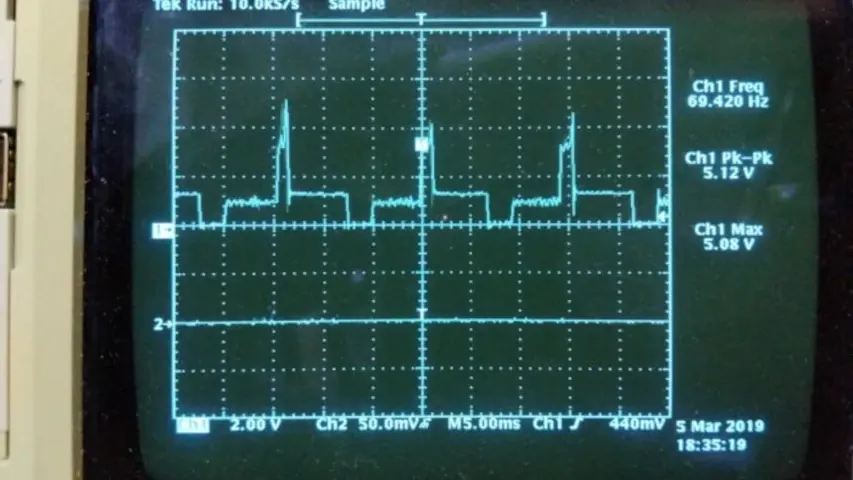
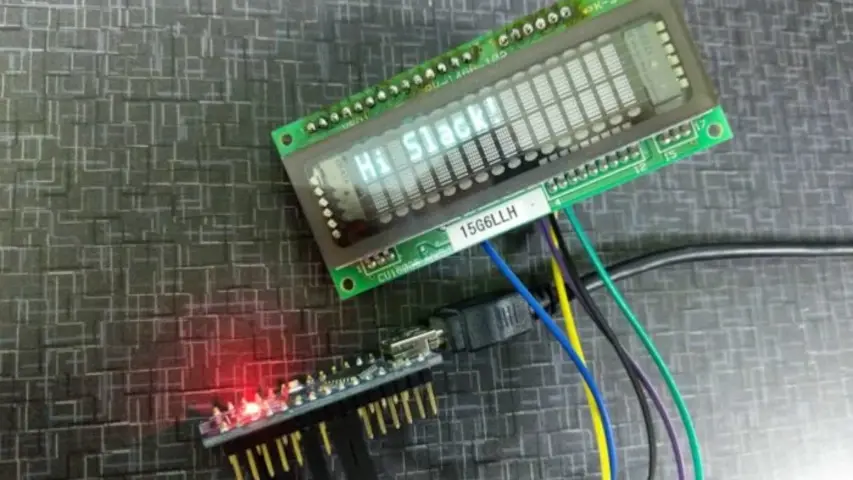
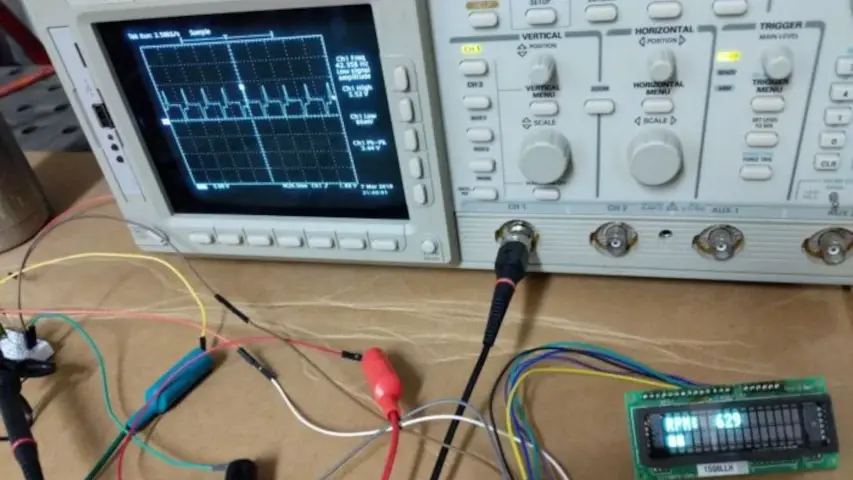
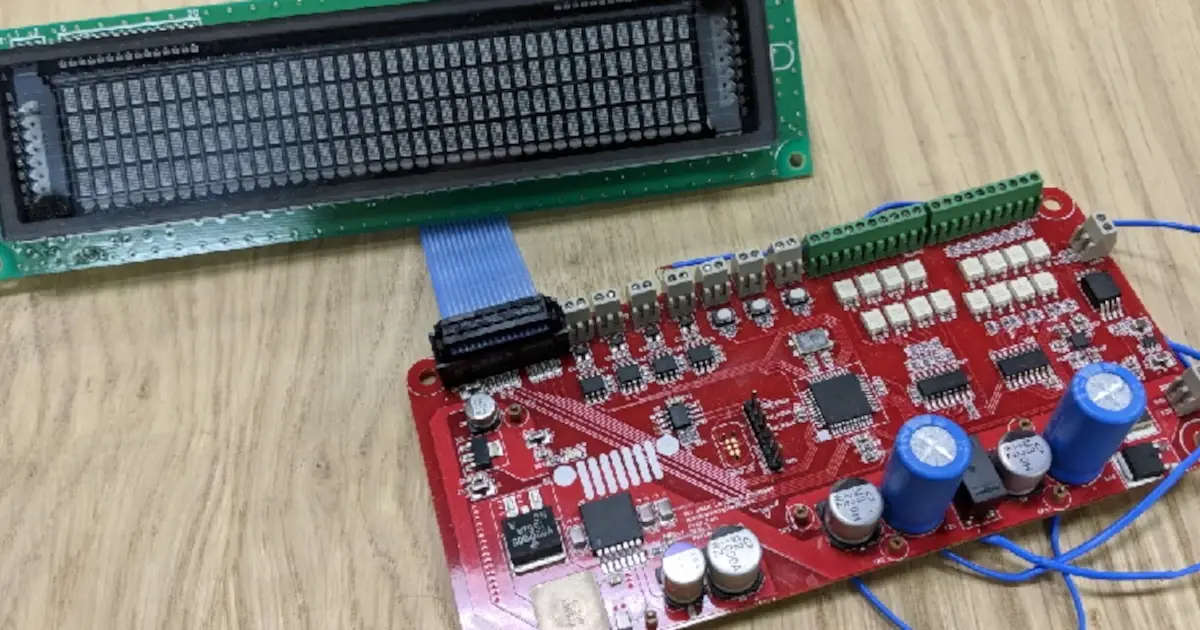
tomorrow. What are them all now? All right, hold your peace. Yeah. So that's that project. And then this is an idea I got after our last podcast we did. I had no crazy idea I that I wanted to put a tack attack. domitor into the wagon because it doesn't have one. And I started looking online and oh, like 150 bucks for a decent one. Like, you can get cheap ones for like 60 bucks, but they go up to like 10,000 rpm. It's like that engine revs to like 4000. And that's it. So you're only red lines at four tiles. Yeah, Red was like fourth. So you only use like, a fifth of the gauge. Right? Right. Yeah, it's kind of worthless. two fifths of a gauge, actually, if you want to get correct on that one. And so I'm like, Oh, well, the, you know, how hard can it be to just like, get an Arduino because I got 1000s of those around, grab a screen I've had in the parts bin. And you know, put that together and read the tack. So I pulled up my multi media, I pulled up my oscilloscope set it up on like the fender, my wagon, hooked it up to the tack, and captured the waveform. And I'm like, Oh, it's a five volt spike all that good stuff. And so I did a little circuit basically, just to, like, you know, make sure there's no ESD or anything like that. Put a 4.7 volt like Zener diode to kind of like clamp it to make sure no spikes would go over that and fry the Arduino. And then I wrote some code. And I found a old VFD screen from an old macro fab podcast project, which will be unnamed. And well, you repurpose that? Yeah, the one for the super simple power supply. Oh,
Host 1
great. Yeah. Well, I guess we'll have to order another one someday. Yep. And so I repurposed that display.
Host 2
Got that all working. I think my favorite part, I'll post the code up. I like GitHub or something. But the My favorite part of that code was I, I made a bar, because it's a two by 16 character display. So the top row has says rpm, and then the number right at the bottom, I made a 16 segment like, like sweet bar, like a bar graph. Yeah. Right. So that was so much fun to program and make that work. Right. And I kind of have a I don't know if it was the right way. But I think it's a very ingenious way how I programmed it. I bet you someone be like, Oh, that's a terrible way. It's more efficient if you do it this way. But,
Host 1
but I mean, that's coding. And no matter what you do, somebody's gonna say that.
Host 2
Yeah, but I like the solution I came up with, I'm actually I'm surprised that Arduino doesn't have like a built in like bar graph library, you know? Well, there is, but it's for like actual bar graphs. Of course they do. But for like actual LED bar graphs, not like using a two by 16 character display as one.
Host 1
Well, I mean, of course, you'd have to take whatever code that they have. And you'd have to translate it to how it communicates to that. Right. Okay, so they do have some built in function for that. Well, it's hard to wait, no, of course they do.
Host 2
Yep. And so I was waiting for some parts, and I decided I got a little anxious. And so I hooked it up to the wagon, and cranked it over, immediately fried the Arduino. Like, it was the most violence, smoke release scene ever microcontroller I've ever seen in my life. And it was like 20 feet away, because it was like on my bench, and I was cranking the engine over in the side, the wagon. I just see just like, just, I don't know how 18 Mega 320 P has that much smoke in it. But it did. And thankfully, it didn't fry just did it. I wrote that my controller. I didn't mess the screen up, fortunately, because that was like that's like a $60 screen.
Unknown Speaker
Host 2
And so I'm like, Huh, what it was up. So I'm like it was a five volt signal, all that good stuff. And so I hooked it all back up without the Arduino and just put my meter on it. And I turned I cranked it over and the diode, my Zener diode was glowing. So I'm like what is going on? So I put the multimeter on it. And AC mode because you know it's a it's an alternating signal Ish. Ish, and I got 50 volts. Oh, so basically, I realized it was my probe scope was in
Unknown Speaker
Unknown Speaker
mode 50 volt signal that just pumped right into the Arduino.
Host 2
And that diode hadn't like it could not handle that. Like clearly, it was like a quarter watt Zener diode. Yeah, that glass was just just boiling. So fix that I made just like a resistor ladder to knock a resistor divider. I mean to knock down that 50 volts stuff, basically like 4.8 ish volts, sure, and then put a zener on it and that works great. It actually works. I made a video and posted it on Twitter. Are and yeah, that's, uh, I need to like make a little like perfboard. Yeah, just like actually wired it in. But yeah. And then like 3d print something.
Host 1
The Yeah, yeah. Have you ever had that before? Where like, I mean, obviously, you just had a situation where the 10x bit you pretty hard. But have you ever had a situation where the 10x probe thing has just got you scratching your head for a long time, we're like, my signal is so small, and there's no way that it could be this small.
Host 2
Yes, that's happening to me all the time. At the point is just like put it in 1x. And just like, put tape over it. Can't move it,
Host 1
there are situations where 10x is is really useful. It is
Host 2
but for my world, it's why use the scope for?
Host 1
Well, I'll get I'll give a I'll give an example. For it. I've had some like timing circuits before, in fact, I did a I did a timing circuit for a, it was an alarm generator. Well, basically, it had another thing where it had a threshold, and it would detect some kind of input signal. If it reached that threshold, then what it would do is it would throw a comparator high, but you didn't want to immediately like throw an alarm signal, you wanted to wait anywhere from zero to 30 seconds. So I made the timing circuit there. But in order to measure that timing circuit, for a 32nd timing circuit, and this was analog, mind you, because we didn't want to go digital with it.
Host 3
In order to measure that, if you had a probe on it, you you'd mess the measurements up at 1x. So you had to have it at 10x in order to like actually measured the timing on there was that because of the loading or something like that it the one megahertz loading of the probe was enough to alter the timing because it would discharge through the probe also, now and technically 10x would be also but it's an order. difference, right?
Host 2
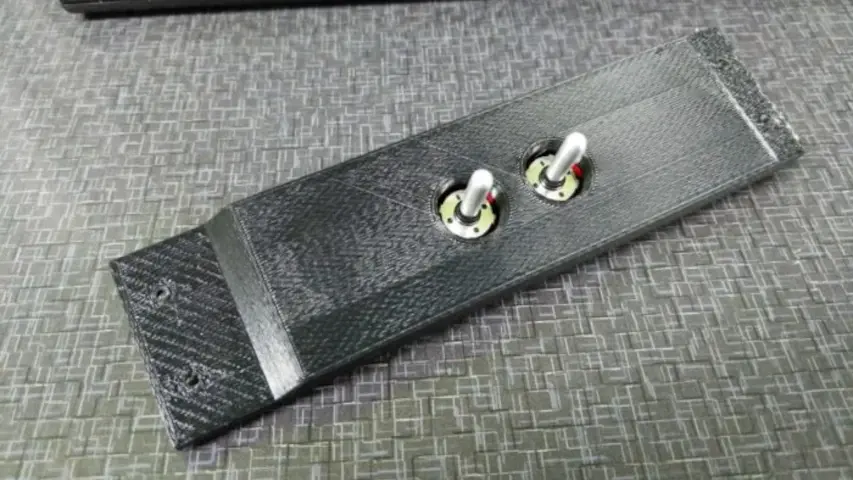
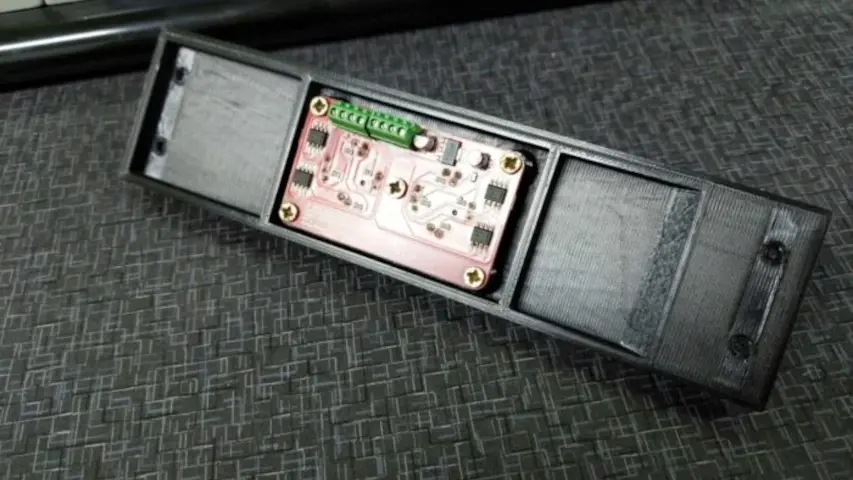
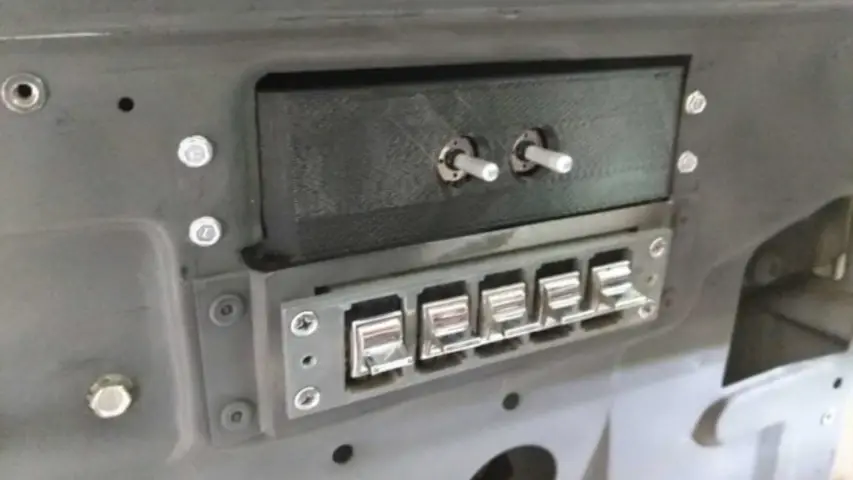
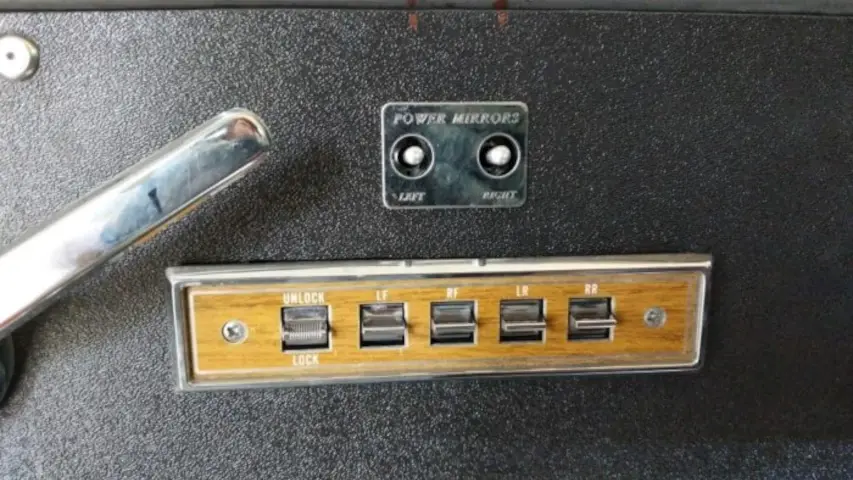
Yeah. And so and this is actually not on my notes is last podcast. I said the power mirror circuit worked. Well actually finally installed it. And I actually 3d printed a bracket and everything. So that's all installed. It looks factory. Oh, nice. Yeah, put some pictures up on the blog for that. That was pretty cool. And then the last thing I have is I haven't got the try them yet. But I was ordering some Tech Connect stuff for a project at work. And I saw that they came out with like these probe ends that go on like the end of your your multimeter. Like the little pointy multimeter probes. And these have like a micro claw on the end. Like, it's like three or four prongs that are really tiny. Yeah, and it's supposed to like grip onto like the Li You poke it into. And so it doesn't slip. That's I haven't tried them yet. But I did like get them out of the box and like kind of like poke around on a PCB. They do grip really well.
Host 1
Like, can you grip? A, like a dip chip or a smaller pin or something like
Host 2
that? Yeah, yeah. Oh, wow, that's cool. It will kind of like stick to it. So that's like when you try to like measure a lot of things. And then like, do something else. Like or look at, like, adjust the scope as you're like holding the probes and stuff. I think that will come in useful. Oh, yeah. I'll get back on that. Once I've got some miles on him.
Host 3
You know, I learned my lesson with this last year on a product I was working on. So I did an initial prototype. And the prototype functioned. But it wasn't anywhere near where I wanted it to be. And one of the one of the things that sucked about it is I couldn't reach any of the signals with a scope when it was assembled. So I had to do these like goofy like octopus, you know, tendrils hanging out of it, it to grip onto, and they were all the same colors, I had to remember Oh, this one coming out of this side of the board means this signal. So I redid a prototype of that. And I added tons of through hole test points that are it's just a through hole pad. In fact, the one I have now has 35 test points on it. And they're not test points in terms of like, you need this for calibration their test points in terms of you know, I need to adjust a resistor for timing or a resistor for gain or something like that. I can just shove a an oscilloscope probe in there and it hangs in there. And it makes it super easy. So for prototypes, it's actually a really, really nice way of doing it. If your layout can handle that, of course.
Host 2
Yep. So yeah, I'm hoping to put those under further use and see if they actually hold up because they were not cheap. How much were they like 30 they're like 25 bucks. Oh, man. Like a good pay. Are probes for like a multimeter are like 25 bucks.
Host 1
You know, I bought I bought a set of oscilloscope probes the other day off of amazon for I think they ended up being 17 bucks. And that's unbelievably cheap. But to be honest, for just general use of for low frequency stuff, say 100 kilohertz and less, they're actually pretty dang good. I would buy a whole nother set. Because I do have a scope that has four inputs. I think it would be totally worth it. My bad. It's actually $30 Yeah, 30 bucks. You know, I'm a bit interested in how long those would last those little fingers, you know, are they gonna break or whatever.
Host 2
But we'll see. Cool. I was willing to give it a shot because I know how annoying that is when I'm trying to like, especially on like, Fine Pitch stuff like trying to poke like a point four millimeter q if p or something. And you just like, keep slipping.
Host 1
Yeah, yeah. Well, and especially if you got something where you don't want to short something next to another pin. That's the worst. Yeah, yeah. Do you ever okay, the pins coming out of a chip, lead? Take a ticket qf P, the pins come out? I think they're called J leads, right? Something like that. Yeah. So they come out they do. They do one bend, and then they do a secondary bend to come down to the board. A lot of times, I tried to measure where the pin actually enters the chip, like at the first knee? Because if I get a signal there, then I find that the solder joint has like passed. Because I don't like the idea of like, if you're putting your probe at the like the foot, I guess you could say of the pin. There's a name for that. What is it?
Host 3
What toe the toe is I should know that. I think IPC rules actually have a name for that part of the pin. But yeah, we'll call it the toe. If you put it in that like joint where the toe bends up, then there's a chance that you can push it down into the solder joint. And then, you know, you can introduce errors, things
Host 2
I actually like to do I want to call up the word you'd like to test it the thigh that's above. I actually like to put my probe there too, but for a different reason. Yeah, let's any because at macro, we use no clean solder. And that no clean flux plates and makes a hard shell. And sometimes you don't know if you're poking through that or not. It's but so if you go above it, it's fine.
Host 1
Well, and on top of that, with that no clean grab, if you if you poke through it, a lot of times you can fracture it and then it just looks like but you know, you can get little flakes of stuff. Yeah, that's good. So can this tag connect grip at the thigh as opposed to grip at the toe?
Host 2
I don't know. I bet you it can. Yeah, I bet you it can. I'll give it a shot this weekend.
Host 1
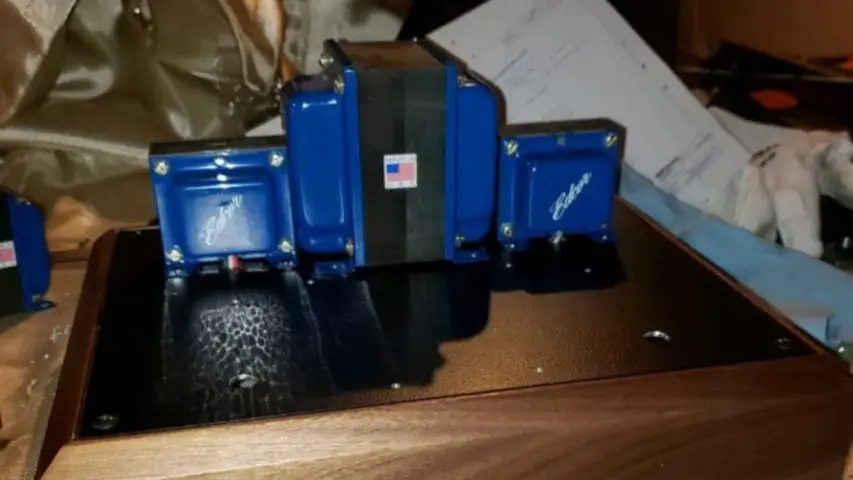
So yeah, cool. So so this week, I actually made some progress on the macro amp. Which Funny, funny story about that. So custom macro amp was one of the first things I did at macro fab or, you know, in a string of one of the first things that I did at macro fed. And I bought all the parts for it got the board made for the most part, and then shelved it for a good handful of reasons. And it's been on on my show for a long time. But I but I resurrected it mainly because a lot of other projects shelf space. Well, you. Yeah, a lot of a lot. So what I'm what I'm doing right now is on a lot of my projects, I'm trying to just like, etch away small pieces of each one, as opposed to trying to do like a Herculean effort on each and every one to get it done. Like, just chunk away a little bit on everyone. So I resurrected this one. And it's kind of fun to see what you did in the past. Not that I think I did a bad job or did a good job, but it's just like, I did some things. And I'm like, Okay, well, that was what I chose to do. I guess I have to continue with it. I mean, it was over three years ago. Yeah, I mean, things are different now. And if you know if at that point three years before that, I probably looked at a project but like what, what what did I do? So so it's kind of fun, though, because like I have it I'm approaching it from a different mentality. And so so first of all, so I Okay, so I have the enclosure, I have the Transformers I have the PCB. And now I'm just basically connecting everything together. So I actually spent some time laying out the enclosure. But before what I was really worried about was like, Okay, I want to like hyper define where every little thing goes. And this time, I just I modeled the footprint of all the trends warmers and the PCB in Fusion 360. And then I just moved them I like, Yeah, I like that it looks good. And I printed it out and drilled that. So I took away more or less just like fun approach to this, as opposed to like, I have to be super careful about where everything goes. Not really, this is just a fun project, you know? And I'm not going to sell this or anything like that. And yeah, no, like, I moved it until it looks good. That's, that's a totally valid way of designing in my opinion. Now, if you're, if you're designing a product that needs to last a long time, and is going to be sold to a bunch of people, of course, you need to think about other things. But this is going to sit on my bench and be a turntable amplifier. So I'd rather just be like, Okay, this was fun. So I ended up I mean, the actual construction method of like, aligning things, you know, actually doing a good job drilling them and making everything straight. Like, of course, I'm going to do that. But in terms of stressing where each component is, whatever, I'm not going to do that. Yeah, so So yeah, that all worked out. So I actually drilled it out the enclosure, and I've got the Transformers mounted. I don't have the hardware yet. Because what I realized is there's like, I've got five or six projects right now that are all at the state where they all need hardware. So what my plan is, is I'm just going to get everything together and say, Okay, this one needs a 632 by quarter inch, this one needs and 1024 by half inch, blah, blah, like get a whole list and just make a big master like explosion, and buy, like all the hardware I need. So I can mount everything because, yeah, I fixed a buddy's amp this weekend. And I used up a handful of tube sockets. And, and I used up a handful of the hardware, I need to for some tube sockets for some other projects. And then I've got an app sitting over here that needs 10, more two, or eight more tube sockets over here. I've got this macro amp that needs some. I've got a buddy who I'm sending some hardware to so it's just like, okay, like, I'm just gonna make master the hell out of well, do
Host 2
you need a big whiteboard and just write things down on? No, I started doing that with my wagon. I'm like, Okay, what's Nazer? I put a whiteboard up. And I wrote down everything that needs to be done on it. Yeah, before it gets driving. And then I'm like, Okay, what parts do I need to get, and then wrote those down. And then as I was able to find them and order them, cross them off. And then as I'm building this, I'm like, I got like two things left on my list. Now before it's it rolls out of my garage. Well, at least a month.
Unknown Speaker
Host 1
you know, it's funny, because before before I met you a few years before I met you, I actually lived in a warehouse. I think I talked to you about this at one point. Yeah, like I built out a warehouse and made a home into it. It was it was really awesome. But so I had an office that was like an actual office that was inside the warehouse, where I built an entire whiteboard where I had all my electronic projects written out on that. But then, in the garage portion of the warehouse, I put another whiteboard where I had all of the garage projects out there. So it's funny because I used to do that a whole lot. I don't anymore, but that's a good idea. Maybe Maybe I'll just because for really, really cheap. Home Depot sells four by eight sheets of whiteboard material. And what I've done in the past is just buy a sheet of that, make a frame. And what I mean by frame is like, like visual frame, by putting gaff tape around the edges, it keeps the edges like connected and like because that stuff will swell if it gets wet. So I gaff tape the edges and then just screw it to a wall somewhere and bam, you're done. You know you for I think I think they're like 1314 bucks and you have a you have a four by eight whiteboard. It's kind of awesome. So yeah, that's, honestly, that's not a bad idea. I might end up doing that. Because Because I'm resorting to like Word documents with like,
Host 2
here's all the hardware I need for these projects. Exactly. I'm actually gonna put one in here in this room. For my I actually pointed like, our listeners could see that. The younger put one up in here too for electronic projects. Nice.
Host 1
Gotta gotta stay organized somehow, with all the co ordinate somehow well, and it's funny too, because a buddy of mine. So I started this thing at work. That's actually kind of fun. Well, it's actually not even at work. So Wednesday nights, I usually just somebody from work I or multiple people from work. They just come over, and I'm trying to set my basement up where it's just like, tools are available to you. If you want to work on a project. Just come over and we'll all have fun. I'll have some beers. Maybe we'll grill some burgers or something. But like, if you want to work on something, bring it over and I've had people bring guitar pedals over. I've had people bring other random stuff over and they just do I work on whatever they want. And so I'm trying to make my basement sort of like a makerspace for all the people at work. And it's been kind of fun, I'm considering getting a shelf. That's like other people's shelves, so they just show up on Wednesday, they get their thing that they're working on, and they just sort of
Host 2
grow to like lockers or chips, they will have cards, and they cut the clock in.
Host 3
No, it's, it's been, it's been a whole bunch of fun. So yeah, back to the Mac ramp real quick, on the board that I have. So there's a few parts, I think there's six parts that are missing, they're all the same thing. It's a J FET. So I gotta get that on order, I use j FET. Buffers, because the, the new tubes that go on the actual amp are really kind of awful at driving loads. So you have to have them push into something that has a higher impedance and J FETs. make for a pretty nice little
Host 1
buffer stage. And the reason why I even chose J fetch is because I believe the provided schematic that came from the neurotoxic fab where these things are made, they use the J FET. So it's just like, Whatever, I'll just use whatever they're using, I'm actually
Host 2
been thinking about, well, I guess it's not really a J FET. Or I'm gonna add a buffer stage to that wagon RPM project. Yeah, I'm just gonna do a comparator. O type circuit. So it goes into and goes if it's over, because that signal isn't purely, you know, ground and then five volts after the the resistor divider, it's got an intermediate step. But I that I think that step, kind of like messes up the, the Arduino code, it's like, right in the range of if it can be a 010. Yeah. And so I'm gonna make a comparator. So it's like, it knows when to zero and one.
Host 3
Oh, sure. Well, actually, Schmitt trigger probably would be better. Because then like you're capturing an edge and you know, it's an edge and that that basically, Schmitt trigger with an RC filter on the front end. So you're just capturing that. And that's game over? Actually, no, no, no, in that case, that you might actually end up with some issues. With the RC filter, the Schmitt trigger, you know, with a little bit of passives around it should should get you good. Yeah. So yeah, I still have to order that, that J FET. But I've got a bunch of tube sockets and some other things that I have to order some capacitors and things that all come from, you know, they're not Mauser style stuff, they have to come from a specific thing. So I'm going to throw that together. Hopefully in the next day or so, such that next week, I can get that all soldered up. But in the meantime, I can still end up wiring, like a lot of the board and things like that. So so funny story I've been, when I was working at macro fab, we bought the evaluation board for the new tubes that go on this thing. Yep. And I brought that to work here. And I've been using it as a headphone amp, even though it's not necessarily I literally have been taking the signal out of my computer going to that and then coming out of it. So it's like a Unity game. headphone amp right now. But
Host 1
the thing that's interesting is, is it stopped working, like about a week ago, and I measured voltages on it just to check. And it seems to be that the tube is dead, which, which is like if you look at the datasheet for these things, they're like super robust will last 400 trillion hours. And you know, all of these words.
Host 2
It's like the sun is consuming the earth and the new tube is still working.
Host 1
Right. Yeah, right. And like, all said and done, I've probably put three or four hours into this tube, and it already died. Like this is not good dude. At the same time, I found a really interesting failure mode.
Host 3
Well, okay, so let me let me let me back up one quick second. I got that evaluation board. And that when I was at NACA, Feb, and that evaluation board has a pluggable new tube in it, so you can swap it out. And I think there's like nine other new tubes that are in a box down here somewhere. But I only ever had the one that it came with on its little carrier board plugged in there. So I've only ever listened to one of these tubes, and it sounds fine. However, if if you tap it at all, it is unbelievably microphonic. So there's a little wire inside that goes over the I guess it's the cathodes. The wire I think is the anode itself. And it's under a pretty high tension because when you tap it, it's super loud. It rings like three kilohertz for like one tap on it with your finger will make it ring for like seconds. Well that's like a normal via like a VFD does that well, and that's just the thing. These are VFDs they're VFDs that they're just passing audio through. And so I'm like, well, that's not a good failure mode. Like, all tubes are microphones to some degree, but this is like, holy crap like it. I mean, I heard it ringing. If I put my hands down on my desk, or like, move my mouse around, I'd hear that Ping was like, Oh, this is not good. But to be frank, I've only ever tested one of these things. So I need to test more. But if one is microphonic, and the very first one I ever touches microphonic, that's not looking good for.
Host 1
So yeah. So that's that there is one thing I wanted to bring up, that was fun. And I've kind of started off by talking about like, Hey, I have to go back and look at what I did. And like kind of refigure out at the very input to the amp. For both the left and right channel, I have an ri a filter, which those filters are the let me see, I think I have a pulled up here that Recording Industry Association of America. So at some point in time, I think it was 1954. This association put together standards through which you record to vinyl with these standards are basically it's basically a fancy low, sorry, high pass filter, that that gets applied to the signal when it gets cut to the actual record. And they do a high pass filter such that the bass gets reduced, because bass actually makes the cut on a vinyl larger. So if you have a larger cut, then you actually end up with less space on the record. So if you do a high pass filter or a fancy, it's a multiple pole high pass filter on there, you can actually put more information on the record and have a longer record. But the problem is you've cut bass to the record. So you have to in your amplifier, do the opposite filter, in order for it to be a flat frequency response. So this ri a filter has two poles and one zero, they're at 50.05 hertz, 500.5 hertz and 21 22.1 Hertz. Those are like super odd and specific values. But regardless, like this, it's this kind of fancy curve, that if you set it up properly, then you get you end up with a flat frequency response. So at the front end of this amp, I built that in surface mount. So everything in the amp is through hole, and you know high power, but I made this small little surface mount RIA filter. And I added this this cool like feature, where with a three position rotary switch, you can switch between a CD input, so the gain is set to accept whatever that's going to spit out line voltage, basically line voltage, you can then switch to a moving cartridge style turntable, which has its own output levels effectively. And then there's also a moving magnet stage on there, which that has unbelievably low signal, so you have to gain it up. So this RIA filter is like basically, I designed it to be set for line level, but then the switch can add gain if necessary, while still keeping the filters the same. The one thing that I haven't decided yet is that switch that switches between the gain stages. Because we're talking about the difference between a one volt input down to like 50 micro volts input, you have to have a huge amount of gain variance between those. I don't know if I want those to be on a switch that's external to the amp. Because if if it's playing and somebody goes on, or switches those, like you're talking about an enormous game change without any compensation whatsoever. So it could go from like playing like a third of a watt to five watts with this switch of, you know, the input there. But at the same time, like in reality, I'm probably the only person who's ever going to touch this. So I don't know, I haven't decided if I want that switch to be external or not. I mean, I cut a hole for it. So I've kind of dedicated myself to external. But maybe I could just weld that hole shot. Another one one last thing about it is like the original intent with this app was to cut rectangular holes such that those tubes would be visible, you could see them through it. But seeing as I've had bad luck with them recently, and the magic of them has gone away. I haven't cut those rectangular holes. I don't even know if I'm going to make them visible from the out so you can't tap them. Well, there's that. But I also I'm thinking about taking the faceplate into work and doing artwork over where that is and putting like labels and things because I think that would look classier than having like one of these goofy tubes hanging out. So yeah. Cool. That was uh, that's what I did last week. bunch of cool stuff. Awesome.
Host 2
So onto the RFO. So we have a, we have to TI things, we have the gain ultra high power density for 100 Watt USB power delivery adapters. That doesn't really sound like a title. But anyways, this is a design document from TI to basically build a very compact 100 Watt, AC to DC adapter achieves 30 watts per cubic inch. It's pretty tiny.
Host 1
That's, that's really crazy. So there's like a whole, I don't even know what to call it, like, Division of engineering dedicated to power density in based off of volume, where it's like, how much juice can we have this power supply? Shove into a very small space. In fact, a while ago, gosh, this was a long time ago, I think we showcased a project where it was like, well beyond 30 Watt per cubic inch. And the magic was like, it wasn't necessarily getting power through that much volume. It was more about getting heat out of that much
Host 2
volume, correct? Yeah, there's setting this up to be like AC adapters for USB type C, which is probably why they went with 100 watts. But it gets like 93% efficiency, which is pretty crazy. So that includes like, going from AC to DC. So even all your loss through your filters and
Host 1
stuff. Yeah, that's, that's pretty, that's pretty impressive. It's not hard to find switch mode power supplies that are in the low 90s. Now, but the thing about it is like, that's just the switch mode. That's not the entire system, you know.
Host 2
So they got like, basically, it's a really cool reference design. So if you're designing anything that's kind of like that, I would go take a look at their their solution.
Host 1
A actually quick question about switch modes that I run into more often than I wish. A lot of times if you look at a switchmode, like efficiency curve, that it's like, Great, this thing tops out at, you know, 95% This is awesome. But in order for it to be 95% You have to be pulling like two amps or something like that. Again, most of the time I need like 10 milliamps or something, you know? Yeah,
Host 2
yeah. You basically need to tune the design for your current, right, your average current that is right, right.
Host 1
So sweet. Yeah, switch mode power supplies, you you a lot of times, you get pretty awful efficiency if you are not pulling a lot of juice from it, or a lot of current. So it almost makes sense to just spend some more on your budget of your current budget and just pull a little bit more because you'll get better efficiency. Although the thing that that I've found in the past with designs like that, like the that chart that shows Oh, okay, at 10 milliamps, I'm going to be 30% efficient. I've found just across the board, that it's that's been incorrect, where I've been something more like 70% efficient when the chart says 30 or something like that. Maybe it's like worst case scenario. Yeah, I don't know. And that's just anecdotal. That's just my experience. Cool. So yeah, next, this next one's really, really cool. So we found a Digi key article that actually showcases a five watt power supply in an IEC mains filter case, which is deceptively simple and a really, really great idea he asked me so if you've ever seen them before, there's these EMI filters that you can purchase for IEC entry modules. So like basically where your mains enters your case or your chassis or whatever. A lot of times you can just go straight to wires or straight to PCB, or you can buy these like all in one cases that have EMI filtering and balancing and things like that. Well, who is this is REM calm? I think it is yeah, Rem calm has taken it one step further and they added a five watt power supply directly into the IEC case. So you plug mains in and you get something from 3.3 to 24 volts out.
Host 2
You get you get DC out and they do like three and a half volts or 3.3 volts to 24 volts Yeah, at five five watts. Yeah. Which is easy. And like they have a cool picture with like it next to a Raspberry Pi and it's like no bigger than a Raspberry Pi.
Host 1
Oh yeah. In terms of in terms of its length. Yeah. Yeah. So you can do
Host 2
really compact off shelf basically designs without having had the role of power supply design.
Host 3
Well, and at the same time, if this is like your first time working with mains, you You can do it in a much safer way. You know, you don't have to do mains to a power supply to your project, you go mains directly to your project effectively with this,
Host 2
and you don't need a wall wart or anything like that.
Host 1
No, the thing that I kind of liked about this also is it's CE certified. I don't know what it would take, you know, if you had one of these into like, a larger produced project, but I'm assuming that this would make getting certification a little bit easier, you know, probably, I looked at the price for it, and they're like, across the board, it's like $17, regardless of what voltage you choose, a little bit on the pricey end, it is, but it's also like a one stop shop. So that's kind of nice. That's true, too.
Host 2
I guess it's been really useful for projects like they have here with the Raspberry Pi, like, kind of like one off kind of art style projects or terminals or stuff like that. Where you have wiggle room in your bill of materials.
Host 1
Yeah, if you can, if you can drop 17 on a on a power supply. But you also have to consider like, okay, so yeah, $17. But if I don't have to design a power supply, there's some money there. So I don't know, I think it's I think it's really great. I like you were saying, especially for these more, you know, one offs, little things, because it just makes things so fast. And the
Host 2
next article we're going to talk about is the TI claims breakthrough bar technology. And ball stands for bulk acoustic wave resonator technology, when that be
Host 1
bar, Bart Bart, bulk acoustic wave resonate be a WR bore. Oh, that's great.
Host 2
So what's what this is basically, instead of having an external crystal oscillator that you would need for like a microcontroller or radio circuits, ti finally has figured out how to put that directly onto the die without having to, I guess, change any typography or anything like that. So because a lot of times your internal oscillators, they're oscillators made in silicon, so they're not very, they're not immune to like jitter. And they're very imprecise. They're good for like getting stuff running. But the moment you start trying to run like serial protocols or whatever, it kind of, you can't keep the clock from drifting too much. But now it seems that T is all of that. So now you can basically get away with, you know, lower Bill materials and lower square inch on your PCB.
Host 3
Yeah, I wonder what the I'm kind of sifting through right now to just see, like, what's the general accuracy? Like, how close are they and also like, have they? Have they compensated for temperature and things like that? Because a lot of times, like that's what drives the cost of a crystal through the roof is like, do you need accuracy? And D needed to always be that accurate? You know?
Host 1
I'm sure that you know, the crystal that well, actually, does an Arduino even have a crystal right now, or are they still using a resonator?
Host 2
I don't know. I think they're using a resonator on some of them.
Host 1
I know on some of the at some time in the past, they use a resonator, I can't remember if they switched over. But But the example is like an Arduino something that doesn't have to be like there's not a very expensive resonator on there, for obvious reasons,
Host 2
correct? Yeah. This is gonna be cool. I like to see this being rolled out to more microcontrollers, basically. And basically, just to reduce, you know, how much should you have to put on your PCB?
Host 1
So what is bulk acoustic wave? resonation?
Host 2
I don't know. We can come up with an idea what it is.
Unknown Speaker
You know what, I know what it is maybe it's
Host 2
like a microbe. It's, it's a microbe right inside. It's just screaming at a MEMS mic.
Host 1
I think I think it harkens back to what we were talking about earlier with the new tube. It has a little wire that's held at such high tension that any little vibration makes it vibrate at like a gigahertz what what kind of, you know, this is something probably like physics to you had to do but like what tension would you have to have a little tiny piece of wire at to make it vibrate at a gig it's probably like the weight of the, I don't know, the Eiffel Tower hanging from a micron of wire or something like that.
Host 2
It looks like a men's kind A setup. That would
Host 1
make sense. Alright, I'm gonna I'm gonna cheat. And
Unknown Speaker
I'm looking I'm trying to look in on Google right now.
Host 1
What is it? Oh P zo. Electric layer with some electrodes on it. Cool.
Host 2
So it is a meme style. strat structure.
Host 1
Yeah. Oh, okay. It's a structure, but it's like held up by like, it's actually like suspended. Yeah. Okay. So it just sits there and vibrates. And I'm just, you know, we're sitting here saying, just vibrates. But like, some, like, some high tech technology.
Host 2
There's like, 1000s of engineers working on this right now.
Host 1
I get it. It just sits there vibrates, and then it sits. And then the processor does things, you know, it just does.
Host 2
Okay, cool. So yeah, hopefully they move that technology on to more microcontrollers and stuff. And yeah, I think that's gonna be good. Yeah, that's pretty awesome. So one more I just added to our list. Oh, is I had a question for people on Twitter. And I think it'd be a cool topic to talk about is storage of parts. How do you keep track of parts? And we kind of came up on this idea with the like whiteboard for projects. Yeah. But parts that you I like looking in the background of your webcam, and I see like drawers over there. And then I see like boxes? Well, yeah, how do you store parts?
Host 1
General? Okay, so over on the floor, I have a handful of like drawers. So I have i Okay, so those little drawers that you can get from like Lowe's or Home Depot. And you know, I have one dedicated to capacitors, I have one dedicated resistors. And they're, they're organized by value. And then they're organized by type also. And then I have like a couple, I have a whole separate one that's dedicated to ICS that I use on a regular basis. Like, I have some drawers that are like this type of op amp or that type. But then I then I have one that's like, here's my drawer of all my microcontrollers, because I don't mind sifting through that when I need one, you know. So in general, I do that. However,
Host 3
I have cabinets over on one of my walls here where I dedicate an entire cabinet to one project. So if I have an amp that has a box full of parts, like that goes in that cabinet. And that's it, like nothing else can go there. I know if I look at it. That's that. So I tried to stay organized in that fashion. How about you?
Host 2
So I have for pretty much all my active components. I do drawers like you have for your classes and stuff. So I do it by I just have them all numbered. And then I use a program called parts keeper. And I think it's a you run it on a server and use like log into it. And so I have like drawer eight Parker MRP. That's actually what it is. Yeah, it's my MRP ERP system. Yeah, ERP. That's it. Yeah. Yeah. And so all my drawers are that way and so that way, it's like, basically have a bin runs out. I just mark it as empty and I can sort by like what bins are empty. And so if I get a new part, I can just be like, okay, that bin is empty, put the part in there and then set it up.
Host 1
I thought it was going to flag you and be like Parker, you need to order more 555 timers or something.
Host 2
And then for SMD parts, I have a like a like a tackle box. That's like four inches by eight inches. And it has like it's got something like 40 Little like inner like hatches inside. And so I just dumped all my SMD parts in those and then those are in parts keeper as well. Like what numbers they are. Oh, nice. And then for resist like through hole parts, I have like boxes that have them all in bags, so I bought them that way. It's like the like the variety pack of like through hole resistors and through hole capacitors. Yeah. I like doing that for those because I don't use them all the time. But when I need like a 4.7k resistor, I'm like, Oh yeah, it's in that box. Yep. Yep. And then for fasteners I just have that's one thing I need to like organize. I just have a ginormous drawer that's like four feet wide and two feet deep and six inches and is a two foot wide and six inches deep as full McMaster bags.
Host 1
Oh, no. Okay, I was wondering if it was just box loose hardware. No,
Host 2
it's not loose, but it's like, I need to find like a number six. Like screw that's like three quarters inch long made of stainless. It's in there. This is the funny thing is I actually go to McMaster and see if I've ordered that book. Want to go look for
Unknown Speaker
your order history is your ERP system
Host 2
for that, yes, I need to fix that and actually, like, organize it and, like get quantities and stuff, but yeah, that's
Unknown Speaker
frightening. Yeah, that's Yeah. Yeah. Good luck. And bless your soul.
Host 2
Yeah, it's it's seriously like, probably 200 pounds of fast.
Host 1
Cheese. That's crazy. Yeah, that's another thing that would be great to hear from other people, like, how do you store your stuff? Do you have some kind of fancy way of doing it? Like, I've been looking at welding carts recently for, you know, generating something from my welder. And it's really fun to take a look at how people have gotten creative with like, here's how they have their filler rod or here's where they like store their torches, or whatever it's like, it's really cool to see like a bunch of creative ways of doing it. And it's not like any one is better than any other one. You know, our idea here, but it's like, out of like, it's kind of fun to see that. So yeah, it'd be great to hear from other people in the Slack channel. How do you store your parts?
Host 2
Yeah, the on the welding thing is when I bought my acetylene torch setup, I bought it used. And the person made an acetylene torch cart. But he did so out of a dolly and cut the dolly right down the middle and added width to it so it can hold both tanks. That's great. Yeah, it's great how it's set up that way.
Host 3
Yeah, actually, so a good friend of mine back in Houston, he had an idea for an art show that I really, I want him to do it. And if he doesn't do it, I want to do it. But his idea was going to people's garages and having them like open their toolbox, and not change anything. Just take a picture of it. And just like completely plaster a gallery with just, this is a guy's toolbox. And this is how he chose his toolbox to be added. Like I would totally go to that show. That would be such a great show. Just to see like this guy, like, here's like, here's a guy who's like got every wrench like with an outline drawn around it. And here's a guy who's got 200 pounds of fasteners in a giant drawer you know that would be so great. Cool. Well, I
Host 1
think that's gonna wrap up the podcast. Yeah, so that was the macro fab engineering podcast. We were your hosts even Greg and Parker Dolman Take it easy.
Host 2
Later everyone thank you. Yes, you our listener for downloading our show if you have a cool idea, project or topic or cool way to store parts. Let Steven and I know Tweet us at Mac fab at Longhorn engineer or at analog EMG you or email us at podcasts at macro live.com. Also, check out our Slack channel. If you're not subscribed to the podcast yet, click that subscribe button. That way you get the latest episode right when new releases and please review us wherever you listen, as it helps the show stay visible and helps new listeners find us