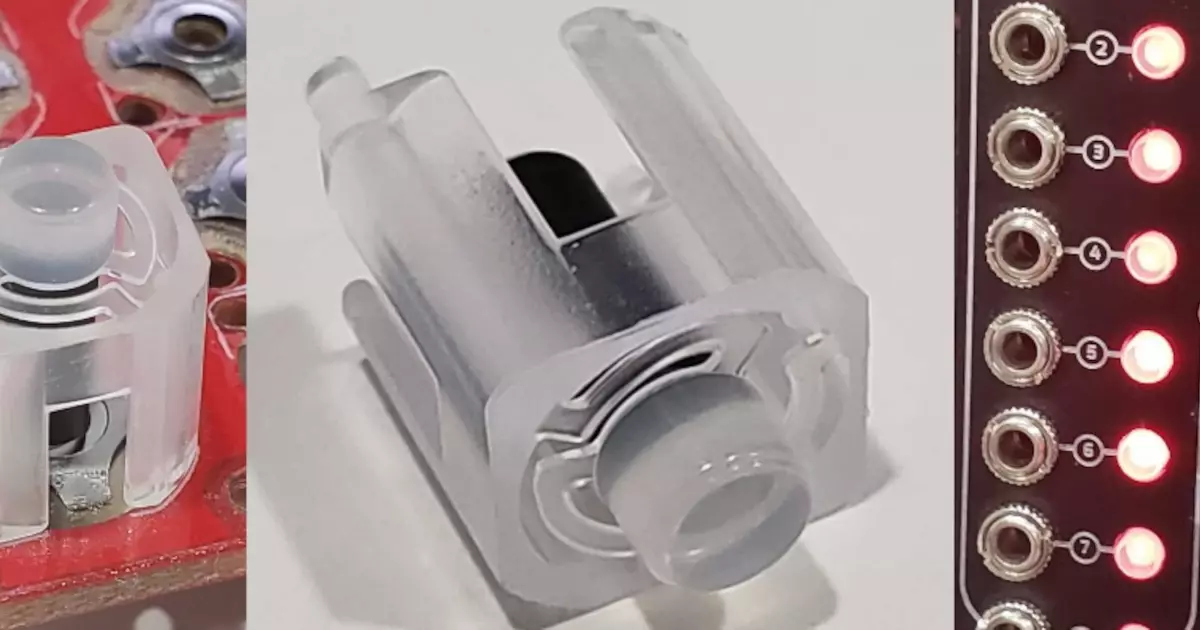
The quest for the right connector for a project! The right of passage for any hardware electrical engineer starts with a connector catalog.
This is the last installment of Stephen's 'Adventures in Injection Molding'. We are going to recap the entire two year sage and close the book on it.
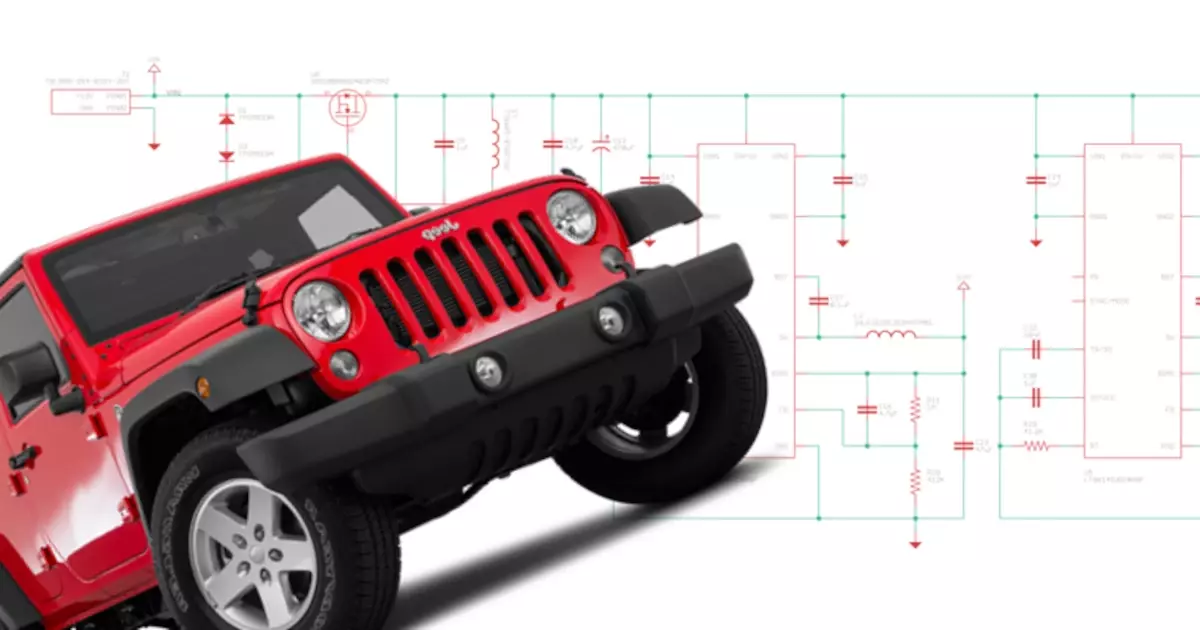
The Jeep Prop Fan project rides again! Well some iteration of it at least. Lets design an open source PCM (Power Control Module) for automotive apps!
Parker
Stephen
R.F.O.
Visit our Public Slack Channel and join the conversation in between episodes!
Parker is an Electrical Engineer with backgrounds in Embedded System Design and Digital Signal Processing. He got his start in 2005 by hacking Nintendo consoles into portable gaming units. The following year he designed and produced an Atari 2600 video mod to allow the Atari to display a crisp, RF fuzz free picture on newer TVs. Over a thousand Atari video mods where produced by Parker from 2006 to 2011 and the mod is still made by other enthusiasts in the Atari community.
In 2006, Parker enrolled at The University of Texas at Austin as a Petroleum Engineer. After realizing electronics was his passion he switched majors in 2007 to Electrical and Computer Engineering. Following his previous background in making the Atari 2600 video mod, Parker decided to take more board layout classes and circuit design classes. Other areas of study include robotics, microcontroller theory and design, FPGA development with VHDL and Verilog, and image and signal processing with DSPs. In 2010, Parker won a Ti sponsored Launchpad programming and design contest that was held by the IEEE CS chapter at the University. Parker graduated with a BS in Electrical and Computer Engineering in the Spring of 2012.
In the Summer of 2012, Parker was hired on as an Electrical Engineer at Dynamic Perception to design and prototype new electronic products. Here, Parker learned about full product development cycles and honed his board layout skills. Seeing the difficulties in managing operations and FCC/CE compliance testing, Parker thought there had to be a better way for small electronic companies to get their product out in customer's hands.
Parker also runs the blog, longhornengineer.com, where he posts his personal projects, technical guides, and appnotes about board layout design and components.
Stephen Kraig began his electronics career by building musical oriented circuits in 2003. Stephen is an avid guitar player and, in his down time, manufactures audio electronics including guitar amplifiers, pedals, and pro audio gear. Stephen graduated with a BS in Electrical Engineering from Texas A&M University.
Special thanks to whixr over at Tymkrs for the intro and outro!
Welcome to the macro fab engineering podcast. We are your host, Steven Craig.
And we are Oh, I am Parker Dolman.
And this is episode 170. Yes. So what are we Parker?
The macro engineering podcast,
right? Yeah, yeah, I think that's what I said. Right? Yes. Okay, so Parker, feed me what's new? What's cool?
Okay, so the the wagon tack project, I mentioned this a couple of weeks ago, I kind of had something kind of prototype working, kind of like just cobbled together my bench. And so I started, I 3d printed the housing for it. So I made like a little plastic housing. Let me go grab it. So does
this. This housing is it? Is it like something that's on top of your dash? Or does it actually fit into the dash?
So I'm, so my dash is like the old school style style dashes are just like, think about like a pillar that goes all the way across. And so underneath, there's quite a bit of space where your feet would go. Yeah. And in the center, there's your space there. And so it's designed to be mounted underslung. And then, like as a 45 degree angle, little ledge there that will bolt up to under the dash.
Okay, I see. Yeah, you printed you printed some holes in there. I guess you don't print holes, but you have some holes that can be used as mounting. You print around holes,
right?
So it's a it's a VFD that has like a bar graph base or a horizontal bar graph, right?
Yes. Yeah. I think there's like a little video I took last time and uploaded it. And so it displays, you know, the rpm in the numbers. And then there's a bar that goes up to like, I think 5000 is what I have the bar graph capped out at. So like you actually have like a kind of like attack needle, so to speak. But it's a it's a bar graph.
Sure. So Wait, does the jeep not already have attack?
The wagoneer does not have attack. Okay.
Is that just common across all webinars? Yes. Yeah.
They just never really had tak commoners in them.
Okay. Very cool. Are you going to put the files up on on you don't
need a you don't need to worry about how fast your engine is spinning when you're in luxury.
Sure. Amazing, but yeah, are you gonna you're gonna put the files up such that people can take a look at them?
Yeah, I'll put them I don't know why anyone wants to replicate this project. But technically, you can actually put this tack on any, it would be for any car that you're working on that has a GM style, high energy distributor setup, because it just has a tax animal that comes off and you just feed it into the circuit board. And voila. And so I'll post up the schematic and stuff and, you know, the code for the Arduino that's on there.
Yeah. So you said people wouldn't have a need or a want for it. I actually, like I'm gonna, I'm gonna tell you a little bit of a story here. Just a quick one. I actually took a class in college where we had to pick a semester long project. And you could pick one of three projects, and one of them was to build a tack for your car. I did not pick that one. But the project that had a requirement that you had to have some kind of a system that had a microphone that would listen to your your engine, and then it would do some DSP and determine the RPM based off of your car. So you know, your your project wouldn't necessarily fit that exactly. But the bargraph would have made that project really cool. Yes, yeah. So
that's cool. I thought about doing like a microphonic style setup for it. But given that my engine makes a lot of weird noises, it probably wouldn't work too well.
Yeah, sure.
So I 3d printed the housing. The next step I need to do is run the wire from the distributor all the way into the cab, just haven't ran that wire yet. I'd like I've already redone the wiring harness on the engine a couple times already. So I'm not really looking forward to cutting it open putting the new wire in and that sounds like a giant pain. Yeah, it is a little bit because it's like you're running only 12 feet of wire. And it takes like an hour and a half.
Yeah, right. Right. Well, okay. And it was like 50 volts coming off of the cap, right. So you had some form of a voltage divider or something like that.
Yeah. So what I ended up using was kind of like a hybrid of all the circuits I found online, that kind of knock that signal down because some people just use resistive divider some have like fancy converter circuits and stuff, I just used a, I had an insert diode to basically prevent negative flyback. Well, I think it's flyback voltage, because what's happening is the voltage ramps up, and then the field collapses, work happens. And that can create a negative voltage. And you don't really want a negative voltage into your circuit because your Arduino won't be too happy about that, right. And then that feeds into a resistor divider. And then, on the output of the resistor divider, I have a Zener diode to clamp at the 4.7 volts. And that's just in case like those, it sees a higher spike that the resist divider doesn't knock down the five. Sure. And then that goes into a Smith trigger Opto. And I use part number h one one L one M, which is almost like a five volt, you know, Schmitt, trigger updo. And so that kind of cleans up the signal a little bit and you get a little bit more of a square signal. Yeah, you get pretty close to a square wave coming out of it. And then that feeds into the Arduino Nano.
Got it? So I'm curious with the Zener diode, why not? Why not just have instead of a resistive divider, why not just have a resistor into the Zener and let the Zener just clamp it.
I tried that. You wouldn't need a big Zener diode and a fast found. Yeah. I was. I've never seen a diode actually glow like an LED. But yeah, that was happening.
Nice. All right.
I think if you put enough resistance, it will be fine. But I found that the resistor divider just was better, more reliable way of doing it. Yeah. Well,
the resistive divider is just kind of a little bit more of a guarantee that there will be some ratio there. Right? Yeah, there is some ratio there. And that zener actually has to turn on in order to clamp right? Yeah.
And most of time it doesn't I have I had the 50 volts, I had the resistive divider to hit like 4.5 volts.
Okay. And so the Zener is probably just barely starting to turn on.
Exactly. So I'm I was trying to make sure hey, you know, I only want to I don't want to wear out that Zener diode, because it would wear out eventually. And then it would you know, blow up the Opto eventually.
You know, Okay, quick, quick little tangent on on zener. diodes. This just came to mind, there, something that's really annoying about Zener diode data sheets, is you look at a Zener diode. And they give you got what they call zener current, which from what I've I've experienced is, that's the current at which they tested the voltage across the Zener. And that's great. It's nice to know that number, but half the time the Zener current is like 200 milliamps through the Zener or you know, it's some huge number and you're like, I want my circuit to be like half a million through the Zener. And I understand that like what you know, at lower currents, the Zener is are going to respond differently than at higher currents. But don't tell me the test at 200 milliamps, it's way too much. You're like I don't like that's just burning juice that I don't need, like you'll have, you'll have like a, I don't know, a nine volt zener at 200 milliamps that's a ton of juice going through that thing, you know. So that's, and then
they turn into LEDs for brief moments.
Well, I mean, I've seen some, some data sheets where they say, okay, so we tested the Zener at one milliamp at 10 milliamp and at 100 milliamps. And and give you kind of like a an idea of how the current will change whatever voltage drop goes across it because it's not constant, right? It's not exactly the voltage. And so you get an idea of like, okay, the tolerance of this, even if I pick it to be a 1% zener, it's going to be a little bit different at each current level. So then you can actually design it a little bit easier. So I don't know, a little bit of a gripe. Maybe I just don't understand it. And there's a reason why it's that
way. Well, we do have a topic on better data sheets later.
So you know, and it's funny, I probably brought that tangent up because I saw that topic on our on our little cheat sheet here. Yeah, I guess we'll talk about that
later. Next. So I'm gonna go ahead and get this thing installed probably over the weekend, and probably make a video of it working in on the dash. So yeah, that's gonna be pretty cool. And then I was working more on the penetrator. I was last week I was talking about looking for IO expanders. And I was looking at some microchip ones, the part numbers MCP 23, S O, or s 08, I should say, and these are the spy version and make an I squared C version as well but these spy bus ones. And I was looking at all the features and then these things have tons of features and these like, chips for you can change the addresses. You can they have they have interrupts really interrupt pins. So you can see that IO expander can interrupt with a pin interrupt to your microcontroller over SPI. No, no, it's a separate IO pin.
Oh, okay. So it has an interrupt pin that it can throw to over to your processor. Okay, I thought it was going to kick over an interrupt over SPI, which that could be cool, too.
Maybe it does, but I don't. I don't see how that would work. Because it's a slave device.
Yeah, I don't know. Okay, yeah. If it's just a slave device, and it can't work.
Yeah. So I was looking at these and I'm like, okay, these are really cool. But they're kind of like a buck apiece. And I'm going going over our spec sheets for the printer. And I was thinking, why not use just shift registers. Except for HC five? Because those are technically serial in parallel are out there. IOHK whether they're an output expander Yeah, they don't have input. They don't have inputs, but they make a parallel to serial converter. It's the same for hc 165. And so I was like, Okay, what is five, nine fives are like 10 cents apiece. So you have an order of magnitude difference in price. So, the difference I was finding out is basically if you need the IO pins to be either change, you know, input to output, or you need to you need these interrupts stuff. Yeah, go with the IO expander. Or you need to be over i square C. But if you just are using like to expand how many outputs that your microcontroller can have. And there's no reason to not use the seven for hc 595.
Yeah, right, right. And 595 I think you can write at like a screaming speed to that thing. So so so you could you could flip, you could flip its outputs really fast.
So I was looking at the speeds and you can drive most seven, four, HC five, nine fives at around five megahertz. These IO expanders run at 10. So if you need screaming IO pins, yeah, you're gonna need to go faster IO expanders, but
I'm pretty I'm pretty sure that 595 There's some variants that go faster than that.
I was just looking at the HC style. Yeah,
yeah. I think there are some that go past 10 I mean, I've never ever had a need to go that freakin fast. In
the sun for AC fighting fires. I was looking, I was looking at the 3.3 volts. Okay, got it. You can quote overclock them by running them at five volts. And you can get to like, I think like, that series is like seven and a half or eight megahertz. Yeah, right. Yeah.
Gotta go fast. Yes,
you got to collapse those fields.
Nice. But when are you gonna go with the 595? Or are you going to do microchip?
I think we're gonna have a fight on fires right now, because we use them on the pit on the pin. Heck, yeah. And they weren't great for what we were using for. And we're not going to use pinner interrupts, we're not going to be using, like changing the IO states, we're not going to be using E and that kind of stuff. And so there's not really any point to use an IO expander in our case,
right, right. Well, yeah, you don't need the you don't need all the fancy extra stuff that you paid tons for.
Yeah, cuz we're gonna we're gonna pull our IO and output our IO at a consistent rate. You know, given our our colonel cycle on the on the penetrator. So there's no reason to have it interrupt there have been like, hey, something changed. It's like, no, you gotta wait your turn still, because we're gonna be pulling it every so often.
Right? Yeah. And when you start getting into all that extra, like off processor stuff, then you really, you start ramping up your development time, you know, because you have to do so much extra coding to just make sure everyone's happy and taken care of that that's worth factoring into everything that you're doing, you know, at the same time, like, if you're spending an extra dollar for extra pins, why not start looking at processors that just have extra pins? You know, because I mean, if you're already willing to potentially do $1 I mean, I'm not saying you I'm just saying any, any designer in general. Yeah, there's, there's so many like, it feels like those IO expander. Things are kind of like Band Aid fixes in a way, unless you're talking about 595. So just so cheap, you can sprinkle them in. Exactly.
Yeah, it really depends on you know, actually we have our listener like if if you could get on microcontroller for X dollars. And then for X plug in, you need more IO. So you do x plus one. But the next version of that microcontroller is x plus one and has additional IO. Is there any way any reason why you would go the IO expander? Route?
Yeah, okay. Well, but with the with the caveat that both options are the same price, right? Yes, yeah. Yeah, I don't know. Like, it might have to do with board. positioning, you know, like routing, might
actually you could do is you can have the IO expander really close to the connector. And then it's talking over a serial connection to your microcontroller, which could be farther away on the board. So those IO connector IO can be a lot lower noise,
then yeah, there's some benefits to that maybe also expandability, or something, if you had like some part of a circuit that you added to, then you could just slap in the IO expander. And then it just becomes a change in firmware as opposed to a board? Rev. So I don't know, there's there's probably a lot of reasons why each for each option is better than the other. Right? Yeah. So I guess also, it depends on what's going on, you know, what you're doing with the pins, and how much extra juice you're going to burn in the processor versus a separate chip somewhere else on the board. Too much crap to think about.
And it could be you, you know, you also done a lot of software development, and then switching into the higher version might mess up your it's not supposed to mess up your development environment. But it could.
Oh, yeah, no, always expect something to happen. Like you have to change your bootloader or something at that point. Yeah, yeah, for sure. We started using the phrase, it's never easy at work. Like every every little thing where we're like, yeah, we got this this is this is great. And then like, something unforeseen shows up, and you have to deal with it. And we just go it's never easy. A wild irata PDF has shown. Yeah, it's super effective. Yeah,
it uses that feature is broken. It is super effective.
did not read footnote.
Yep. Pick six genes.
I were just stacking up all kinds of stuff for the data sheet talk later. Oh, yes, exactly. Start kidding night. All right. So we
so we're gonna get closer to the data sheet topic. Yeah. Well, you've been working on Steven.
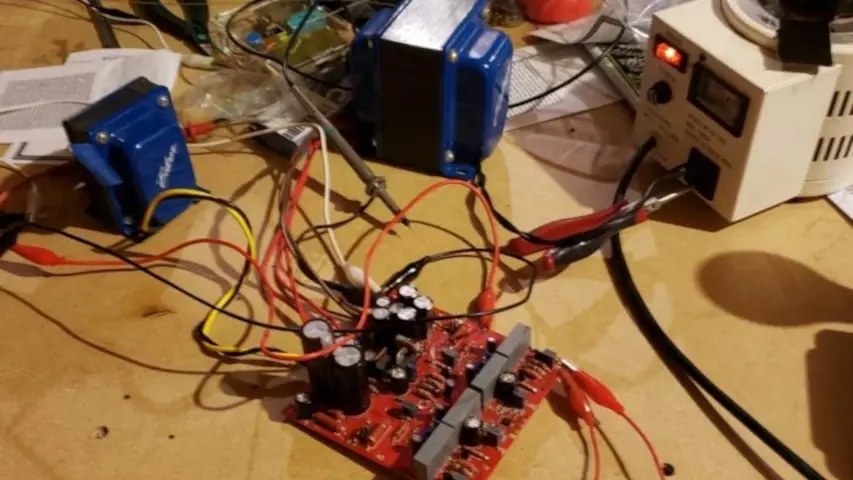
Okay, so I put some more effort into the macro amp. I think the last time I talked about it was I was talking about getting it into the enclosure, but I decided to do some, I guess, bench level testing before the enclosure just to make sure everything was good, because I realized I didn't want to wire it up and then have to unwire if needed be, but I got I got pretty lucky because I put it on the on the bench and did some some modifications here and there. I think the last time we talked about it, there was some incorrect resistor values, I ended up just swapping those out and just doing those from like, but solder joints for all the Transformers in, you know, where you just like set them on the pad and solder them like real quick kind of thing. So certainly not permanent, and brought up the entire amp under wall voltage. Because the last time or the first time I had tested the my board, I did it all with a nice clean power supply. This time I wanted to see like Okay, so if I have an under transformer power, and I'm also dealing with all the extra magnetic crap and stuff, am I gonna get, you know, nasty junk on my on my signals. And it's all working great. I was actually somewhat surprised. In fact, one of the resistors I talked about last time in the power supply was like a 2.2k resistor, I actually ended up not having to change that because I reduced all the currents in the preamp, all the extra current and it ended up being that that was correct. That value that I initially chose was correct. And it was it was correct because I calculated without those currents in mind. And then I reduced them a ton and everything worked out well. So I'm getting pretty close to all the voltages that I originally designed for in the heater circuit. You know one of the things I ran into that's kind of difficult I was doing dc heaters for the well okay, so I rectified the heater supply such that I could use it to power the op amp. So I made a dual rail supply to power the op amp that controls the Ri a filtering, but then I also tap off the positive side of that to heat up the new tubes, which they don't need a lot of current but they only need their current voltage is 0.7 which is kind of odd. And so one of the things that's On a difficult with just a transformer that's off the shelf. Since I didn't design it, I didn't specify it. And you don't like if you look at a transformer datasheet for the off the shelf stuff, you usually get a voltage and a current. And that's it, you don't really get much else. So when you rectify it and apply a load to it, what's it going to be? That's, that's not necessarily an easy question to answer, like, what what?
Change is the inductance? Or is it heating or?
Mainly it's, it's the load current and the resistance of the coil, which the resistance of the coil is not usually given. And it's also Gosh, when you specify a transformer, you can specialize, specify coil, what do they call it? Regulation, even though it's not regulating anything, the regulation of a coil in a transformer, you can define it as how much of a difference do you see between a loaded a fully loaded coil and an unloaded coil, because you know, they're going to be different voltages. A higher level of regulation, you can get a ends up costing a ton more, but the difference between those is much tighter. It's harder to design, you have to use better materials, stuff like that. But since this is an off the shelf thing, basically, my original goal, and this is how I had to do it was I knew it was going to be somewhere between this voltage and that voltage after rectification. And I just needed to adjust resistances to get what I wanted to. So on the bench, I basically just started clipping in resistances. And it was funny because I got to the point where I just had a bin of high voltage resistances. And frankly, I wasn't even looking at their value that much. Just clip them in until, until it worked until it worked because I knew they were all high enough that you know, as you're paralleling, it's not gonna like short or anything like that. But I ended up getting that all all worked out. So the heater voltage, I'm getting almost point seven, I'm getting the voltages I want for the for the op amp supply, I'm getting about 365 volts on the high voltage supply. And then and then I actually passed some, some signals through it. And when I was testing on the power supply, I was getting a gain of about 42. But now that I've switched it over to this supply, and that you know, some of the voltages are different, I'm actually getting a gain of about 100. Now, which is 42 was already too much. Now 100 is way too much. But regardless, you know that that was nice. So basically 100 millivolts comes in, I get what is it? 10 volts 10 volts peak to peak? For 10. Yep, yeah, yeah. 1010 volts peak to peak on the output, if you know if I'm cranking it all the way. So I mean, that's huge. The cool regular SSPs. Effectively, yeah, although my rails don't go past plus minus 10. I don't think something like that. I don't remember exactly what that what it is, it goes way past what I need, let's just put it that way. So that's the output of my little preamp board is the signals that we get sent to the power tubes that eventually make their way to the speakers. So I just took that signal that goes off the power board, and I plugged it into my power amp in on one of my guitar amps, and just played directly through that. So I was actually cranking 100 watts out of this thing and worked out viden you know, other than the fact that I'm playing through guitar speakers, which are not intended for Hi Fi and they don't sound very good for that. I mean, everything was great. One of the cool things is the signal noise ratio is through the, through the roof. I mean with with those signals that I'm talking about. I mean, I wasn't even able to really see the noise on my scope. It's buried in the noise floor that my scope has. So the signals, I mean, the preamps not really even introducing much of its own junk characteristics. Yeah, well, noise characteristics. Because I mean, even even when with the gain cranked all the way 100 times I was seeing less than, like, if my scopes in the two millivolt range, I'm seeing one square of jitter you know, that kind of or less than one square? So it's kind of hard to with with the measurement systems I have, it's kind of hard to qualify, but not much is the answer. So,
which is is that is that from your board layout or the new tubes are that good?
The new tubes
are 100% not that good. I guarantee you that in fact, the next thing will Okay, so my board layout turned out to be really great. You know, that's that just worked out. I'm happy with that. This is not like a super intensive circuit anyway, so it's not surprising that it turned out okay. The thing about it is every new tube that I have used so far has been unbelievably microphonic which really really sucks. ox microphonic as in, if you vibrate them, they start to squeal and they don't squeal that like a frequency that is acceptable, they squeal it like 6k, you know, like, it's it's way, way, way high. And the thing is I had this board, just sitting on my bench, and I had my guitar cabinet on the floor away from it, like, not physically connected, and just just the air moving in between was shaking my bench enough to start them oscillating. And they would, they would just run away, and you get this like real high pitch squeal. And I could, I could, you know, introduce it by just pounding my fist on the table and starting to get them to shake a little bit. So I'm gonna have to come up with some kind of system to hold these little things, you know, perfectly still. And this is this has happened on multiple products, like I've had other products that are maybe not products projects, that weren't even mine, that that someone else has a new tube in it, and you just tap it, and you can hear it and it's just like, oh, man, that's
a huge flaw in these things. Because there's, there's a good chance they're gonna be in a in an environment that has vibration, you know,
I think that might be just the nature of VFDs. Because all of you theories I've messed with, if you like, tap them the right way they vibrate, you can hear that.
Yeah, well, there's the belief, it's the
belief, it's actually the heater, which is also the cathode in this situation. It's it's a you can if you put it under a scope, you can see it, it's this really, really tiny wire that must be at an unbelievable tension, you know, or or it's it, maybe it's not under tension. It's just the right length and the right diameter and the right, all the characteristics that make it ring at 6k. You know, I and I don't know if it's six gauge, which is way up there, and it's annoying as hell. So I don't know, that's something I'm gonna have to fix or find out a way to make it not happen. Maybe I'll have to have the amp away from the speakers as far as possible.
I got it was word with that frequency is output of the preamp notch at that.
Yeah, like it negative infinity notch right? Right there that frequency? Well, and you know, so the thing is also, I'm thinking, that vintage EQ that I designed. I'm thinking about using that as the input to this, like making another little box that that kind of looks nice. And so I actually could do some notching at that frequency. Because the thing about it is it it's a, it's an interesting feedback loop because it's not necessarily electronic. Well, it's electronic to acoustic to acoustic to vibration, and then back to electronic, you know, so it's like, it's a really nasty feedback,
you can make an op amp with it.
A really, really slow up. Yeah, I like that. I probably won't do that, but I like it. So yeah, the next steps on the Mac ramp is now that I've proven that the board functions, I just have to get it in the enclosure, and actually have it run off of the power tubes, which I've done that a gazillion times, so I have no reason to believe that that wouldn't function. So that'll be next.
Yep, I'm excited to hear it. Yeah, me too.
Actually built just for fun. I built a pair of DML speakers, which are panel speakers that you stick a vibration audio exciter on them. I bought a pair of those, they were like 20 bucks for a pair of the audio exciters and then bought some plywood at Home Depot and just stuck them to plywood. And so I'm going to use those as just some test speakers for right now.
How good are those sound? Not very, they sound like plywood.
Well, you can actually get them to sound really, really good. I was more doing this as just kind of like a cheap way to get some fun speakers. I'm going to my plan is to rebuild them but with better material. And in fact, it's funny because the better material is actually cheaper than the plywood. Be. I was watching a YouTube video of a guy who who does these DML speakers and he's found that one of the best materials is acoustic ceiling tiles, which are like four bucks apiece. They're the right size two foot by four foot so you don't have to do anything other than drill holes to hang them from the ceiling. And these audio exciter speakers have some really really sticky three M tape on them. So you just pull the tape off, stick it to the acoustic tile and you have a speaker effectively.
That's that's gonna be a pretty cool experiment. Yeah. When you said you were going to buy some of those I had the idea of like, what if you had a shaven head and you stuck it on your head? Because it like there's like a 40 watt version I don't know what 40 watts of acoustic power of being directed right into your skull would
what? Its mechanical vibration. I mean, it would mean that thing just sit would sit there jiggle your skull. I'm sure you would hear it. I'm sure you would hear that. Yeah. If I remember a while back, there was a kid's toothbrush. In fact, we talked about this on the podcast. Yeah, that vibrated your teeth. Oh, that was yo Grande, wasn't it?
Yeah. Juergen hacked one of the it's a it's a commercial product. And then he hacked at the plates own music,
right. He could upload mp3 to his toothbrush. Yeah.
But that's like probably, like MIT probably not even an eighth of a watt.
Yeah, it's not 40 Watt, toothbrush, watts, right near school. A 40 Watt toothbrush would just plow right through your tea.
I can just imagine you like stick that driver on your head turn on, turn on the music and your eyeballs just
melt? Oh, well. Okay, so I have been working on my hair for a long time. And it is quite long. So I'm not going to shave my head. But I could put a 10 watt exciter on my head to head see what it does.
on your forehead.
Yeah, I'll report back if it sucks.
Hopefully you live.
All right onto the RFO. So I found a I found a fun article this week, actually, I find this a little bit more interesting. Electronics Weekly has an article about a new chip component to get heat out of tight spots without leaking electrons. So I saw that title. And I was like that sounds like a map style title, you know, without leaking electrons out. So effectively, this is a pretty cool little chip that's made of I don't remember the materials, aluminum nitride, that's it aluminum nitride. So it's a SMD style chip that has SMD style pads on it that has really, really excellent thermal properties in terms of conducting heat, it's like five times better than alumina, or whatever they say. And, but it it has really low capacitance and really low leakage. So you can use it with unique and complex shapes on your PCBs to solder down interesting thermal paths. So
this is so you could jump a trace and then continue your heat sinking area.
Yeah, that's right. In fact, one of the example pictures they show is so that you can jump a trace over to a chunk of copper that is connected to your chassis ground somehow, or like through a screw or something like that. So yeah, so if you have some kind of like high voltage section that you need to get rid of some heat, you could use something like this, and it doesn't require a whole bunch of extra manufacturing processes, because it just comes on a reel and you can use a pick and place to drop it down. So pretty neat.
It's a surface, you can say it's a surface mount heatsink almost.
Yeah, yeah. Although it's not dissipating heat. Well, I mean, it is, but it's not much it
does dissipate heat, it just not its primary function. Right,
right. So the cool thing is, you can use it to get cute with how you get rid of heat. And instead of just relying on loads of copper right next to the chip, you can potentially use it to direct and guide your heat where you want it to go. Using your EDA tool effectively. Pretty cool. Yeah, I don't know, I've I just thought it'd be cool to showcase that. I like the datasheet too on it. I don't think I looked at the datasheet. It's pretty self.
It's pretty self explanatory.
Would you say it's a good data sheet?
I'd say it's a good data sheet.
We're gonna talk about that later. If we haven't said that already.
I like the performance data. Okay, on this thing. It's on page two. Okay. of its three pay the three pages. Yeah, it's performance data. So it has shear strength greater than 80 Newton's? It's like, oh, it's greater than 80 Newton's is it 20? Is it 100? Is it 1000? And then temperature cycling. So they have a negative 55 225 C 30 minute dwell. And it's just report is no visual
damage. It can be it can be ruined, but it has no visual but yeah. You know, they tested and like does it look good? Yeah, it looks fine. Yeah, that's fine. That's great. Oh, that's interesting. So solderability for using this, it does say greater than 95% coverage, which. So what's what's important to note about that if you were going to use one of these, you would want to specify the right IPC class for inspection on this component or across your entire board, because basically, you want to make sure that you get as much coverage as possible.
I will, I'm guessing that's how it I mean, the solder paste is the conductive path to get it into this part. Well, of course, you need greater than 95% coverage to probably hit their thermal performance calculation.
Exactly. But if you do, say class two or class one, IPC requirements, then you like think that's 50% pad coverage would be unacceptable, correct? Well, class one is, is like, Isn't class one garbage? Is a class three. That's garbage or class one. I can't remember off the top my head no, class three is the best one. Okay, that's right. Yeah. So class one is like McDonald's toy kind of stuff. So 50% coverage is class two. So they're saying you you would want 95%, which honestly isn't hard to get, and you would probably get that. But in terms of, if you were using this on a product, you would want to specify that.
I think they they're saying that the cover to make sure that to hit your thermal performance of this part, you need to have 95% greater than 95% of coverage to hit that. What's your make sense if you're hanging on by a little sliver. All that heats gonna go into that little sliver. Now I
see what happens as all the heat goes into that sliver, and then it heats it up. And that reflows it. And then and then it cools itself down.
I have self heal. Edie, I have had failed MOSFETs on my own projects on surface mount that have failed, and then reflowed themselves off the board.
Nice, like just falling off
to a new one on nice.
Auto Repair. Yeah.
That's a feature. Cool. So the next article is server maker super micro to ditch made in China parts on spy fears. And so we talked about Super micro in Episode 142. With the podcast with Misha and church. And this is harking back to the supposedly implanted hardware parts that were spying on server hardware.
Yeah. So what? So super micro is just completely dropping made in China altogether.
I think they're trying to reduce how many made in China parts they're using on their boards. They're saying it's because of spy fear fearing like, but is it because of? Is it a security move? Or is it money?
Well, it's probably all their customers saying like, I won't buy your stuff, if any of it comes from China? Because of the Bloomberg article because
the Bloomberg article Yeah. Or is there something more like, because people were saying basically, the Bloomberg article was a bunch of crap. But is there actually something to that article? Because basically, we just got Bloomberg said, No, our facts are right. Or are not facts. It's not opinion, either. What is it? Our conclusion, I guess, is true.
I mean, even if it was fake news, the it still was enough to you know, cause a stir and have, you know, fear causes people to either spend money or save it. Right. So in this case, they're probably making a call to just make sure that everything is taken care of, and that their customers are feeling good about it. Yeah, it's
the I bet you it's a little bit of everything. It's probably a money reason. And they're spending it as the security move. Yeah. And I bet you that Bloomberg article probably scared some sea level type people who actually make the decision of where they buy their servers from. Right. And they're like, We won't buy from Super micro because we don't know if this is true or not.
Exactly. Yeah. Well, when we had that, that episode with Misha and church, I think there was already stuff or rumors about Facebook and Apple not buying servers from them for those exact reasons.
Yeah, yeah. There were different reasons. Apple was apple. Yeah, I think it was Apple not buying servers. I think it was because they were changing the firmware on them or something like that.
Well, also Amazon AWS was looking at them and then they mysteriously not well, maybe not mysteriously, they just suddenly said, No, we're not going to do this. Even though they like, you know, had this big pushed towards investigating and looking into using these servers. So there is I don't know, it looks like there's something there. But yeah, we're not going to know.
Now we're not going to know. Yeah, it's interesting that they're going to move the, I wonder how much percentage they can change on their boards. Because I know you can't buy. Well, I guess you can buy from Taiwan. There's a lot. There's a lot of passive parts made in Taiwan.
But But okay, so get down to the kind of the meat and taters of it. What is made in China mean? Like, how much it can't be made in China? Or how much can be made in China in order for it to be called Made in China or not? Right?
That's true. Yes. So building, you know, 49% of your truck in Mexico, and then shipping it over to Texas and reclaiming the last 51%.
Yeah, or 99% in Mexico and doing the last, you know, putting the license plate on it, or whatever. You like, we made it here. Right, exactly. So, yeah, if it says made in China parts, does that mean? No. passives are there or no connectors? Or what?
Yeah, that's what I'm wondering about. And I'm bet you that it's probably more about active components, like, the parts that do switching and like, like data switching and stuff. EEPROMs that kind of stuff. I could see that being it.
I you know, I think I think I would make the argument that it's probably more no assembles assemblies in China. So like, the parts might come from China, but they are certainly not like, the whole motherboard is not created there.
Now they're saying parts of
like, just full on parts. Like what but Okay, so once again, like this is the part like, do they consider the whole motherboard of the server apart? You know, yeah. So because it will. Okay, so maybe you're right, though, because the when we were talking about it last, we were focusing entirely on the PCB, not the server as a whole. Correct. So maybe it is just parched from the PCB.
And I actually yeah, read and look more into the article. It says your scarf customers and especially government related clients have asked Supermicro not to supply them with motherboards made in China, because of security reasons.
See, okay, so that that would be assemblies then. motherboards made in China not motherboards with parts made in China. Yeah, okay. That makes a bit more sense.
But the article says parts. Okay, it could probably be both.
Yeah. I think I think parts to an electrical engineer means something else to parts, you know, for someone writing an article, probably. Yeah, yeah,
I would say Yeah, cuz I would say most PCB on a PCB. Most PC builders like they build their own computer. They wouldn't say they would say a motherboard is a part.
It's an AI it's a singular part. It has one box for it. Right? Yes. Yeah. So your your
the truth lies in the middle somewhere on that one.
Oh, of course. Right. Have you ever thought about building a motherboard?
Not really. Sorry. I
know. That's super tangent. That comes to mind because like you've seen the the PC guy considers a motherboard. I think I looked into it once. Just out of curiosity, not that I was going to do it. But like, what would it take to make a motherboard? And like, what do you even have to consider like how do you start designing and making a motherboard? That's like way beyond me. I have no idea I've repaired
them before like replace like surface mount parts and capacitors and stuff. But just on
your on old boards and stuff. Yeah. Yeah. Cool.
guy get that older 386 running again man. Got play do man. It's actually was for a a small business that that entire POS system was on it.
Really? And it crapped the bed?
Yeah, well, it was starting to get a What's the term? Unreliable is probably the best term for it.
unreliable.
Nice. Hey, swap the swap the caps and it ran for another four years before they upgraded the POS system. So nice. Okay. Next topic is an article from bold port on better data sheets. This is a really cool article I thought about basically like, how data sheets are, how manufacturers talk to engineers. And what engineers use them for. And there's a couple like he's got a couple examples in here, but I favorite thing is like, how, like, he goes through, like the engineering mindset of how we use data sheets, which I never even thought about this before. Because, as engineers, we digest data sheets in two modes, which are like search mode, and design mode. So search mode, we're still searching for a component. And so a lot of times we need, like, we need this, like laundry list of features, right? Yeah. And so we just opened up like 100 data sheets, and we started just going through them. All right, pick like 10. And my next step is and then I go to, like, Mouser DigiKey, and see which one is the cheapest. Take that one, and then make sure it will work. Right? Yeah. And then design mode is like, Okay, we pick the that holy grail part, right? And then you have to read the whole thing to make sure that it's going to work correctly, and you can actually design it into your page.
Right, right. And then you have to follow their calculations and their formulas on whatever pages and yeah, you're, you're really starting to dig through it. Right?
Yeah. So he's saying in these two different modes, we should have two different data sheets, so to speak. Hmm. So in search mode, you should have like a more bullet points, and performance requirements, quarks or Rados. That kind of stuff, like the high level stuff that will really impact your decision on this part. And in design mode is kind of like, yeah, this has got everything, you know, in a searchable format.
Yeah. Well, and some, some manufacturers actually do things similar to that where they have the design brief, or whatever.
Well, and a lot of times, you'll get that at the top of a datasheet. Anyway, like the first two pages are going to be that, although you have to an Eevee Eevee. Blog goes over this a lot. Dave Jones, like, the kind of the text on the first page, most of the time, you can just skip that, because it's just marketing crap that half the time is a lie, right? Yes.
Or it's like everything is the most ideal condition.
Yeah, ideal condition. We talked about a MOSFET datasheet. That's like that, like how much power how much power we can actually put through it. It's not exactly what it says. I'm actually I think he mentioned that in this ballpark article, as well, that that MOSFET problem.
You know, one of the things well, okay, so he has some suggested alternate reading on on one of one of the links in that article. And it is really great, this, it's a separate data sheet article that basically steps you through, how do you read a MOSFET datasheet. And it was fantastic. I kind of like skimmed through it. And I totally want to read it in depth. Because it was, it was basically pick a MOSFET datasheet. Here are the things you need to know here are the things to watch out for here, the things to look at here, the charts, and it work goes step by step. And man, I really, really wish I had that years ago, that would have been awesome to know, instead of having just stumbled my way through most of that crap. And in fact, I was suggesting, like, it would be really, really great if, uh, you know, Ti and Maxim and all these other guys had a, here's how to read our datasheet guide, you know, like, here's, here's a guide to all of our op amps. And when we have the symbol like, v, p h, this is what that means, you know, like, I just, I just threw out some random letters there. But a lot of times, you'll look at the datasheet. And it'll just say this, this thing, and it's a voltage, and it says, Never exceed this and you like, what does that mean? You know, like, they don't ever exceeds
them. Right, right. Right.
As I'm looking at this additional documentation that's in here, yeah. Or page. My favorite thing is what is a data sheet? And it says, it's a bunch of information about claims of a part that can what the part can do. Yeah, claims, not guarantees. Because then all the data sheets have terms and conditions that basically stay, let's say, data and specifications subject to change without notice, right? Like as an engineer you like wants.
You want something to hang your head on, right? Actually, he and he goes into a little bit further detail. He says, the thing that you can hang your hat on is the absolute maximums. Like those things are just like guaranteed you violate those and you'll have you're gonna have a bad day. Yes. Yeah.
So one thing is Beauport article I don't agree with is he wants like, fancy web UI UX stuff for data sheets. Okay, and Ti has done this. I absolutely do not like it. And I because a TI is implementation interactive data sheets and things like that. Roi tabs and stuff. And I'm like, man, just give me a, like text readable PDF still, like Ctrl? F.
Yeah. Well, I could see that being useful for processors crap, not see that it is useful for processors when you can do all that stuff. But yeah, if I'm looking at an op amp that is 12 pages or something like that. I don't I don't want it to be all broken down into five different categories. Yeah. Cool. You know, another thing that he mentions that I absolutely agree with, is the Some manufacturers still have their data sheets behind a registration wall or something like that. It's like, yeah, if your if your parts for sale, let me look at it. You know, let me look at the datasheet. You know, yes. That's super annoying. That's a really great way to make me not use your part.
Yes, I do agree. Manufacturers should start using revision control. That is easier, easy to find out if your data sheet is the current version. Yeah. And that don't make it like the name of the file, it needs to be on the PDF, or whatever it needs to be in the document itself. Yeah, preferably at the bottom of every page, or wherever you're on every page somewhere, somewhere. Yeah. Yeah, and they I do agree with him is placed documents in a permanent location, always don't change it. Ti is really bad at that.
I got a good one here. Because I run into this on occasion, actually more than I've wish. If you have a product that's really old, or a datasheet, that's really old. Just do everyone a favor and create a new datasheet. Don't just sit there and photocopy your old datasheet. And then slap your logo up at the top, like literally spend the four or five hours or even a week making a nice datasheet for your old product. If it's if I can buy it brand new, there should be a new datasheet for it. And if you do photocopier, datasheet Holy crap, do it straight. Like I hate when I opened it sideways or like angled, it's like, really, this is not air about your product. Like take a little bit of pride in your data sheet.
There's also the when we talk about updating stuff, like you see this a lot right now with Atmel. And microchip is your download of a datasheet. And like some of the really old Atmel products, you can definitely tell they just like printed out the Atmel datasheet. And then like posted noted microchip on top of the logo, and then scan them all back in. And the newer ones, it really depends on what product it is. From this. Sometimes they just like, put a microchip cover letter on the PDF. And then the next page says Atmel. Right. Yeah. And it's some of them. Like I think they're newer stuff. It says microchip from the get go. But yeah, it's always it's interesting. We'll also why are we
scanning stuff? Note like, what, what what do we need to scan stuff for anymore?
How it exists?
You know, another one that it's not the end of the world, but it shows up as it's kind of annoying, is when you search for a transistor, like you just want a single transistor, and it just ends up being a single page from a manufacturer. That's not the manufacturer you're at. And it has like a list of like 50 transistors, and maybe like one or two characteristics about them. It's like, okay, great. Thanks. You know, it's just a jelly bean.
transistor, I get it, but it's also like, man, I was hoping to get a datasheet for that transistor, not just a whole family.
Yeah, I would say data sheets definitely need improvement. But I'm not sold on the making it like a UX thing in a browser. Sure, but everything else I kind of agree with, with this stuff. Yeah,
it's a good read, go and check it out. We'll post the link up in the show notes if you want to check it out. And and also, yeah, read the read also the other article about how to read a MOSFET datasheet. And at once, I would say
for beginning engineers, this is a really valuable resource.
Yeah, it'll start getting crusty.
Right away.
Yeah, from the get go. This shouldn't be mandatory reading for freshmen in college. Half the
people would drop out immediately. You'd be like, This is gonna be my life after I graduate reading these. Yes. Yep.
Good luck. Great.
Cool. Got anything else, Steven?
I think I'm good. We'll see if we can nail the outro then. Okay, well, that was the Nanofab engineering podcast we were your host Stephen Couric and Parker Dolman. Take it easy
later everyone thank you. Yes you our listener for downloading our show if you have a cool idea, project or topic or you can do the intro better than I can tweet us at McWrap at Longhorn engineer or at analog EEG, or email us at podcast@macro.com. Also check out our Slack channel. If you're not subscribed to the podcast yet, click that subscribe button. That way you get the latest episode right when it releases and please review us wherever you listen to helps the show stay visible and helps new listeners find us
The Jeep Prop Fan project rides again! Well some iteration of it at least. Lets design an open source PCM (Power Control Module) for automotive apps!
This is the last installment of Stephen's 'Adventures in Injection Molding'. We are going to recap the entire two year sage and close the book on it.
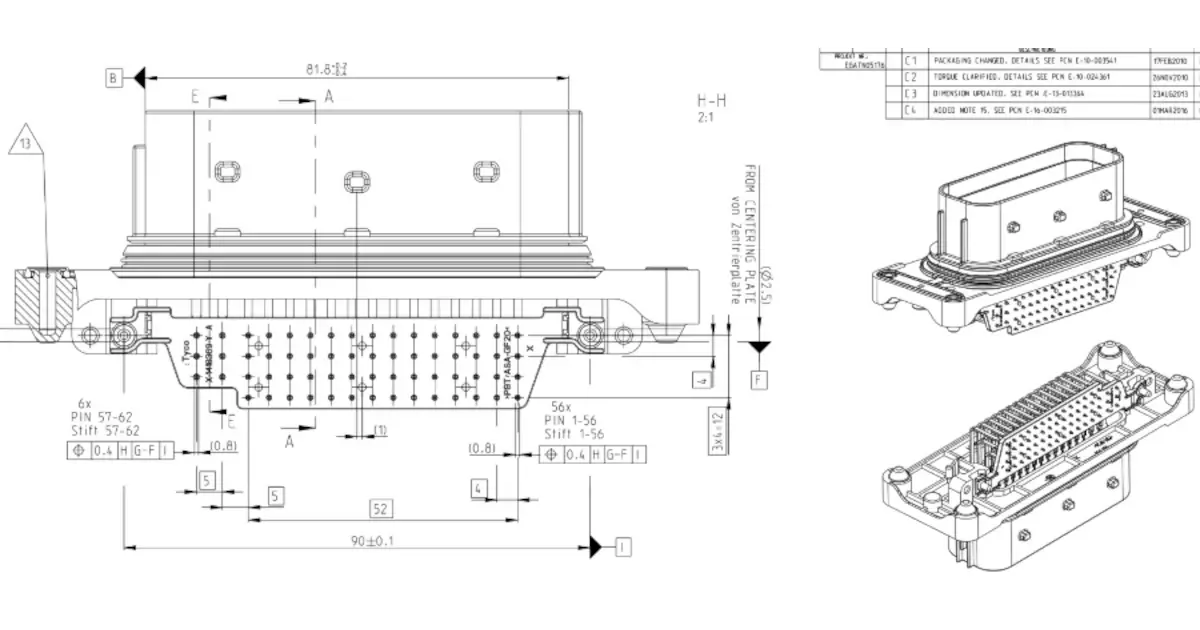
The quest for the right connector for a project! The right of passage for any hardware electrical engineer starts with a connector catalog.