MacroFab Engineering Podcast #309
Did Stephen and Parker complete there holiday projects?
Will the Rebel Codebreakers be able to emerge victorious against the Empire, or will they succumb to the overwhelming power of the Empire? Tune in!
Design for Testing means enabling your product to be tested easier or quicker. But what about the documentation and implementation of the testing?
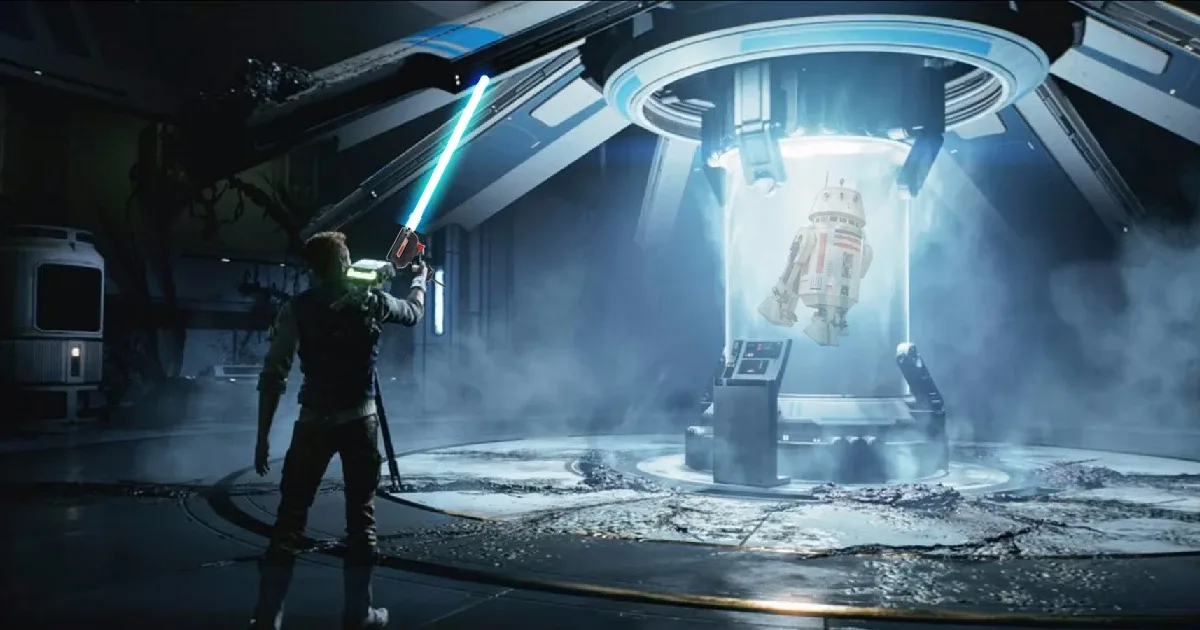
On this episode, Josh Rozier joins to discuss Star Wars. Is the force a glitch in the Matrix? How much energy does it take to vaporize a Jawa?
Parker is an Electrical Engineer with backgrounds in Embedded System Design and Digital Signal Processing. He got his start in 2005 by hacking Nintendo consoles into portable gaming units. The following year he designed and produced an Atari 2600 video mod to allow the Atari to display a crisp, RF fuzz free picture on newer TVs. Over a thousand Atari video mods where produced by Parker from 2006 to 2011 and the mod is still made by other enthusiasts in the Atari community.
In 2006, Parker enrolled at The University of Texas at Austin as a Petroleum Engineer. After realizing electronics was his passion he switched majors in 2007 to Electrical and Computer Engineering. Following his previous background in making the Atari 2600 video mod, Parker decided to take more board layout classes and circuit design classes. Other areas of study include robotics, microcontroller theory and design, FPGA development with VHDL and Verilog, and image and signal processing with DSPs. In 2010, Parker won a Ti sponsored Launchpad programming and design contest that was held by the IEEE CS chapter at the University. Parker graduated with a BS in Electrical and Computer Engineering in the Spring of 2012.
In the Summer of 2012, Parker was hired on as an Electrical Engineer at Dynamic Perception to design and prototype new electronic products. Here, Parker learned about full product development cycles and honed his board layout skills. Seeing the difficulties in managing operations and FCC/CE compliance testing, Parker thought there had to be a better way for small electronic companies to get their product out in customer's hands.
Parker also runs the blog, longhornengineer.com, where he posts his personal projects, technical guides, and appnotes about board layout design and components.

Stephen Kraig began his electronics career by building musical oriented circuits in 2003. Stephen is an avid guitar player and, in his down time, manufactures audio electronics including guitar amplifiers, pedals, and pro audio gear. Stephen graduated with a BS in Electrical Engineering from Texas A&M University.
Special thanks to whixr over at Tymkrs for the intro and outro!
So, we have a new intro, everyone that Steven wrote for us. Yay. That was that was the perfect lead in for you to start the podcast.
Oh, okay. Oh, we're recording. Sorry, I didn't even see we were recording. Okay, well, why don't I kick it off then. Welcome to the macro fab engineering podcast, a weekly show about all things engineering, DIY projects, manufacturing, industry news and general nerdery. Where your host electrical engineers, Steven Craig, and Parker, Dolman, this is episode 309.
Okay, Steven, last week, we talked about projects that we were going to do on our holiday time off. So far did you get?
Well, okay, so let me start, let me start counting up here. As I mentioned in the last episode, might, my Christmas gift that I asked for was time to work on these projects. And I got a boatload of time like I got, I've been blessed this season, let's just say I've had five straight days of just being able to work on projects. So in the that five days, I had placed 910 11, surface mount PCBs, I built three guitar pedals. And then I got my longest running project, my longest Open Project functioning. And I repaired a client's amplifier in the last five days. So overall, I would say that I'm pretty successful. I think I think it all came out. Did you exceed your expectations? Again, actually, yes, yes. Which is maybe the first time I've done. Like, I usually go into these things with really lofty goals being like, I can get all this done. And then I get like, not even one of them done. And in this case, I got nearly all of it done, then, of course, there's always some more. And and in doing all of these projects, I probably made some more work. Because like, yeah, the project's in a lot of ways are done, but I'm like, there's some modifications I already want to do.
Oh, do you want to? Or do you want to? What's what's the word that we don't like to say around here? feature creep. Oh, scope creep.
Well, okay, so feature. Now that brings up here's, here's a tangent for you. Does feature creep count? If you're adding things after you've built it? Or does feature creep only count when you're doing the design itself?
Well, you're technically going to make a revision to of your project. So yeah, yeah, totally counts. We can call it something else, though.
We need to come. Yeah, we need to come up with a name for that feature creep, to me feels like I'm in the deserts like during the design. Yeah. During the digital work on my computer. Yeah, I'm just
digital work. But just like, when you write up the spec sheet of what a product should be, that's when feature creep happens. Or scope creep, I should say. Yeah, revision, revision creep. I totally get what you're saying. It's like after I built my brewery the first time and I'm like, This is gonna be so much better.
Yeah, well, so that, oh, that project that I was that I've been working on for over a decade, that tube compressor. I finished it in. Finn, I'm using finished loosely because like it functions, it does what it's supposed to do. Like I can plug a microphone into it. And I can see it compressing and all the all the knobs and everything do what they want to do. I just want them to do some more I want I want to enhance it, let's just say. And luckily with that project, I have a lot of control over the circuitry, that's pretty easy. So like, right now the compression happens in this device, but not I want it to be wider. I want the compression to happen earlier. Because this, the whole circuit I have right now really really wants to have a super hot signal on the input. So this compressor works great with a with a mic preamp in front of it and that's fine. But even with a mic preamp, you have to hit it with a really heavy signal for the detector to actually detect and start compressing. So I just wanted to do increase the sensitivity of it a little bit which is nice because in the original design for this compressor, the the envelope or the amplitude detector was a bridge rectifier that comes right off of a transformer so Transformers, sensing the output signal, and then it, it rectifies it and smoothes it out. And that is your signal that gets sent back and changes the gain of the amplifier. And in in the original design that was just transformer rectifier bubble, well, that wasn't really a great design because it just, it doesn't respond fast enough, the impedances are a little bit funky and off. So in this current revision that I'm playing with, I actually took a design that was that already exists and kind of modified it to be my own. And it's basically a high powered op amp, it's an op amp that goes into it a dual transistor driver stage. So it has boatloads of current available. And, and basically, in between the transformer and the detector stage, I put a high powered op amp that can just drive heavy loads, which allows this compressor to have way faster Attack times. And it can charge large value capacitors much faster than the previous design kind of thing. Well, that whole detector circuit works fine. It's just it doesn't, it has unity gain right now. So I think I can just adjust some resistor values and make it a lot more sensitive. Therefore, my threshold doesn't have to be as intense to start like compression. So all of that is just in my opinion, like the circuit functions, that's just polish, I've got all these circuits to the point where they work now there's a lot of Polish in there.
Polish creep.
Well, and that's I'm actually holding up now one of my other circuits that I designed and built over the break, which is a phaser pedal, this this pedal works awesome, it does all the functions that I want it to do. It's just most of the functions are, like 90% of the way there. They like they function exactly how I was good. And I just want them to be more, you know, and most of the time with this kind of circuit more just means adjust gains. So in terms of like calling something done, yes, it functions but I just need to change some values of stuff
you need to rev to. I mean, that's a great, you know, product to show someone who's like interested in it, because it it fully functions. It's just not ready to be released to the world. Can I play that sample? Oh, sure.
I mean, like, you can play some really terrible guitar playing Sure. Yeah. Yeah, so I built I built this phaser based off of a ssi 2140 VCF chip. There's some vaguely Pink Floyd stuff going on there. So hopefully we don't get hurt a little bit. Yeah, get that struck,
um, at the outset to Josh so that he can put it in there. Okay,
maybe I should actually play one that's decent, cuz that was some pretty bad plenty. I think it's fine. Yeah. But yeah, yeah. So like it does, what it needs to do is just, I measured some of the voltages on like, the LFO, and things like that. And I had originally designed it to do plus to minus five volts and it's doing like plus minus three volts because I had some gains off. So that's just like resistor changes and things. So yeah, it's a little bit of grunt work, but the polishes the polish is what makes these circuits like sets them apart Shine. Yeah, cuz like, I know, like, I could stop this right now and just be like it's done because it functions right. But like really getting that good edge and like, get it where I want it to be is the next step. So yeah, that those all worked out. Well. I got the rotary switches that I've been wanting to make for months and months done. I just needed to dedicate a whole day to placing resistors because I placed 800 Something resistors in a day. Just put on a whole bunch of heavy metal and sit under a microscope for five or six hours. But
did you hand solder with? Did you do? Did you reflow them? Or did you actually solder iron them?
I cheated. I did, I did a hybrid process. And here's why I say hybrid, I did actually get a stencil and just pasted them. But I use leaded paste, which is like, easy mode. Because it melted like nothing whatsoever. You
You just like Breathe, breathe on the board.
And let it paste has an amazing surface tension on it. So like I just took a really low flow, 420 degree hot air, and everything just kind of snapped into place. And it's like, you have to put about half the amount of heat into it make lead melt. So yeah, I normally don't use lead. But since I was building this entirely from home, and it was just a project that's going for me that I was like, You know what, I'll make the I'll do easy mode. So I don't have to fight with lead free solder. Yeah, and it's a really small amount of solder too. I love it too. Because the I can't remember how many different values of resistors. But I was like, you know, I haven't priced this out. And I ended up over buying every value by like 10 or 15 resistors. And it still came out to $20 worth of resistors or something. So it worked out
it was like, it's like 40 different line items on those boards.
Oh, easily 40. But yeah, because it's just it's ridiculous what I what I was trying to do with these resistor ladder strings to get exact or not exact as close as I can to one dB per step in rotation. And I got really close this, it worked out fantastic B, the total string of resistors on this is 15k. And I read virtually the same value across nine different PCBs of this. And then I took a bunch of data on it, which I've actually posted all my data up in our Slack channel, if you want to join up and take a look at that. But they I put all the data up there. And every unit was basically I'm getting a tolerance of less than 0.3% across all units. And then from unit to unit my worst spread is also about 0.3%. So in other words, the whole tolerance of each one of these rotary switches is way better than any dual gang pot. I can I can purchase. It just takes a full day's of work to build them. When I can get a dual gang pot for like a buck 50. You know,
it's the destination now.
Yeah, yeah, absolutely. Well, well, that's the destination the journey was was certainly just a handful of hours of just placing resistance. I
said it's destination that counted on that project.
Yeah, yeah. Well, I mean, these are the only rotary switches out there that are like this. And you know, if I wanted to buy something like this, I've priced it out there, like many hundreds of dollars, because probably somebody has to do what I did. These are like super hyper custom.
If someone wanted to buy some from you, what would you sell them for? Come on.
I had the whole like frame of the switch, I just needed to replace the actual element, the PCB element. So if like if I had to, if I had like frames available, lots of them, and I just manufactured boards, I would just do a full run of boards on a pick and place line and just make a ton of them. Because like these boards could be made really cheaply. Even if you bought a full reel of every single value, it still would be only a few $100 You know, yeah, I wonder if
if someone's ever interested, you could say hey, buy this part that you're gonna take apart for the frame. And then you can sell the boards on, you know, only PCBs.
The thing is, I've never seen these, these rotary switches the frames, I've never seen them before anywhere. I bought them when I bought the PCBs for this project a decade ago off of a person who just had them
only PCs
10 years ago.
And so Oh, wow. So yeah, okay. Yeah, yeah, so
the the rotary switches had been around for a long time, but these rotary switches were just the switch bodies with PCB like through hole pads. So you were supposed to solder through hole resistors into them and make your own thing out of it. And that didn't work out terribly. Well. That's why I just replaced the actual switch PCB on it. With my own custom stuff, but I mean, I would love to share this with anyone who has this exact switch out there. But like I said, I've never seen it before. So yeah, I don't know if anyone is ever interested in that I'd be happy to share all my files with them. But it's a super ridiculously custom thing for a very custom item. Yep.
I compressor.
Yeah, a compressor. Yeah, I suppose you know, maybe somebody out there has some kind of audio equipment where they want 24 Step one dB per step. Maybe add like a little gang version of that, like, that's super. I don't know, that's really specific. And in any way, like, I would think most people would do that in the digital domain nowadays. Anyway, you could be way more accurate for a lot cheaper. Yeah, you could use a 20 You could use a rotary encoder and have like a, you know, a display, like the gate all of it. This is, this is so ridiculous what I made. But I love it.
So I didn't finish painting the golf cart frame.
While you were coding it, right, or did the coding already happen?
I was painting it. Yes. coding. It's, well, it
was it's sort of like a mixture of both right?
That ag 11 or ag 111 paint? I guess. They call it a coding because basically, if it's beyond like spray paint, or it's like a professional paint, they call it coatings,
wasn't it? Wasn't there two steps? There was like a coat? Yeah, there's two cycles over it in a way.
Yeah, there's a sealer primer. That's a one part urethane and then there's a two part urethane that goes over that. I ran out two part urethane. Oh, that's Yeah. So what was happening is I was painting it and then like, I had all my pieces hung up in my garage. I think I have a picture of it. Of like, it's like a horror movie where like, people go hide and there's like chainsaws and stuff hanging around but like it's all metal and you can't barely see in like the garage. It looked like that. Because everything's just hanging from the ceiling on metal hooks. And well, so I was painting I was like halfway done and I piece of metal fell off one of the hooks right into the into my mix bucket. No, why mix all the two part urethane and crack the bucket. And so I have so I had to scoop up all the two parts here that you would like a dustpan because it's like spreading out oozing all of my epoxy floor. There was probably some choice four letter words being thrown around. Oh yeah, it was not fun. So I scooped up into new mixing container. I lost probably about an eighth of a quart. Oh sure. Not too much. Not too bad. And then I cleaned up the spot. Good thing is I do have an epoxy floor. So like I was able to wipe most of it up with minimal staining. It's still a big dark circle. It's built
with your epoxy floor.
Well, the epoxy floor is great. Like it's the epoxy soaked into the concrete so it's like it's not perfectly smooth. Got it. Okay, my my concrete floors up smoothen there. So there's like ridges so you can't clean I'm not going to go in there with a toothbrush with a thinner and like scrub it all out.
Oh yeah. Any good garage floor should tell a story right?
Oh yeah, this is where this is where I dropped in last $20 worth of paint so I had to order more. Two part urethane it came in yesterday. So yesterday evening I finished up the last pieces of the paint. So it's actually drying right now my garage. Tomorrow I'm going to start assembling all the pieces so basically I'm like three or four days behind on that project. I did do other things on it like I redid the electrical took all part all the old loom off of it and cleaned it because sand in electrical loom. It's just it's just nasty. Got that all taken care of. So
yeah, you bought together two parts of the frame. I thought I got a text about that.
Bolted two parts of the frame together.
I thought I got a text from you saying the bolted the first two parts together something like
Oh, I put the I put the rear leafs into the back of the frame.
So it's begun like the beginning of the started.
It's starting. Yeah. So the idea is I'm gonna put everything together. And then when it's all put together, I'm gonna put it up on the mic lift Get underneath it. And I'm gonna make sure that I basically want to coat all exposed bolts and that kind of stuff with this paint to basically make sure that I didn't miss any spots and there's no scratches stuff like that.
When you went and picked it up, did you just get the frame or did you get the whole cart? I got the whole cart. Okay. Okay, so you have to rebuild the entire thing basically.
Yeah, like the body of it's in my backyard right now.
The shells you're gonna repaint that? No, no,
I'm gonna leave that it's plastic. It looks fine. Right? Especially after I cleaned it, it looks. It's green.
Come on, eat like you should deliver to your mom with like, flames on it and like, ya
know, the body itself looks okay. All the plastic bits are fine. It's just all the metal needed to be gone through and sandblasted and cleaned up and painted. So yeah, that's that project. And so since basically, I had a couple of days where I wasn't working on that. I played a lot of pinball. So I worked on my, my space shuttle is completely done. So I started working on Congo, my old Congo pinball machine. And so I actually cleaned it set it up. I'm not going to do too much to it, because it works just fine. And it's playfield is in perfectly good shape and that kind of stuff. One of the switches. So basically, I'm making a list of like what I need to do to it. Before I'm like, Okay, it's good to go. Like, I don't have to worry about it anymore. Yeah, it's gone. I need to replace some of the LEDs on it. And we're like, one of the rollover switches is not working. And that's it's like, it's amazing how like it seriously I set it up, like, put new batteries for the backup in it. And it fired right up and was playing right away. Like one switch stopped working. Nice. And the LEDs were like, there's kind of flickery so I'm like, okay, it wasn't even replaced eventually. So I made a list order those parts. But I ran into the problem of, Oh, where am I gonna put my beer. And I'm playing pinball. And so you can buy these things called pin gulps, which are like a holder for your beer or drink. I guess that bolts to your pinball leg too. And I'm like, I want one now. And so I went into Autodesk fusion and drafted up a, a holder and printed one up.
Okay, so I've seen a handful of pictures and as Parker was showing it when he first made it. This looks fantastic. And it's changing my opinions on 3d printing. Like I haven't been anti 3d printing. I just think like 99% of the time 3d printing. You see like, it ends up just being like action figures and little toys. Yeah, and and with the, with the with the print style with the layers. They just look terrible most of the time to be frank. Most of the time. 3d printing looks like toys, but bad toys. When Parker is using his new goup printer. I can't remember what it's called.
Yeah, you printers. Good. You're
looking fantastic. It looks like it looks great. It looks so good. It looks like a 3d injection mold. It
looks like injection molded part does. So this this I printed this on. I have a my new elegoo Mars three. And I printed this it took five hours to print. And you can tell that I printed it at an angle. Yeah, because this is like the might be like it's not the tallest thing I could print but it's like the biggest x y it can print because I had it printed at an angle. And the reason why you have to print it at an angle because you get what's called Peul forces on your printer and you just have to experiment with it. And because I first tried printing it so straight up, and once it got to this little U shape it started to peel away from the from the body and so I had to basically stop the print, peel it off and then tweak the orientation design so that it could print correctly and it turned out great.
Yeah, I feel like if you painted that oh yeah wouldn't be able to tell
you or not tell. So DJ in chat, wondering how long it'd be faster if I if I ordered it well only took me One hour to do the CAD work and then about seven hours to print because like the first two hours was on a failed print and I'm actually printing one right now on my FDM printer out of polycarbonate because what I want to do is I showed this to my dad and my dad's like you need print cupholders for the golf cart now. Yeah. And so I modified the bracket to the golf cart in the front already has cupholders but in the back seats that are rear facing there's no cupholders and so I designed a cup holder that fits on like the new like low use shaped thing in the back that's got like the slow vehicle sign on it and stuff but and I had to make a bigger because my dad wanted to put a hole like not a koozie but what's what's the vacuum? The Oh stainless Yeah, like the Yeti whatever. Yeah, yada yada. Yeah, for some reason I was thinking their competitor Arctic for some reason. I'm sure they make something too. Yeah, they do. But yeah, a Yeti, people will know what yetis are. So he wanted me to make a bigger diameter one that would fit a Yeti and of course, my, my elegoo is not big enough to print that. So I'm printing it on the polycarbonate one. And also, the problem with the resin is it's UV cure. And if you give it too much UV gets really brutal. Polycarbonate is UV. It's naturally UV stable. So I'm purging out of the painting or anything. I just bolt it right to the thing, right, so it won't look as nice as this but it will look my prints turned out pretty freakin good.
That looks fantastic. I'm actually surprised at how good that looks like that looks like the way that 3d printing, like when you first imagined in your mind. Should look.
Yeah, I'll say SLA printers. Early for me changed the game on how good the printer. there are downsides to the SLA printer. Like the resin is stinky. It's like that when FDM printers done, you simply pop it off. It's ready to go. Great. SLA you got to this blush it postprocess it UV cure it is that UV stable. I mean most plastics that people print like PLA is not UV stable anyways. But are there's a much more variety of materials with FDM for sure. Which is SLA. Even the strongest SLA stuff that I've tried still isn't as good as the polycarbonate polycarbonate and FDM is like yeah, if you could get rid of the lines. That'd be like the king crop right there. Yeah, but um, you can definitely tell where like, the color changed in the print. Yeah. Why? Why is that happening? Because I had I ran out of black and had to fill up the rest of our mid print. Oh, okay.
I thought that was some kind of artifact from doing it diagonally.
No, I just poured in gray into the black as it was printing. And this I'm actually printing another one too right now my other pinball machine. And so it's like mostly gray, but it was running out. So I put white in it, because that's just what I had. And so it's going to be the same. It's gonna be like morbidly colored. It's gonna be interesting. It's fun. Big scoop together. It's like when you're a kid and you like, mix all the shampoos in the shower together.
Travel? Yeah.
I like I like DJs solution, though, is to weld a pinball leg to the golf cart. And then I can just bolt these directly on. Yeah, cuz
that bolt pattern is the same as your pinball leg. Right?
Exactly. Yeah, this matches this. So I'll share this. I should put it up on Thingiverse. I did look, there are other like people have designed this already. So it's not like the first one out there. But I'll actually toss up the Autodesk fusion file. So if you want to, like modify the design, like make it bigger or taller or whatever. Done, it's all parametric and I designed it and a convenient way to edit the settings. That's one that's one thing I've been learning more and more about with Autodesk. Steven is getting better at planning your design out.
Oh, yeah. If you don't do that, you'll walk down a bad path, bad path.
And so like designing stuff out and then dimension it in a way that you know, you can easily edit later.
Yeah, yeah, like getting rid of conflicts that happened in the future, like avoiding that is
avoiding conflicts down the road. Yeah. Yeah, it's just that's why I do it this, I was pretty happy with it.
What I've been doing an infusion more recently is trying my best to use as much their inbuilt. What is it called functions as possible like you, I could draw a circle and extrude it through to make a hole. And that's fine. Or I could draw a point at the center of a hole, and then use a hole command and make a mess. And there's differences between those the way that fusion handles it, it tends to like when it defines the hole, and you just tell it where, like a lot of those kinds of functions, you could draw a 45 degree on a side thing and then extrude it to make a chamfer. Or you could use the chamfer command, and you'll get better results most of the time using the chamfer command. So just lots of things like that I've been trying to implement more than trying to brute force my way through drawings.
Yeah, that's I've been doing that a lot too. I mean, that's what I did here on like, these are points and then I use the whole command to do the holes, the best thing about that is, you know where to go find your hole. And, and like the history and so you so you can easily edit the size of these holes. Or if you wanted to put like a chamfer on them or something, it'd be a lot easier.
So one of the things I really love with Fusion is even though it's really strict, how it handles assemblies is great. So I try to be as strict as possible when it comes to assemblies, like let's say I have a an enclosure of some sort, you know, you have the enclosure, you modify the enclosure itself to have all the holes and then you bring the enclosure in with its other parts and you make those parts to the holes and then you modify from there and go up to the next level. If you ever get to the point where you need to say move a hole or something like that, it's best to go all the way to the bottom level and then suck it up to the top level throughout all the sub assemblies Toria top level as opposed to breaking your links and then destroying everything down the line which I've done it both ways some some out of laziness and some out of just like trying to be really strict and if you play by the rules like you'll just get better results all the time.
Yeah, that's only to work on the assembly aspect because my last assembly i i messed up halfway through it and I'm like well too late now keep going. Right right. Fortunately, I didn't have to go back too much in my last design I did that was like a multi part assembly. And it turned out great. The stuff I had to edit I did not to really go too far back in time to fix but I definitely need to spend some time practicing multi level assemblies in Fusion because this is this is one piece so well right
yeah, yeah. I've gotten to the point now where for most of my projects even though it adds time to the project I will 3d model it just to make sure my PCB fits especially because like on these enclosures that I've been dealing with they have a fairly severe draft angle on them have this is two degrees I believe but the what enclosure is that this is a Hammond 1590 BB two Yeah 1590 BB two is the enclosure it's a it's a diecast aluminum enclosure. So it has it has a decent draft angle on it, which affects the total window size of your PCB. Well I know I have certain standoffs of components from the inside edge but when it comes to maximizing your PCB area on the inside, I ended up just downloading the 3d model from Hammond themselves bringing that into Fusion and then modeling all the all the parts and the the PCB which luckily I already had all the parts already modeled. So like all the assets are there, I just had to suck in my PCB from dip trace. And in fact, you don't well, it was interesting I was I was when I was modeling all this up. I was really thinking I know people are working on this Autodesk is already doing this with with Eagle I believe, but being able to have your PCB and Eagle and then just go directly into your PC to does a design from from right there. I'm realizing like there's so much value from system level design in that sense, because, like take, for example, in this enclosure with the fact that doesn't have straight walls. If I have things that marry to those walls. I've now I inherited that draft angle into all my PCBs on inside the enclosure. And so it would be so awesome if I could just model the PCB and then go right into it, place all my parts, and then check all the FITS and everything. If that doesn't work just within fusion, if I could modify the board outline to work with the stackup of how everything else fits together on the fly, right now, I don't have that capability right now if I find a conflict, I have to switch over to dip trace, change everything re export, bring it into Fusion check again. It takes a lot of extra work to do that back and forth. Yeah, there's there's a ton of value I see and having your 3d CAD work and your electrical work together. Maybe maybe one day, I'll have to switch to Eagle just because of that.
It's not that perfect yet. And Eagle but it's getting close.
I haven't used it. Have you tried it at all?
I tried it a long time ago. And that's where I'm getting my it's not perfect. It does work. Okay, not perfect. I did like a 3d rendering for like our website.
Oh, got it. Yeah. Because I'm wondering like, can you? Do you select an item in fusion and say like, oh, this is a PCB and therefore,
I know it's like, you am I have changed since I last used it. But an eagle there's a push to Fusion button. And it makes an object in your like fusion that trots. Oh, yeah. Whatever. It's called vaults. Where like, you know, when you first put up fusion on the left side, there's all your items, like in your folders and stuff. So you can click your models. It adds it to like there, I think. Okay, that's convenient. Yeah. Yeah. So you can just pull it in as a component.
Nice. Okay. And then, and then when you're in fusion, can you select that item and say, I want to edit it, and then it brings you to Eagle,
there is a way to do that. You can like move a connector, and like it will push back down the eagle. And so you have to reroute it. That's nice. There's a little bit of back and forth. Right. It's, I want to try it now. Since it's been like a you. I want to say it's been two years since I've used it. Because I just don't do a lot of enclosure work. From my stuff.
You know, I you know, I'm pretty married to Detroit because I use it in my day job and all of my own personal stuff. But if there was a really good if eagle was really fantastic at doing that marrying between the two, I would almost be willing to switch just because of that 3d aspect.
I think give it a shot again, see how well it works. So So before we go on to our next topic, everyone out there, click that subscribe button. Go to McAfee lab.com/podcast. Click the podcast links. And there's a subscribe button there. Click that subscribe button. That way you get our podcasts right when it comes out. Also, check out our Slack channel. Steven, I post a lot of our in work projects. There's a there's over 600 like podcasts and doozies people do use macro fat people who build like tronics in that slack channel. It's a very good resource. If you're asking a question, think about like It's like Stack Exchange for electronics. I got some really tall order may or may not be stackexchange level but it's getting close. And that's Mac fab.com/slack. And anything else on that Steven?
No joke. Just join up. It's it's a lot of fun in there a lot, a lot of good information, a lot of cool people.
So I got some sheet metal back from Sun cuts end. So I did do some like 2d Sun cuts then is a service that I've been trying out that is like a laser cut metal service for Friday different kinds of metals. That's really nice. You basically just have a you take your DX F, so what I do in fusion is I make a a assembly plane and then project my object onto that and that makes my and that makes basically you projected to make a sketch and then you take that sketch and that's your DX F export that you can bring that right into into st godsend. And so I did a couple of different small pieces. I did like the a pan a gauge panel for my jeep. I did a bunch of little tiny parts for some like fixturing but then I wanted to try their sheet metal bending stuff. So I missed the first time I also use the sheet metal tool All infusion I had to like, that's a whole nother thing to have to learn about.
But it's super cool though, right?
It's super cool. So like, the sheet metal tool and fusion, you'd like tell it what material you are. And you can give it rules on like how the, how it performs or you can just use the defaults, I just use the defaults of like, I've been using this kind of steel and is this thick, and so it knows what kind of radiuses you can bend stuff to. Yeah, k factor. And I did this on
not show until time.
Show and Tell time I'll take some pictures for everyone who is listening. Ooh, fancy. And so these are, this is a a faceplate for a 19 inch rack that fits basically fixturing for PCB fixtures. And, and it's bent. So it's like, all reinforced. So it's got like a bend back on the top so it doesn't bow in. This is like where the operators will be interacting with the, the UTS. And so I've got an extra ridge down here. It's like it's like a liquid work shelf. That's like a little bookshelf. And I had all the holes put in so I could put the has DIN rail that mounts on it. And turned out great. Nice like it's, it's perfect. Now apparently, as I was doing this project, they have a powder coating service to I'm like, dang, I should have gotten powder coated.
Is there any kind of is that just raw metal?
It? It's steel, but it's got a little light oil on it. Okay. So it hasn't I haven't for about a week. It hasn't rested yet. But I painted one I just wiped it down with, you know, acetone and it was spray paint and was fine. Yeah. Really, really happy with that service? Because I think I bought 10 of those. And it was $250 shipped. Nice. Which was pretty, pretty good price.
Yeah, that's not not half bad. Yeah. Let's see here they have, they'll do laser cutting, bending and forming powdercoating. Tapping. And then they also have CNC and deburring. So it's a it's a it's a job shop.
Yeah, they mostly catered towards lasering, though. Yeah. So powder coats are new thing. haven't tried it yet. But yeah, the bending was a lot of was pretty easy to use. You can probably get away with not, they have like a calculator. If you don't have like fusions fancy K factor equations built into your CAD tool of like, oh, I need to make it this long. Well, you need to make it actually this long. So you can have the curve and that kind of stuff.
Fusion is amazing how it just handles all of that for you.
It did it was perfect, because I got these pieces back. And it's all dimensionally accurate. And I'm like how to have that work.
So well. In this service, did you Okay, so fusion allows you to design all the stuff in three dimensions, and then there's a button of like flatten it
unfold it yet to unfold to a DX F. And so when you send that in, what is a solid line is considered a cut. And then what's a dashed line is a bend. And it software knows dashes and solid lines somehow I don't know how, but it's figured it out. And so you can tell which ones are which bends like if it's an in or out then and what the degree is, then you also help out I did upload a STEP file of the thing. I'm like, This is what I'm trying to make. And they don't think they haven't used it.
But did just out of curiosity. Did they have any communication with you were theirs. Was there any questions about it? Yeah. So
they asked me one question is I have a slot opening, which is for the like the wires for the DTS to go into the chassis. They said that was really close to the bend line. And that might have deformation on like the lower lip. Because I was like right on the tolerance edge. Like they don't want you to have a cut that's closer than like, a quarter of an inch to the bend. And I'm like, Just do it anyways, it won't matter. And it was perfect came out. Yeah, came out fine. That was the only communication that they had with me.
Most of the time. It's been my experience with sheet metal that I prefer to send a drawing of the thing and allow them to decide all of the actual, actual physicality of things because their machines might be different than whatever or whatever material they're using might have a slightly different K factor something that causes their beds to require more are less fat, shall we say? But it sounds like in your situation, it all worked out. Well.
It worked out perfect. That's cool. I'm really happy. I'll probably know I did find is xometry just launched a sheet metal service too. So I want to try Zamp I probably actually send there's a revision two of this, which it probably will be over there. And that's not because these don't work. These actually work great. It's just, you know, what, what do we call it? It functions fine, but we have another improvements. The synopsis back around the beginning of this episode?
Yeah, gosh, did we come up with an actual name for it? I don't even remember.
Did we come up with one? Okay, yeah. One of those though.
I guess prototype creep. Like you live in the land of perpetual prototypes?
Yeah, that's exactly what it is. Perpetual prototyping. I like it. That's, that's that's the nature with any low volume thing, isn't it? That's a very interesting thing to think about with listening to the early engineers that worked at Tesla. I've I like, the engineers themselves. Were working on the cars on the line. And every car was different for a while.
Oh, yeah.
Because it was perpetually prototyping, trying to figure out how to make a car.
I wonder, I wonder when it kind of folded over to, instead of like prototyping just to make it work. When were they just prototyping to make it better? And then eventually, you get to the point where you're like, Okay, we have to be done. Like, yes, you could make this better. But eventually, we have to call it complete.
I don't think they're at that point yet. Because I know they still make routine improvements to like their models. Sure. But I think they do it on like a sub assembly basis.
So yeah, I guess that falls into the category of sustaining like you have a product that is in production, but you're constantly updating it or making it better. That's, you know, for sustainability, I guess.
Yeah, I'm gonna try Zama trees. Next. See how well that one works? Yeah, that's cool. I just thought that it was very, it was it was just all I really liked about certain cuts and is the speed. It was a week. While this was like a week and a half turn, but like just getting stuff laser cut. It's a week turn, which is amazing. Really, the only way to go faster than that, I think is to have your own metal laser cutter.
And and something to bend it with?
Well, if you're a bit more bending takes an extra couple of days. Yeah. But you're just doing sheetmetal work. Yeah.
You know, we talked about this a lot like the value of engineering drawings. And, you know, how much effort should you put into them? If you're talking about a week turnaround from making a thing to getting it? That seems really difficult if you also had to put the generation of an engineering drawing and approval of it in there as well. Because it mean, it sounds like you went straight from the design, to uploading it to their thing to buying it, as opposed to like, what you might have done in a more traditional sense is, okay, so you've made the design. Now you have to go make the whole drawing. That's another handful of hours of work, making sure everything is pristine and right. And, and it's also prone to errors. You know, you can you can screw some things up in there. So I don't know. Yeah, that's, that's kind of cool. Like, I don't know, if it replaces the whole drawing thing. I still think there's a lot of value in there. But for what you're doing for a quick turnaround thing that's maybe not like, mission critical. That seems like that's pretty awesome. Yeah.
I'm impressed. Yeah. It might be also because I'm a really good designer.
Bring your arm back did oh, my things weren't diverse dry. Oh, sure. Although you just said there's probably another revision of
it again. It's an improvement. There's nothing wrong with these but I'm like, Oh, well, you probably tweak this one thing and make it better for the operator or something like that. No, of course. Yeah. And also like the next one, probably get them powder coated. So so that we don't have to paint them. Stuff like that. Yeah. Yeah, the that was the funny thing about the pinball leg holder thing. This is this is Rev. One. So beyond a failed print. Yeah, that's pretty cool. Yeah. Hey, drivers when you get a couple of beers on a late night on the Saturday, yeah, in the garage at Parker's house
as a, you know, any normal person normies I guess might just be like, go out and buy a little end table and put it next to the pinball machine or, or just like be like, Okay, well, I'm gonna sacrifice drinking while I play, Pinball. But Parker has to go out and design a whole 3d printed thing to modify.
It was like a Saturday afternoon and I'm like, I'm like, I need a pin golf holder. I went on Amazon, Steve was on Amazon, like can get next day, couldn't get next day. So I'm like, Well, I'm going in the garage, designing one and printing one designed it started the print. And then before I went to bed, I saw it failed. cleaned it up, restarted it. Boom, done. The next day, it was done. I'm like, awesome.
So I'm curious. Is that these things exist right for pinball? Yeah, yeah. The
called the brand is pin gold.
Oh, okay. Because that was I was about to say like, you know, if for it for probably somewhere in the range of 10 to $15,000, you could get a mold made. And then those things would be 50 cents apiece to injection mold.
I think you can buy them. I think you can buy them like 12 bucks online. hidden gold beverage caddy Pro.
Wow, these things are looks like some places are selling them for upwards of 30 bucks.
I think it depends on design. Yeah. It looks like there's a couple of different designs.
Yeah, I'm seeing that. That's cool. Yep, I like it. I've made sure it's another venture for you.
I do like how I made also, it's big enough to fit a pint glass. So Oh, nice. pint glass in it. Oh my god, this one is like I'm looking at another picture. One, it looks like a like a martini holder. It's kind of fancy.
Yours Yours is different, though. Because it has the the cutout. It's like It's like a It's a speed holder. Get in there faster.
No, I I'm the one I saw on Thingiverse had had this you cut out. And so I copied that, that design aspects. It's nice. So because then when you can get your like, if you put a pint glass in it, you can put your finger underneath the pipe class to pick it up. It's pretty nice.
So before we close out here, I just got one cool thing that I saw today that I want to share with everyone. I found it on Hackaday. There's an article up about this thing called the pinouts book, which I was not aware that this was happening. But a gentleman by the name of node has unveiled the pinout book, which isn't actually necessarily a book. It's a it's a PDF, and there's a companion website to go along with it. But this PDF is a fairly comprehensive pdf of pin outs of connectors, dev boards and processors on a hop mostly hobby level. But it's actually really, really well done the artwork in it is fantastic. And it it seems to reduce a lot of confusion. And on top of that, like I'm really impressed with how unified all the artwork is in this. So basically, the this book is broken up into different sections, mainly those, like I mentioned earlier, the connectors or cables, and then dev boards, like Arduino and Raspberry Pi and things like that. And then at the end there is pin outs of processors themselves, but it's mainly the process that you'd find on Arduinos and things like that. Regardless, the whole first section about connectors I think is really useful. I'm going to hang on to this PDF myself. It's just really well drawn and really easily labeled. And every page on this has a picture of the connectors or, or an image of the connectors. And then the right page on it has a diagram or a chart table have all of the connectors but also pertinent information about those connectors. So if there's anything special about power voltage or something like that, it's written in there. So I recommend go check this out. Just it seems like a really nice useful resource available, especially for a hobbyist level if like you're first getting into USB or something like that and you don't know the pin outs of USB as opposed to just Googling USB pin out and then seeing a bunch of stuff that looks confusing. This puts it all in one location.
Yeah, I already downloaded it, it's pretty cool. I was actually looking at the T shirts, I'm gonna have to get some of those T shirts too. Yeah.
And it also has like really comprehensive stuff on the Raspberry Pi compute module, which that has a boatload of pins on it. And it's just, it's just a like, it's, it's all information that you could find if you just go and google it. It's just all in one location and a really nice, really well done artwork. So you know, hats off to node and their team for putting this together. And it also seems like this is going to be an ongoing project. So this book will get updated continuously through the website, so I guess you can just visit the website and get whatever revision is the most up to date. But just in terms of getting good information on connector, pin outs and stuff, I think this is a great resource.
Cool. So that was the Mac fab engineering podcast. We are your hosts Parker Dolan
and Steven Craig Thank you everyone. Take it easy
Thank you guess you our listener for downloading our podcasts if you have a cool idea, project or topic. Let Stephen and I know Tweet us at Mac crab or at Longhorn engineer with no O's or at analog E and G or emails that podcasts at Mac fab.com You know, it feels weird saying like at Longhorn engineer with no O's. That's really
that's how I'm wired. If
someone had well, yeah, you know why it's spelt that way, though? Was it? Because that's the character limit for a Twitter handle? Oh, is it really? Yeah, that's fine. I think they've increased it. But when I made that account back in,
can you make a new account and then tie it?
I don't think so. You can change your handle though.
Oh, well, yeah. So yeah, see if you can do that.
Well, also check out our Slack channel, which is that Mac fab.com/slack letter one
Will the Rebel Codebreakers be able to emerge victorious against the Empire, or will they succumb to the overwhelming power of the Empire? Tune in!

On this episode, Josh Rozier joins to discuss Star Wars. Is the force a glitch in the Matrix? How much energy does it take to vaporize a Jawa?

Design for Testing means enabling your product to be tested easier or quicker. But what about the documentation and implementation of the testing?