MacroFab Engineering Podcast #299
Multi-layer PCB designs. As an engineer, how do you decide when it is time to increase layer count and how do you decide what goes on those layers?
This week we are talking about Breadboards. Is breadboarding a circuit or design still applicable in today's SMT component dominated world?
What lore have you discovered in component datasheets? On this episode, Parker talks about how he picks electrical components and risk management.
Ever have PCBs that solder just will not wet and solder to? You probably thought it was improper soldering technique but that was probably not it!
Parker is an Electrical Engineer with backgrounds in Embedded System Design and Digital Signal Processing. He got his start in 2005 by hacking Nintendo consoles into portable gaming units. The following year he designed and produced an Atari 2600 video mod to allow the Atari to display a crisp, RF fuzz free picture on newer TVs. Over a thousand Atari video mods where produced by Parker from 2006 to 2011 and the mod is still made by other enthusiasts in the Atari community.
In 2006, Parker enrolled at The University of Texas at Austin as a Petroleum Engineer. After realizing electronics was his passion he switched majors in 2007 to Electrical and Computer Engineering. Following his previous background in making the Atari 2600 video mod, Parker decided to take more board layout classes and circuit design classes. Other areas of study include robotics, microcontroller theory and design, FPGA development with VHDL and Verilog, and image and signal processing with DSPs. In 2010, Parker won a Ti sponsored Launchpad programming and design contest that was held by the IEEE CS chapter at the University. Parker graduated with a BS in Electrical and Computer Engineering in the Spring of 2012.
In the Summer of 2012, Parker was hired on as an Electrical Engineer at Dynamic Perception to design and prototype new electronic products. Here, Parker learned about full product development cycles and honed his board layout skills. Seeing the difficulties in managing operations and FCC/CE compliance testing, Parker thought there had to be a better way for small electronic companies to get their product out in customer's hands.
Parker also runs the blog, longhornengineer.com, where he posts his personal projects, technical guides, and appnotes about board layout design and components.

Stephen Kraig began his electronics career by building musical oriented circuits in 2003. Stephen is an avid guitar player and, in his down time, manufactures audio electronics including guitar amplifiers, pedals, and pro audio gear. Stephen graduated with a BS in Electrical Engineering from Texas A&M University.
Special thanks to whixr over at Tymkrs for the intro and outro!
Hello and welcome to the Mac fat engineering podcast. We are your hosts Parker,
Dolman and Steven Craig.
This is episode 299.
Before we begin this episode, I have a quick announcement. If you're currently enrolled in college, we would love to have a chat with you. If you have a we have some ideas for future podcast content, we
have ideas, I hope so
that you could perhaps help us with. Also, we would just love to get to know our listeners a little bit more. If you have not already, please send a hello email to podcast at Mac fab.com. Thanks to everyone who has reached out already it's been fun having chat with with people and getting to learn our listeners a little bit more.
And then we also I have an announcement. But this is more of a me thing I guess. But wait for y'all out there and ethos can help me. So last year, around this time, I did a a video stream as like a 24 hour video game playing stream with extra life, which is a charity for children's hospitals. And I do a stream for the Texas children's hospitals here in Texas. Last year, I raised $2,600, I'm hoping to double that the stream is going to be November 6 of this year. So that's November 6 2021, starting at 8am. And that's not gonna be on the macro fab stream, it's going to be on my personal stream, there's gonna be all that stuff is going to be in the show notes and stuff. And I'll be posting it in our Slack channel and stuff. But be awesome. If you could just you don't have to donate or anything just come and hang out for bits. Because sometimes when it's like, you know, six o'clock in the morning, it's kind of lonely sometimes.
And people do jump on the stream at any time. Right come hang out. You start at eight, you go till the next day at eight.
Yeah, basically. And I'm hoping to raise basically I have it set to $5,000 right now. So hopefully we can pull that off.
Any any hints about what you're going to be doing?
I think we're going to play a we're going to try to beat the Legend of Zelda Ocarina of Time in 24 hours. I've never tried playing or beating that game and 24 hours. The average time when you look it up is like 26 hours. So maybe I can pull off because I've been in the game a couple times. And I kind of know like, the checkpoints that you have to hit in the game. Oh, yes. The channel it is. I think it's twitch.tv/crab. Foam. I think it's what it is.
Yeah, so Well, Parker's looking that up. Let's just say it again. November sixth 2021 at 8am. Anytime, from 8am to the next 8am. So between November 6 and November 7, go to twitch.tv/crab. Foam CRA B fo am.
Yeah, and all the stuff that's on that link right now is like last year's charity stream stuff. So I've just got an update for this year. And like because it was like a tracker for like the how much money you've raised and I stuff I got to set that up.
Okay, so one other quick question. If somebody doesn't want to watch your stream, but they do want to donate How do they do that?
Oh, yeah. So I have a link to my extra life page. And you can just donate there.
And it's all like get that link.
Like I looked that one up, too.
So we'll Parker will have more information as we get closer and in the Slack channel. So if you go to macro fab.com/slack We have a bunch of really cool people there. And Parker will be posting information. And you can always just show up and ask for information to
Yeah, yeah. And it's a it's always a lot of fun hanging out. I think. So last year, I took like a break and got cooked a pizza, I think I'm gonna do is I'm gonna take when I take that break, I'm going to stream making that pizza because I've made it from scratch. Oh, nice. I'm gonna just take a break. And I don't know how I'm gonna do that yet. Because like, I have to somehow get like a portable webcam. I don't know yet, because I don't like to drop the stream. Because when you dropped the stream it like kicks people out of the chat and stuff. So I gotta figure that out. But should be fun. It's always a lot of fun.
Nice. I am going to try to show up to that myself.
Yeah. But yeah, we're gonna play Ocarina of Time. I think that's what one we discussed this like before the podcast a couple we go and that kind of one out of the ideas that I was throwing out. So anyways, electronics, and engineering, which is what this podcast is about.
So it's been a while since we've had an episode that has some, I guess, project updates on it. So Parker, and I kind of like, put a bunch into this one. So it's one of the things I wanted to kind of mentioned, I've just, I'm excited about this, because I'm at the very end of a project that I've been doing at work for quite a while now. I've got an eight layer design for a board or for an assembly that actually has 12 Different PCBs that all come together to make a single product.
Now, we're going to build on one panel.
No, no, luckily, good lord, no. Well, and not all 12 of those PCBs are eight layers, there's actually Oh, okay. Okay. And in fact, that's sort of the that's sort of the whole point is that the eight layers expensive, so but but but the eight layer is also the biggest. But we're using the eight layer as sort of like a backplane board that holds all of the necessary electronics, and then all the others are kind of module assemblies that connect to it. So most of these other boards that connect to it are either like a power supply board that we could just replace the entire power supply, or, like different channel strips, such that if some mechanical parts go bad, we could just take that strip off and put another strip on, kind of thing. So the meat and potatoes is in this eight layer board here, which is right at the very end, I've got six nets left to go out of 600 and or 963. Nets, which it's just a giant pain to make that fit into a board that's like eight inches by five inches or so, kind of thing. But I thought it'd be fun to have just a quick chat about attacking eight layer designs, like, first of all, like how do you even know you need eight layers? And then like, where do you start on something like an eight layer design. And in my career, this is maybe I think this is the second eight layer board I've ever had to do. Like I've I've done countless four layers and a handful of six layers out there. But I've only ever had enough requirements for an eight layer twice to need it. And this is certainly one. And the majority of this, this board does have a processor on it. But this processor is doing very minimal work. In terms of there's nothing fast about this processor, like the fastest thing it has to do is read some ad ds. And I mean, maybe a few 100 times a second, maybe. So almost everything the processor is doing is switching things around and just changing states. All the rest is analog, which the thing about it is, this is a mixer, an eight channel mixer that has expansion ports to be able to support extra modules being plugged in so you can add channels to it. So if you want more channels, just purchase more channels and plug them in, basically. So the thing about it is, with this mixer, there's by default, it's eight channels. So almost everything you do on this, if you route something, you're routing that seven more times. And some of the channels are stereos, so you're doing that another duplicate of times. So almost everything you do like you have to you never considering one signal, you're considering like, oh, well, this one signal that has to go across the board I'm doing it has to do that 10 times, kind of thing. And so considering signal integrity and how it gets across the board was a nightmare to begin with. And that's mainly why I chose to do eight layers is just so I could get channel separation and signal separation and not get a lot of crosstalk I mean, that's the fingers crossed kind of thing. That's why you
normally go with more layers is to have isolation.
Yeah, isolation, but also. So this, I also have quite a few power supplies on this or power supply rails. And a lot of that just has to do with the nature of what's what's going on. So some of the things are reference rails and some of the things are higher voltage rails and some of the things are lower voltage rails for heat savings and things like that. So, all said and done, I think, in terms of the way my EDA tool handles it, I've got 12 different power rails. So I need multiple layers to be able to distribute all of that. So the way I kind of start with any PCB, regardless of how many layers it is, is as I sort of just make a game plan of where the parts are going to go first, like the major parts and things like that. But then I try to work out. Okay, how do I consolidate as much as possible to make sure that I'm efficient with the layers that I'm working on? Because I tried to avoid analog digital doesn't matter. I tried to Avoid via hopping all over the board, because it ended up just looking like he shot your board with a shotgun. And then you got your jump in between the layers all over the place and talk about signal integrity problems, like that's a fantastic way to introduce them. So whenever possible, I try to get as many analog parts on one side of the board and try to route them on one side of the board with the most minimal with with the closest I can get my traces. And as soon as I get an optimal route with that, I can then start focusing on other layers.
Yeah, I mean, you're talking about No, I do the same thing with digital too. Because you know why? It just looks nicer. It's actually it's better for signal integrity, too. Because because there's that old joke where like, electrons can't go around a 90 degree turn. I mean, they can, but at certain frequencies, they like to bounce. They do like the bounce a little bit. So you got thing as a via is a 90 degree turn. So
yeah, yeah, right. Well, and yeah, changes and trace width, which happens at 90 degree turns, or or vias that can have adverse effects. So if you can avoid it as much as possible, we'll do it. You know, another thing to consider, though, this is this is a problem I see sometimes with kind of newbie players, it's something that you don't necessarily think about when you're sitting on on your board. If you can consolidate parts, to have fewer unique parts, that becomes highly preferable. Like Take, for instance, if you have 100k resistor on a board, and you need a 50k resistor, or you need a 200k resistor, or let's say you need 50 102 100. Well, it might make sense to just parallel or series up a bunch of 100 Ks, in order to get the 50k and the 200k. Because you got to remember that every unique part takes up space on the pick and place machine that's at your your manufacturer. And if you're one of those guys that has 800 unique parts, it might not even fit on the pick and place machine. And then your contract manufacturer is going to kick it back to you and be like, Look, this is just not manufacturable. At the same time, if you do need a bunch of unique parts, consider your load of how they go and put you know, half of them on the top of the board and half on the bottom or work with your contract manufacturer to figure out, you know, how many can you put home and walk away with without overstuffing their their pick and place machine. Also realize that on a pick and place machine, you know, your contract manufacturer may say Oh, our machine has 100 slots worth of available room. Not every part takes up one slot. Some parts might take up two slots, or some parts might take up four slots. If you are one of those guys that has to have parts in a in a tube that takes up 16 slots on our pick and place machine. That could have been 16 or single slot reels for passive opinions
about that is I saw a picture on Twitter of I think there were I think they were what's the small What's the new Raspberry Pi, the microcontroller? 100
the microcontroller one Oh, yeah. No.
But they're on like little dev boards, too. Yeah. I know. And they're in the same format as I remember my prop stick there in St. Pecos. Is that Pico? Yes. I think it was a rope at Pecos in cut tape.
That's great. You gotta have a hell of a pickup arm. Yeah,
I don't know how many picking places that could actually pick that part up. I think the Micronics that we have can, but I don't think you could use the camera. I think it's too big for the camera.
No, yeah, our Samsung would do it. But you have to have a special add on. It's like a robot arm that comes over and it would it would grab it. It's really slow. But it's meant for huge stuff.
Is it like is like a claw machine.
The claw? Yeah, it's similar.
The operator is gonna drive it over and it's got little red button on it.
Okay, that's actually a really good, that's a that's an excellent point. Say you've got a new idea for the most amazing IoT device out there. Picking an ESP thing as like a daughterboard to go on a new PCB you've designed. Those are not typically readily placeable by most OEMs it's huge. It doesn't use as a waste. Yeah, they're usually hand placed. So yeah, keep that in mind. Like even though that thing is like you know, it's a few bucks off of Amazon and it's really easy to set up like I You're gonna get a bunch of assembly cost? Well, I've seen
a lot with those modules is they also like to shift during reflow, because they have three edges have capsulated terminals, and usually you got to put a lot of pastes on them to kind of fill out that filler when it reflows. Well, all that paste kind of wants to pull that part. So you have to really design those packages really well.
So, so yeah, back to eight layer design, I kind of think that once, once you have a game plan in terms of your park placement, the the additional layers will start to basically tell you what they need to be. Now, there's a lot of pre planning involved in that. That, frankly, I'm not an expert in in terms of like, which layer would you want ground to be on? Which one would you want? You know, like with eight layers? Do you put two power planes as the two innermost layers? Or do you put power planes closer to the edges and things? There's a wealth of information on the internet in terms of what's good and bad based off of your application? And based mainly like, are you doing an analog board? Are you doing high speed digital, if you're doing that, or this? Consider the options there. For me with highly analog, I was able to get away with more, because most of the stuff is so slow, I was able to get away with well, whatever I need this layer to be, it can just be that leg and just be that. Yeah. So that's kind of nice. But But I was able to what
I've always wanted to try is having power and ground on the outsides.
And also Yeah, I did that on I have a I have a board that I designed a few months ago, that's part of that stair, that stereo compressor project that I've got going on that I hadn't finished yet. Where I did that it's a four layer board where all the signals are on the inside, and its power and ground on top.
And so what I would do is I would do via and pad on all the parts. And so you have your your vias go straight into the
signals. Yeah. Great, big brain. So I thought it'd be that would be fun to talk about. Just I'm excited because earlier today, I counted my nets. I'm just like, oh, six more. And of course, like, two days ago, I had 200 nets left to do. And it and now I'm like, the amount of time it takes to do 194 nets is the same amount of time it takes to do those last six.
Yeah, the I do agree with the adage I can I will do a little pre planning. I typically will do a four layer board. If I know I'm like only gonna build a couple or whatever. But if I know it's gonna be a product, I know what the PCB prices. I considerable portion of the product price, then I go to Layer, right. But for layers, what I really like to do, I've only done a couple six. I've never done an eight layer. But yeah, six layers. And that was for the old pinball system. And that was because, well, I just wanted six layers is really actually what it was. I wanted. I had more
dedicated high powered layer. Well,
no, because I got your crowns. We're all in that on a layer, right? No, no, no, no, no, I thought that was its own isolated area. I had, it was signal 3.35 ground signal, and I can't remember and the other the other one was 12 volts. So three power rails as good, but that system had a lot of mixed typography, I guess is good. That's not a good word for it. But mixed mix. Power power rails, like there's a lot of 3.3 volt there's a lot of five volts, and there was a lot of 12 volts. And typography is not the right word for that, but it gets the point across to get and then we went to pin notar. I was like that never again we're doing 3.3 volts for everything.
Not just a whole bunch of shared stuff.
Well, that got we were able to go down to a four layer board. Because of that, we were able to act two whole layers because we just went everything's 3.3 volts. That's it and then like any higher voltage, like 12 volts that has to come off the board. You just I just dropped a big trace there, because I could.
I found the difference in price between a six layer and a four eight layer is actually not considerable. Once once you get past four, like it's staircases up slightly. Yeah,
it's just pretty much just, it's almost a linear graph. So like, there's really two and four is like it's almost like a inverse log function. Okay, it is, well, like the jump between two and four is really big. And then but but four to six is smaller, and then six to eight is even smaller and increase. Once
they have to get into internal layers, like, they just know, like, you pay up front for the, for the for, and then after that it's not as bad. And it's funny, the first eight layer board I did it, it was required to be eight layers, mainly because it had a BGA on it, that I had to escape. But like that just the BGA guarantees eight layers. That particular one just has so many signals that it's
I believe it's just a regular log function. My bad not inverse log, for some reason, for some reason, I just got those mixed up.
But yeah, this one I have, I just have enough signals to warrant multiple layers.
I really kind of want to see this board, when you're done. I put
it I actually put a picture of one of the layers up in our show notes. And this is just one layer that I have distributed power planes about just to get things all over the board.
I'll put it up on the stream.
I don't know if I can share this with everyone. But yet for the stream is it's fine.
Well, it's definitely low enough resolution where I don't think you can do anything.
Yeah. Like it's just colors.
Yeah, just colors. Yeah.
I'm a big fan of using big polygons for low impedance for power supply stuff. So actually, in this picture, like the big pink areas, all my digital stuff, and I kind of worked it out where it just stays nicely contained on one side of the board, then everything else is either power for op amps or reference voltages for like instability and things like that. Or stable voltages to send around. So yeah, but I like using big polygons to distribute everything as much as possible.
Well, I can't wait till that product comes out. And we actually can see where it goes into.
I'm, I'm excited. I'm excited about it. Well, given that this is the first PCB round, I'm sure there, there's probably something that needs to be adjusted on it. So you know, we'll get these PCBs in we'll we'll work through it. So I'm expecting 2022 is one we'll see this in production.
So I've been my PC projects I've been working on is the old prop fan. Podcast long time ago started this project to build a basically a fan controller for my jeep. And what happened was, I actually ended up going away from an electric fan setup on that Jeep project. And then so that project died. But with my current rebuild of that same Jeep, I'm actually going back to an electric fan setup. But I'm not building electric fan controller anymore. I'm building like a multi gauge. Because I was talking, I can't remember what podcasts it was, but I was talking about, there's a couple different products out there that do this, like, plug in like five sensors. And then like you can configure the screen to display what you want it to display. They all have weird compromises that can't figure out why they compromise that way. So I am aiming to build the no compromise version of this,
that's such an engineer, like way of looking at it. I don't like the way you do it. So I'm gonna make it do everything and then it ends up doing it the way you want to.
So well I'm not gonna make this as a product I will this would be will be open source. So like, I'm just gonna say if you want to build it, go build it. I am not supporting this at all though. Because I think there's going to be something out there. Someone's going to want this because it's, it's really it's also nonsense. And it will require like, if you're going to configure it a different way you have to program it that way. Like I'm not doing like menu driven selections or anything it's going to be like you plug it in and go. So for screen and navigation because you have to do Split because what this thing will do is it needs to have a analog front end that's going to be read a bunch of sensors. And then it has to have a screen to display it. And then maybe some buttons so you can like scroll through messages or like acknowledge alerts, because one of the things is you want to also like, beep at you when like, a sensor is out of range, like transmission is getting too hot. And then you just push okay? Right and keep driving. So there's show the temperature or show all the readings and that kind of stuff. I'm, I'm going to I found a Chris was crystal fonts is the company, CFA, 635 dash t f k dash k L, which is like this, this serial communication screen with buttons on it with like back lights and the buttons and stuff. And I'm seeing that screen, a lot of the hardest stuff taken care of. Yeah, a lot of the hard steps taken care of, like the physical design. Okay, the physical design is already taken care of. And it's a character display, which is what I wanted, I didn't want a graphics display, I want the display like transmission temperature is this. I don't want like a graphic or anything because I want to be easy to read, like use look at it. And you know what, it is
also potentially easier to code.
Very much easier to code because I actually already written code that like works with the screen format. Is that like, increase the, or add on like the navigation function for that screen or that module, I guess. But the other thing about it is on the backside, there's a connector. And then what you do is your board plugs into it. And then you just kind of screw it all together. And then it's a brick of electronics now. And so it actually kind of handles How do you mount it as well? Yeah, this this
board looks like it has a handful of convenient just mounting holes on it. Yes. Nice.
So that screen and navigation, then for the temperature. I picked the I think I've told us talking about the shipper for but it's the LTC 2983. And I think I made the joke of how do you verify or how do you secure your supply chain by picking the most expensive parts possible? That's like a $40. Chip?
Yeah, well, yeah. And it directly does RTDs, thermocouples and thermistors.
So it has 20 channels. Yeah, now some sensors, because it does basically any kind of temperature sensor you can think of, you can hook it up to this thing. Some sensors take more channels and others, like I think three,
three wire RTDs. And things they're gonna pick up
thermistors take I think two because you have a sense, you have a feed resistor, I think they call it a sense resistor. But you basically have to put, you have to feed a certain amount of current into your thermistor.
Which distinct probably has like constant current drivers and all that. Yeah. Amazing. Yeah.
And because basically, what I'm going to be most automotive sensors are there's two of two kinds, really, you have thermistors. And then you have five volt analog sensors that are active sensors, like you give it five volts and ground, and then it spits out a variable voltage that's linear. Those are there's probably other ones out there. But those are the two major ones that I'm going to support. With this, I'll probably put in the code for everything else just to have it in there. So like if you want to do use a different sensor, you can, but all automotive grade sensors are going to be in those two categories. Now, the problem is I'm running, I'm going to run a parallax propeller, because I've written a lot of code for it. And I you can buy those because no one really uses those in products. And they're expensive and
packs. I know they're one of the cheaper ones now. cheaper ones now
that you can buy. But it runs on 3.3 volts. And now the LTC 2983 can run at 3.3 volts. But the problem is when you do that those inputs the on the on the ADC side of that chip can only accept like 3.3 volts is the max, right? Because the they probably have like ESD clamping on it that goes right to that rail. And that would not be fun if you tried to put five volts on it because it would you know, burn up those ESD ESD diodes in there. Probably other bad things will happen too. So you gotta level shift it and so Oh, I actually I started looking at my library and a parts, and I had some, I had some level shifters designed but there were nothing I really like, I'd have to use two of them because I only had like, there were bi directional level shifters, but you had to like, set if it was going one way or the other way. And so wouldn't work for spy. Because I needed I needed bi directional communication all the time, right, because you have a clock, and then you have data coming back and data going forward, and the chips like blah, blah, blah, etc, etc. So I picked the TX b 0104, d r, which I can shift between 3.3 volts and five volts. And it's a bi directional without having to set what direction you're going. It Like It, according to the document auto detects. So we'll see
how to do that.
Tip magic. That's, that's great. And on a previous podcast talked about the power of filtering for it. And this is I basically lifted the design straight from you. When we when I found this, it was linear tech, but then they got bought out by analog devices. So now I don't like devices stuff is all over the PDF. But the comprehensive
projects are so so old that companies get bought during the design
during designs. Yeah, the comprehensive power supply system designed for harsh automotive environments, if you just Google that it will pop up. But it uses the LT 8672, which is a basically a ideal diode simulator. For power protection inputs, it uses a MOSFET. And then it makes sure that a reverse polarity doesn't happen and that kind of stuff. It's a pretty sweet little chip. And then for the power regulator, I'm using the LT 8614 I'm actually using two of them. One for five volts and one for 3.3 volts and it's really good. They have really good reduction of noise from like the noisy powers 12 volt line that's going to be coming in. And that handles everything that a awful automotive power supply can handle can throw at you. If you look up that PDF there's or the or old podcast that recovered I can't remember what episode but put in the show notes. Because it was like some things you won't even think about that it covers. Like what happens if you just disconnected the battery while the engine is running. Now, that's not a good thing to do, causes a voltage spike of like 100 volts. Only 100 volts actually, if you're lucky. So you have to put it in production for that. Now, this is where that was all that stuff that I just talked about was covered under the original scope of the project
I got done is the new stuff,
new stuff. So I got that old done. And I'm like, Man, I'm only using like half my IO pins on my my parallax propeller. And I'm also like thinking about the code. And I'm like, Oh, I'm only using like three of the cogs because it's a it's a multi core processor. And so it has eight cores, essentially. And then it uses one Mike central RAM system. And so I was like, Okay, I have like six now I have five other cogs to like, do stuff with so what should I do? And I'm like,
okay, by the way, this is an excellent way to start feature creep. I have pins, and I have cores and my processor, they need to do something, right.
That's actually a good point. That's exactly what's happening here. It's totally what's happening and I love now this is something I've always wanted to build, I was going to build it as like a separate product, because it's something I was actually thinking like about because I was watching a show called roadkill which is the hosts go out and then they like rescue a car from a junkyard and fix it and then like try to road trip it across like America. And they usually like break down at times and suck catches on fire. And that kind of one thing that I've always thought about is like the exhaust leaks on those cars have to be awful. And and a lot of times they're driving around and like, like rat poop and stuff is like floating in the car. Because it's like, you know, the car has been sitting there for 50 years. Yeah. So I got to thinking I'm like, Wouldn't it be really awesome to have in your project car and air quality meter to make sure you're not killing yourself while driving your car. Like by sea, carbon monoxide, particulate matter, that kind of stuff. So I'm going to get
this as a real big prop that happens every day. I don't know
people suffocating their cars in the winter all the time from carbon monoxide. Sure. So like, all it takes is a slightly rusty hole in your floorboard, and then an exhaust leak and you know, you're dead. So it actually is a big problem. Now you could just get a carbon monoxide sensor and just kind of like, stick it on your dash, right and solved. And actually, I've seen people do that. But you know, what's the fun in that? So we're going to add air quality to this. And so I found a, this is a very interesting sensor. Because usually when you think of a sensor, it's like a IC that just goes on your board. Right? Yeah, this is a box with a fan on it.
Like an intake fan. intake fan.
So it's, it's the it's by Honeywell, it's a HP M A 115, c zero dash 003. And it's a, it's a, they have a couple different flavors. But this is like their premium one because it can, it can detect parts per million of 2.5. I think that's stupid five micrometre things micrometre particular size, which is like the particular size that can really mess you up gets really, really fine. So I'm going to add that sensor in there. That's mainly for like, I kind of just want to see like how, like if you drive through like a dusty road does. How dusty does it get inside of your car? That's kind of like what I'm doing for that though. Then there's a voc sensor. The sensory one, I think is how you pronounce it. S GP 40, which is a voc sensor, then same company, sh t c three, which is a temp and humidity sensor. And in chat engineer Bob says I'm calling fake news on that. Is it really a problem? Really question mark, go watch roadkill. And there's a lot of times where they're wearing masks and respirators because they can't breathe while driving these cars.
I guess the whole reason why I even asked that question is I was not aware that those things happen and I bet air quality in your car is a is something to be afraid of.
Most modern cars know. Like, if your car is not rusted piece of a hunk, then yeah, totally fine. But I mean, like, if you're having an older car that's got exhaust leaks. Yeah, that's a big problem. Now, it's way cheaper to fix the exhaust leak than to go in design a air quality meter for your car, though for sure. But this is more for adding it in into this product because I can write, what's the worst thing I could do? I just Depop it later and just sell version?
No, I think I think it's great. I love this kind of feature creep, because it's feature creep, that has a purpose. Maybe the purpose is not fully required. But like you're, you're you're adding features to the processor, because you need to fill out those pins with something and this is in the same vein of what you're going for. Also, I love it. Because you're you're making this open source you said, so this is just more information for people who might want just the, the air quality sensor thing and on the rest of your project. Right, exactly right. There's there's info there.
Yeah. The other thing I need to do is I am going to bring back in the like being able to control relays, because I originally X that button is gonna bring that back in. And all that is is Opto coupler outputs on it. And so that way, you can just hook up an external relay. And you can do whatever you want for that. Because that way you can you can code in, you can actually put in temperature control for fans and stuff if you want to. I'm probably not going to do that. But I have the IO and so boom, done. Yeah, add that back in, because that's actually already designed. So I just got to pull up an older version of the board and GitHub and rip that part out and put it back into the into the project
seems like a lot of this you could have just non popped on the board. And then if you exactly on the road, just stuff it.
Exactly, that's exactly what I was gonna do. Because like Opto couplers are, especially the ones I was using, you know, the couple bucks a pop. And so it's like, well, that's like, you know, $10 right there where you have to populate them if you don't want to. It's really the last thing to do on the schematic side is to choose how to protect the inputs to the LT EC 2983, which are all these analog inputs, so they do have ESD protection. And they do have a op amp. I don't think they say an op amp, they say a buffer, which is an op amp in there. They're buffered inputs. And what I was looking at was their demo board. That's like, this is a protected demo board. It's got all they did was put 100 Ohm in series resistors. And I'm wondering if that's all I should do? I think they, they expect about one watt, which seems way overkill. But maybe like some one watt surface mount resistors, 100 Ohm, and that's it.
You know, so I designed an industrial temperature sensor at a first job that use the chip. incredibly similar to this. It was an analog devices part, but like, I looked at the datasheet, it must be the same family. And I know like we got we put ferrite beads on all the all the lines for EMI, EMI compliance, basically. And but that's that's what we needed for protection. And then they just broke out to connectors for people to connect thermocouples and things like that. So I don't think you need to go overkill on this.
Yeah, I think I'm just going to put, I'm going to do what their demo board does is put 100 ohm resistors. And then, so in chat engineer Bob says we use three watt 10, ohm resistors. And then yeah, yeah, exactly gives the movies or TV SS something to work against. And it does help reduce energy. So when you have a high energy event, those resistors do snub it before it gets to your delicate, inter integrated connect component there.
Yeah, I mean, obviously, you just have to keep in mind. If you're using resistors, and things like that on your current sense lines, then that's going to Yes,
yes, you have to the thing about your current sense lines is you already have a resistor there. So you don't need another 100 Ohm there. Yeah. Okay. Yeah. Usually those current sensor resistors are higher value. So you don't need to be as high wattage,
you're just talking about the voltage sense lines themselves,
correct. Yeah, that's really one thing that gets exposed the outside world. On the temperature side, or temperature sensing side. So cool. Ooh, adventures and plastic injection molding? Round four, five, I think we have for now,
I think I think we're at four, in fact, okay. So I actually, I wrote down a timeline of this. So just a quick recap for everyone. I've got some parts, and I'm getting injection molded. And for the past handful of months, I've talked about what I've been going through designing this with this local company. So if you, I don't know the episode numbers off the top of my head, you're gonna have to go back and listen to all of them if you want to get get everything but so I'll give a recap though. So I designed this little plastic actuator, which is a little switch thing.
So I'm gonna interrupt real quick, though. Yeah, what we should do is once this arc is over, yeah, do like a full thing. Do you have one episode that just covers like, start to end?
Yeah, I guess. And then.
And maybe do like documentation that you've read. Like, you don't have to write anything but the stuff that you've read that helped out? Yeah, let's do it. I think it'd be good episode.
Yeah, for sure. This is my third time, I think going through injection molding apart. But this is the most intense let's just put it that way. So yeah, so this this part I've I've got going on here. We we've got the mold now, here in Denver. So the mold was originally made in China, it got outsourced to there. And now it has finally been brought stateside. So we've had to pay for the mold now which so just in case you are interested in getting apart, molded. I'll give you guys just like a general gut feel of cost here. So say you have an idea for a widget some kind of plastic thing. Expect to spend somewhere between, say 14 $15,000.40 $1,000 Somewhere in that range for the mold, not for production for just the mold. Now, my guess is for most little things, you're going to be way down towards the $15,000 range. It's like car bumpers or something like that that is massive and takes just a ton of steel and a ton of work that will push you closer towards the higher end stuff. Or if you have like really crazy requirements and really complex geometry. That's when you start getting to that higher side of the mold cost. But we were our part is small and it's not crazy. So it's, it was closer to the bottom side. So yeah, we've we've got everything of the mold in and are the plastics manufacturer now that we have the mold in, they did a whole not a production run, but a pre production run here where they were tuning the mold to the machines that they have. So I think we went on a 60 ton machine, which is on the low side of machines.
They go is that how much? That's not how much the machine weighs? But how much that's how much is the plastic in?
Yeah, at this particular location, they have machines that range from 10 to 400 ton. So like a giant, like they I said car bumper earlier, that's the, the part that they use to represent a big plastic piece. So a car bumper might take up 300 or 400 ton thing because you just have to push plastic until it spreads all the way out, you know, yeah. But my parts small. And the materials not crazy in it. So we're able to get away with a 60 ton machine. But But what's nice is their manufacturing engineers went and tried a bunch of different variety of temperatures, pressures, and, and materials to kind of find what is the best secret sauce to make it work because we did have before the the mold was shipped over to America, we had it shot a few times in China to just get a feel for what the mold is creating. And we approved that. But that doesn't necessarily mean that it's the exact same machine. And so these guys wanted to fine tune it. So they've made about 6000 of my parts, just kind of figuring out, like what are the best, you know, parameters on the machine to get it get it working? And it's funny, because right before they did this test, they had actually given me two bags above two different materials, or the my part in made in two different materials. And they were like, Hey, can you tell us which one of these you like better? And, and I eventually picked one and they were like, Oh, damn it. And I picked the one they didn't want me to they were like, what about this bag? Do you like these ones and,
and I picked the one material is a lot easier for them to work with that one, then
here's here's the whole reason what was funny about this apparently, apparently, so the requirements from my part with just general flexibility because it's has a spring mechanism in it. But I need it to be semi transparent because because it's going to illuminate with an LED light through it. So when they made these parts, these are the bags that they were showing me when they made these parts are at a place in shot at wherever they had it done in China. Apparently they just had a bag of stuff on the ground that they just threw in, shot that. And they've had that bag sitting on the ground for six years. And nobody knew what it was. And I was like I like that. I want that. I didn't know that. I didn't know that situation. So they were like ah, so now we they had to go and figure out what the material was. That was Bureau remade. Yeah, yeah, it was. Here's the thing. It's not as like, it's funny, but it's not as bad as that. They knew what the general material was. They just didn't know where it was purchased from. Okay. And they wanted to they wanted to buy the exact same stuff, if possible.
So the beer story. Yeah. Is we broods Steven I brewed a batch of beer. And we just I'd had like, three years were the hops in my freezer. That was just a jar. Everything that was left over, I just threw in there. We took that whole jar and eat it into the into the boil. And that made a really good quarter.
It was excellent. And it is absolutely impossible in all of history to ever prove that again. We don't know we have no idea what it was. But it was good. So So yeah, luckily the bag was polypropylene. And they knew it was polypropylene. And what's nice is it was natural polypropylene which you
free range and aged for six years.
Oh, absolutely. Yeah. No, no, not caged polypropylene for sure. No, it was just mystery bag polypropylene and like I said it was it was natural. So luckily you can just go to Tao and buy natural polypropylene right. So they also in this in this run after they kind of figured out polypropylene they also shot polyethylene at They call it general purpose polyethylene. But I kind of laughed because as soon as they gave me the part, like, you could just compress the entire thing. It was like gummy. The whole part had just, it stayed structurally the same, but you could just completely deform it to nothing in your hand. So just the way I described it, it was just gummy. wouldn't like it would function but not good like the, the button you would feel it like, kind of wiggly on your finger. So that's, that's no bueno. So polyethylene was out, we ended up going with just natural polypropylene. Which a great because it's easy to get. And, and it's not terribly expensive. So they've kind of worked out all the 11 herbs and spices between the material in their machine to make it make it work, right. So I have a bag of like, 1500 or so. And I said they originally shot 6000 of them, they gave me 1500. And they kept another bag. And I love this, I think this is this is great customer service issue, if you ask me, they kept a whole bag of these. And they put 5000 in this bag, and then they put that bag in a box. And they're letting it sit on one of their employees in the office than letting it sit on the floor. They're gonna let it sit there for a few weeks. And they're gonna pull it out occasionally, and measure some of the parts to make sure that they don't deform just sitting there. Because when it gets to our office, they end it just sits on our shelf to when be used. They don't want it to be damaged or or or get deformed. And if it does, they'll go to, like 1000 pieces in a bag as opposed to 5000 pieces in a bag. I thought that was great. That's I think that's a great little test for them to do. Because they're looking out for our inventory. Because I mean, I guess they don't want to shoot 100,000 of these. And then we come back later. And we're like, oh, yeah, 70,000 of them are bad. Or crushed. Yeah, right. Right, exactly. So I don't know what kind of Fallout we'll see on these, I actually don't expect to see much on them. They're such a simple part. And there's not a lot to go wrong with them, other than perhaps the spring mechanism getting stretched and broken, or something like that. But I have taken this this spring and like yanked on it and pulled it a good long way. And it takes a lot of effort to break the spring. So I think that's a I think I'm happy so far with how it turned out. So let me give you just a quick overview. Here's the story so far. So if anyone wants to get into plastic molding, these are the steps that I've had to go through. And the times that I've had to pay for it, just so you know what's going on. And your your mileage will vary. This is just how this company is doing. So I submit my first thing is I submit my 3d CAD, and they do a whole file review. We make slight adjustments on things based off of what's realistic and not. So it's basically like how like,
tweaking it for it to make it actually manufacturable, that kind of stuff, draft angles, all that good stuff.
As soon as the as soon as they're comfortable with the part and I'm comfortable with the changes, we submit it for the first moldmaking. And that is, at least with this company, I had to give them 50% down. So if you're thinking about, you know, $15,000 You got to have half of that ready right then. So after the molds made. Now, it's worth noting, would they only cut one cavity in this mold, this mold is a four cavity mold, they only cut one for this first proto, and then they shoot a couple. So I got maybe, I think it was 100 parts something as just like an initial a check this out. They came, the parts were really great. But there was a few small changes. We adjusted the mold slightly and approved it. So they went and machined the remaining four cavities in the in the mold, shot some more send them to us, and we were happy with them. So we said Great send the mold over. As soon as we say send them over, we had to have the other 50% payment for that boat. It gets shipped over for us we were able to fly it over for not much the shipping was great, but you can save money if you put it on a boat. If you've got three months to wait for your mold like you could you can do that. I mean,
now it's like six months but yeah, yeah, right, right, right.
thing to think to note, if you ship a mold over there is duties and taxes on that. So it's not just the mold cost you got to pay, you got to pay on those two. So just keep that in mind. So it came over to the states. We then did our third round of prototyping, which was where they did the adjustments on their machines shot about 6000 units, and I have an enhanced, as soon as we up final approve these, we're ready to go for production on that. So that's sort of like how it has walked down the line in terms of that. Now that's, that's if you're doing plastics manufacturing in the states, if if we had approved the molds to be done in China or wherever else, we would have kind of already been past that step and been closer to production at this point. So, and I, this has not been absolute priority one for me at work. So I haven't been like hounding this project. I'm, I have many other projects I'm working on, this has nothing to do with even that board I was talking about earlier. So I've been kind of letting this one move forward as soon as, as soon as things are ready, but I'm not pushing this project as fast as possible. So this has been a handful of months, I think if if I was on the phone with them every day, I probably could have knocked all of this out in say, three months, four months, something like that, if that was one of our top priority. So just keep that in mind. Like if you have a small plastic piece you want to make, you're gonna go through a handful of prototype rounds, it's going to be a handful of months, and you're going to be dropping some money on them all. So as soon as as soon as the whole project is wrapped up, I think that's a good idea. Let's, let's have some show and tell and, and then we'll actually go through it, there's still some updates that we might do to not the mold, we might actually adjust the piece itself by adding extra parts to it. So we just kind of had some ideas about that a few weeks ago. So we're working that out. And if that's the case, then I'll talk about that as well.
Cool. I think that's going to end our podcast this week.
I think that's it. So that was
oh, wait, wait, wait. So if you listen to the podcast still right now, and you had time on Tuesday after work, come check out our live stream. It's twitch.tv/mac Fab. We used to do like a pre show, which is just Steven I just like shooting the shit and talking with chat. It's always a lot of fun. And then we usually do like 10 minutes afterwards. The pens Really though, so you can go now Stephen.
Okay. That was the macro fab engineering podcast. We were your hosts, Stephen Craig
and Parker Dolman. Let everyone take it easy.
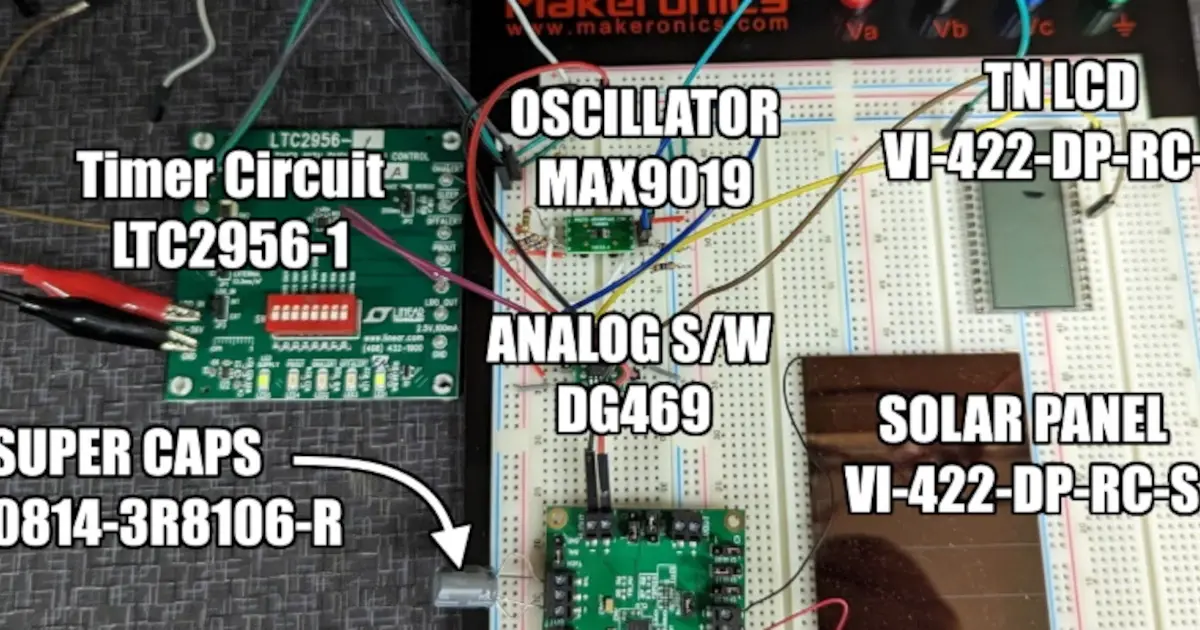
This week we are talking about Breadboards. Is breadboarding a circuit or design still applicable in today's SMT component dominated world?
Ever have PCBs that solder just will not wet and solder to? You probably thought it was improper soldering technique but that was probably not it!
What lore have you discovered in component datasheets? On this episode, Parker talks about how he picks electrical components and risk management.