This week we are talking about Breadboards. Is breadboarding a circuit or design still applicable in today's SMT component dominated world?
What lore have you discovered in component datasheets? On this episode, Parker talks about how he picks electrical components and risk management.
Ever have PCBs that solder just will not wet and solder to? You probably thought it was improper soldering technique but that was probably not it!
Parker
Stephen
R.F.O.
Parker is an Electrical Engineer with backgrounds in Embedded System Design and Digital Signal Processing. He got his start in 2005 by hacking Nintendo consoles into portable gaming units. The following year he designed and produced an Atari 2600 video mod to allow the Atari to display a crisp, RF fuzz free picture on newer TVs. Over a thousand Atari video mods where produced by Parker from 2006 to 2011 and the mod is still made by other enthusiasts in the Atari community.
In 2006, Parker enrolled at The University of Texas at Austin as a Petroleum Engineer. After realizing electronics was his passion he switched majors in 2007 to Electrical and Computer Engineering. Following his previous background in making the Atari 2600 video mod, Parker decided to take more board layout classes and circuit design classes. Other areas of study include robotics, microcontroller theory and design, FPGA development with VHDL and Verilog, and image and signal processing with DSPs. In 2010, Parker won a Ti sponsored Launchpad programming and design contest that was held by the IEEE CS chapter at the University. Parker graduated with a BS in Electrical and Computer Engineering in the Spring of 2012.
In the Summer of 2012, Parker was hired on as an Electrical Engineer at Dynamic Perception to design and prototype new electronic products. Here, Parker learned about full product development cycles and honed his board layout skills. Seeing the difficulties in managing operations and FCC/CE compliance testing, Parker thought there had to be a better way for small electronic companies to get their product out in customer's hands.
Parker also runs the blog, longhornengineer.com, where he posts his personal projects, technical guides, and appnotes about board layout design and components.
Stephen Kraig began his electronics career by building musical oriented circuits in 2003. Stephen is an avid guitar player and, in his down time, manufactures audio electronics including guitar amplifiers, pedals, and pro audio gear. Stephen graduated with a BS in Electrical Engineering from Texas A&M University.
Special thanks to whixr over at Tymkrs for the intro and outro!
Welcome to the macro fab engineering podcast. We're your hosts Parker, Dolman and Steven Craig. This is episode 200. And to
Parker, what's up?
Oh, I finally finally got my pinball board ordered rev two of the Patar with the with all the Flipped relay logic, right? Yes. Yeah, the one major copper issue which was so I actually figured out what happened I did hook it up, normally closed and said normally opened. So, yeah, I all I had to do was just in the schematic, change that one little little net and then reroute the board that will go funny part. All fixed, you know, a quick quick little tangent, I'm working with a client right now that
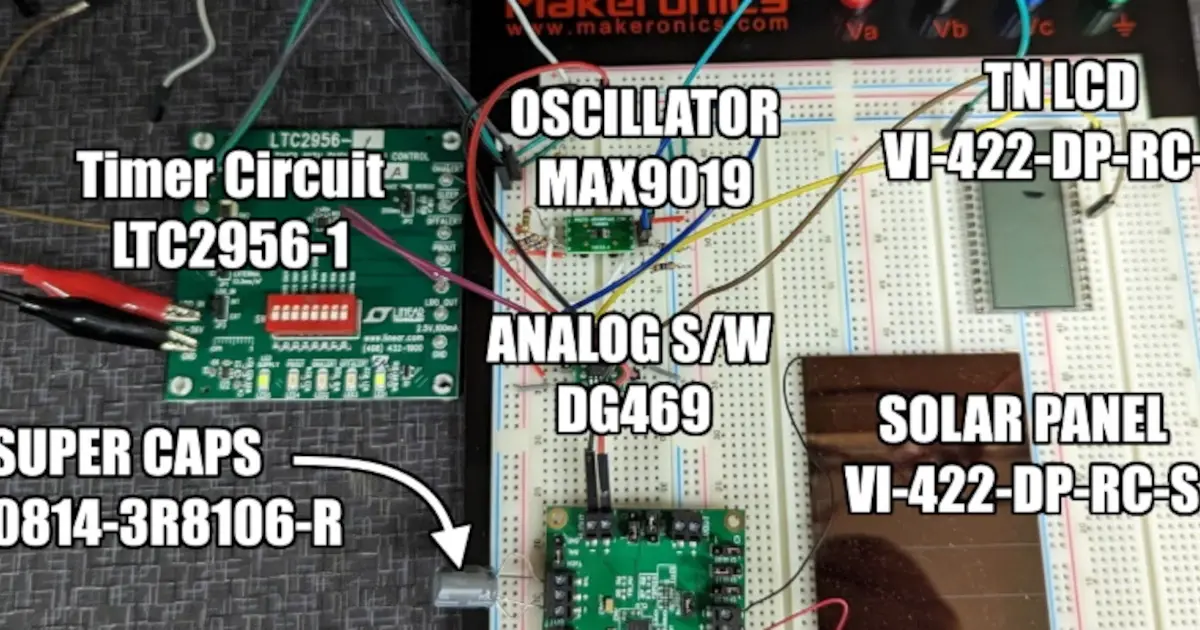
let's just put it this way, we are implementing some modern electronics in a vintage cassette kind of thing. Okay. And so I've never designed anything around, like cassette head control or anything like that. I've done plenty of analog electronics. So I know the back end of that, but like the actual head, like the the the main oscillator, the record head, the Erase head, all that kind of stuff. But this, this client has done something that is absolutely amazing. They gave me the specs and the whole spiel of their project, which is absolutely enormous. Let's just put it this way. I have over 20 pages of schematic in dip trace for their one project. And then I provided them with the with the schematic and they went and breadboard the entire thing. Like why not, I'm talking like, multiple breadboard for each schematic page and they sent me a picture of like, a four by eight table with a just breadboard all the way down the thing and like straight up tested the entire circuit that work. Oh yeah. Yeah, like awesome. The first picture he said, or video is he puts a cassette in and presses play. And that starts jam. And like, this is the best client ever where they will breadboard your circuit for you that they are having you design.
So great. But all I'm getting at is like, I wish I had more time to breadboard the circuits that I do design. There's sort of like a fine line between like, do I breadboard this and test it? Or do I just ordered the PCB. And then if I make any mistakes, just ordered another Rev. You know, yeah, so how I handle that is I typically I build because a lot of stuff I do is surface mount now. I don't do a lot of through hole stuff. So it's really hard to I guess you can get breakout boards and that kind of stuff. But at that point, it's like it takes almost the same amount of time for me to get a surface mount only PCB built. Then the get breakout boards and all the parts I need that's actually prototype it I will section stuff off. So like, like, Why did last couple of weeks with like the power system on the on the badge I'm working on, I actually made that its own board. So it's like everything that revolves around the power goes on this board. So we can just test that. So I do that a lot. Like I'll bake like modules so to speak. So I'm like, okay, the power system is good. Now, this microcontroller design, make sure that is good. And then at the end DH squish them all together. Yeah, just squish them all together. So like the pennant star, we knew a lot of this stuff would work and the stuff that we didn't know that worked, I actually designed a couple little tiny boards that were just those things, the SAT test if that sub circuit worked, and then I kind of just went up and popped it on to Eagle. One of the first engineers I ever worked under was was really really anal about breadboarding stuff. The guy said like, how can you ever tell if a circuit is going to work unless you breadboard it I know that's a little ridiculous of course, like experience can tell you a lot but I used to see him in the lab a bunch like testing new stuff, but he was also doing high frequency oscillators and stuff that that did require a bit of tuning the tuning in a little bit of voodoo that you could slap some stuff down on a schematic and like we're like well I calculated things that I hope it works but he also did on on breadboard just to like, prove it to himself. But I liked one thing that he said he's like, if you can make it work on a breadboard, you can make it sing on a PCB. And I was like that's so true because it's true. Yeah, yeah, like especially if you like if you build it like garbage on a on a breadboard and it still works. That means you have a really good chance on a PCB I would agree there. It's really it just comes down from, you know how you design stuff and I designed stuff a lot like building blocks is I'll, I'll take, I'll take the design apart and build it in separate different ways. I guess you could breadboard that. But again, it's like, you know, TQ Fp 144 package part, it's like to put that on a, it's really hard to put onto a breakout board regardless, or let alone a breadboard. Like, what breadboard has 144 pins. You know, I'll give you a great example of something I did the other day on a breadboard, that is an excellent example of when breadboard and comes into play. I had a customer who had, they wanted a very cheap sinusoidal oscillator. They didn't want it to be digital, they just wanted something that like what's the cheapest way that you can get something and it doesn't even have to be a perfect sinusoid it just needs to be sinusoidal ish, basically. So So I built up a triangle wave generator, which you can basically do with two op amps that are in a feedback connection. Basically, one is an integrator and the other one is a comparator. And you get a triangle wave oscillator. And then by using some other components, you can make it either voltage controlled or you can control the frequency on. But the main thing that I use to actually turn a triangle wave into a sinusoidal wave is I just basically did a resistor into a pair of reverse polarity diodes. So using using the diodes, you can kind of shape a triangle into a sinusoid. But the thing is, like, depending on Okay, so depending on your supply voltage rails of your, your, that you're supplying the op amps, you'll get different amplitudes of the triangle wave. So you can either squish it harder or less into a sinusoid. And that was a great example for I built up on the breadboard such that I could throw it on a scope and then just quickly adjust resistors until it was the sinusoid I wanted with given the supply voltage rails. And that way I didn't have to build a PCB and then like guess at values for making the soil I could just do it and then build the PCB off of that. And it only took me like an hour so yeah, I mean, the last time I breadboard so that was for the wagon tack project. And I had to build that filter that was reading the coil spikes. Oh, like I'm like, Oh, this might work. And so I kind of breadboard it and of course it didn't work right away. Right? That it just cut just a couple of resistor values and capacitor values to get that roll off of that peak just right so that the basically I wouldn't blow up the Arduino. So yeah, shooting like 50 volt spikes, right?
Yes. Yeah. Yeah. In the five volt Arduinos. Yes. The Arduino I wired it up just straight away, it did not like it.
So what else is new on the penetrator? Rev to a bunch of silkscreen changes, we didn't move some components around to make it easier to build. made it a little bit smaller. So now it is it is five inches by 11 inches perfectly. Now. I'd like to make it five by 10 Just for the one to two ratio. But I don't think that's worth rerouting a big chunk of the board to make that work. But yeah, it should be ready by early January. Nice. Is it going to be in a machine in January, late January, it'll be in a machine. Cool. But early January, I'll get the boards back because I'm just getting them SMT populated. And then I'm going to stuff all the through hole on this bench behind me and then ship them off to everyone that needs one. So I ordered for when it goes to me one goes to one of our pinball designers, when it goes to the band and one goes to a person who's developing software. Nice. So it should be pretty cool. Those revisions are always fun. The ones where you already have proven like 99% of things, you make a few changes for all that like oops, issues that you made and then like you refine the silkscreen and stuff to make it just look pretty. I love those revisions because they're super well generally they're super fast, but they they're also just like, you don't have to worry about anything Correct. I know this board is going to work to worry about exactly rev one we didn't know if it was gonna work. It worked fine. It really though. Seriously, the only copper was we had to solder a wire jumper on the relay. Now one of the things we want to do for rev three is to make it better for integration into pinball machines. Because there's some connectors that are something devices that are like always a thing and depending On machine, like the what's called the ball troth, which is where the balls drain when they go through the flippers and they drain. That whole mechanism is the same in every single pinball machine that we build. And so it's got like four Optos, it's got two solenoids all this like stuff. It's like, okay, instead of having like, all those individual connectors on the main board, what if we made one connector? That was the ball trough connector? I'm surprised that hasn't already been done. No, not really, no one's really done that. And so we're like, okay, so we can basically, instead of having to run like, eight power lines to the ball trough, you run one power line to the ball, go figure Go figure, just to make it simplified, I think actually, like stern does that. But they have their own system. And they're super highly vertically integrated of a company. They've done that. And so we're going to do that. It just makes sense. Yeah, instead of running eight, and that when you can reduce your part count on the board, all that good stuff. But while I'm waiting for those rev to to show up, I got to start designing cables for the for the printer. So we're going to supply connectors that are basically a connector with all the wires populated. So like a big pigtail. Like, just, yeah, a harness, basically. So you can plug it in, and then cut what you need, and then solder to where you want to go. And I was going to ask you is what should I design those cables in? Ah, you know, what was going through my head is? Well, certainly sometimes at macro fab, I did quite a few wiring harness diagrams. That's what I was going to ask you. Because yeah, you were the one at the company that did that. I did a lot of harnessed diagrams, and they obviously wiring harnesses are a pain in the ass. Well, there, maybe that's not fully right there. It's just it's, it's easy to envision in your head. Sometimes they're really difficult to describe to somebody. And when it comes down to an engineering drawing, you really want it to be foolproof, and like easy to read, and very easy to just like get to someone and have them be able to describe back to you what they're looking at. Yeah, and wiring harnesses are kind of hard to do that. If he asked me, especially I've seen some. Well, I'm sure you've seen a bunch Barker, like, wire harnesses that go in in vehicles that have like, different lengths, and they spawn out at different locations. Yes, splices are the bane of my existence. Yeah, those are good lord. I would hate to be the engineer. That's the draw that up. So the, when I first started doing the wiring harnesses for customers at macro fab, honestly, I just did the drawings in I think it was Inkscape. Just because that was the only drawing program I had available that was just free that I could just use. And I just drew everything up in there. I actually drew up macro fabs Title Block first and then did all of all of my stuff around that. And so you could do see the thing about it is like, I wouldn't necessarily even do like a real heavy engineering program, like AutoCAD or fusion
zeigen probably use like Eagle schematic. Yeah, you totally could. Yeah, the biggest thing about that, that I've had trouble with in the past with wiring harnesses is dictating a, an appropriate length to somebody, like when you when you say, okay, it is, in my opinion, it is never appropriate to provide a wiring diagram to someone without appropriate links, links on there. Like if you say, I want this to be 10 inches. I know it's ridiculous to assume that it would be 10 inches, but like, a lot of people assume that they're gonna get something that's 10 inches long, like, No, you need to give that person a tolerance and give them a frickin reasonable tolerance. Don't tell somebody like I expect this wire be plus or minus five thousandths of an inch, you know, like, Okay, whenever you're doing a wiring harness, first of all, wiring harnesses are there to be a little bit sloppy half the time. So get
called cert. No, it's not called sloppy. It's called service loops. Oh, yeah, there we go. There's a good, that's a good way of redefining it plus or minus one foot. This is a good thing to keep in mind when when doing any kind of drawing. Remember that there's somebody out there that has to build what you're asking for. Yeah, so like, there's some poor schmuck who has to actually measure out the length that you're saying. So give them like, if you can give them plus or minus an inch. You know, that They'll be happy because and also, if you say something like, Okay, I expect this to be 10 inches plus or minus one inch. Don't be surprised if you get something that's nine inches long. Like that. You said that's okay. If you're not okay with that, say 10 inches, plus one minus zero or whatever you, like, just be reasonable, always try to be reasonable and make things very, very, very clear. Pictures, help. Diagrams help, tables help. I remember a lot of times what I did was I would draw the headers or whatever connector that was going on there. And I'd have a table right next to it that said, connect, you know, conductor one is purple conductor two is red, and then I had numbers next to each wire. And if you make it really bulletproof, you have a much better chance for success. So yes, but the beautiful thing about wiring harnesses is the drawing doesn't have to be accurate. You know, oh, you know, mean, it doesn't have to be to scale. No, no good. Draw the connector and then have four feet of paper. That's what that I got has a name. I don't remember what it is. But you know, like the squiggly line. It's like the I call it the lightning bolt cut. Yeah, the lightning bolt cut that Yeah, it's like that shows that hey, there's more inserted infinite. I viewed as there's infinite space in this little section. It tell engineers draw infinity. Yeah, I like that. Yeah, the lightning bolt cut us that. There's got to be a specific name for it. I don't know why. I don't know. You know, your what's funny is I took four years of drafting in high school, and we did never we never covered with that thing was called.
Huh, yeah. You know, actually, okay, so, here's the thing. When you do Gosh, when you're trying to show an infinite sliver of drawing, you can use the lightning bolt cut. But if you're ever trying to show like a pipe or a cylinder, then you use that like the S shaped one. Oh, yeah,
there's there is an S shape. One, two, there's a different name for that one, too. What? What g, d and t are? What is it? What's it all called for? Like drawing? Oh, I GD and T symbols. Yeah, here we go. I'm looking this up. What is what is the lightning bolt infinity slice. I'm sure it has a name somebody out there is probably yelling at us right now. But like, you guys should know this. I mean, we know just draw a lightning bolt when when this happens. But okay, so the whole boil it all down? When it when it comes down to headers are our wiring harnesses. Like those are unbelievably useful.
Yes. So I draw a lot of those for for this and get those quoted out.
I'm hoping to use like a local place here in Houston, we pretty cool to kind of make it all us or at least non China made. So that goes on my second topic. Non electrical components. And where do they come from? Question mark. Oh, yeah. Parker was complaining about this a lot this week. Yeah. So I've been trying to figure out, like with tariffs and all this stuff. It's like, okay, how do you reduce your tariff impact, I guess is a good way to put it, right. Which is don't buy parts from China. That's like, Okay, if we can do that we can reduce how much tariff impact we have on a product, right? How do you know where a resistor comes from? Steven? It comes from China wrong. Like that's, that's what I know. Right? Well, no, not asked no incorrect, actually. But how do you know before you buy that resistor, where it comes from? So it all just depends on where you're buying it from. And the only way you really know is you pretty much have to ask or request the country of origin documentation. Right? Correct. Now, so like, let's say DigiKey Mouser. is, I think that I had some copy from Digi key like, an DigiKey is terms of service, you have to get a quote from Digi key. And then they will tell you the country of origin. Oh, really? You can't just get assigned like part. Yeah, so you have to get a quote from like a salesperson to get the country of origin. Now. When you order stuff from DigiKey, Mouser, they stamp the country origin on the part, you know, on the bag. stamp is the wrong word they printed on the label. And then in your invoices. The country of origin is also in there. And so, I'm like, Ah, that's interesting. So I can get at least in Historical country of origin data for parts, right? And then I started going around and I started looking at Arrow arrow will actually tell you the country of origin of their stock, which I thought was interesting. So the actual, they will tell you on the website. And so I'm like, oh, okay, I wonder if I can ping. Like, how do I get that information from Arrow? Arrow has an API. I'm like, Oh, perfect. I can write a script that just like I could punch in a part number, and it can go to arrow and pull the country of origin. Except when I went to go request an API key, that part of the website crashed. I can't have it for Arrow yet. Yeah, exactly. So I was like, Okay, I can't do that method yet. And so I sent an email, no one responded yet. No, no, you know, they're like, shit, someone's actually trying to look. And then I started looking at Mouser. I'm like, oh, maybe Mauser can, will provide it through their API that's not on the website. They don't, it doesn't do that. But Mouser has a new API set up now, where you can like build requests in the browser, it's kind of cool. Like, I was able to figure that shit out. But that was kind of cool. It's like, you can build the URL string that you send.
With your, your scripting. It's kind of cool. And then I started looking at mousers. Like, they're,
they have an order API. So you can get all your past information. I'm like, oh, yeah, that's five years or six years at this point, macro fab information from Mouser. I can scarf all those PDFs, you can't do that. So the only way for me to do is to manually download all the PDFs and browser, which is fine. Well, you know, I vote every customer every part, right? Well, I was able to, I wrote a script that basically parses Mauser PDFs for, you get the part number, the country of origin and the HST code, which is, which is, yeah, that's pretty used. It's information that no one thinks about what's pretty important if you had to export this stuff. So I wrote that script. And I ran it through a couple of different PDFs from Mouser seems to be working pretty well. And I'm thinking about making it kind of like a I got talked with like the big, big wigs of macro fab if I can do this, because technically, it's like our information because all our PDFs, but maybe just hand a script to other people, too. They can parse it and maybe make a database online. So you can know historical data, if you order this part, it came from this country. Hmm. It'd be kind of cool. If you could allow people well, I don't know I'm thinking about this. Maybe it's not so cool. But well, I don't read too deep into this. But But it'd be it'd be cool. If you could see on a notice on a glance, see, like where your parts coming from and say like, I want to make sure it comes from XYZ or maybe I want to make sure it doesn't come from XYZ, you know, that kind of Oh, yeah, that's the idea is like, so I was looking at it. And I'm like, Oh, I usually buy Panasonic resistors. Right, because I just know they're good, high quality resistors. And you know, their partner provide memory. Yeah, the ER J CRJ. And so I was looking at him, and I'm like, huh, their country of origin is is China. And I'm like, I wonder if there's any, this is what spurred on. Like, I wonder if there's any non country of origin China of resistors borns makes them in Taiwan. Across the pond? Yeah, I saw I'm like, Well, I can this I'll have to do is just change all the boards. And now I don't have tariffs on my resistors. That's kind of cool. Actually. Yeah. Does. Does macro fab. The whole tariff thing happened since I've been there. So does macro fab, indicate what has a tariff and what doesn't. Like connect comes through the distributors and distributors have already marked it up. So right, right. Okay. So yeah, you wouldn't know. We don't we don't know. Now we can know, by doing this through
pre history, as long as like, basically borns doesn't change where they build those resistors then, you know, hey, the last time we ordered these, they came from Taiwan. And then you can always update that later. So I'm wondering if like having a website because I have that MF er.io website. I'm thinking about making this kind of the first. I've been doing a lot of like, research into like how to build like single page applications and stuff like that. Like maybe you can punch in a part number, and it will tell you hey, the last time we saw this part number It came from this country had this HST code, maybe it was had this pricing, we can add that stuff into kind of like a historical data, like historical database for parts.
The underbelly of the of the electronics world, you're going to start uncovering it. Slowly but surely. But um, it's actually very interesting how few, what's really interesting with parts is like diodes. Okay? I only found one company that does that make them in China. Really? Yeah. That Taiwan Semiconductor company makes them in Taiwan. are the only ones like for like, the run of the mill like surface melt? I can't remember part number off top of my head, but like, a regular like jelly bean diode for on for? Sure. Like, yeah, they're all in China, except this one company. There might be others. But like, I went through, like, about 20 Different manufacturers. And that found that Taiwan Semiconductor company, I'm like, Oh, they make them in Taiwan. Least according to the packaging. Yeah. Interesting. Diode. story happened the other day, you know, a lot of through hole. Small signal diodes come in that glass package that has the one little stripe on the side. But you can see inside of it, we actually came across two diodes in a lot that were backwards. Where they had the whole glass body, you could see the line, but if you held them up against another one, you could clearly see that the dots were backwards backwards. Yeah. I've seen those light up before. Well, that's no good. They're not supposed to turn into Light Emitting Diodes. Yeah, for a short period of time. So let me know in Slack, if y'all want me to actually make that thing happen, I think it'd be kind of cool. So and then, my last update is the brewery update. The electrical box needs wire management. It's just like, I'm showing up pointing at Steven and there's just like wire everywhere. Rag rat nest. You still wait you said was it by Christmas or by the end of the year you'd have it done? It said Christmas will be brewing a beer I don't, it's gonna be tough. That's, you know, that's 15 days away. Yeah. And so I got the electrical box just needs wire management now, which is basically I'm just gonna zip tie a bunch of shit and logical tape and call it good. And then I gotta run. I ran 120 volts through it, and it works. But I got it. I got it. It's supposed to run on 220 though, it's like I bump it up and see if it any sparks fly. Everything seems to be working though. And then all the majority of the fittings, stainless fittings arrived. Not all of them yet but I am working towards that. And I am going to think I'm going to try buying a 50 foot coil of half inch stainless tubing. Because someone in Slack told me like I looked at those straighteners before and I actually started looking at like ones that are pre built. And like results people get you can get a pretty good straight tube. So I'm like, Okay, let's give it a shot. It was funny. I was just going to the Slack channel to go because I read that this morning. Someone was like, hey, you know you can do it yourself. Sorry for that someone I don't remember the who it was. But yeah, I want to go read that again. Just because like, hey, that might be another tool that you could buy. It will be probably because it's like the price of the tool plus the coil is still cheaper than like buying sticks of, of straight tubing. It's ridiculous how expensive straight tubing is the body? The coil is. Yeah, robot tech is the guy from the Slack channel. He laid his podcast and the stainless steel tubing straightener can be made cheap to lengths of angle iron fiber or more roller wheels that will cut the tubing up to half the tubing size bolt two bolts everything together, clamped the two length of angle in a bench vise and run the tubing through which is like if you ever see like automatic wire benders, they basically have that mechanism on the back end. And in fact, we bought when I was at Microsoft, we bought a automatic wire cutter. It has that that basic mechanism on it. So yeah, just make that on a larger scale right that does half inch
or half inch stainless, which is super hard. You got this man. Put some uh roller skate wheels.
Actually, that's what I was looking at is like his roller skate bearings and then yeah, and getting something machine that would cup The tubing correctly. So yeah, because what I've seen, like I've seen that done before where the bearing what's called the race the outside of the bearing. Yeah has a, a contour in it that holds the tubing, right. I wonder if that's a you know what you could get V groove bearings? Oh yeah, go do some Viva groove bearings and then the mechanism we have at work as two thumb screws on the on the top. So basically you open it up, you slide your wire through, and then you thumb screw it down in it. You do a handful of bearings in one axis, and then you do a handful of bearings in the other axis, and then it's generally straight. And then everything's cheaper, but not really because you spend a bunch of money on the tools to make it straight. So I'm reading some of the reviews on this tube bender, a tube straightener I found Yeah. Candice do stainless tubing? I tried. It didn't work for me. It just turned the tubing into an octagon.
That's great. might not buy that one. Yeah, I'm looking at some of these straighteners in there in the 100 to $200 range. Yeah, I
don't even know what what size that? Oh, this one is 216 bucks does up to half inch in diameter. Yep. Here you go. It's like I'll need it anyways, for brake lines. Sure, share. As you slowly accumulate more cars, yes. Tools. And one of the massive cars I have is more than the tools? I don't know yet. They're probably equivalent. equivalent. As soon as you buy another car you by its weighed in tools and tools. So Steven, have you bought any tools recently? Have I bought any tools? No. But I have used the TI web bench to design a switch mode power supply a free tool. Did you see that segue that was solid that was really actually so in all in all, honestly, I have used the DIY bench to design another switch mode power supply. And so far, not trying to gush too much on on DIY bench. But I think unless they paint well, how will our lie if you want to sponsor us,
we have to say we are not sponsored by t I can tell you that for sure. I think in total, I've done five or six, switch mode power supplies using the TI web bench. And every single one has worked the way I want it to which is kind of cool actually. So I we got a product at work that we didn't really have a ton of space for doing a bunch of linear crap. And we needed to we needed some good regulated supplies. So I slept together a TI web bench design and totally got it working pretty well. I shouldn't even say pretty well, like fired up and the smoke didn't release, right. So that that's good. And I gave it right to our firmware designer, and he was able to load code on things. So it's basically just a buck converter that goes from 12 volts down to 3.3. Because we have a we have an entire design that this is kind of uncommon for what we do on a regular basis. But because most of our stuff is positive, negative 12 volt, but the majority of this circuit is just 3.3. And it's still doing a bunch of like digital audio, work in general. But we didn't need a whole huge analog range in this one. So that's why I was like, Oh, this kind of works a lot better for a buck converter, instead of just doing a whole bunch of linear crap. So I still need to test the temperature performance of it. And the powerup testing for seeing if there's any, like really nasty overshoot or anything like that. But that's a lot of I don't know, I like doing that kind of testing. It's it's, it's fun, when the testing isn't to just see if the circuit works. It's more to see like how well it how well it works. That's that kind of testing is a ton of fun. I love doing temperature testing. Especially like when you like when everything starts to become successful. And you see the light at the end of the tunnel. That's really fun. In fact, we've got some, we've got some analog circuitry that's coming up here soon, we're planning to do that I know is gonna need some pretty interesting temperature compensation. And there's been some really traditional temperature compensation in my industry, that is a lot of the parts that are used for that are going obsolete. So we're going to have to develop something new that works as well as it has for the last 30 years. And we already have some designs that we've done. General testing, we've actually done a lot of functional testing on Azim like we've built circuits with these designs and put them in cases and played music on them and everything works well. But no one has yet put it in an oven and said, At this temperature it is doing this and at this temperature, it's doing this and plot that. So I'm super excited because that's coming up.
Can you lay down the same slick riff down in Austin, Texas, verse Alaska, that's you. But here's the thing, we've had that conversation, that exact conversation because that like matters,
in fact, so there is one band in the world that has actually played on all the continents of Antarctica, Metallica has played on Antarctica? No, no, it's a total Metalocalypse. Yeah, I swear to God, they they got like this little dome thing. And they put it there. And they invited Well, I mean, I'm sure we're a bazillion dollars, but but it wasn't, it wasn't a very big show. But they did it just because and if you've ever seen the show Metalocalypse it's totally that. But but if you think about it, like they had to put together this whole, like dome thing and do some kind of environmental, whatever, such that their electronics would work. But yeah, I mean, the reality is, you might not think about it, what if you're designing something for like consumer electronics, but somebody might take it to Antarctica and try to play it. So you do have to think about that. And it's funny, because like with our devices, we put them inside of a case where there's a lot of other things that are getting hot. So we sort of assume that okay, well, everything's always going to be above room temperature, but not necessarily. It could be played outside in Antarctica, where it's not above room temperature. So you do have to pay attention to that.
Well, what's the room temperature Main article? Where temperature the rooms that mean? Temperatures kind of the same everywhere, right? Or you would hope that it would be? So so I don't know, like that. That's a bunch of fun. So yeah, this this SNPs that I designed, I did a lot of work on the layout for it. Because
I try, even if it's not required, I try really hard to stick to good engineering practices for FCC rules, and radiated missions and stuff like that. And a lot of these data sheets, I think it's funny because they call out like, here's a good layout for, or here's good layout rules for this kind of switch mode power supply, which is mainly, you know,
solid, uninterrupted ground planes, very, very small current loops between whatever switching transistor and whatever inductance is available. So, it's a lot of that stuff. But one thing that I think is funny is, is a lot of times you open up these data sheets and go to that, I don't know, 18th page where they have the, the layout guidelines and things, and they show their like, perfect layout. And it's always just like the few components they need with these, like massive planes that like they are able to get the lowest impedance and they're just like, well do this. Do my circuit has a lot more going on than yours does. I can't do your thing. It's like It's like every one of those those example circuits is done on like a 24 inch by 24 inch circuit board. And they're right in the frickin middle. And optimal cooling. Right? Right. The thing though, a lot of times they usually well not a lot, they call out like make sure that your input voltage in is as low impedance as possible. Your ground path is at low impedance possible your loops are low impedance things. And so when I do SNPs is I usually try to stick to polygons for all of my copper fills. I don't do a lot of trace work. In fact, my boss was when I showed him this design the other day he goes, Man, you really like polygons because a lot. I do that a ton in my power supplies. Do you do polygons much in your layout? For power circuits? I do. Yeah. Yeah. LBOs or switchers? I'll do a lot of polygons. Actually, Pinter has a lot of that coming off main power connectors just like well, we need to flow, you know, six amps at five volts through this trace somehow.
Right, right. Yeah. And like, if you're talking about five volts, then your clearance from whatever copper, you know, pour or copper polygon to another copper polygon. I mean, it can be 10 thousandths of an inch where they can be small. It can be really small, but basically my thought is I'm going to To get uninterrupted ground planes that fit all of my current loops, such I keep everything super tight. But I have the lowest possible impedance to all of the pins, which means I'm just filling my area with copper. And I, you know, to be honest, I've been super successful doing it that way. I've seen a lot of just like, trace traced out SNPs designs, and they always make me cringe a little bit, because I'm just like, yeah, sure, it'll work. Because you I mean, the right things are connected to the right things. But I'm always like, do you really know how it's emitting? And frankly, you know, I don't either until I go and test it. But it's also like, there's a much higher chance that that, you know, using big copper pores or,
you know, polygons is going to give you a much better chance of success. If you do it that way. I know, I've always I've always worked that way. A big fat trace is no different from a polygon the same shape, though. Well, not necessarily. But yeah, I mean, you got to think about how things are actually flowing, right? Like, that's, that's one of the biggest things is like, where's it coming in? Where's it going out? And high frequencies, things start to become more like strip lines, right? Where you current flow directly underneath where you're driving them. So yeah, you certainly, especially if you're talking about a big ground plane, you start to get to steer the current wherever you want it to go. So we'll always got to pay attention to that. At the height, I'm doing air quotes here, higher frequencies, you know, so I love doing that. I think that's I think that's a ton of fun. Power supply design is killer, when it comes to that kind of stuff. Yeah, I'll have to show you the when when I get the the board for the the badge power supply and show you how I did that. Nice. I wanna, I want to check that out. The I studied under an engineer at my first job for PCB layout. And he was unbelievably anal about using polygons. Like I would send him my work and just be like, hey, what do you think about this, and he goes, those are traces, not polygons, like redo it and was like, ah, but like, after I did it for a while I was like, Man, I kind of actually really liked this. And, and the first big eight layer board I did for them worked great. On the power supply, there was like zero power supply issues. But that's because I went through like six revisions of him being like, the impedance here is going to suck. So do this again. So I got another thing that I'm kind of curious about. So I finished up a quick layout the other day, that project that Roz and I are working on that rackmount preamp that I talked about a few weeks ago, I did a whole PCB layout for that. And on that, that layout, it just worked out because I want all of my components to be on a centerline of the front panel. Some of my components have different stack ups than others. So like for input and output jacks, I ended up putting them on separate boards. And I'm just going to connect those boards with actually a small SMA connector and an old coax connector thing. But I didn't want to order multiple different boards. So I just did mouse baits and made like an assembly board of everything, which you know, not particularly uncommon. And in my head, like these are all going into the same product. So I make one board that has mouse bites all over it. So I uploaded the board to JLC PCB, which I did I order a lot of boards from them, and ran that the other day and I got an email coming coming back saying like your board has multiple designs on it. We're going to charge you extra for it. It's like a few bucks or whatever. I don't care. But I'm curiously how many PCB manufacturers do that charge you extra for what is called like a multi design? Upload because like, in my opinion, well, they don't know what my different boards are. They could technically be for different projects or products. But why does it matter to them? You know, just I've got extra drill hits and mouse bite tabs, I guess. Is that extra work for them? Or it's it's extra tooling on the CAD side? Yeah, because they have a when you upload a single design, they have that in their pricing, because I deal with this a lot. Yeah, we're a front end for people uploading their designs. When you upload a design there is baked in cost of tooling. Time for making sure your files are in a format that Like the machines that are building your PCBs can read. And so all that a single design is kind of baked into the price for them for the square inch price. But if you have two designs now, that's basically twice the amount of work for that for like, let's say routing out, although, yeah, I can see that like, because now they have to go in and they have to make more toolpaths for their CNC to route all those little channels. And that's not and that is not baked into their square inch price. So they have that. You're right. It's only a couple of extra dollars, but they want that couple extra bucks. Yeah. And that makes sense that that doesn't make sense. It was just one of those things where I went back and looked at their little configurator thing. And I could have chosen, hey, my board has three different designs that I have separated by mouse bikes. And I probably should have done that. But I overlooked it when I ordered the board. So but I was also sitting back thinking like, wait, wait, why am I getting charged for this? And why does it matter to them? But I guess you're right yet like the CNC work is extra time for them. It's just extra human hours clicking buttons, right labor effort. Yep. Yep. Cool. So those boards should actually come in soon. I'm super excited about that. Just because they're sort of I designed one to be like a billboard board in a way. So I have a main board and then a billboard that get connects to the other one at a 90 degree angle and soldered with Phillips No, I thought about that. But I was I just went with 90 degree headers because I'm actually passing signals between the two boards. But I was thinking about I did a lot of thought about, okay, solder fillets across it for extra mechanical rigidity. But I also thought about like making like teeth that stick down into slots in. Yeah, exactly. I like that kind of stuff. I liked that too. But I was also like, it doesn't matter. And also these are like super prototyping boards. We are going to give these out to some people to get their opinion on on the board but or on the function of the board. We're not giving these to anyone for like, Hey, tell us how this PCB looks like. So the solder mask looks great, but the silkscreen is a little off. penetrator rev three should really have our 13 Over here, not over. On the left side of the component. Oh, man, I cannot wait till the silkscreen shows up because I put the big pennant tar dude on the back of the board. And he's like, the only thing on the back of the board. Oh, nice. Pretty cool. So you know, quick fun, I just kind of slapped him up there. Because I kind of want to do like, because on the backside of the board is only like, eight or 10 components. There's not a lot. Yeah. So I really wanted to like, like, when we're finally done, like, Okay, we're gonna go to production is like, get someone to do art on the back of that board. Because you have five by 11 inches of huge, and it's, quote, free art.
We can vote on it. Right, right. So we so work we
design and manufacture a lot of synthesizer modules. And sometimes we will do trades with other people who design and manufacture synthesizer modules just because it's like, in the family kind of thing. And we actually got one the other day, and this particular gentleman does some really awesome artwork, and their panels look super cool. And so we opened it up and everyone's like gushing over it. And I turned it over and looked at the side. And the potentiometers that were coming off the panel were at like a 20 degree angle like they were like Oh, and and some of these potentiometers whoever had assembled it together forgot to clip the you know, those little tabs those anti rotation tabs that are on the pot bodies and they still assembled it that way which means that they probably put it not on it just cranked the living hell out of it. And I felt so bad because it's just like, I we know we were all like, gigging on and stuff and
not talking trash in any way. But I feel bad because it's like we get it's not a competitor or anything but we get a friend's module and we just start dissecting it and like looking at the PCB like oh, we would have done this different but like this is what's the whole point though. We'll learn from each other too, right? Yeah, that's the whole point is to learn from each other and improve someone else as well. You know, Okay, quick rant. I freakin hate those anti rotation tabs on potentiometers those should not be a standard. Like those should be an option that you add to the PCB. Not Never once have I ever used those. I've always an ever I've used them I've ever used. I've had to Clip them off and we clip 1000s of them at work because they're worthless and nobody freaking uses them. But they come as a standard and I freakin hate it. I hate drill a hole in your in your lovely looking faceplate. And then you always have this hole and you think it might be covered by whatever knob it is not covered by whatever knob and it looks like crap. So I saw my air conditioner for the wagon. i The the, the potentiometers have a high that had that that anti rotation knob goes into the I just have another hole. But no one actually has a sticker that goes over the whole thing. So you know what? Position your fans at and whatever? Yeah. And then up, I'm like, perfect rotation. Okay, if you're
purely talking about chassis mounting, like that's the only thing that holds on. That's chassis mount, it's, it's nice. But if you have a PCB mounted pot, you're correct. Doesn't need that crap. Like, I hate when you purchase it from a manufacturer and it comes standard with it, which that's the standard for these things.
And I bet you because there's only one mold property for that piece of was it? It's like zinc. It's like diecast shank or magnesium or something like that? Yeah, it would not be magnesium. That's way too expensive. No, you never know, maybe. It's probably zinc. Or we think it's think it's actually like all flavors of the Sun metal. Know, what it is, is it's kitty litter that's just been pressed together. And two different residents of metal used kitty litter actually. So if there's any potentiometer or manufacturers listening out there, just make that your standard offering to not have the rotation thing if you have a PCB monopod that had to make another another guy. Yeah. It's funny, I actually contacted a piece apart manufacturer the other day, and I sent them a drawing where I had like deleted that little thing. And they were like, Ha, we haven't thought about that before. It's like really like you. You should see, you should see the floor of my manufacturing facility, it is covered in your little nubs. Yeah, you have an entire industry that hates these things, right. It's like, oh my god, really? Okay, that's things, even if they can give you that part for the same price, or actually a little bit more, I would pay more I would pay you would pay. Well, you have to figure out how much labor you're spending it. But yeah, it could be worth a couple extra more cents of pot to have that thing actually, not even there. You know what's going to happen? They're just going to remove it on their end.
pay someone to remove it. Yeah. And then remove it. Yeah. Okay, let me put this into perspective. We did a Customer project the other day that had, it was a 500 piece run. Each one had 24 pots on it, each pot had a knob to do. And we paid a guy for 10 hours to clip all of those things. And he wasn't slacking. It was it took 10 hours to clip that many pots worth of nubs. Okay, so, perspective like,
we're gonna do some quick, quick math. So quick maths. So 500 units, right. 500 units, like 24? Four. Yeah. So 12,000 pots. Yeah. How much does this guy get paid? I don't know how much this guy gets paid. Let's just let's just go with 15 bucks an hour? Yeah, sure. Let's go with 15 bucks an hour. For like, 10. That's 100 It only cost you 150 bucks to do that. Yeah, sure, but that guy could have been useful doing something else. That's true. That's a compulsive, worthless task. If you ask me. It's 12,000 pots. So you are looking at
a full day of the week is shot. You're looking
at a little bit more than a penny. A potentiometer is what you paid to remove those things. So price wise, if it was a penny, it would be worth it. But it's the principle of the matter. Okay, okay. So that no, no, we're gonna play some some like counting games here. So, yes, sure. Let's say we paid that guy. 150 bucks to clip those pots.
You could have found someone that was like, you could have found someone that was just hanging outside your building to do it.
Sure, sure. No, no, look, follow me on this accounting game. I'm turning into a business man here. You ready for this? We paid that guy 150 bucks to cut all of those nubs let's say if we had had that Guy building a new product, not just clipping pots, let's say labor would have grossed US. 500. Yeah, you're talking, you're talking about grossing right on top of what on top of that. So take the $500 plus 150. There $650 that were out that we could have had. Right? Yeah, I agree. Now we're talking about more money there. And screw the, you're talking about, you're talking about just utilized. You're talking about utilization now, exactly. There's a whole different ballgame of calculating net. Net Worth. You can make numbers do anything. That's you can make numbers here. That's what it boils down to. Right. So, yeah, and yeah, no, this guy was not allowed bathroom breaks. He wasn't allowed a lunch. That was just 10 hours of straightened up cutting. I'm joking. Okay. Oh, man, let's go on to our phone. Yeah, let's do that. Yeah. Okay. So this week, we've got Ben Heck, Norton, who has been on the podcast a couple of times. He's got his single chip, Atari 2600, portable project done. This is a project that I've helped him with. And it's basically a we talked about this on podcast before he's had the baby. He's had this project going for a decade. Yeah, long, I think longer than decade. But yeah, okay. I think, yeah, at least a decade. Yes, at least a decade. But at the very end of the Atari 2600, which is a video game console for people who don't know, Atari made a all in one chip that had all the components that was inside on the circuit board in one chip, at the very tail end of the of their, the lifespan of that product. And Ben managed to snag one like decades ago. And he always wanted to make a portable with it, he couldn't get to work. And then he found out that I actually had one as well. And the reraised, reverse engineered the schematic. And he got his working after 10 years. And he made a cool portable, so go check it out. And if anyone out there has one of these single chip, Atari 2600, juniors, let me know because I just want to know, like, what serial number and stuff it is because like, seriously, like, I think Ben and I know like, there's only three that exists. Like, I have one, he has one and there's like one random dude on the internet. How many of these things were made? For? We have no idea for that could be more. But yeah, it's um, it's even like the official schematic for this chip is incorrect. Right? You guys had to like pin it out. And you're dependent on ourselves because the they're the official schematic uses. They were going to use a dip 48 package, and they ended up using a dip 64 And so there's a lot of no connects on on the chip. Yeah, it's weird. But go check it out. I'll post it we'll post the YouTube link in in the podcast description. The next thing is the wormer is that warmer multicolor LED beacon a beacon displays 2000 Color 200,000 200,000 colors. So this is a light tower that is USB controllable. So like a notification tower that you would put on like a, a pick and place machine or CNC machine vote, you know, the status of the machine from you know, across the building. So you know, oh, that's yellow. We need to go figure out what's wrong with it. Green is good. Red. Red is bad. Green is good. Which, okay, so these light towers? Um, okay, kind of cool that it can display 200,000 colors. You really only need three. Yeah, I'm getting that. That's what I'm getting at is I'm like, What are you going to have like, oh, it's magenta. Now. What does that mean? Yeah, what does that like? Can you from a glance across a building? Find two different shades of like, say blue. And you know what that what it is? No, just I think it's a little silly. Now, having multiple colors like maybe you could have seen like four color towers. And I've seen five color towers. I'm like, Okay, there's some use for that. But like 200,000 colors. It's a little ridiculous. Like, yeah, you're gonna waste time like customizing your favorite color when it just needs to be some shade of red some shade of green and you know, whatever some shade of yellow but red is an aggressive color. Button. Rouen is not yet ready to use maroon, actually. So the large CNC I use at work has four different colors. And at first I thought it was super cheesy, like ridiculously cheesy because it doesn't have a light tower. The entire gantry of the CNC glows colors. Like it's it looks really like cyberpunk CNC kind of Yeah. But I've learned to really, really love it because it's super bright and absolutely unmistakable. Like, if it's green, it's running, there's no problems. I can be all the way across the building and look over and see my like, favorite green color that is glowing. Because it's still running. And if it's red, there is a problem or if it's yellow, I need to address something, you know, like, it's super easy. And like I said, at first I was like, oh my god, this is so cheesy. But now I'm just like, that's amazing. Super great. But the other thing is, this multicolor beacon is over $300 Oh, geez. I bought lock light towers that are like five color light towers with a siren and like 20 bucks, like 20 bucks off of Amazon. Like you know that that was a really that was a very early macro fed project, the fart tower? Yes, yeah, maybe we shouldn't make that or is or our inaugural 2020 projects. One project to rule them all. The fart tower. It was a guy said that we were going to do like a, it was a tower that would had a methane detector on it. Right? It basically had a voc detector. And then it had a light sensor so it can know if the light in the bathroom was on or off. And then you had a a a PIR, I think it's what it is sensor, person, infrared, I think anyways, it can basically detect if people are there. And so you can basically have it so you can say, you know, there's people inside the bathroom or not in the bathroom without having to use a camera or anything super. It's all like there's automatic like, like, better smeller devices. When you call those they spray aerosol to make the bathroom smell better. Yeah, right. Great. Great. Yeah. So the Yeah, I'm I wonder if if some of our listeners are like, Did you Did you guys ever actually do any work? Like? We did a lot of work. That's why this thing doesn't exist. The concept and the parts exist, but yes, the final pass will have that box. Do you really? Yeah. Okay. Did you do you still have what's it called? Box MacBook face. That's gone. Ah, I did reinstall the speaker back in the ceiling, though. Okay, yeah, we had to go over to the newer location. We pulled out some of the PA system from the ceiling that was from the previous tenant. And then we just cut a hole in a cardboard box and shoved it in there. And then Parker and I had we had a sound system that was actually fairly decent for just a speaker. I have it right here. Do you really? Oh, look at that. Oh, I hacked a bluetooth module onto the back with some sticky foam. And so the old PA system, you could Bluetooth connect to it and then play meatloaf. We would Bluetooth it Yeah. Honestly. The the engineering department every day was either meatloaf or the Doom soundtrack.
Yeah, that was for about a couple of months. That was that way. Which I was okay with that. I like both of those.
I didn't have a problem with it now. Other people didn't. I don't know. That's their problem. Not ours. Right. And we had a we had our own Well, I guess Logistics was in there as well. So okay, logistics was not into meatloaf, but they liked the Doom soundtrack. They didn't like the Doom soundtrack. Good times. Oh, we should wrap up this podcast. Yeah. So that was the macro fed engineering podcast. We were your host Stephen Craig and Parker Dolman take it easy thank you yes, you our listener for downloading our show. If you have a cool idea, project or topic let Stephen and I know Tweet us at Mac fab at Longhorn inch. newer at analog AG, or emails at podcasts at macro fed.com. Also check out our Slack channel. We talked about that select channel a lot today so go check it out, give us some ideas. Say if you like meatloaf or not, you know stuff like that. If you're not subscribed to the podcast yet, click that subscribe button. That way you get the latest episode right when it releases and please review us wherever you listen to helps us that helps this show stay visible and helps new listeners find us and I think we have a guest next week. Right Steven? We do have a guest next week we're talking about coax design and manufacturing with wood
Ever have PCBs that solder just will not wet and solder to? You probably thought it was improper soldering technique but that was probably not it!
This week we are talking about Breadboards. Is breadboarding a circuit or design still applicable in today's SMT component dominated world?
What lore have you discovered in component datasheets? On this episode, Parker talks about how he picks electrical components and risk management.