Parker and Stephen discuss Chat GPT-3, a language processing AI system, and what it can mean for engineers and society.
Are Stephen's LM338 regulators fake? Parker uses X-Ray vision to find out the answer! This and an Adventure in Plastic Injection Molding this week.
Why are all Python PDF creator modules just terrible to work with? Does anyone have one they like? Help me. Oh and Stephen's CNC machine is moving!
Parker is an Electrical Engineer with backgrounds in Embedded System Design and Digital Signal Processing. He got his start in 2005 by hacking Nintendo consoles into portable gaming units. The following year he designed and produced an Atari 2600 video mod to allow the Atari to display a crisp, RF fuzz free picture on newer TVs. Over a thousand Atari video mods where produced by Parker from 2006 to 2011 and the mod is still made by other enthusiasts in the Atari community.
In 2006, Parker enrolled at The University of Texas at Austin as a Petroleum Engineer. After realizing electronics was his passion he switched majors in 2007 to Electrical and Computer Engineering. Following his previous background in making the Atari 2600 video mod, Parker decided to take more board layout classes and circuit design classes. Other areas of study include robotics, microcontroller theory and design, FPGA development with VHDL and Verilog, and image and signal processing with DSPs. In 2010, Parker won a Ti sponsored Launchpad programming and design contest that was held by the IEEE CS chapter at the University. Parker graduated with a BS in Electrical and Computer Engineering in the Spring of 2012.
In the Summer of 2012, Parker was hired on as an Electrical Engineer at Dynamic Perception to design and prototype new electronic products. Here, Parker learned about full product development cycles and honed his board layout skills. Seeing the difficulties in managing operations and FCC/CE compliance testing, Parker thought there had to be a better way for small electronic companies to get their product out in customer's hands.
Parker also runs the blog, longhornengineer.com, where he posts his personal projects, technical guides, and appnotes about board layout design and components.

Stephen Kraig began his electronics career by building musical oriented circuits in 2003. Stephen is an avid guitar player and, in his down time, manufactures audio electronics including guitar amplifiers, pedals, and pro audio gear. Stephen graduated with a BS in Electrical Engineering from Texas A&M University.
Special thanks to whixr over at Tymkrs for the intro and outro!
Welcome to the Mac Feb engineering podcast. We're your hosts Parker, Dolman. And Steven Craig. This is episode 275. Yes, it is. Yes. Yes. So okay. I kind of our general rule here. Well, it's not even we have a rules here. Well, Parker instituted this. In stated this a while ago. In order for us to talk about a project, you have to be at least 50% done with a project The only rule? Right, right. Because how many times have we talked about, this is an ongoing joke with us, but so I have something I want to talk about that I am 50% of the way done with, I've mentioned pieces of this project on the on the podcast. And if you've been on our Slack channel, then you see me posting pictures, but I've got this audio compressor that I've been working with. But as a part of this compressor, there's a handful of control knobs on the front that are stepped attenuators on them. And they're super like wanqi Hi Fi not hifi, but like a pro audio attenuator to 24. Position dual. What is it? Dual deck matched attenuators. So like, every one of those words, as I say that like it's like touching, touching, just like the money signs go up and up and up. And in fact, I kind of recently looked at these to see like, if I wanted to replace these, how much would they be? And I think they're like $95 apiece for these. And there's four of them inside of this, this project I'm working on. So they're a bit. Okay, I just had to Google a picture of what you're talking about. It's like a, it's a rotary switch. It's a rotary switch, but with like resistors and stuff all over it.
Well, here's the thing, these particular ones that I have, don't even come with the resistors on their $95 for just the switch. But it's a Skookum switch and I got a little bit of Show and Tell so the people on our Twitch can can see this, but so I'll just describe it for all the audio people. But these these rotary switches have a really nice like,
you got to do some ASMR it's got some chunky, really slow and slow. Yeah, like Can you can you actually care? Oh, yeah, that's the stuff. Yeah, no, it's super good. And like I said, dual deck. Big old fatty. That's like a dual pole. That's right. Yeah. Yeah. So it kind of so the input to this compressor is transformer coupled. And so you have XLR, you have your your your two signal ends go into it, they both go to a basically a stepped attenuator. So that's what each deck is.
It's a 24 P. DP switch? Effectively. Yeah. It's, it gets really ridiculous. And so I disassembled one the other day, because the story goes that I bought these right after college right after I graduated college, because I was like, I'm gonna do something with these.
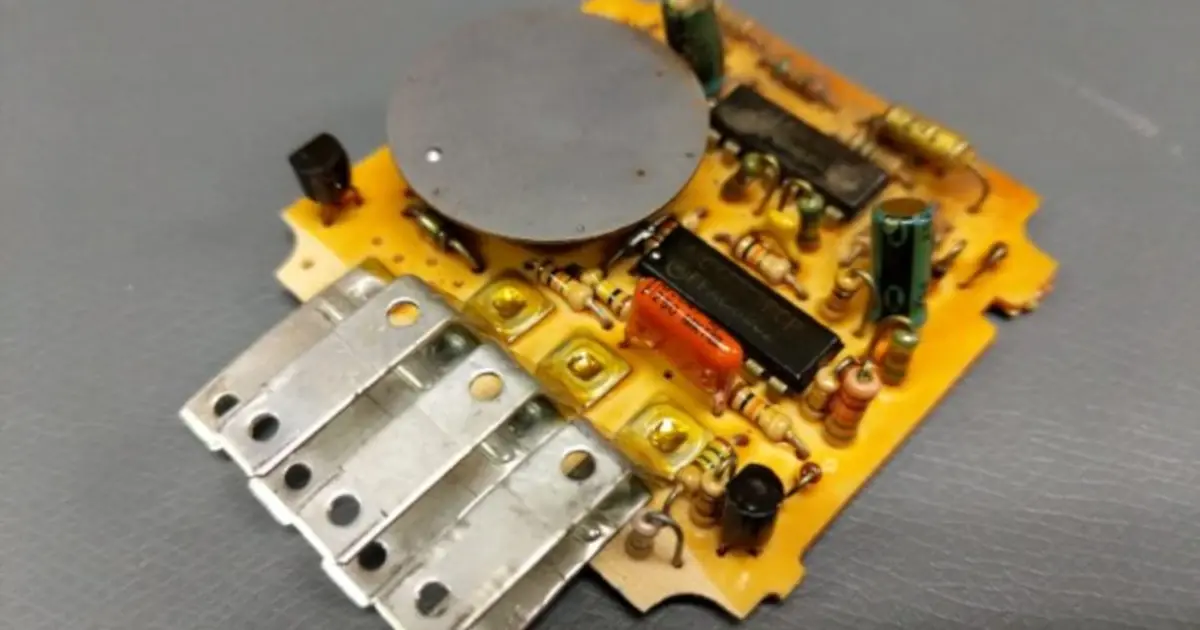
They already got that vintage taste to him now. Yeah. Thanks for reminding me. So I bought these, and I soldered on a boatload of resistors on them. But I made a ton of mistakes on it. First of all, the soldering is garbage. Second of all, I used like 5% resistors on them. So like the whole purpose of having like matched resistors and precision attenuators. I just blew it entirely out of the water. Yeah. And I used one resistor per step. So the accuracy of every step is only so good, right? Because effectively what this is, is think of a voltage divider that has 24 resistors in a line, and you're just tapping in between each one of those resistors on there. So the other day, I broke this, the one of these rotary switches apart and I was like, Could I just replace the rotary element in it, that is the actual selector. And lo and behold, it's just a PCB with gold plate with with enough plates on it. So I reverse engineered this basically redesigned this PCB, and instead of individual resistors, I did a little bit of Excel foo, and made a log like chart effectively, such that I could get exact positions off of this thing. So in my application, I need it to be a total constant resistance of 15k. But then I want each tap to be there. A specific ratio ratio of
Yeah, yeah. 24 ratios of 15k. Exactly, exactly. And, and they The good thing about this is this particular resistor or this, this attenuator feeds a very, very, very high impedance, so don't have to worry about the load that's connected to this. So in other words, I can just calculate all the resistors for this. And I don't have to worry too much about what it's driving. Yeah, has
very little current that goes through this device. Right, right. And yeah, like the actual, so each one of the tabs is connected to something that's in the Giga ohm range. So the actual load of what this attaches to, is not going to drag down any of these values as I switch through. So what I designed is I've got it such that the 24th position, if you turn it all the way up is just straight pass through. And then it's one dB steps as you go as you click all the way through until you get to the last step, which is basically dead short. And so it's negative infinity dB. So it's got 22, effective DBS of range, all the way down to zero. And so basically, it created this giant resistor string to get all of these exact values. And they all add up to 15k. And if you've ever tried to do this, or something of this sort, you end up with, well, effectively, what I'm trying to do is make a perfect log pot in a way. And actually, if you look at our Slack channel, I posted a handful days ago, I actually measured a log pot that I purchased from Mouser to get its actual curve, and it's not logarithmic at all. It's to linears linear curves that just have like a tip point such that it approximates so it's like yeah, it's got a that to it. Effectively, yeah, it's got it's just got to it goes linear for some to some rotation of the pot, and then it changes to a different linear slope. And goes, well, those potentiometers are on like, what 10%? Oh, 20 or 20? Yeah, so that's the like, so they have so the engineer, right that the manufacturing engineers like, Okay, we need to make these super cheap. So they drew the log that's supposed to be and then put a 20% bound above and below it, and then drew two straight lines, I think I think what it is, is it's easier to make a linear carbon track on Oh, wiper. So for 60 or 70%, they do one linear slope, and then for the remaining 30%, they do another linear slope, it's probably way more down to manufacturing. But that's sort of the whole point, if you want, if you want like a duel deck potentiometer, that is logarithmic and matched, you ain't gonna get that by just buying that off the shelf. Hence, why these things even exist. These rotaries attenuators. So now, I came up with this list that approximates or does a pretty damn good job of getting close to logarithmic attenuation. But I ended up with a boatload of resistors, none of which exist in real life, like these values just are absolute ridiculous. And in fact, almost all of them are like two or three digits to get it to be accurate. So the question is, like, how do I want to go and actually pull this off? And how do I get those values? Well, I've been searching for for a bit and I found a place. I apologize, I don't know the person who wrote this code, but I do have a link. Here. The website is caffeine owl.com. Unlike the name, there is a calculator called RAS calm resistor combination. Basically, you can type in whatever resistor value you want. You can say, however many resistors you want, if you're willing to do series or parallel combination, or both, and your series of resistors, ie 12 or 24, or whatever. And it will go through and it will just chug through millions of calculations to find the combinations they get exactly what you want. So what's nice is I found with four resistors, I am able to to nail like exactly, every single one on there. So what I'm doing is I remade this board. And each position has four resistors in a weird series parallel combination that exactly nails every single point on there. It ends up being monstrous because you got effectively you have 23 resistors on this because I have infinite and zero dB as the so 23 resistors times infinity. Oh, I apologize. I apologize. So uh I've got a, I've got about 50% of the project done. So I'm willing to talk about that now. Now you're doing it with all through hole resistors? Nope. So you actually gonna make a little SMT board? A little SMT board all? Oh, 402 resistors 1% I wish I could go with 0.1. But I'm just not going to do that, I'm gonna go to a ones. No, I don't want to go that small, I want to actually be able to look at them. But here's, here's the best part for this $90 switch. The, each one of the actual decks is just a PCB with enough traces on it. So all I have to okay, I assume you're saying that you're replacing that board, this board, I just have to re manufacture this board with all those resistors on and pop it in. And I get exactly what I want. Oh, it's gonna look so nice. It's gonna look really sexy. On top of that, okay, so if you look at the context on this, apologize to everyone who can't see this, each one of the contexts is, is separated by a gap. So this is a break before make style switch, which in my application is actually not great. Because that provides that makes a pop every time you switch. I'm going to adjust the pads. So they have little fingers that cross over each other. And they and conservative wiper goes over both before it switches over yet. So I'm going to convert it to a make before break so you don't get nasty pops as you turn this. Oh, yeah. The amount of work I go through for this is amazing. This is one of my favorite projects you've done. I'm just I'm just super happy that all it took was reading like their guts of their switch is something I can get made. Yeah, gadget junkie says and thus begins Stephens lengthy career in custom Switch Design. Dear Lord, I hope not. So I'm really looking forward to this. Also, I want to get them in macro fab read, so I can have these look all sexy. And with the look great. Yeah. So the length I'll go through for something that really kind of doesn't matter. It does matter. Because it's good to have a perfect, well, not perfect, you can have a discrete logarithmic potentiometer. That's right. But not only that, it's discrete, but it has the exact values I want. Because you can purchase a 24 step attenuator right now, but it doesn't have one dB steps. It'll have like two and then four. And then what like there's more accepted combinations of steps, but I want one where each step is one dB, and exactly one dB. And that's what's that's what's going I have a whole Excel spreadsheet, I'll pass that off. And in case anyone wants to check it out and see all the wacko resistor values. And I put all the combinations of resistor parallel series in there too. Yeah, it's kind of funny, because I'm not looking forward to it. But it's, it basically uses every value of resistor because it's just like whatever worked, you know. Yeah. So I'm excited to see that. Yeah, I'm pretty stoked to. Alright, so over the weekend, we're actually I'll say last week at last week after the podcast. Chris Chris Kolbert, who is the production manager at macro fab.
He brought in a 3d print that he did on his, he has a hobby level SLA printer, and I've known about SLA printing before and have ordered stuff that's been SLA printed. So SLA printing is like resin so it's like a big goop and then you hit it with UV and it solidifies the polymers locked together and it makes a solid thing I've always done FDM which is like you take solid plastic melt it and then it and then shape it by extruding it out like a hot glue gun.
And but he handed me this print that he did on like a $200 SLA resin printer, and I looked at the print quality and it's just amazing. And so I was like Okay, I gotta try this now. You know, apparently they've come down to a price where I can just like just go order one right and
off Amazon and not feel super guilty about it right.
So I ordered a the same one that he has, which is a L elegoo.
I think e l e g Oh, isn't that like one of those Amazon wonder brands? Maybe it could be I think I have an elegoo Arduinos somewhere. Yeah, I think they
make a lot of stuff. But they're Mars too. And like, so my FDM printer, I've got like a Monoprice duplicator six, which is like a one one how something like that. That printer cost the same as this printer, by the way, same price range, like 300 or $400. Basically, it took a couple $100 worth of parts to get this printer by my Monoprice. One to print how I want. And I'm printing like super high temperature polycarbonate and stuff. But it took a long time you remember like me calibrating it and tweaking the value so that when you did that calibration cube it was 20 by 20 by 20 millimeters, right?
This thing, I took it out of the box that on my desk filled the the goop chamber, and it printed a 20 by 20 by 20 millimeter cube pulled it out and it was 20 by 20 by 20. So in other words, it's a real 3d printer that you don't have to do any work on. Correct. Wow, it was unicorn dust. It was kind of amazing. Actually, the quality of the prints has the line thickness like the the slices, I guess you can call it are so fine on this printer too, that you just don't get lines. Let's see. So this is a piece of a model I'm working on. Is that on our wing? Yes, it is in our wings. But like there is no lines. Yeah, it's just it looks like it looks like cast plastic. Wow. I am amazed at the quality. So okay. I've known about this technology for a while, but I've never actually used it or seen it. So the question is, why isn't every 3d printer this? Is it more expensive? Is it less? Is it more difficult? Like what's why not? It's so I've only been working with this technology for about a week now. So experience very limited. But the print speed is interesting. Because on the FDM printer, you can do like tricks to the your model and stuff to speed up printing, because it's printing a continuous line, basically, you know, all the time. So you can print stuff hollow, you can print stuff. And you could change the orientation because your printer is gonna be faster. Doing straight lines, a bunch of little tricks you can do. This printer, on the other hand has a set rate that it goes at, because it's it uses an LCD screen at the bottom to turn it and that shines UV light through the LCD screen and uses the LCD screen. It's like a polarizer basically. So it's like selectively darkening areas and then it's us it's think about like a silk screen. It's just an adjustable silk screen. Got it that's just letting UV light in instead of paste and for silkscreen, your PCBs. And so but so it does the entire layer at once, and then it raises up and then does another layer. So it's got a fixed time. So the taller your piece, the slower it is, I guess, or the log, it's got a fixed rate per layer. So it's very interesting on the time wise, for the same models, my FDM printer prints faster. So that means it's way easier to simulate right like to get an estimate on time you just get the height, right? Yeah, exactly. Now and craft lab brings a really good point is no matter how much detail you have on SLA printer, it doesn't slow it down whereas an FTM printer, the more detail you had the slower you have to go and takes longer so you can have insane detail and still have the same print speed on the SLA. The other downside is there's the the materials are way more expensive. The like a ginormous like three kilogram spool of polycarbonate is like the same price as one kilogram of resin. And that's like the cheap resin to that's not like this super high performance polymer polycarbonate, poly carbonates plastic. This is like the cheap stuff. And I have looked into I want to try different resins and that kind of stuff. But you have to be careful because your printer only works in one UV spectrum. It has one wave that it puts out like 405 nanometers. So you have to make sure your resin works with that and your resin also works with your printer because that they'd have they have different light outputs. And that's also the interesting thing. Is there easier, in my opinion to dial in. Because there's not a lot of settings, you set like what the layer height is. And then you set like the exposure time. And that's it. That's it's that's the only sentence. Whereas if you open up like normal 3d printing software for FDM, there's like a bazillion settings and sets and tweaking, just one can turn your print into a spaghetti mess verse, like an awesome piece of artwork. Now, the only other downside is the print beds for the same price printer, my print bed on my FDM is like four or five times the size. So you can just print bigger things on FDM printer versus the SLA printer. They make big SLA printers as well, they just cost more. But for the same price at the M's are bigger, and the smell. There's also a downside. No, it's very, it's not super chemically, but it's pretty bad. Whereas like my polycarbonate, like when I'm running, it actually makes no smell like you can't even you only wait you know it's running because it makes noise. Whereas the the resin printer, it actually doesn't smell when you have the enclosure on it. But the moment you lift it up to take the prints out it just like fuming gates everything.
And then there's that's good point brought up in chat is you also have to cure the resin prints kind of so they come out solid, but they're kind of soft. And so you you have like a UV like chamber, you put them in and it just spins around. That's actually very interesting how that works. How the one I have works is the base. The base is like a turntable. Let me go grab it real quick.
So I guess I'm there's also one other aspect about this that isn't, we haven't mentioned you print basically upside down, right because the plate lifts out of the ooze.
Yeah, yeah, it comes upside down. And so you can print really interesting geometries. Just like in 3d printing, you can or FDM you can print very interesting geometries, but you're limited by how it works. Same thing is like CNC machining or lathes work. There are certain limitations of the machine that you have to take into consideration when you're designing your part. Same thing with this, it prints a completely different way. And so you have to think of how you're designing your part and how it's gonna print. But the chamber is just like a big UV chamber. So it's got
it's got UV, LEDs LEDs in there. Yeah, it's really shiny. But the base symbol just fell apart. Is this little doohickey, which is a turntable with the, with a clear bass. So like, the UV can go through the bass? Yeah, but it's got solar panels. And so it's not electrically connected to the lid. The UV inside the chamber hits the solar panels, which turns the turntable so you don't have a wire between them. Now, that was very interesting that they decided, instead of putting a very inexpensive wire, they're like, Yeah, let's put some solar like some solar calculator.
Solar panels on it. Just very interesting design idea. So interesting. Okay, so 3d printing is typically considered additive manufacturing. But in SLA, you're starting with goop and you're subtracting the amount of goop. So is it because you still have the goop leftover, it's not like you're chiseling a print out of the goop, but you're subtracting goop. You're subtracting material off for real FDM printing.
The only thing I don't like about it, the smell, I don't have a problem with because it's in my garage, like whatever, right? So that if you're if you're printing in your your bedroom, that might be a problem. It's actually and more expensive printers solve this problem already. But it's like so you fill up that chamber. And if you have a big print, it's going to empty that chamber. And so you have to watch it. It takes a long time to empty it though, but you have to pause the print and pour more resonant.
Whereas the spool I just buy big spools of FDM filament and so I only run out like once every couple months maybe that's the only downside, but it's super easy to set up like least this one like the home it. It's the zeroing process takes no time. I haven't had any issues with like adhesion problems. Whereas like every so often Something like in the Invisalign, garage will change. And then the prints don't stick to the FDM bed. And I'm like, why does this not working? And then like next day it works. How do they initially stick to the bed on the SLA printer? It just does a long flash and it just the polymer sticks to the it's like a powder coated steel. And it was just stick to it. Okay, so it just, it just does more. Yeah. Yeah. Just those more kind of like hardened it onto the onto this. And do you leave the resin in that little tray when you're done? Or do you? That's what I've been doing? I haven't had any problems with that so far. I don't know if you're supposed to or not. But yeah, it seems to be fine. I mean, I would call that a positive if you don't have to clean up after every time, you know, yeah, I haven't had I haven't touched it yet. But I have been printing like once every couple of days on it. So that might be it. I've also only had it set up for about a week now. We'll have to see. I so far. It's awesome. I wish I wish I bought one of these sooner. And actually, at this point, I want a bigger one.
Bigger printbed. The. So Chris brings up a point, that's probably true. You don't want to leave it too long, because the resin will settle. Now I'm like, every before I print, I add a little more resin to it. So it's it hasn't affected the prints yet. But we'll have to see if that's actually okay, if I had to really worry about that. Or I guess if I leave it for like a couple of weeks, that's probably not a good thing. Well, okay,
so if it settles, is that like, does that mean it goes bad? Or do you just mix it up, and I mean, so the way you're supposed to shake the resin before you pour it. Okay. So I guess you just shake, you can pipe, pour it back all of it back into the container, and then shake it back up and pour it back out. I think it's awesome. And it's one of those things that we're I've been experimenting with plating, 3d printed stuff. And I've been plating like finished, basically polycarbonate off my FDM printer. And the only downside to that is how much post processing you have to do to make it actually look good. Because when you plate something you you're plating it to most of the time, make it look shiny, and nice, shiny, and Chrome, witness me. And so you have those, like sand all those layers out. And like Bondo sand filler, primer, all that stuff. And it's a lot takes a couple of days, I do a good job on it and make a good a good, good plating process out of it. But with this, I'm going to try basically like pulling, pulling a print out curing it. And like just hit it with a light like 400 grit sandpaper, and then just try plating it and see how it goes. So that's what I'm going to try next. And so I started looking more into this right now I will take the print at I've finished it, and then I spray it with a conductive paint that like energy chemicals makes
its foil actually for internal shielding inside of like plastic enclosures. So you could like, you know, spray the inside of your stomp box with this stuff, and it will help prevent, you know, it'll shield your circuits. So it's highly conductive, actually. And it actually works really well the problem is it doesn't lay super smooth when you spray it, it's kind of got a little grit texture to it. And so you got to spray it, let it dry, sand it, spray it and keep going and basically until when you sand it, it doesn't go through the to the plastic anymore, which takes forever. And if you have an intricate surface, you know, good luck trying to get it all smooth. So I started looking at like, Okay, is there a better way to do this? And I found an article. I can't remember. I think it was on form labs. They were talking about a because Formlabs builds SLA printers and so they they had some customer study and the customer was building like horn microphones, not microphones and tennis horn antennas. And they would plate them for better performance. When so they were like we played we first played it with a chemical process to deposit copper. And I'm like What? What is that what's plate how do they play copper on it? It's electroless copper plating it's I'm really planning to using the chemical products but they could have said electroless copper plating but they wanted to sound fancy with some proprietary like chemical process.
So yeah, just electroless copper plating which is you don't get in and the solution and a really thin layer builds up and then you can take it because now it's conductive and then you can copper plate more onto it. And then your nickel and then your chrome
So, hopefully next time I talked about this, I'm going to wait till after I've tried the planning process and see how well it goes or in case or like this printer explodes and catches fire. I'll definitely talk about then.
Alright, are they known for the hit? No, not as much as FDM printers are especially very inexpensive once unknown to catch fire. Actually, I was doing I was servicing my printer because the, my FDM printer, because the cable that goes to the head, actually, like I guess internally broke or something, basically it would work and then the head would move to the other side of the printer and then stop working. Yeah, so inside that cable, it had fatigued the wire inside of it because it looked fine. It would beep test, but when it would move it would incrementally connect. So servicing it looked at the connector that goes to the heated bed. We're gonna have to get a new connector. It's it's almost like charred black charcoal. Like the nice white colors should be so good. Okay, fine. Still.
Can you print a clear prints with SLS? or isolate? Yeah, there's clear resins. Okay. Yeah. That's cool. I haven't tried it yet. But yeah, I would be interested in doing that. I don't think I have an extra three to $400 lying around, though.
I can print it for you. I'm actually thinking that that would be really useful for some stuff that I've been doing at work I've been. I've been doing some 3d prints for I'll get work to buy it. Well, yeah. I mean, that's what I'm thinking about. Yeah, I've been doing 3d prints for doing some, some injection molded plastic stuff. And this would this would. I mean, I'm already past the point where I need that. But this would have been really helpful a few months ago. Yeah, I was looking at some residence. I don't have the name in here. But they actually work with the 405 nanometre UV that my printer uses. And it's a very high strength, high temperature resin. I want to order some, probably when I run out of this inexpensive stuff, but apparently you can you can make your your molds for injection molding with this, like you can't do 1000s of units, but you can do a couple of 100 with these molds. And that'd be really very interesting for you to prototype with. Yeah, yeah, I'm actually going through the process right now of getting molds made. And it's, it's not cheap. No. So you could print your eventual, like your positives, right? And so you can actually test those, but then okay, and be like, Okay, now I need to see if you can actually injection mold these. So you print the mold, injection mold through that and make sure that you got your geometry right for your draft angles and stuff. And then you can go Okay, now let's go put this into tool steel, and actually get, you know, a proper mold made.
Yeah, I'm in that process right now of getting the tool steel, milled machined? Yeah. It's a it's a massive process, especially because the stuff that I'm doing is fairly complex.
I'm doing you have a multibillion, like mold. Yes. I don't remember how many pieces it's, it's, I'm pretty sure it's just too, but I have not too bad, then I have some pretty specific geometry and very, very specific places where injection pins can go, I just they can't be anywhere. You know, yeah. That's, that's fun. It's it's difficult. I've done it before, but on not on this scale. And so I'm kind of learning as I go, in a way. But luckily, I've got a local guy who has been really helpful that he's the expert. I provide 3d models, things like this works, this will not kind of thing. It's fun. So actually, you know, another another topic that I'm going through right now that I've got a little bit of, I'm curious to hear other people's opinions on this, or I'm in other words, I'm curious to hear other people's process on this. So I'm in I'm in the middle of a new revision for a product that I'm working on. We haven't released this product yet. We're still in the design phase. But we're nearing the very end of of the design, like it's pretty much working where we want it to. So I got some boards. And usually my process goes like this. I get my boards in that I've designed. I go to testing and I find out if there were any issues. As I find those issues, I document them in a large Excel sheet. I give reasons as to why that was an issue what I did wrong, what's the fix for that? And then I usually create a little chart that's like, like for instance, I have six prototype units right now. And I have unit 1234. I write in there have I changed the schematic for this have I changed the layout for this problem. And then I have a list of have I actually physically made that change on the, these prototype units. So I keep track of everything I'm doing. So, for instance, like a lot of things are simple, where it's like, oh, I, this is a wrong value resistor. So I go and actually swap that out. But I write down, I swapped it out on each individual prototype unit, I changed the schematic I changed the layout. So at the end of the day, once I've got everything working, my Excel sheet should show that everything has been changed appropriately to the next revision. As much as possible. There's something sometimes where it's like, oh, well, like, I can't do this unless I roll the board, again. But for the most part, I can barge in any changes, or just change component values or things like that. And I'm curious, everyone else's process on how you go through with that, because like, I have a really kind of regimented way where I do it, because I've learned in the past, if I don't do it, it doesn't happen. And then I get a second revision that has the same value still, same problem. And it's embarrassing as hell you know, but the way I like to do it is like, I make changes as I go. So I'm at version 1.1. And I'm going to version 1.2. By the time I'm done with my testing version, 1.2 is almost ready to order. Because I've been making changes all along the way. Do you do it that way? Or do you do it the way where like you keep a list of running list, and then make all those changes all at once at some other time in the future? Or what's your process, that's actually how I do it, what you just said there, because I use GitHub, to do my hardware revisioning. It's not the best at it, but it's the best I've come across. I know, we've talked about some other project products, but they tend to be like, EDA, tool focused, and not EDA tool agnostic. And I use a lot of different EDA tools, because I work on seven different projects. So I just use GitHub. So my process is in GitHub, I'll have let's say, I'm on Revision zero, or the board, right? That's kind of like your first person, you're, you haven't built hardware yet. Doing all your changes everything. And then when I'm like, Okay, I'm ready to order my first board, I use the release functionality of GitHub. And that makes a snapshot in time. And that the great thing about the release functionality is you can attach files that are not originally part of your GitHub repository that like you can attach like a compiled like exe or something like that, like in case of software. So in this case, I can attach my manufacturing files to it. So I'm like, Okay, this is the Gerber's. This is the the drawings with it, everything that I send to like a fab to get made, I can attach it there. And then I get those back, stuffs not working, or I have to make changes. And so what you can do is you can use the there's you can open up tickets, or issues with that, that that release, when I just make a rolling, like, if it's ever I'm like, Okay, I need to change this resistor, and I might change it on the board right away. But when I do that, I make sure to put an entry into the issues. So I have a running list now. And basically, I'll make sure everything's working. And I'll just have the running issues list. And then at the end, I'll be like, Okay, time to roll to version 1.1. Look at the issues list, implement all those changes and close them out. And you can, if there's multiple people working on the project, you can chat with people in there, like make comments, stuff like that. I always will put in like my rat, like if I have to change components or stuff like that, I'll put in why undoing that. Note stuff like that. And then at the very end, you click release version 1.1 now exists, and then attach manufacturing files and send it on its way. So slightly, I try to use I want more. I would like to have a way to do that in the EDA tool, but also be EDA tool agnostic. I don't know if that's possible. But like when you're taught, like say, Okay, I need change r1 to something else. Sure. You can go into EDA tool and change it, but you don't have a change history. It just changes it right? And then you click ctrl S and then you don't have any history instead of instead of like undo right well and well that's just the thing. The second I find one problem with my with whatever revision I'm at, I create a new revision and I make those changes in that new revision. I never change. Oh, so you are you have multiple changes until your next release. Yes. Okay. Yeah, yeah, yeah. And you might. So if you check out the chance 20 resistor values, you have 20 different board changes up until the next release? Well, I mean, I do them all on one working file effectively. Oh, okay. Okay, yeah, I don't have 20 different. I don't do it every time I make one change. But, but I basically have, yeah, the second I find an issue with one revision, I start a new one. And that is my working one until I release it. And the only way I can release that is once everything has been solved effectively, yeah. And I like to. I like to work. As I find issues like I'll find an issue, find the solution. As soon as I find that solution, I implement all of those things, including all my notes and everything into the schematic, throw it over to the board, I may not do the board layout at that moment. But I just see floating components out there, that's indicating that something has changed. And so the whole goal of this is, once I've made all of those changes, the basically the only thing I have left to do is just reroute whatever changes were on the board. And it ends up being a really quick thing, as opposed to like, I guess I'm interleaving all the changes all at once. Like this. Yeah. Like this. And that's what I'm curious is like, What is everyone else's process flow? Like? Do more people do it your way? Or do more people do it my way? Because I like doing it? Because I've done it I've used? I've done both in the past. Yeah, I like I started doing it. This way, I say it this way doesn't make any sense, the way of finding all the fixes and implementing them all at once. Mainly from a system integration standpoint. It's because doing iterative changes, I might not think of, oh, if I make this change is actually gonna affect this thing instead, whereas if I do them all at once, in one session, sit down session, I can go Oh, actually, if I change this one thing, it's going to skew this other part of the circuit. And I'll catch it that way instead of doing it over a week's time. That's my only suggestion. Sure, sure. I think either way it works. Yeah. It doesn't really matter. In the end, it's just as long as at the end of the day, your next revision, fix all the problems that you had. Now, they might introduce new problems. That sounds old. Yeah, yeah. But as long as the old problems don't happen anymore, then you're fine. Well, and that's why I started moving to my interleaved version. Because if I try to do everything all at once, I just know myself, I won't remember it all. And I mean, like, yeah, of course, I write down notes and things like that. But I find it like, if I write down notes, and then have to go in and fix those days or weeks later, they don't mean as much as if I fix them right in the moment. I gotcha. Gotcha. Yeah. That's why I make sure to write everything down. Sure. Right. Yeah. Well, and the nice thing is also, in both of our situations, at the end of it, you have a list of everything that has changed. And so when that's the most important thing, actually, exactly, well, and what's great about it in this situation is is when it comes time for me to roll out the next revision and dump all this stuff into the system and build my bill of materials in the system such that my pick and place guide knows what I just have the list, I just grabbed the old revision in the system, take my notes and make my changes, it ends up like it's a ton of work up front. But at game day, it ends up being a lot less work bodies. Yep, yeah. And game day to me is like, make my like, make my board edits, you know, shoot up the Gerber's, and stuff like that, as opposed to like, oh, do all the changes all at once. But I guess it doesn't look as nice, because in my design meetings, everything's always like, well, I'm partially there, as opposed to like, at a design meeting being like, I have everything done, you know? Just different ways. Yeah, we can do the same. It's the same process is just different ways of splitting up the work. Right. Right. Well, and there is one downside that I've experienced, and you were just even mentioning, it is like, sometimes you like, Oh, I found this the solution to this one problem that I was seeing. And you implement that at that moment. And then you go to start testing other things, and you've broken something else. Most of my circuits are independent. So you can change one without affecting others. But that's not always the case. Because yeah, most of my circuits are that way too. It doesn't. Pretty independent, especially in the digital realm. That's like, there's not a lot that can go wrong between different systems. But there's sometimes you introduce something that you know, cause a little more ringing or something like that. And you Yeah, well, I did. I had one the other day where I was actually solving ringing and I added some capacitance to some circuitry. And I was like, Oh, this, this is great. It's all about the ringing. But then I went to test something that was downstream of that. And I had just completely obliterated the frequency response of it. Because like, I added too much capacitance. And I fixed something way early on. And then I was I realized, like, it wasn't anyway, so I had to roll back those changes, which it wasn't a big deal or anything like that. But it was, I guess that's more of a mistake that in the moment that I was coming up with the solution, I jumped to the solution too quickly, as you didn't think. Yeah. Thinking what the amplification down the balance down your circuit line? It would affect Yeah, yeah. Alright, so last week, I introduced a project, which is the the amplifier project, which is right behind me. And so next week, I'm hoping to have like a bigger update on it besides, like, I've cut down the enclosure box, which I talked about, actually, after the podcast, we talked about it on the live stream, like after the recording. So I actually will bring it in here and show like the people on live stream afterwards again, and pictures will be in the in the podcast description, of course. But uh, hopefully next week, we can do like live part replacement. So we'll go through like the schematic in like, go, Okay, we need to find this part, I replacement for this part and go get a replacement, that kind of stuff. Be kind of fun, I think and different. We've never really done that before. And also, I want to, like recover it. And so it's that vinyl, material and steam, what kind of material do I need to order. So the sort of the trade name for that stuff is tau Lex, T O L E X. It's basically a fiber backed vinyl. And it's kind of akin to fake leather in in low end furniture, but it's just it's meant to take abuse and look good generally. If people use it to cover equipment that gets moved all over the place. And so it's tough for the most part. And it's generally easy to work with some more than others. There's nowadays there's bazillions of different flavors of Telex. You can you can purchase. And some of them have, you can you can buy them in different grades of backing. So how many fibers are even some of them have no backing whatsoever? It's just the vinyl. So it depends on how much punishment you want to put yourself through when it comes to the actual upholstery work. Yeah, I want to I want to make it I want to make it look nice. Yeah. So what kind of glue should I use? Because I suggested like, because I have like this badass like automotive grade like headliner material. That is our contact adhesive. That is amazing. And I mentioned to you, you said don't use that. So and this comes purely from experience. I started using contact cement like the DAP brand you can buy at home. I think that's actually notes.
Anyways, doesn't matter. I thought it was DAP. No, that is one of them. I don't think that's the brand I have oh, I'm just saying
like that's the stuff you get at at Home Depot and all of those guys. And that stuff. It works. It functions in fact, it's, it's well over on the other side of my show. The very first thing I told next, I still have and it's still running strong. And it was done what that context meant about it actually is its depth well weldwood contacted ECER so that stuff is like earwax and snot mixed together. And yeah, it it goes on very thick and it doesn't thin out and it has one type to thin it out to spread well it has one significant problem is in my experience, it actually softens the tolix so the toe Lex does, it doesn't work well with your fingers and it stretches. So you like any texture that's in the vinyl, you lose it and you get the stretched lines across it. So it takes a ton more skill to work with. Also, it's incredibly slow to dry. And it'll appeal with age with heat and with humidity. So it does not work well for Houston at all. And and it's it's a nightmare to work with. I can't stand it and it does not do like corners very well where you have to like bring two pieces together and then lastly and things like that. So now what's interesting is traditionally hide glue was used for this. So you get you get a hot animal glue roller basically and you just feed your your your flat pieces through and it applies like butter to the back of it. And then and then it So one one application. So you, you do just the application to your upholstery and you slap it on and go to town. And those things are nice, but they're not available to regular people like you and I, the, the solution is a water based contact cement. It basically looks like milk. And it's think of taking, like Elmers glue and just making it like 50% More water, like basically just the same viscosity is as milk effectively. It's super, it's really, really easy to work with. It dries very quickly. And then secretly over the really, really disgusting band name was that sticky milk? Oh, God. It's like that. It's a what is it? What's the movie? Anchorman? Oh, yeah, no, it was a bad choice. Yeah, milk was a bad choice. Because it's like 110 degrees out in LA or San Diego, where hell is that? Yeah, he's just like drinking milk in a glass case of emotion. So here's the thing with this water based contact cement, it goes on super thin, so you don't get any like ripples or bubbles, it does not make your toe Lex soften at all. So it remains really stiff. So you can pull it and push it into corners and things like that. And it responds really, really well to heat guns. So you can apply some put a heat gun real fast to it, and it'll make it tacky. So as you're working with a large surface, you'll have different pieces down, you can tack pieces down, you can work on one edge. And then if you've spent too long on it, and the next edge is no longer tacky, just put a little bit more on there. Hit it with a heat gun, and it revitalizes and you can you can work on that side. It's just it's way, way easier to work with. It's just unfortunate because it's not readily available at at your big box stores. But you can order it online. It is not the cheapest stuff. But when it comes down to like if you if you put both if you did one cabinetry job with each one, the cost just wouldn't even matter if like if you had to experience so like Okay, so the goopy context cement, like the daft stuff is great. If you're putting like veneers on wood or something like that. It's so easy. But if you're doing like complex geometry where you have to wrap things around corners, or or do curves or anything like that, it just it's awful. So what you haven't said what but it is yet though besides a water based contact adhesive. There are certain brands the brand that I use as Wilsonart. And the the model I think is just called h2o. It's Wilsonart h2o, and that's their water base contact cement. I can get a five gallon bucket on Amazon for like 100 bucks, right 200 200 bucks. Yeah. My local Lumberyard actually just stocks it so I can buy it by the gallon there. I think Home Depot and Lowe's those guys, they used to have it on the shelf. But they Oh, here we go. i You can get one quart. It's like $30 Yeah, it's not too bad. Yeah, and one quart would be way more than enough to do your whole thing there. Oh, yeah, plenty. And I what I do is I use a little one of those foam, those black foam brushes, okay, and you just make sure your surface is super clean, you know, general prep stuff, but then it doesn't take a whole lot to make it work. And once you get it stuck on there. It's really really easy to work with a shotgun. Yeah, that'll be fun. Doing cornice, I've always wanted to make a jig that like butts up in a corner and has like a nice little slot that's at 45 degrees from the edge of the corner such that you could run a razor at an exact 45 from whatever corner you're doing. And then you create the exact pieces that fold properly down the edge. 3d printer man, you make those fixtures. You're right you're right actually yeah, maybe you should make those jigs so um, over the weekend, I was actually running the amplifier like all day on Saturday and I had my mp3 player plugged into it. I actually do have an mp3 player still. And I had it hardwired in and the oh that was actually one thing is it takes it takes line level in because the old ceramic style needles actually output like Like 700 millivolts is like what their Peak Peak is a big it's it's pretty hot coming off a record, which is also why like those ceramic needles eat records is because they have a lot of pressure and they move the needle a lot whereas compared to like a modern what's called a moving magnet needle is like a couple millivolts if that of signal Yeah, like that's a hot signal. Yeah, so I had I had to put a alright ordered a like inexpensive tube preamp for it. But the so I was I just plugged my my mp3 player into it. And it just jamming away all weekend. And then at the end of the night, I picked up my mp3 player and it shocked me because my mp3 player has got a metal enclosure around it. And it's connected to the ground, which is through that death cap. So I got a nice little tingle sensation in my my left hand when I picked it up. I was like
ooh, tinkle. Well, okay, so those hadn't completely failed yet, but it was getting there those death caps the problem the problem with them is they
this was an era where that where we didn't have exactly like the XY safety caps that are intended for a cross line or whatnot. And most of the time they were just ceramic disc capacitors that it was like a point one or point 01 that would connect the neutral to your chassis. Which Okay, fine, it gets the job done effectively but if that capacitor ever leaks or if that capacitor ever shorts now your chassis and anything that connects to that chassis is live effectively. And and so they call it a death cat because that can certainly happen. Yeah. I think that's going to wrap up this podcast. Hopefully next week. I have like the enclosure made me nice. Yeah. Let's see if everything shows up in time. That was the macro aborigine podcast where your host sparked and Stephen Craig, later everyone and may the Force be with you take it easy.
Why are all Python PDF creator modules just terrible to work with? Does anyone have one they like? Help me. Oh and Stephen's CNC machine is moving!
Parker and Stephen discuss Chat GPT-3, a language processing AI system, and what it can mean for engineers and society.

Are Stephen's LM338 regulators fake? Parker uses X-Ray vision to find out the answer! This and an Adventure in Plastic Injection Molding this week.