The quest for the right connector for a project! The right of passage for any hardware electrical engineer starts with a connector catalog.
This is the last installment of Stephen's 'Adventures in Injection Molding'. We are going to recap the entire two year sage and close the book on it.
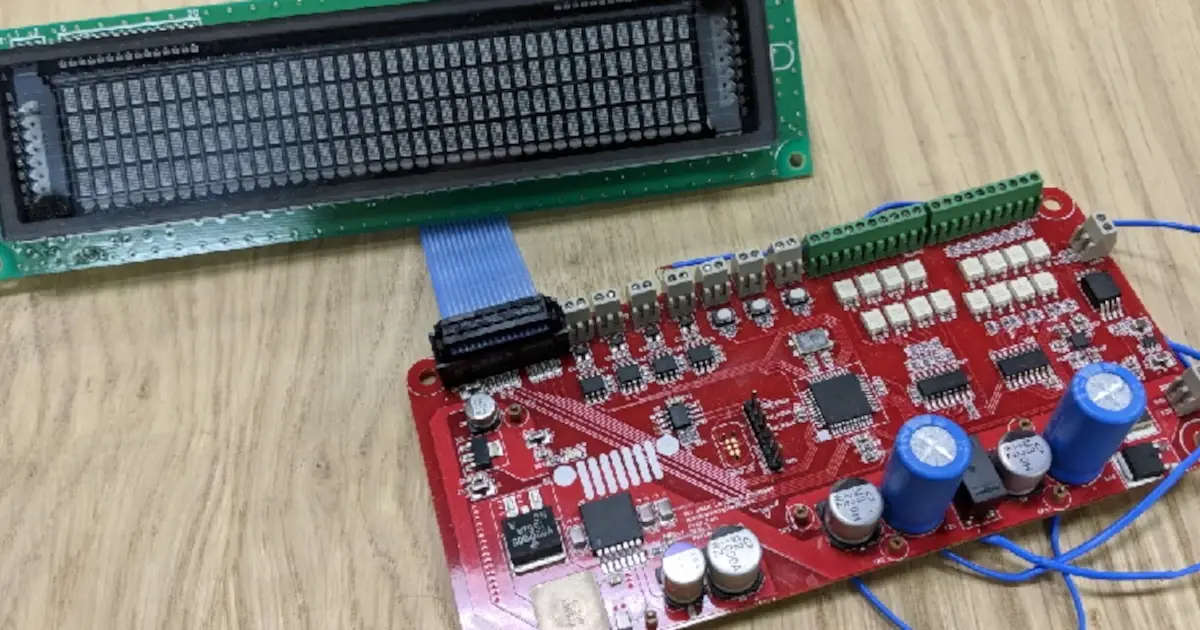
The Jeep Prop Fan project rides again! Well some iteration of it at least. Lets design an open source PCM (Power Control Module) for automotive apps!
Visit our Slack Channel and join the conversation in between episodes and please review us, wherever you listen (PodcastAddict, iTunes). It helps this show stay visible and helps new listeners find us.
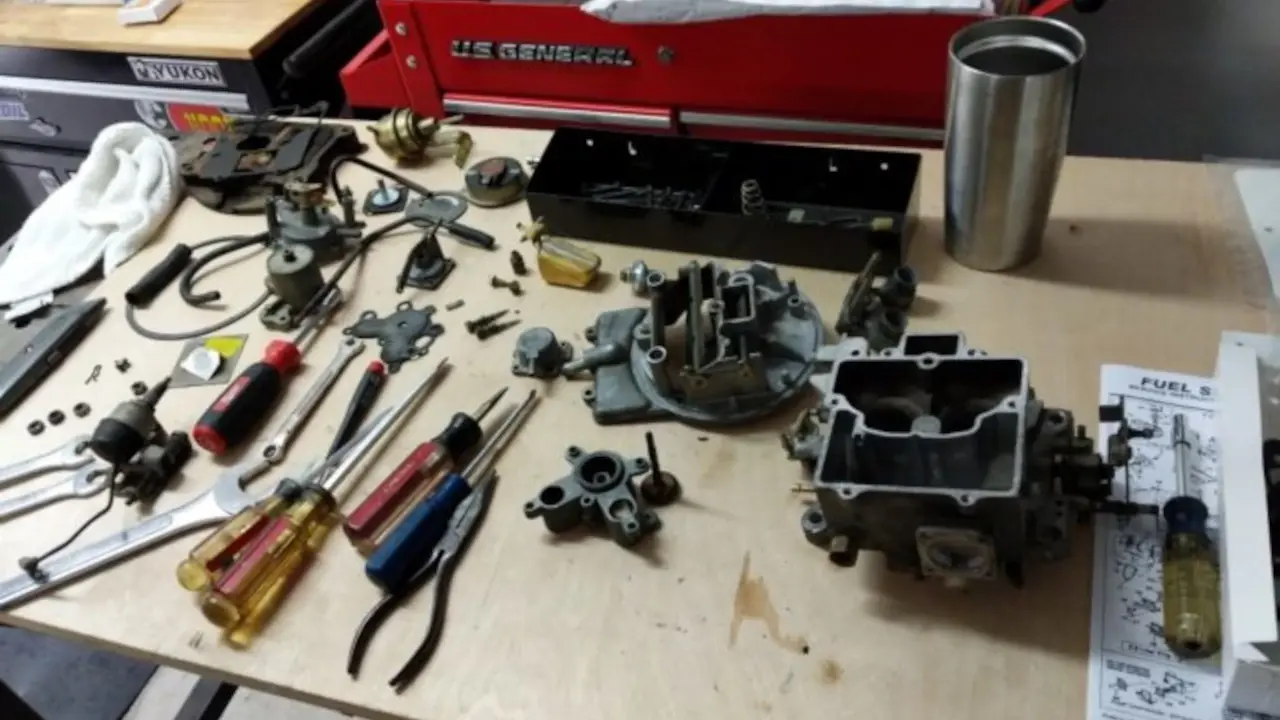
Parker’s 1990 Grand Wagoneer carburetor rebuild. It is a Motorcraft 2150.
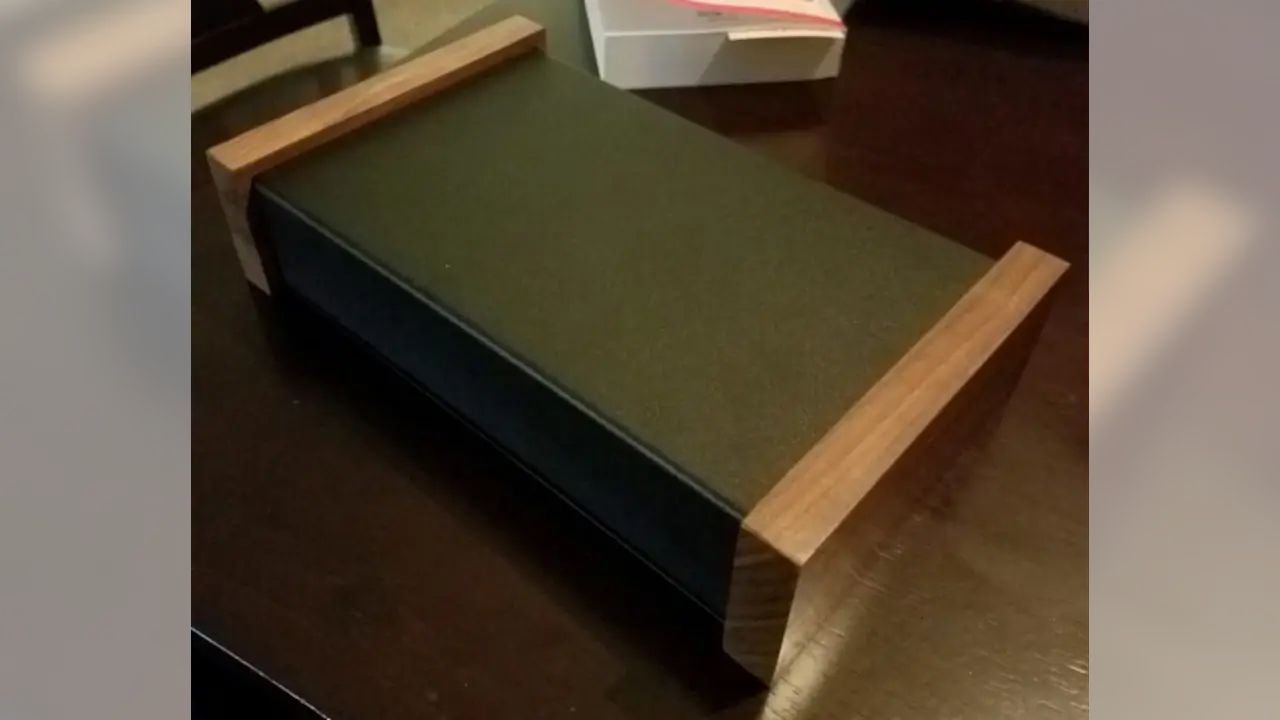
Hammond MFG enclosure P/N: 1441-16BK3CWW. Stephen will be using this for his uTracer project.
Parker is an Electrical Engineer with backgrounds in Embedded System Design and Digital Signal Processing. He got his start in 2005 by hacking Nintendo consoles into portable gaming units. The following year he designed and produced an Atari 2600 video mod to allow the Atari to display a crisp, RF fuzz free picture on newer TVs. Over a thousand Atari video mods where produced by Parker from 2006 to 2011 and the mod is still made by other enthusiasts in the Atari community.
In 2006, Parker enrolled at The University of Texas at Austin as a Petroleum Engineer. After realizing electronics was his passion he switched majors in 2007 to Electrical and Computer Engineering. Following his previous background in making the Atari 2600 video mod, Parker decided to take more board layout classes and circuit design classes. Other areas of study include robotics, microcontroller theory and design, FPGA development with VHDL and Verilog, and image and signal processing with DSPs. In 2010, Parker won a Ti sponsored Launchpad programming and design contest that was held by the IEEE CS chapter at the University. Parker graduated with a BS in Electrical and Computer Engineering in the Spring of 2012.
In the Summer of 2012, Parker was hired on as an Electrical Engineer at Dynamic Perception to design and prototype new electronic products. Here, Parker learned about full product development cycles and honed his board layout skills. Seeing the difficulties in managing operations and FCC/CE compliance testing, Parker thought there had to be a better way for small electronic companies to get their product out in customer's hands.
Parker also runs the blog, longhornengineer.com, where he posts his personal projects, technical guides, and appnotes about board layout design and components.
Stephen Kraig began his electronics career by building musical oriented circuits in 2003. Stephen is an avid guitar player and, in his down time, manufactures audio electronics including guitar amplifiers, pedals, and pro audio gear. Stephen graduated with a BS in Electrical Engineering from Texas A&M University.
Special thanks to whixr over at Tymkrs for the intro and outro!
Hello, and welcome to the macro fab engineering podcast. We are your host, Stephen Craig and Parker, Dolman. And this is episode 128. So, Parker, what do you been up to this week?
So we finished the map shitty add on, or essay, oh, it uses a dfma Sleepy V. It's actually the same one that we use on the macro watch the FM eight, SB 10, F to G, which is like, has like no memory or anything. It's like Uber, Uber cheap. It's like 30 cents in quantity or something like that. And it's got 15 addressable channels for LED blinking. All right, good. So So basically all the IO goes through blinking LEDs. And I think it's, it might be the only shitty add on that actually has a microcontroller on it.
That's pretty sweet. Is there a standard for how much power shitty add on can draw? No, no. However much you want,
I did limit all the LEDs to like eight milliamps. Okay. It's got more than 15 LEDs on it cuz I have like three LEDs on one line. So like an area lights up, so to speak. Things got like 20 Something LEDs on it. 21.
What? Is there a situation where all of them can blink at the same time?
Sure. Why not? Okay, so you could
I didn't know if you had already worked that out
yet. Yeah, I can't remember what the exact number was.
I guess I was just wondering because you could have a pretty significant current draw.
It was only like 180 milliamps is what I calculated it out. Like with the microcontroller running, and all the LEDs turned on without PWM I'm like, that's not a lot.
I O. Standard, you just make a shitty add on. That all it does is drain your battery.
Big power resistors it just gets hot. That's it. Oh, that could be the big old bigger pin.
Oh, the bagel add on. It just gets hot. It's just a ring that gets hot.
Unfortunately, DEF CON for the map was canceled though. So we won't be building the shitty add on or Stephen and I won't be going to the map. So I guess I'll just release the shitty add on so people can just make it. Yeah. If you hurry, you can actually probably still I think it only cost like $30 and singles. And it qualifies for the Mac crab 10 day so you can get it in before DEF CON. kicks up so
well. Well. Cheers. Here's to all of our DEF CON buddies. Yeah, we'll be there.
We'll be there. Yeah, we'll probably do an episode. Well, we will be doing an episode when DEF CON is going on. So yeah, maybe maybe someone will make one with the Mac prep 10 day and take a picture of it. And it'll be like we were there.
Ah, so you've been you actually spent quite a bit of time working on the aesthetics of the show. Yeah.
Yeah, it looks really good. I like it your description of it, though.
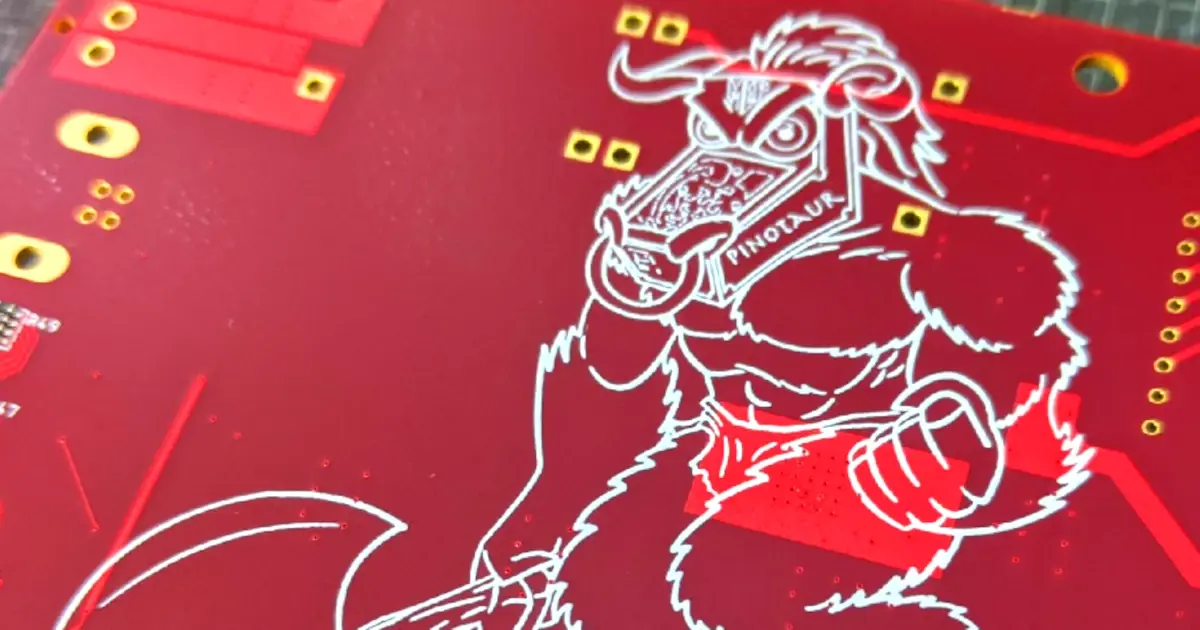
Well, okay. So for a long time ago, gosh, I don't I don't even remember how long ago Parker made a logo for the Mac fab engineering podcast. And it was the, the macro fab logo that's tilted on a 45. And he he put a pair of headphones over over it. Well, he decides to make the shitty add on, take that same imagery and turn that into a PCB. But with the gold and red kind of color scheme that you went with, it ends up looking like the mag fab logo that has hamburgers on either side of it with a hot rod. And it's funny because all this week Parker has been showing me progress of it. And every single time he makes a change to it, it doesn't seem to like not become hamburgers and hotdogs. It just It always looks like hamburgers.
When we first first design it, you're like that looks like I'm like yeah, it does. I wonder if I can change it to make it not look like that. Impossible now
No, always it looks like it's etched into your memory. And we can and we tried different things like hatching patterns and, and different ways of using silk screen and it just makes the hamburger buns look like sesame seed buttons. You just can't get away from
Yeah. So so. Yeah, I'll release it now. We'll probably build one. So at least one exists and the finish up the code. The code is almost done. From we're just open source Where's the code?
You know I might I might have to pay for one myself and have it shipped up here so I can have up a hamburger PCB
PCB yeah I guess what we should do is just it's so we're gonna add a little tiny like coin cell to it like one little tiny ones like it wasn't 41 One or whatever it is. Yeah a little tiny one and then it could just power itself
up. Hmm It's getting less shitty.
Yeah less shitty. It's a full fledge all it needs to be in a full fledged batch is a power source.
You know, basically what you did was you just recreated the macro watch on a different format, basically. Yeah, yeah. Yeah. Similar to that.
And then I got some updates on both jeeps, the red Jeep and the wagon. So when I was working on the Jeep over the weekend, I was doing electrical work on it finishing up, like all auxilary stuff is almost done. Like it looks great. Like all the looms are perfectly done. I got you know, engine harness tape, so won't melt in the in the engine departments,
how many? How many wires do you think you've run? Oh, like enough to
like wire up the Titanic.
How many wires were on the Titanic,
as many as in my jeep. So I was finishing up the wiring harness. And that was one of the last parts was like finishing up the the loom that's on the stock harness. So I'm redoing that. And I pulled the what's called the PCM, which is the Power Control Module in the jeep. I think other brands called the ECU or ECM engine control module, and one of the little plastic retaining tabs snaps off. And I'm like, Ah, that's like, you know, 19 year old plastic. Yeah, like, just disintegrated. And so I'm like, man, and I bought, like, connect, like old connect, or new old stock connectors for this Jeep before. And they're never inexpensive. They're always like 50 bucks. Yep. Like, it's never more than that. Or under, that's always like 50 bucks. I'm like, crap, like 50 bucks right there just for that little stupid piece of plastic.
Come on, you don't want to Baba in the place. I
was seeing what other people do. And people like zip tie that connector to the the engine control module. So that's actually how it is now it's zip tied. Okay, but I'm like, I did all that work on electrical just to have this.
Because like the last of it, of course, I had to be the very last thing you do. And so
I started looking for like, alternatives, right? Like, someone might still be making these connectors. You know, who knows. So start looking around. When I found on ebay, a guy was selling brand new connectors, like a whole rebuild kit for a Jeep harness. Right. And it had the three connectors for the PCM like, has all the pins and all that stuff. But he wanted 100 bucks for it. Oh, of course, which is actually a pretty good price. Because if you bought the new old stock stuff, it'd be 150 for all three,
because it's $50 per right? Yeah.
And so I'm like, Well, I only need one of them. And so I like zoomed in on the picture. And the part numbers are silkscreen on to the connectors, ah, and type that into Google and lo Behold, te makes these really, like they still make them, they still make them. And so the part number is for those that want to know, for Dash 1437290 Dash five, and the other two are the same number but instead dash five, it's dash six and dash seven. And so I ordered I think the one I needed was that seven, so I ordered it, and for Mouser and it was like $13
I'm going to Mouser now is that because I want to see what this looks like.
Or it's like $16 Something like that.
That'd be funny fun. Mauser was 50 bucks. That would be hilarious. Oh, they don't even have an image or a datasheet for it on Mouser it just says that they have 209 of them in stock.
So if you just if you google image search that part number, you'll see what they look like. Okay, it's actually those are not the right images. That part.
Yeah, this looks like a like a 25 pin thingy. Is that what it is? There was a there was a customer when I was working at macro fed that that had a product that used like, gosh, a handful of these kinds of connectors, these multi pin, you know, waterproof kind of things. And I did, I did wiring diagrams for them. And I remember that just being an absolute pain in the ass drawing, drawing these things up. Just because you got so many you have to create inside of an enclosure, you have to create a wiring diagram that goes to this. And then outside you have to create another wiring diagram and you have to keep it all together in your head. like purple goes to purple and purple was pin five on this connector but it pin 22 on that connector, you know, just that'll make her go cross eyed real fast.
Here. Here's one that actually has a picture that you can see. Yeah, that's it. Let me send that out. Yeah.
Cool. Oh, look at that you even embedded the link. Okay. Yeah, I see what this is. Yeah, this is. Yeah, these are those super multi pin Connect. Does this come with all the pins installed in it? Or do you have to put those in yourself? No, the pins are separate. Okay, so you have to crimp each wire and then plug it in? Well, yeah, but I don't need to replace the wires. I just have to replace the housing. Okay, so you're you just yank them out and put them in the new one.
Yeah, at St Yank one out, put it in a new one. Make the next one out. Put a new one. So I don't lose where these wires go. Oh, yeah,
you see, you're a lot smarter than me. I was thinking about yanking them all out and then being like, shit. What holes do they go?
That would be bad. Yeah, yeah. Yeah. Cool. So there's that's that.
So you're also messing around with your carburetor? Right?
Yeah, the wagon says it's, it's a carburetor. And it was one of the last carbureted engines or vehicles you could buy in the States. I think there was one other one, like, went out of production at the same year, which was like 1991. And this was 1990. Right? This is a 1990 but the wagon was sold up to 91. Okay, so I rebuilt the carburetor. Thinking that it was there was a carburetor issue when you when you basically mash the throttle from idle. It just dies completely. Like it doesn't even attempt to run or anything. It just goes dead. And so I'm like, Okay, it's probably carburetor something gummed up in like the power valve or something. Right? So I take it apart, clean it and I don't find a lot of gunk, but it's obvious that like it hasn't been cleaned in a while. And the big thing was when I was reassembling it, I found a crack in the isolator that goes in between the intake and the carburetor. And that was probably creating a massive vacuum leak, right? And so I'm like, okay, so I got a new isolator. Put it all together. Now it runs like crap. I think it's because it was tuned with a crack in the isolator. And so now I have to retune the engine. If that's
the case, then it was probably tuned wide open basically, basically, yeah, yeah. Cuz it's just trying to drink as much as possible. Yeah.
And so at the return the not the carbon, right, the return the the timing base of the distributor. And so I've actually never done that on a old car like this before with a mechanical and vacuum advance. So I'm gonna be learning how to use a timing gun and all that stuff. That's great fun. So while I'm waiting for, like, all those parts to show up, so I can actually like, fix all the timing and stuff, basically also go through like all the vacuum hoses and like, replace them all because they're all you know, at least 20 years old now. So I've been working also on the power steering pump, because the power steering box was leaking like crazy all over the place. Yep. So I bought a remanufactured one, and I dropped it last night. And then I was taking the power steering pump out, which is on the engine to remove the hoses, and then I looked at it, and it was leaking to come it's front seal. And so I'm like, Okay, I probably should just buy a re rebuild kit for this and rebuild it and rebuild kits like 15 bucks, and you can buy a brand new one for like 25 or manufacture one already. It's like $10 and labor is like
it's it's like a third of a beer.
Yeah, third root beer. So I'm like, Okay, I'm just gonna order a remanufactured pump. And so I'm waiting on that. But the big thing is trying to remove the pulley from the power steering pump, because the pulleys on these things are like, impossible to get now. And so I had to remove this one without destroying it. So I went to Autozone and I rented a power steering pump removal, like it's designed to remove this particular style of pulley well, and basically what it is it has a because it's a it's a friction fit pulley. Hmm. And so on the on the shaft, it's actually got internal threads and so you thread into it. Instead of like a jaw that normally goes around the pulley and pulls out this actually threads into it. And then it has a collar that goes around the pulley shaft because it has like a a groove cut into it for the Polo to sit. Yeah. And then that is what pulls it out. And you just like crank on it until it pops off. Or you break the pulley either one. We want to wait until one of those
happens. Yeah, exactly.
If it breaks, it's kind of like oh, now I need to go to a junkyard and find one. sells them. Yeah, you can't really like and people just snatch them up on eBay immediately. Like for oodles of money. Sure. It's like it's almost at the point where I'm like, you know, it might be cheaper to design one in CAD in like, get it made get a machine somewhere, or 3d printed out of some, you know, steel or something. Huh. Sinister steel. Oh, that's a cool band.
Sinister,
sinister. What's that? What's that process called?
syntes Sin
centered centered steel. I like sinister.
It's in it's just yeah, it's like it's like evil. Yeah,
he will steal. That's a good band
name. Yeah, that's that. You want if you want to hear some cheesy Heavy Metal, go to YouTube and type in medieval steel. That is some cheesy metal, but it's kind of awesome. It's very sinister steel.
Steel. Yeah, was it sinister snips? Is the evil crab from Futurama. Sinister snips. Yeah, you don't remember that?
Is that one of the laser later seasons? Oh,
it's the episode where they all have that like cream that turns them into superheroes.
Oh. Yeah. No, I remember what you're talking about. Yeah, that's
good. Kevin bender. Bender superpower is getting a beer from across the room with his extended arms. Oh, so that's what I've been working on. To jeeps and and add on. I'm still waiting on the that thermal couple. No thermal thermistor thermistor. Board on I think that comes in this week.
Well, you know, other than rewiring the wagoneer. I'm interested in seeing what kind of electronics are eventually going to make their way into the wagoneer. Because we all know what's going to happen.
Oh, yeah. Um, yeah, actually, we've talked about this before, a couple days ago. So I'm going to do on that is because right now, it's, there's no computers at all in this thing. Right? It hasn't been parkerized it? No, it has no microcontrollers, nothing it so like, basically, like if you want to roll down the window, the switch is connected in series to the motor. Yeah. Which is fine. That's actually how I wired up my new my, my red Jeep, my red Jeep is wired that way. The thing is, I wired my red Jeep with all waterproof connectors and stuff. So so nothing can corrode in theory, but 30 years is not kind on non waterproof leaf switches. Basically, that's what they used. And so I want to do is rewire everything in the jeep because first of all the jeeps, the wagons wiring is just horrendous. It's like, you cut off some insulation, and the copper is black. And like, oh, I'll just go like six more inches up the lead cut black. Like it's garbage, everything the insulation on it shot. And so I'm going to rewire everything, but to prevent the hazard of fires happening with these really crappy switches because you can't replace the switches because they're part of it as the aesthetic of the insides of the Jeep is the match, you know, that style switch, I guess I should take a picture of it for the for the podcast. So I was gonna do is just run low voltage or low current through it to what what modern cars do is they have what's called a Body Control Module that goes inside the cab, and then all the switches go to it. And then it controls all the motors. It's like a distribution box. Yeah. And the thing about that is your switches are now low, low power switches. And you can do awesome things like if you just touch a button, it can automate things like in modern cars, if you just touch like window down, you don't have to hold it the move the window down, you just touch it once. And if you tap it again, it stops. That's the stuff I want to do with this. And I'm probably gonna use like a prop, a parallel propeller to do all the software because that's gonna be the fastest way for me to develop it.
Basically, it puts some level of smarts between the actuator that you're pressing and the actual thing that's happening
thing that happens yeah. And I want to put in like a remote Durrell unlocking. It's all has all auto locks and everything but there's no you know, transceiver for it. And the main one is actually the back window because the get into the back trunk area or the tailgate actually, is you have to lower the window all the way down. Then you can open it up. And so it kind of sucks when you're like carrying your bags of groceries. and you're like, Oh, I got to put these down. So I can put my key in it. Hold the key as it goes down, and then undo it. So I'm like, Okay, if I just had a button, I can press and it lowered it.
Well, and that was originally intended so that you don't bring it down and bash the glass on something. Right? Exactly. Yeah. Yeah. So so when it goes down at a fully extends into the tailgate, yeah, you can't see
the glass anymore. Right. Right. Okay. Yeah. And so that's going to be the end goal for the wiring on the on the wagon is, it's a lot more ambitious. And then the red Jeep was, but again, the red Jeep was kind of like a prototype, I guess for this guy.
So when are you going to weld up a roll cage for the wagon?
If I roll that thing that something bad has happened? Yeah, yeah.
It's a big issue. Yeah,
it's a lot lower to the ground. It's almost like a just a big station wagons what it is. Yeah. Yeah.
It's a fully enclosed El Camino.
Yeah, actually, pretty close to cool, the Grande Camino wagoneer. See what you've been working on?
Not a not a jeep. But my version of a jeep, I suppose. So I've got a little bit of an update for the new tracer project that I've been working on. Two weeks ago, I said I would have some more stuff done on that,
you know, we should ask the original creator how to pronounce this.
We should ask him to come on the podcast. Ah, yeah. He's in Denmark, I think Denmark. So it would be weird timing, but very fine. But however, when when all of this is said and done, or maybe even before, I do want to, I am going to package this all up and send it off to him as sort of a thank you because he was the original designer. And I just wanted to say, hey, you know, what you made was really cool. I added a whole bunch of useless add ons to it that make it kind of cooler. So I guess I guess I'm creating a shitty add on for his. So yeah, so I ordered a couple parts for it. First of all, the enclosure has arrived for it. And the enclosure was that ham in the box we discussed in a previous podcast where it's just basically a steel box with walnut edges to it. So it looks really nice, it's classy, it's classy, it's expensive. It's actually
a lot nicer than any of the pictures that you see. Like, oh, like, on Hammonds website, what you sent me looks so much better. Yeah,
yeah, it looks a lot better. And we'll, we'll post that picture of it. So that's, that's arrived. And it's, it's an overpriced box for what it is. But, you know, to like, just get a box that looks nice, right out of the box, basically, I'm happy to go with that. So I'm in the middle of the layout with this. And even with the box that I chose, things are pretty tight. I'm shoving a lot of signals and a lot of crap into into a small area. So the layout is moving forward,
like 40, PCBs, and like 32,000 relays,
something like that. Pretty close. It's actually I think it's 47 relays, something like that, something in that ballpark. Yes, somewhere in that range. And then and then a four layer board plus another big two layer board with a lot of a whole lot of components on it. So but there's also nine seven segment displays, and nine encoders with switches. And I on the STM chip that I have on there, I I successfully used every single pin on the chip, like I didn't need any more and I didn't need any less. So yes, super perfect. But I'm also realizing what sucks about that is now I have to get a signal to every single pin on the on the microcontroller, which kind of sucks in layout world. Especially because a lot of them are just like it's an encoder, and it just has to go right to it. So you know, hopefully I could pull this off without a whole lot of sneaky sneaky traces, you know, doing like logically and laid out well, but yeah, if you
if you take a look at the map shitty add on, it's got a lot of good routing in it.
Oh, I will look at it for inspiration. And when I'm laying out my board I'll think about hamburgers and hotdogs the whole time.
Anyways, yeah, that's
right. Yeah. So yeah, no the enclosure arrived in actually today, the power supply for it is supposed to arrive. So this thing does not have an internal power supply it it relies on an external supply and it was originally designed to work on a laptop power supply, a 19 volt switcher. So I just went to Amazon But whichever 19 volts switcher has the highest rating, and I'm just going to clip the end off of it and put a 2.1 millimeter barrel jack on it. Gotcha. Because I got a, I got a little barrel jack input on on the enclosure. So that'll arrive today. And with the power supply and the box, I can start thinking about a little bit more of the layout of how I want it to look from the outside. I've already basically determined where I want everything. And and, and really the decisions on where every part goes was a lot less of like an aesthetic thing and more about like, well, this is the only place that can go, you know, kind of situation, but I did try to make it look logical and the LEDs are spaced evenly. So you know, it just it there's not like random LEDs all over the place and things. So the cool thing is at work, I have access to a Tormach 770 mil and a Maki uj f dash 3042 printer, which is basically a industrial inkjet printer. So between the two of those, I can mill the the box and I can print in full color. Well, basically whatever logo or information I want on the front of it. So it's actually I expect that's probably going to take the longest time it's like figuring out what I want the outside to look like because I want like the box looks classy. I want it to the they that text and everything to look classy also.
Yeah, so you use like sand scripts.
Yeah, comic Comic Sans just nothing but comics. It's actually
on the bottom of it, you need to put Comic Sans like this was built by Steven Craig and like and all that stuff is like in in Comic Sans.
Uh, I will think about that.
Yes or No,
I have I have a gripe about that. That Hammond box the part number that you have on Mouser for it is purely the box and the two wooden ends. The the bottom plate is a complete separate part number that you have to buy separately. And the screws that screw in the bottom plate are a completely separate port number like
I can I can understand offering them separately. Like if you just need one or the other it's always nice, but that being the only way to get them
and and the you're right so the thing is the main gripe that I have with all of this is buying things separately makes total sense. If this was purely just a steel box, I could get that but this box is clearly intended to be like it's steel and wood you don't find that every day on on Mouser The only people who are ever going to buy this steel and wood box are going to be like goofy audio guys like me, you know like it has that kind of stink to it. And so like there's no point in selling them as separate parts like every single person who buys this box is gonna buy the bottom for it so just make it one package like that. I don't understand but you know, maybe you know maybe I'm not a sales rep for Hammond so maybe Hamad is no some secret and there's some a whole bunch of people who buy them separately and do them for whatever reason but it just doesn't It doesn't sound right to me
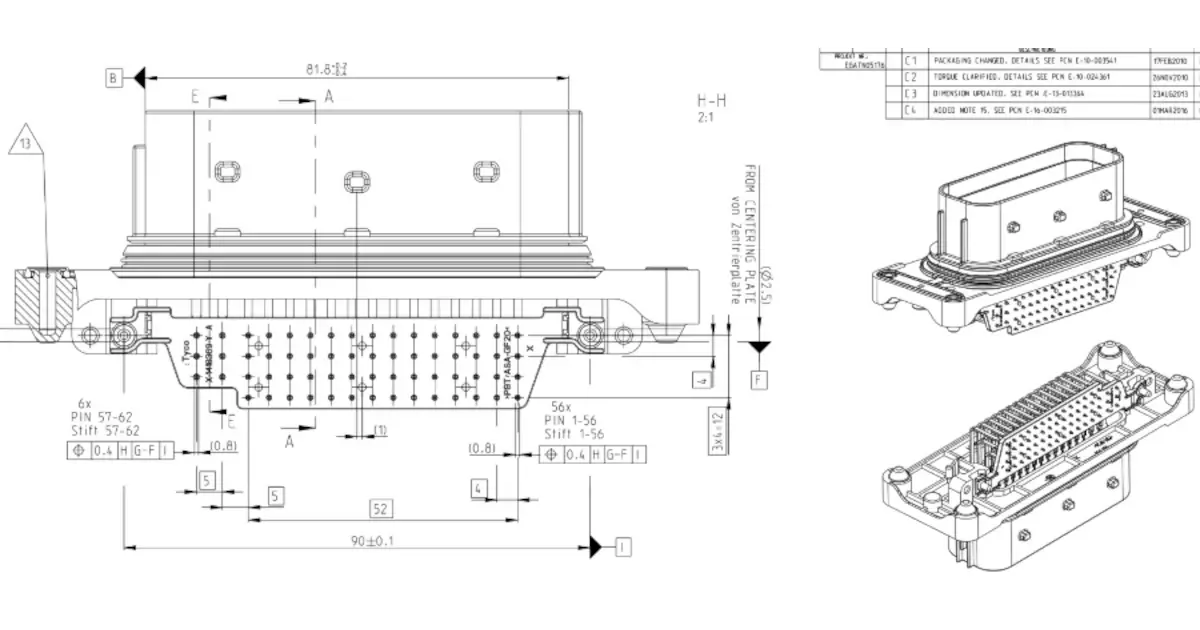
well I agree to it's like I was slightly different problem I had was when I was looking at those bulkhead connectors. I don't know if we ever talked about on the podcast we can talk about next week, I guess was like just finding what parts I needed to make the system work. Yeah, you know, cuz you go on T's website and like parts that are in this family and you click it and like you have no idea what you're doing. Like there's no this is be a list of like, this is what like an exploded diagram of a connector. Are they awesome? That'd be nice. Especially for people like oh connectors like one thing like a barrel jack or whatever but like, I want you look at this connector that I'm trying to use. It's like it's got like eight parts to
it. Yeah, yeah. Yeah. Crazy. Yeah. So So in when we retire, we need to go start a connector company and just do everything right. Because Because we pretend like we know what we're doing. Exactly.
Still gripe a BSc
opsc Yeah, like that. Yeah, PSC. So actually, so So one of the things on the on the micro tracer, you know, actually I have the power supply or the schematic pulled up right here. I found so so that was a good chunk of the circuit works on 12 volts, or a good chunk of the circuit that I'm adding to his circuit works on 12 volts. But that 12 volts goes to supply the relays and it goes to supply the seven segment displays and I worked out Like a worst case scenario, and where, you know, worst case with the relays is 11 of them are on at once. There's not a situation where you'd have more than 11 on, but 11 on that. And then if you take the seven segment displays, and let's just pretend every LED was on with the seven segment displays, and I'm not doing PWM on those I was just having them on, then I could pull 840 milliamps in that situation off of the 12 volt bus. Well, I have 19 volts coming in from the laptop power supply. And this laptop power supply is has way more than enough current to handle that it can it can juice out that much. But getting 19 down to 12 volts at that current if using a linear regulator, you just you're dumping a ton of heat at that. Yeah. And so I actually spent a good
it's almost like seven watts. It's like six watts.
Yeah, it's it's Yeah, right. And if you've ever experienced at even one Watt of heat, it's a lot of heat, it gets hot, real fast. So six watts, I was like, in a small case like this, how am I ever going to get rid of that much heat. So I said, You know what, screw it, I'll go look for a switcher, because I'm only powering relays, and I'm only powering LEDs. So extra noise from a switcher isn't going to bother me at all. Even if it's a good chunk of noise, you won't even see it on an LED. And the relays not going to care. So I actually found a really cool switcher on Mouser that is a 12 volt switcher, the power started the part number is VX 078012 Dash 1000. And it has pretty good efficiency. And it will do
what's pretty good. Uh,
with with enough current, it'll be in the 90s.
Okay, yeah, that's always good swing, like read like description of parts that are totally written by salespeople, not engineers. So like, this is a fast, whatever it is. Yeah, it's like fast relative what?
Yeah, yeah, yeah. And so the cool thing about this switcher is it's just a three pin guy. So it just basically drops in like a linear regulator. It has in a row, okay. And in singles, it's only $2.70, which, you know, that's way more expensive than a linear regulator, but it will do a full amp at 12 volts with 90% efficiency. So there we go. There's the solution. I don't have to burn up a boatload of heat. And I've got a little switcher, and it's it's a small enough package. It actually stands vertically off the board. It doesn't lay down on the board.
I think, you know, I think I know what you're talking about. I've seen those before.
Yeah, it's super nice. So it's non isolated, but I don't care. I don't need an isolated switcher in this case.
Yeah. So you don't have to design a switcher? Yeah,
I started by doing that. And, you know, if, if you're in the situation that I was in, where I was hoping to go linear regulator, and then you have to design a switcher, it's kind of a pain in the ass, because then you're like, Oh, my God, there's like 5 trillion options for you know, Buck regulators and things. And then you have to go and do all the calculations on whatever, datasheet you find stuff. And that's, that's fine. And all but it just, I didn't want to do that. And then I found this package, or this part, and you're like, great, done. Here. It all is.
Well, there's something to say about that. So, yeah,
yeah. And for the situation that I'm doing, where I'm just purely having that 12 volt rail supply, relays and LEDs, it's perfect. Yeah, and, you know, for $2.70 That sure as hell beats the the labor I would have to put into designing a new switcher half a day or half a day of routing at least. Yeah, well, and and selecting the right inductors and capacitors and crap to make sure that it all works. So much easier. Cool.
So let's go on to the RF Oh, yep. This is yours. This is a maxim is Guiney. A maximum IC is getting into the MCU game microcontroller game, right?
Yeah, yeah. And you know, it's funny, my, I walk into work today. And my boss tells me, or asked me if I knew if Maxim was in the MCU game, and I was like, I don't know about that. He's like, I got an email about it saying that they are. I was like, send it over. That's an RF Oh. No, I didn't. I didn't know that Maxim was was getting into MC use. And apparently, if you go to their website, it looks like they did a few months ago. And they're just they're doing marketing stuff now for it. But we've talked about Maxim a handful of times in the past, and both of us have have stated that, you know, we like their offerings, because they offer a lot of different features, and a lot of really cool apps. for their for their stuff.
The problem is buying them.
Yeah. Right. Yes. Yeah.
If you find maximum is the you find the golden goose of an IC that is impossible to buy
it Yeah, right it does exactly what you need is that one weird one that has a bagel pin or something like that like they are the bagel? icy world?
Yeah, I'm using a max max maximum chip on the thermistor. Board. Oh, yeah.
And and I used I use two or three of them on that. On that first since that I made on the map project kind of thing. I use some of their I think they were the ADA DS. I can't remember either entities or D days. They were they were inexpensive and they had really good characteristics.
Yeah, so this MC use the Max 32 652. And the nickname for it is called a Darwin.
Yeah, I you know, I was discussing that at work today. Like that seems kind of odd. It seems like they're really trying to get into like that, like goofy. Like the naming convention, like the Edison and in the BeagleBone. And that kind of stuff where they have to come up with some kind of like quirky name. Yeah, and
especially because the tagline is a brute. Here we go. Darwin, a new breed of MCU built for evolving IoT.
They should just hire you. That's perfect. You know, before too long. We're gonna start seeing like YouTube ABS pop up where they stole that audio. And I you know, if that was me, I would just let them do it. I'd be like, Okay, that's cool. So yeah, it looks like they're, they're putting together like what, what appears to be an entire, like, genre of MCs that are dedicated for IoT devices, but also wearables and portable medical devices, is what they're
saying. Yeah, and lots of peripherals, like, just in the chip. They rent me a lot of EFM eights is like, if I may have a crapload of really cool peripherals inside there. And maxim is like doing the same thing. It looks like it's up like, Maxim is known for their crazy peripherals.
Yeah, yeah. And, you know, I think, I think if anything, they are like the, the feature creep of IC or event to us, you know, like, they let so many features like, just soak into their stuff. Which which is cool. And and you know, some of the stuff that's that's kind of neat is one of these Darwin ships actually has an internal thing, it was 90, it was either 96 or 98 megahertz clock, internal, that you just don't even have to jack width. So they're really they're really kind of touting, like, lots of speed, lots of power for low power, in effect, you know,
they don't have anything on cost yet. Please, I didn't look,
I you know, I didn't spend too much time looking at it, because because one of the things I sort of wanted to mention about this as they're really driving home, the IoT kind of genre on it's like all of like, all over their website, it's it's pasted with IoT, these things are meant for IoT. So clearly, maximum believes that IoT is big enough that they're willing to get into the MCU game for this. It's not that they're making like general purpose MCU they're making flat out IoT. And yeah, which is, which is, you know, that's, that's interesting.
Yeah. And it's got it's got an ARM Cortex on four core. And a, it's interesting, I've never seen this advertised, but it says with fpu, based, like, stuff in the app core, which is floating point units, right. So I guess, like, basically doing calculations on like, sensor data is probably what they're aiming at that for, yeah, like doing accelerometer stuff doing 3d. You know, what's called telemetry? Yeah, I think it's right, what Telemetry is what what they're doing with that.
Right, right. Right. And, you know, the thing that I kind of find interesting is that they some of their marketing content, some of the videos that they have are kind of like, cutesy and cartoony and like, it doesn't seem like it's geared towards like the really dry hardcore professional group. It sounds more like they're gearing it towards somewhere in the middle. However, a lot of the packages that they offer are like 140 pin wafer level chips, which that does not fly with like the the hacker maker community. That's because it's just difficult to deal with.
Yeah, so for the hacker it looks like they have this what's called their pico Yep. Which is like a castle ated board that you can put on your your product,
right? Yeah, you can it which is their little dev board and they they you know, they're talking about I think it's like a point six inches by one inch, so it's it's small, it has USB on it and it breaks out most of the pins onto the On the side, and it handles all the voltage conversion on on on the dashboard. So, so yeah, they kind of do have some offerings for all over the the spectrum there. But like I said before, one of the things they mentioned was like medical, portable medical devices and wearables and things like that, which that's sort of a little bit outside of the normal realm for the hacker maker community. So they're spreading it pretty wide. They're casting their net wide on that. It's got
a 63. Pin BGA.
Yeah. So that's sort of more intended for just buying the Deaf board slapping it on whatever, you know, carrier board you design.
Yeah. The thing is, though, is when you get their datasheet I'm not seeing dimensions for this stuff. It just shows the footprint with the pin out on it. It doesn't actually like, I wonder you to download a different datasheet for the maybe for the dimensions I've seen, like how small is this thing?
Oh, gotcha. Yeah, yeah. I think it's pretty cool. It's always nice to see maximum, you know, breakout from do more stuff, just because, like, their list of features is like a mile long. It's probably
gonna cost like $8. And there's gonna be like four of them on the marketplace.
That's great. Okay,
I wonder that's because just maximum is just like the they must be at the will have like, they probably don't own any fabs.
I, you know, I have no idea. It probably not.
I wonder they're fabulous. Because Silicon Labs is fabulous. They don't own a fab
unit. Do you know where they get their stuff? Manufactured? No idea,
either. I never looked into it. If you're from maxium? Let us know.
In the comments below. Yeah, come on as a guest and talk about these product offerings. That'd be cool.
Why can't we buy them?
Well, they are brand new. I shouldn't say brand new.
But no, I'm just I'm just talking Maxim in general. Oh, you find the golden boy chip? Yeah. Alright, so the next topic, see? So
this actually sort of has to do, or it spawned from my mute tracer project. This is more of like a question that we posed up in our Slack channel. And, and some stuff that Parker and I've been talking about. So we're revision control for hardware, in terms of things, you know, platforms such as GitHub, we wanted to talk about revision control on on hardware projects that are complete, but also revision control on projects that are incomplete, or projects that are in process. So one of the questions that we post on the Slack channel was, if you have a board that you know, you're working on, such as my new tracer, and you want to put that up on GitHub, do you wait until you're completely done with the board until version 1.0? is out? And slap it up there and say, Hey, here's, you know, version 1.0? Or do you put your progress along the way up on GitHub? And if you do, how do you handle that? And what's what's a good way of telling people, you know, hey, this is incomplete, or this is what needs to be done left?
Yeah. So as I was looking at the responses, and are very similar to what I do with GitHub, basically, is I the first thing I do is like, create a repository. And after my first spacey, Bruff schematic, I upload that, okay, a base, I just keep pushing it, like probably every couple hours, I'm working on it. Or like if I work on something that's after work, I'll push that that night's work on to get up. And then when I finally order the boards, I click the revision button on that revision button the commit. No, no, no, there's a certain button and GitHub. I can't remember it's because it basically
like rolls revision.
Yeah, it's a release. That's it, release. Okay. Okay. So when you I consider a release when I go to make a physical thing now, for this hardware,
right, but you click release before you've ever even had a physical object in your hand? Correct? Yeah,
I'm like, I am going to release this thing. And I am going this is the basically the files I put in the release, or like, these are the manufacturer manufacturing files, gotcha. That are going to, to release. If you download, like the latest version of the repository, it's probably not what you want, because that's a working copy. So you go to the releases and see what's been made. And releases you can put notes and stuff like that, like, this is the first version blah, blah, blah, or like this didn't work. So don't use that release, stuff like that. Yeah, but Aster is all over the place. Exactly. And when I do commits I basically just say what I did in the commit. So I'm like, I worked on the switching power supply. And then in the notes for the commit, I can write more details. Like, I added these parts, all this stuff. I don't really do like a to do. Yeah, unless the schematic is really big. And like, I know, I need this section, but I haven't done it yet. I'll actually like just draw a box on the schematic and then write in text of what's supposed to go in that box. Yeah,
yeah, I like that. I actually do something similar with that, where, say, if I know like, say if I ported one chunk of a schematic from a different schematic, like if I had a building block or something like that, but I know I need to change the footprints or something like that. I'll draw a big square over it in, in my CAD program, and I'll write text over it saying, like, you know, footprints must be changed, or all values are wrong, or you know, something, such that the next time I open up the schematic, I look at it and be like, Okay, that's exactly what I have to do. So I'm sort of doing revision control from within my schematic writing myself notes. And
yeah, so I do that, too. But I would highly recommend just using GitHub just to store stuff. Because the worst thing is just losing progress on something. Oh, of course, yeah. Especially board design.
Yeah. And so I liked the idea of, like, you were saying, like, either either periodically through your, your work day, if you know, you're going to be just hammering on a layout for hours on end, or a schematic or, or doing it like say, once, at the end of the day, or once at the end of the night, with, with the list of changes, and I think that's the biggest thing is just, instead of just committing, you have to have the changes that you put up there, or, or, or putting it up, they're sort of worthless, it means nothing at that point.
And then in GitHub is the main thing is that there's the readme, Mark downs, which is a text file. And basically, I leave those kind of blank until I get kind of close to the end of the project. So I know like the scope, what the board's gonna actually do, and all that stuff. And I start filling that I kind of have like, my own template, and I start filling that out.
Gotcha. Good, because the readme files are supposed to be like a, like a mile high view for anyone who's like sniffing through good. Yeah, they're supposed to be able to look at that and get an idea of what's going on,
going on. Yeah. And I tend to use that to use as like instructions, or what the board's used for and like, go check out my blog for more information and stuff like that.
Sure. Yeah. I like that. Yeah, that's good. You know, and one of the things we've we've kind of touched on this in the past, but I've a, it's some kind of system that would allow you to look at visibly look at changes between boards would just be incredible.
And we touched on that before in a previous podcast, maybe with CAD lab.io. I got I've been playing around with that a bit. And it's actually really cool to see my Pinball Controller throughout the years in that Yeah, yeah. And unfortunately, that's only work. It only works for GitHub and only works for eagle,
which, which if you look at the majority of projects on GitHub, that's Eagle. So that is
Eagle, but it's I'm hoping they expand to like KitKat and dip trace and Altium as well.
Yeah. And technically, you could do it with Gerber's, right.
Yeah, you totally can do with Gerber's, there's no reason not to,
right, the only thing that would suck about that is you would have to every time you commit, you'd also have to commit your Gerber's at that time, or you'd have to, you'd have to do a bunch of manual extra processing, which, which, I mean, that would make sense if you if you find an error and you're trying to backtrack, but you wouldn't want to do that every time.
Jared in the Slack channel, he shows he used up Verter and apparently has a histogram feature so you can basically undo or redo from like beginning of your boards time. And so you can make he has he's made a couple crazy looking gifts of basically him routing the board out completely.
It's really it's I'm actually watching the gift right now. It's it's really fun to watch. Like the decisions being made as it goes along. Because you see stuff go and then see stuff, delete.
And that's how it always is. Yeah, we always do. Our rerouted the map essay to like four times or five times.
And it's only 15 LEDs, right? And an MCU. Yeah,
yeah. Just because I'm like, Oh, I needed this, this trace to go in because the main thing with it, the main thing with the SEO is no visible vias on it.
Oh, that was a big thing for you. Yeah, you don't want to have any vias in those hamburgers.
No Well, it's got through hole connector. Yeah. And it's got holes for like the, the pogo pogo pins to go through and like line up. But besides that there's no logical vias
if you really tried hard to do a single layer. Yeah,
well, because all I did is all the LEDs are on top, and I went pad in via the parts on top of it really? Nice. Yeah. So for the vias under LEDs, so you can't see them. Cool. Yeah, I think that's gonna wrap up this episode. Do you have anything else you want to talk about with revision control for hardware?
I guess, I guess the only thing that I had to talk about is sometime this week. Hopefully, maybe even tonight, I will. I will update or upload the new tracer layout that I have so far on to GitHub. And just because not many people use the trace, I'll probably upload images or the actual Gerber, the Gerber's of the current process. So if anyone wants to look at it, I'm going to try to do revision control on GitHub with a new tracer starting from where I'm at now,
it should upload a PDF of the schematic that's pretty popular.
Yeah, yeah, I will I will certainly do that. I kind of get the schematic cleaned up is going to be in is going to be in your your green yellow. Oh, my Jamaican colors. Yeah. Jamaican Kava. Yeah, in fact, so I do have color standards for my boards like ground is green, like every trace on my schematic that is ground is green and usually like five volts is kind of like a pinkish purple and 12 volts is almost always orange and stuff. So you see colors all over and and I do almost all my schematics are in black background. I don't do white by background like Eagle stuff. So bark is shaking his head. I just like I'd like the dark color scheme.
Yeah. I do white for for schematics. And I do black for layout. Yeah, I
just do black across the board. So just a dip trace thing, I guess.
You want those hardware hackers, man? Yeah, that's right. Yeah.
Well, I am working on these boards most of the time late at night. So it does. It's nice to not have a giant light screen in front of you.
That's true. That's true. Okay, well,
that was the macro fab engineering podcast. We were your host Stephen Craig
and Parker Dolman.
Take it easy.
Later everyone. Thank you. Yes, you are a listener for downloading our show. If you have a cool idea, project or topic or unique way you do version control on your hardware. Let Steven and I know. Email us at podcast at macro fab.com or tweet us at macro fab. Also check out our Slack channel. If you're not subscribed to the podcast yet, click that subscribe button that way you get the latest episode right when it releases. And please review us wherever you listen, as it helps the show stay visible and helps new listeners find us
The quest for the right connector for a project! The right of passage for any hardware electrical engineer starts with a connector catalog.
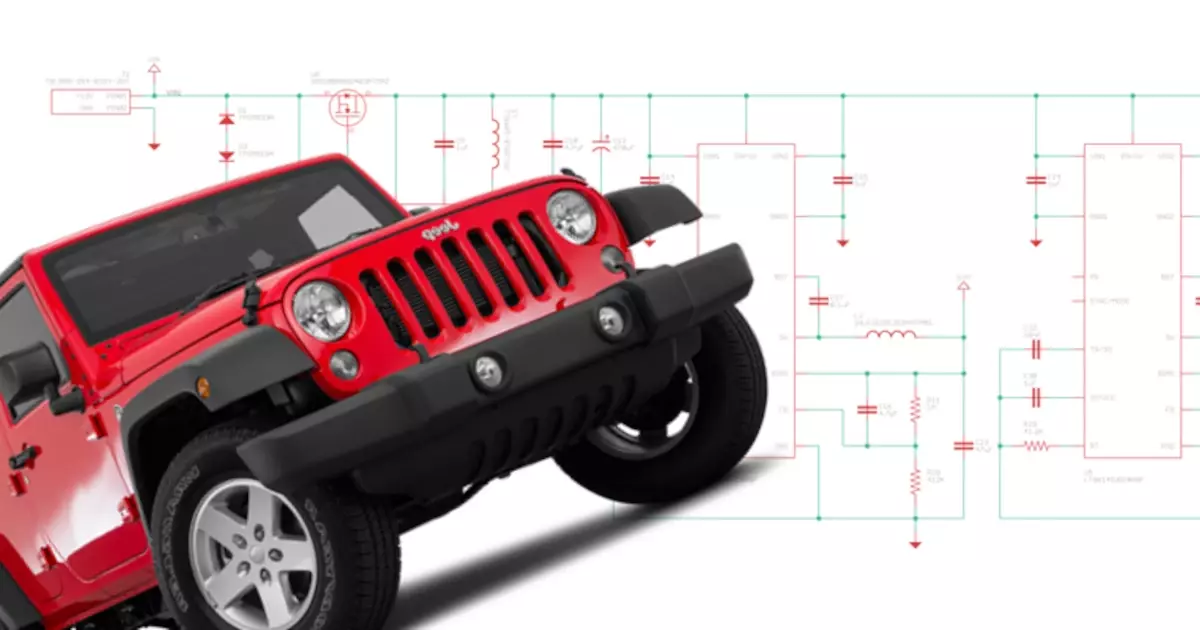
The Jeep Prop Fan project rides again! Well some iteration of it at least. Lets design an open source PCM (Power Control Module) for automotive apps!

This is the last installment of Stephen's 'Adventures in Injection Molding'. We are going to recap the entire two year sage and close the book on it.