MacroFab Engineering Podcast #80
Jeri Ellsworth joins the podcast to discuss the development of Augmented Reality technology and the process of bringing consumer devices to market.
John Teel of Predictable Designs returns to the podcast to discuss designing for Injection Molded Enclosures for MFG.
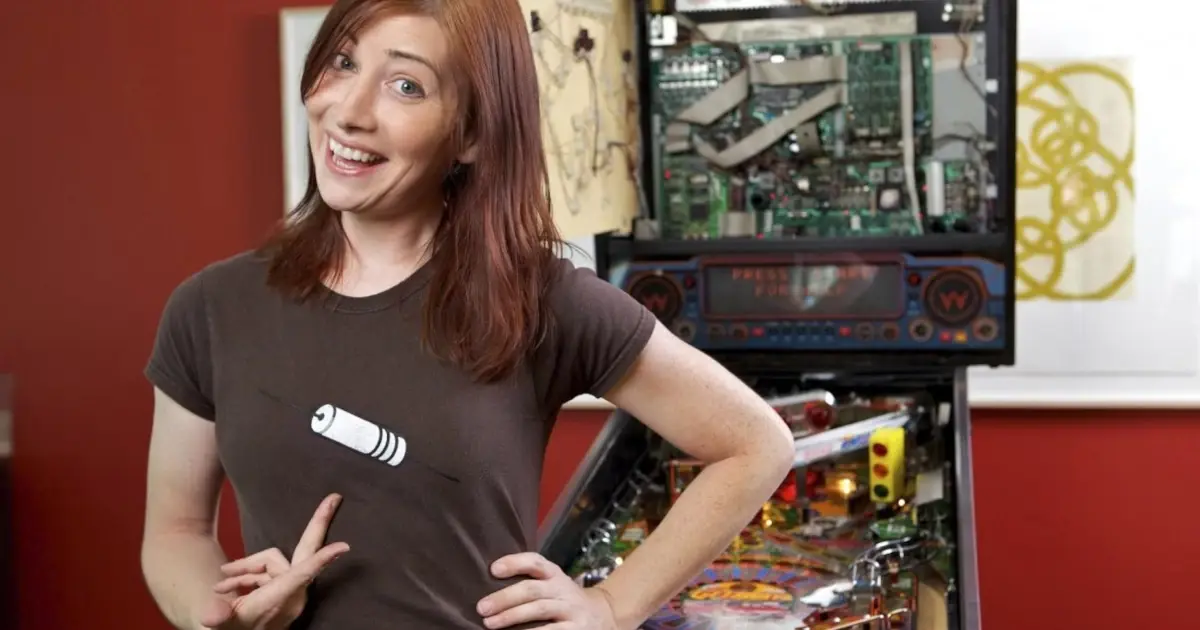
Figure 1: Joseph Broms with his ProtoBricks!
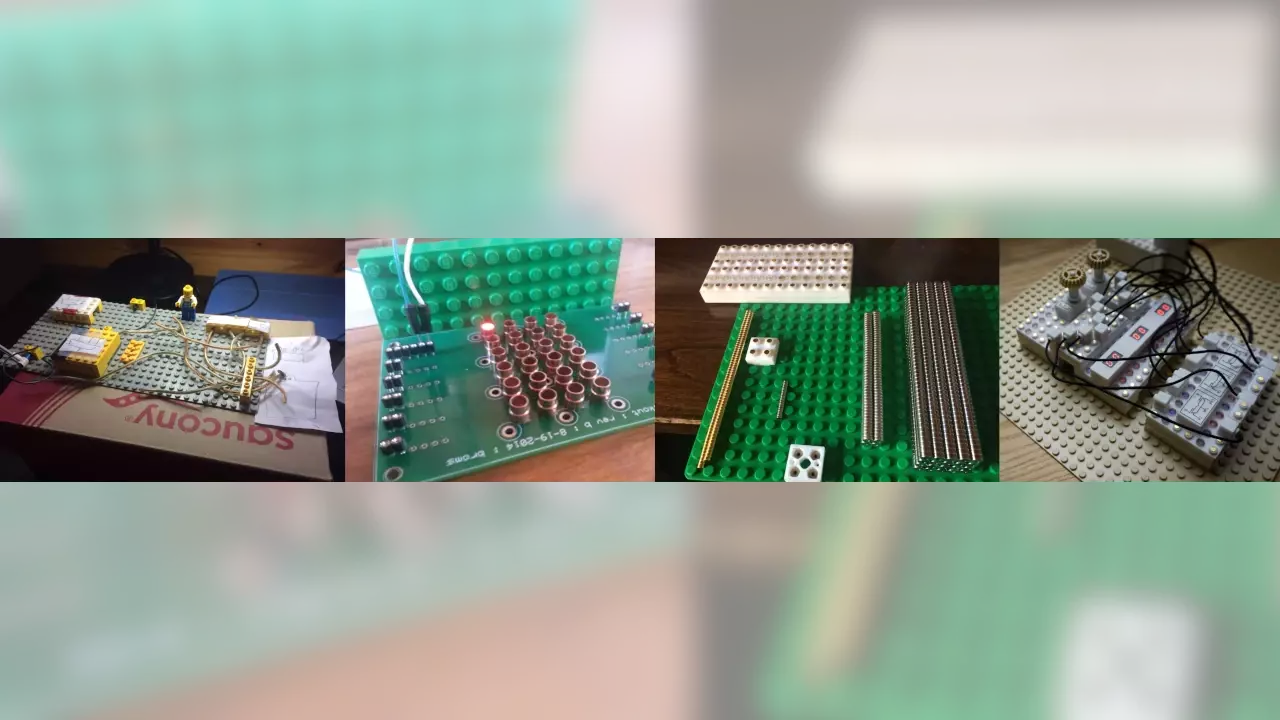
Figure 2: Prototypes Joseph has been working on over the past seven years.
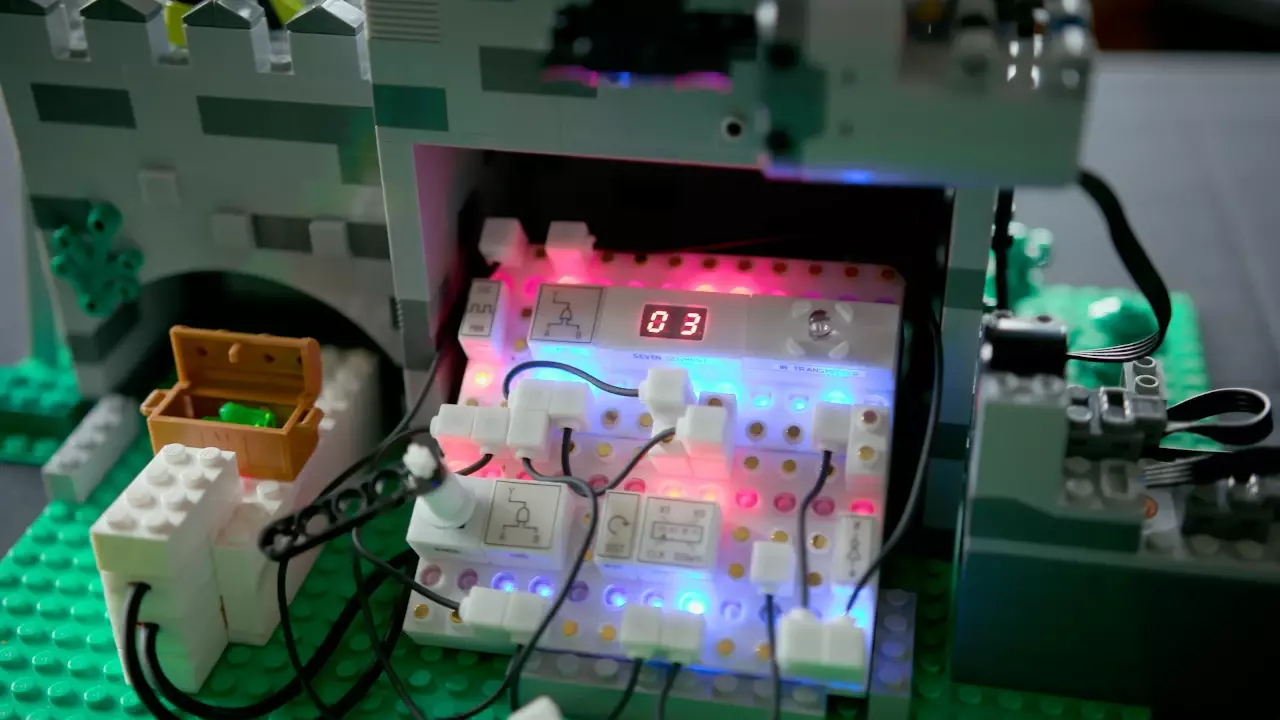
Figure 3: Close to the final product. Protobricks integrates with standard LEGO bricks.
Parker is an Electrical Engineer with backgrounds in Embedded System Design and Digital Signal Processing. He got his start in 2005 by hacking Nintendo consoles into portable gaming units. The following year he designed and produced an Atari 2600 video mod to allow the Atari to display a crisp, RF fuzz free picture on newer TVs. Over a thousand Atari video mods where produced by Parker from 2006 to 2011 and the mod is still made by other enthusiasts in the Atari community.
In 2006, Parker enrolled at The University of Texas at Austin as a Petroleum Engineer. After realizing electronics was his passion he switched majors in 2007 to Electrical and Computer Engineering. Following his previous background in making the Atari 2600 video mod, Parker decided to take more board layout classes and circuit design classes. Other areas of study include robotics, microcontroller theory and design, FPGA development with VHDL and Verilog, and image and signal processing with DSPs. In 2010, Parker won a Ti sponsored Launchpad programming and design contest that was held by the IEEE CS chapter at the University. Parker graduated with a BS in Electrical and Computer Engineering in the Spring of 2012.
In the Summer of 2012, Parker was hired on as an Electrical Engineer at Dynamic Perception to design and prototype new electronic products. Here, Parker learned about full product development cycles and honed his board layout skills. Seeing the difficulties in managing operations and FCC/CE compliance testing, Parker thought there had to be a better way for small electronic companies to get their product out in customer's hands.
Parker also runs the blog, longhornengineer.com, where he posts his personal projects, technical guides, and appnotes about board layout design and components.
Stephen Kraig began his electronics career by building musical oriented circuits in 2003. Stephen is an avid guitar player and, in his down time, manufactures audio electronics including guitar amplifiers, pedals, and pro audio gear. Stephen graduated with a BS in Electrical Engineering from Texas A&M University.
Special thanks to whixr over at Tymkrs for the intro and outro!
Welcome to the macro fab engineering podcast. I am your guest, Joe Brahms,
and we're your hosts Parker Dolman
and Steven Craig. This is episode number 80. Our guest this week is Joseph Brahms. Joe received his bachelor in Science at the University of Illinois in computer science. He's worked in numerous industries, including medical devices security, professional audio, broadcast and education, one central theme to Joe's career in successfully turning ideas into sellable products, ranging from an FDA approved cardiac stimulator to a critically acclaimed instrument tuner, AP tuner,
cardiac simulator or stimulator. It just
stimulates and actually sends pulses into the into the
heart and third, yes, like,
right right there like voltage right there for cardiac arrhythmias. So they'd be sending, okay, pulses in at a certain rate, and try to trick out the heart how its how its pacing and figure out how how it responds. So some people with with bad hearts they've got they have issues where they can figure things out, there's there's fuel to it, and I just helped with one of the devices for that. So but hey, getting anything FDA approved is is worth saying, because that's just, you know, a hurdle unto itself. So
right, yeah, yeah. 90% of it is getting the approval and the 10% is all the rest of everything else. Right?
Well, that and you know, you're building this product and and actually, I was in the room watching the music, and you know, after all the testing and everything else, and it's like, okay, this thing has got to work. So you know, that's a that's an extra level of usually don't expect the engineers to do.
You didn't use it on yourself. Did you?
Know, I did not know that I do that?
tested it on the family cat.
Yeah, there. There we go. No idea.
People think that FCC and CE testing is hard to go. Yeah. What would FDA testing, like,
reams and reams of documentation and all the fun things on the side that is, you know, it just it just adds up. So you wonder why it takes a long time to build these things.
And why medical devices cost so much? Yeah, why they cost so much.
Exactly. Right. So
well just release a product. Right? I am the Go go. Lovely. It's called proto bricks. Yeah, you want to tell us some more about proto bricks?
Proto bricks? Yes. I don't know how to say it exactly. To sell it the best. But yeah, so it's a it's a it's a circuit building toy with using kind of like Lego compatible enclosures to enclose all the all the electronic components and digital logic and all the wires and everything we've tried to make everything look like Legos and fit and feel like Legos. So it's it's actually been a long effort to get to where we are now actually saying that we're getting to Indiegogo and actually gonna be showing to people has been like, a huge undertaking a journey for me, because it's Oh, it's been it's been a hobby for like the last seven years. And it's just kind of turned up and up and up as I've been as been working on it. But a lot of false starts along the way and kind of pass I went down that didn't work out. And one of the hard things is I started this whole thing just as a software engineer which doing the all the software for that cardiac stimulator, and all the all the other things I've done in the past, you know, not all that apply it to doing the circuit board design firmware, although that wasn't as bad because with all the software, mechanical design contacts, and all that stuff the contacts was was by far the hardest thing was just like getting this physically to all click together and have all the electrical connections, the way the way you want a child to be able to put a toy together. That wasn't easy. So it was it was a Yeah, it was quite an undertaking. But I should probably explain a little bit more about it. So basically, if you think of a solderless breadboard, and this is since we're talking to engineers here and hopefully ones that have used one before, you know you've got your you've got your solderless breadboard, you've got dual inline chips along the center there you can put in your TTL logic or more complicated things now and microcontrollers. You've got buttons and knobs and whatnot. So that so they've got that subtle line and then you've got, you've got your spring embedded solderless breadboard contacts that you put your wires into, and you build your network of connections. So I wanted to kind of give that experience to kids but you don't you just give them all that you all of a sudden say well, you need resistors here and you capacitors and a voltage regulator. Let me explain voltage to you and let me explain that You don't want to plug it in backwards, because that's gonna, you know, bring out the magic smoke. Well, what's the magic smoke Well Don't, don't do this. And this and this don't tie two outputs together all kinds of don'ts. So we kind of hold kids back from being able to build with all these electronics for a little while, because there's just too much ancillary gunk that you have to kind of get through at first. But the core concepts of, you know, AND gates and OR gates and shift registers, and now, you know, lighting all these things up all that you don't you don't need, you don't need a lot of math for that you can get started on that right away, as long as we get the other stuff out. So that was my idea was I just wanted, I want kids to build circuits. And in being software, I always like, you know, being able to step through and debug everything. So I wanted to kind of have a debuggable version of a circuit. And to me, that would mean, you can see the whole state of all the inputs and outputs at any moment. So you can kind of just see what it is. And you know, you're not going in there with a multimeter or a scope. You don't need you don't you don't need that stuff. Instead, let's just give them a row of LEDs for all the inputs and outputs will even show them which ones are inputs and outputs as they play, again, the bricks, and then they can wire it up. And they should be no way that if they miss wire it that they can smoke the board or do anything bad. Everything runs at 3.3 volts. So that's the idea. That's the promises can't if I build this product will you know, how easy would it be for a child to do it? How about how much fun? Can they learn this stuff? That's,
that's actually something you mentioned was like, there's not a lot of math, which is true, because it's Boolean algebra, which is you have 01 And then a couple operators, and that's it. Whereas, whereas a whole, I mean, just whole numbers, zero to infinity.
Right? Right. So there's some things with you know,
so it's sort of, it's sort of, you're creating a new definition for plug and play, right? Like, it literally is just click them together. And you've got a circuit
of some sort, you've got a circuit, and it's a plug anything in it, it'll show you in blue, if it's an input and red, if it's an output and bright blue, it's high. And if it's bright, low, you know, high input high. So it's like really quick, you can like see these things and just try them out. But you're actually giving kids like bit they're seeing every single bit. So you need to do a little bit of explanation, like, Okay, this is what a binary number is, this is in here, and you turn the knob and you watch the number count from like, zero to 15, and you're seeing the, the bits flip over, it doesn't take long, just turn the knob a few times to actually kind of figure it out, it doesn't take that long it especially if it's hands on. I don't think a kid's gonna be that said, if you do everything virtually like that, you could always build digital logic on a computer. But that losing that hands on Ness just just takes it takes the takes the fun of it away, and just kind of keeps it from learning those principles. Like just really feeling them and understanding them. So you know, and not only that, but just building them into your Lego models and having to do things is just like, just addictive. It's just like really cool to connect and things together. See how it works. So yeah, so we have to introduce bits and you know how stringing them together turns into a number. And I can break those things out and you know, tap the third bit of your your number and every fourth time a light goes off. Well okay, so now they're understanding what you know, is 1248 They figured that out real quick because it's all kind of broken up for them to do that. And then we try to you know, try to give a for every like, kind of digital logic component I tried to give, you know, a Lego, but I can't say Legos because it's not by Lego, but let people understand people understand. Like, if I say another word, even brick, it's like, Oh, you mean Legos? Well, yeah, I meant Legos. But I'm supposed to say the word brick here. So anyway.
So that's been the mega block, ultra block,
brick block, second not be named here. So the brick and I cannot be named. You know, you want you want it. So there's an analog for a knob for a button for a seven second display. And, you know, I skipped on like, Okay, we don't need to teach kids about binary coded decimals right now. That's okay. They can learn that some other day. There's all kinds of other things that you can kind of, you know, you know, flipping all the bits left or right, because well, this chip has it one way and this one has another. Well, I wanted to make everything very, very organized, very simple, very consistent, compared to kind of like, if you go plug in a bunch of 7400 TTL chips, they all have just a random set of pins all over the place, and just walk through that way historically. I mean, you got a shift register that as a pin on one side and then while they put the rest up here, well that's that's nice for them. I'm glad they fit it all in there, but I don't need to, you know, expose kids to frustration. this URL and that's
to let them know what's what's down the road.
Frustration this early in life, we could give them a few more years here, guys. Yeah, so So you know, we were gonna keep it simple and clean, they can, you can always graduate to dealing with all those things and you know, getting into Arduino and, and Raspberry Pi and stuff like that, and I can talk about a few things and how it'll interoperate with those things.
You know, I really like that the idea of learning when you need it, you know, like you're saying, you kind of learn the basics. And then what you know, bit flipping and things like that. You don't necessarily need to go through, you know, like when you get a book, and it has, like, 30 examples in the beginning. And the examples are not things that you actually want to do. They're things like, here's an example on how to flip it, I'd be like, I don't care until I do, you know, until I have something that needs it. And I like to learn it at that point, you know, and so it seems like you can kind of finagle it with your, your Yeah, it's
like, listen, yeah, listen, Jimmy, let me unexplained Boolean logic. And then I'm explained, you know, negative logic to you. Because, you know, sometimes we just wanted everything flipped upside down, because it was more power efficient that way, at one point in time, there was all sorts of things that kind of has crept in, everyone just accepts, but if you have a clean slate, you can get a lot of things. And it just really cuts down to the core, it makes it really fast to build circuits to because I even hide the power and ground. For the most part, where you're just plugging in your point on the brick, you get the inputs and outputs going up or down. And I mostly put the inputs on the bottom, and the outputs in the top, why? Why are the inputs on the bottom because those are closest to your, to your hand. So you've got all your inputs and your knobs and your buttons closer to you. And your outputs, you know, move up the up the table as you're building thing. So there's a lot of thought in the, in the layout and the Yeah, the ergonomics, I mean,
it's a brick, we cannot mean that is known for not wanting to step on them. And you're talking about economics. Yeah,
I can read there we
go. I think I should round a little more, you know, so and trying to fit you know, have them click into regular Lego bricks. I mean, that's just a level unto itself. That was usually you don't have this when you're building a circuit and you're doing an enclosure, you know, having to hit those critical dimensions trying to match that look and feel. Making sure it has the same holding strength like Lego likes to call it clutch power. I think they just like to call it that just is that also it you know, it's not trademark no one else copies that wanted either. They just
awesome. It's an awesome name. But here's the thing, like, what's funny about it is like, they don't need an awesome name to sell. They have an audience already, like there. They don't need to be like, and now with clutch power. What are they gonna get? Are they gonna get a lot more people as seen
on TV with extra clutch power?
I think they did finally name a mini figure clutch powers or something like that. But you know now like, Yeah, but if I use it in a purely descriptive sense, then I'm allowed to say clutch power. I guess they are to when they're talking about make that
word. I think we can also make clutch where clutch power code word. Okay,
so the clutch power is the secret code word for this episode. If you email in the secret code word to podcast at macro fab.com along with your address, we'll send some cool swag away clutch power. hour. Okay, sorry, continue. Sorry.
Which is incidentally, around 60 grams of holding force. So each each stud holds about 60 grams holding force, that's what you need to get very close to if you want to feel and hold like a Lego. And then there's very particular like, you know, dimensions you need to hold for for the the stud diameter and the brick length and all those things, but it's very regular. And once you've worked on it for a long time, it starts to like, be straight. Yeah. And unfortunately now I'm ruined because I think in metric instead of inches simply because of this project. So everything is millimeters. To me. It's just like, you know, how far away is that? It's about 100 millimeters difference like what what are you talking about? It's like,
I have no clue how far that it's okay, go across the
pond and tell me that again. So yeah, so it goes our
metric
you know, everything seems to be since it's since it's you know, it's Danish, it's from Europe, all the drawings that I see a lot of people always talk about the pitch being eight millimeters, which coincidentally, isn't isn't eight it's slightly less so you know, there's if you look on a few websites, there's people who've measured these things with calipers and micrometre micrometers. And, you know, you you've got to you got to be more accurate than that if you're going to start paying for really expensive injection molds to you know, make things compatible.
I always, always saw it as it's, there's two units at least it's like something OD and height, which is Brick.
Yeah, um, so I do okay. So if I if I recall, right, the the brick height is it comes out to be a nice even Imperial number
9.6 millimeters. That's 9.6. And so you can break it into three 3.2 millimeters. Yeah, and then this and then the stud pitches the other one. Oh, this is great fun fact. So the stuff on it's 7.986 millimeters, which Okay, some point 986 millimeters. Compare that to what is the pitch on a solderless breadboard board? 2.54 millimeters usually seen point one mils. Okay, those are exactly a factor of pi difference. So pi pi 3.14. If you divide one by the other, so interest instead of having, you know, having your son was breadboard, I mean, that's another reason why it's better it's good to get younger kids that they're going to get onto this. Get don't start on a solid breadboard, it's too small for their hands is too small to see any symbols and anything. You need to go 3.14 times larger. And it's, it's the size of LEGO studs. there then you can put labels on you can put words you can like, you know, it's like way, way bigger.
So we can use them. How can I is at a young age.
Yes, exactly. So start explain. That's right. I tried to build the product, like a prototype of it like the second iteration just with a solderless breadboard. And it was like microscopic, I tried to put the symbols for like the AND gate on there. I'm like, Okay, this is why they don't really put any symbols on chips. Because there's no room you can like barely see the orientation marker in the lower left corner. And then you have like three numbers. And the rest is like you have to like look in the light to see the rest of it. So that was just like a hopeless cause you know, regular electronics are not meant for kids to get introduced to it. They they're meant for what they're doing. And this is like from 1970 Now everything is even smaller. Yeah, it's like dust,
right? Yeah, so point four millimeter pitch parts. And yeah, oh, four, two, which is 40 mil by 20. Mil and stuff like that. Yeah.
Good luck parts. Right. Yes. Right. Yeah. It's
like, let me introduce you to your microscope where the see your circuit run on a postage stamp. Thank you, dad. And, you know, it's Yeah, so it needs to kind of be blown up into size that that works for them. So that that was that was a fun thing to find. Yeah, I don't know. It's been a long, it's been a long thing going through each iteration. Like I started this thing trying to, I thought, well, Legos are really hard to, you know, to be compatible. And so what I'm gonna do, I'm gonna take a real Lego and I'm gonna draw out the centers of it, I'm gonna put the circuit board inside the the Lego then I can just avoid having to worry about injection molding and all those problems. So my first prototype, I was actually milling out the center of Legos and then trying to fit circuit boards in there. Just to the circuit board.
Do you have that?
I, I do I can I can show you under sad picture. Well, the first ones is like basically me with me with a drill essentially, like drilling these things out. And it looks to me it looks like a five year old. Like just having fun of the drill and his Legos so that you know, that's me, you know, 34 or something at the time.
Oh, trust me, probably every one of our listeners has been in that exact same spot.
Yes, but not usually, you know, middle aged, but here I take in my son's Legos. And I'm like, and actually I had my oldest son he's he's quite a bit older now. I said okay, well, I explained to you digital logic on the chalkboard, show me how you'd build this Legos and so he I have a picture of him like using speaker wire and you know, like really crude like, taped on like schematics onto like, Technic bricks, how he saw it and actually is really, it was really useful to see you know, how does it I want to try to look at it and connect these things together. So yeah, so he drilled them out and tried to put them in and I suffered with that for a while and then moved on tried to not deal with Lego. So I did this I was breadboard one again and set it out. It's too small, it's not it works like I was able to get all the circuits working and reprogram the microcontroller. But I just knew in my heart of hearts, I need to make it Lego compatible for it to really work you know, at that age. So I went on as I've kind of stuck in like this kind of design corner here and I just had to wait a little while like let my mind free from it. I just had to walk away from it and came back and kind of came up with what looks close to what you see now which is this hub. It's really a solderless breadboard looking piece. It's got six rows, six rows and 12 columns. And the center columns are just like your dual in line you know straight you know your chip straddling your dual, you know, your your side was breadboard and then just a row of LEDs, and a row of IO pins. And I put all the brains into the hub. And actually we can talk about that in a minute is that hub because that's where a lot of the work went, was in this was in that board. And it has one microcontroller that does most of the magic for the for the the product. And so but what I didn't realize at the time as I was building was, well wait a minute, if I'm doing all of the I actually emulating the circuit in this microcontroller is like detecting all the bricks on top. And because I'm detecting all the bricks on top, I can have like, if you want to, like make a string of bricks in the center, like have a different meaning you have complete control over that in the microcontrollers in software. So in the firmware, so So we introduced some really cool concepts like these extended bricks, where you can take a counter that instead of counting, you know, up to, you know, two bits, you can make a count six, or eight or 12 bits. And so you just move this one brick on the right side, and it just extends your brick. And if you want to add a reset pin, well you don't need it to start with, you're just talking Stephen about like, well, you just say add things when you need it, I you don't need every brick that has state have a reset pin on the, on the brick until until you really need it. So if you want to, you can have a modifier brick on the left side of your, your kind of made main logic brick, and it can be a reset pin, or an alternate function, or
you can just reset it, you just unplug it, like pull the brick out and put back in.
Yeah, you can totally do that. You can do that. But this way you can like reset it with a button. So that can be triggered different ways. And one of the circuits in the videos like and not only that, but I use the Reset to like, hold it like if you hold the reset down, then it will like basically turn off all the outputs. So which is kind of normal.
Yep. On reset,
yeah. hazy, essentially. So you know, now you can kind of take advantage of that on some of your circuits to make the the everything really compact. You know, how much can I fit on one hub? How much can I fit on two hubs, so which coincidentally, the hubs are 96 millimeter See, I'm still thinking two millimeters here. That's as far as 97, I only had a limit to when I started this, I started with the eagle Free Wear version, whatever, and you're limited to 100 millimeters. So I built this thing with 12 studs across because I only I can only fit 12 studs worth and Eagle free were obviously I've gone way past that. So I could have bought the eventually did what the main version of it, but it seems about right? What's that,
so you didn't want to redesign it.
I didn't want to redesign it. But actually 12 is about the right size, it's kind of like the size of the cell phone. And it just feels right, you can always put more on the side, maybe we'll come out with a 16 down the road. I mean, it's gonna add to the cost, but maybe, maybe be worth it, right? Like it's like 25% more. But if you got to have, you know, you want to cram a little bit more on there, I don't see why you'd want to go too much smaller, maybe if you wanted to pack a really small circuit into your spaceship or something, you know, maybe an eight, eight column version would make sense. But it's 12 as you can build a lot of stuff, it's but the whole thing actually can branch out from there as well. So you can add as many hubs as you want. So it ends up not being much of a limiting factor. Anyway, so so it's very modular, I'm a software guy so everything had to be extremely modular, like the hub is also considered regular brick and it's very recursive and maybe like three people in the world will appreciate that down the road but it made it made all the programming simpler made all the organization of it simpler. So yeah, you were
talking earlier about the the the platform what was the collagen? The baseplate Oh, the hub the hub? Yeah, yeah, yeah. Um, so what's the hardware and software running on the hub? What's what's good are under the brick so to speak.
Under the brick is it's a Silicon Labs 32 bit ARM microcontroller. That's the guy Oh, yeah. Oh, you got it. EFM 32 Um, it's treated me really well. I've I've used it for a long time. And it has done a ton of stuff for me. So I asked a lot of it to so I'm really pushing the limits on I've written to Silicon Labs, I've actually got a blog post that they're gonna put up eventually just me saying basically, you know, this thing is done everything I need and 64 pins, I'm able to do all the IO for the all the the edge of the hub is just GPIO with Siri series resistors to protect it. So those are kind of like directly connected, but then the center of the board needs to do needs to do you art at any one of the positions it needs to be able to do a voltage or a resistance reading in any one of the pin locations kind of spanning the two columns. So that's a lot of pins and a lot of like circuitry in there, I had to narrow it down considerably. And the way I did it was I have two, low ohmic, analog multiplexers, that kind of like, basically scan the center two rows across, and it does all the voltage readings or talks over you are to something that's on the, on the brick. And it does that like really, really fast. I mean, it's gone. It's looping through, I think I'm down to like, refreshing the whole board and like five milliseconds. So it's like going through there and oh, that's probably less than less than a less than a millisecond for each pin. I'm turning on EDCs actually is wave less than that to us. Probably 100 microseconds, turn on ADC. Take a measure, move on to the next one. talk over you are listening to the response. So it's it's chugging on that. So that's, that's that's called the downlink. Unfortunately, it points upwards, so I'm forever ruined with the naming idea is naming is everything in the programming and so you end up naming it the wrong Trudeau and but the downlink points up. Ah, this is this is bad. But anyway, um,
he just moves Australia, that'd be fine.
That's it, you know? Yeah. Exactly. Exactly. Talk to, to the guy down there. So. So anyway, it scans across there, I also have to control all the LEDs, and there's 24 le RGB LEDs, I wanted to control the intensity too, I didn't want to use too much extra circuitry for that. I might, at some time have to, you know, add a little tiny little microcontroller. But right now this one microcontroller is doing like pulse width modulation on all of those on three banks. I have some
you know, this needed that microcontroller.
Yeah, what? 28 megahertz? 28 megahertz, okay. I'm pretty sure. I think you can do 32 With a crystal, which I don't use. So I could throw a crystal in there. And then I get 32. But yeah, I'm going I'm ripping through these LEDs. I'm like, going through this interrupt like 20,000 times a second. And it's holding up, pumping out all these bits to these, these LED driver chips that I found, and I've got three of them on the board right now. I might consolidate down to one but yeah, that's like the, the the center this the Silicon Labs, microcontroller is like doing all the work. It's getting everything done. So I'm super happy with that. I have written the second headset, guys, this is this is wonderful. So we'll work with that.
Oh, so what's inside the horizon? So if that's doing Yeah, that's the brain. Yeah. What's what's that's the brains
like what tells you? Yeah, so for an gates, you have one precision resistor, fountain pen. That's it.
Oh, so there's no power or anything. It's just
no, there's no power. So it's one precision resistor. And when the hub reads that, then it interprets everything from based on that Gotcha. Sense. It saves its layer, like Okay, so I'm also writing an article plug here for all about circuits that explain a little bit of that. You know, the reason why I did that, because there are you know, well, maybe you want to run your AND gate at 25 megahertz. And you know, regular Seema Sanjay could easily do that way more. But you know, even on a solid breadboard, you could get, you know, megahertz out of it. But you know, for a kid running a circuit, they don't need to run a 25 megahertz, I mean, that one of the blights couldn't be doing I mean, they're gonna be counting like, it'll be just just be a total blur. I might as want to show them a blur. It's, it's too it's too fast to learn anything from or, as I've showed it to kids running into, like 50 hertz, like the counter spinning up. They think it's crazy. Like if you put a sound in there, and it's like doing a pezzo speaker at 50 hertz, or they're like, oh, yeah, that's how computers run 50 hertz. So I say in the article, I'm like, I'm gonna bring it to him later. Look, you can run a million times faster than this, actually, more than that was a little more care. So yeah, it's all emulated on that microcontroller. So that microcontroller.
I was wondering how you prevented or what kind of voodoo you had in the bricks, that you prevented it if someone just turned it around and plugged it in backwards?
Yeah, there's more tracks because I can do two different things I can, I can, like read a precision resistor, or, or a voltage, like the knob is at one precision resistor, and a potentially ometer on the second set of pins. And so I read the I read the potentiometer on the hub. So the knob doesn't even know what it's doing. I mean, it's just it's brain dead. But it that's a good thing, because if you put any real chips inside the brick, you have to protect them. Like you said, cars got to make a good product costs cost. I mean, sorry, this, this is a great product, but it's gonna cost you $1,000 For an entry level set. Now, that's not gonna work, you know? So you got to like take everything In the book to be a consumer electronic device and get it out there, and you know, it's something that will, you know, it's got to find that balance that trade off. So, so this is an easy one for me, because it also the hub knows of zippered output, so it can change all the LEDs for it. It also, since it knows what brick it is, it can like tell that like back to a computer or a phone down the road, it can tell you exactly the layout of your entire circuit and all the bricks connected to it. So you could like see your circuit on a computer and like share with your friend or something. So like we like know, everything that's running on there. You could like slow down the circuit and do all kinds of crazy led effects with it. So there's a lot, there's a lot to it, I it's actually really useful in this case to do that. You can talk over you aren't too I was telling you that. And I do have to do extra protection, if you plug into power ground you are. So it's four pins, it takes four pins. So like the seven segment display, it's using four pins that are power ground, send and receive. And then I use a little Silicon Labs. It's an 8051, you know, an FM a busy bee to run the seven second display. And that's all I have in there, I need to I need to add just a hair more protection circuitry and the final, you know the final thing versus my prototype, but I can plug it in any direction. And it will it'll it'll be safe, it won't work if you plug it in sideways, but at least it won't damage the circuit like that's first do no harm. I also i the whole thing is built such that your power and ground can actually be flipped anywhere. And I rectify power and ground with a set of four moss fats. So even if you flip power and ground it takes the power and flips it back. So that's how we protect power and ground there. And that's how I can plug in, like seven segments play on every column. Because the bottom of the center rows is just power and ground alternating. That's all it is, is just power and ground alternating. So the whoever plugs into it has to like tap into and be like okay, I can just take these two pins and rectify it and now power up so, so yeah, a lot a lot. That's why it's taken me so long. It's been a lot of it's like a puzzle. And I had to do a lot of tricks to be able to, like geometrically make it all work out all the pans all that stuff, man. It takes a while. Yeah, yeah.
So speaking of, you know how long it's taking, because all the challenges and stuff like what about mold design? Because you were talking earlier about? Like how precise you know, make your plastics to get the worse. The clutch?
Clutch Power? Power. Yeah, yeah. Lego Lego is legendary for their plastic molds. Yes, there Yeah, molder, yeah, credible.
They're very tight. So you know, we need to we need and we're going to be judged on at that level. Right? If it doesn't fit, right, if it feels like a you know, Lego clone kind of feeling block has not good. i The brick that shall not be named again. I don't know, whatever.
You don't you want to be you want to be the brick that cannot be named. You don't want to be the mega brick that can't be named. Or whatever.
Yeah, so So yeah, you know, you really need to hit that kind of, that's what you know, it's gonna we want to compatible Legos. It's got to fit and you know, click and snap into place just like that. So we need to hit the tolerances, just like they do. We think we can do it right now everything that I have. And so for all the videos, excuse me all the videos and everything that the examples and the pictures. I was able to do everything with 3d printing.
That's not the case. How do you How did you prototype how the sky iterate?
Yeah, so well. First I drill, but that didn't work.
Did you like get your kids Legos? Or did I totally steal his pirate ship? Apart?
Yeah, yeah. Well, okay, but there's a good side to this and you wouldn't so I'm telling my kids don't worry don't you know the Solly said there's LEGO sets coming in. I'm like, don't worry. It's a business expense. They're like yeah, we're gonna get this eventually so yeah. And in the video the kid my kids ended up building a bought a bunch of the the examples even my two year old built one of the racetrack cars, and that was the one that one in the video. So they're just like, John's one. Yeah. So that they're they think that's super cool. So, you know, Legos are fun. They're, they're playful. And so, yeah, so so so yeah, I have like a million Lego parts here to just, you know, understand how they have all their stuff clicked together feel like all the different types. I mean, the other thing is, is that this set is really meant to be like used with Legos. Like all the supporting structures and you know lifting the hub off of the plates and like you want to use Legos kind of as as your enclosure as you know adding on to these these proto bricks. So arches make excellent wire ties so like you can just like push put an arch down and I like ties down a bunch of the the the wires that are kind of flopping around I made the wires look very much as close as I can to like Lego rubber hoses i That that was kind of my inspiration. So like you know you want to be able to fit and like you know many finger hands and be tied down by arches and you can actually put little clear leg goes like one by one late like whatever you call them cylinders and all the all the polycarbonate but you don't tell a kid that but clear Legos transparent Legos, they can go in those those led rows of the hub and so it'll light those up. So there's there's, there's, there's a lot of lights and 1000s of light pipes. Yeah, exactly. Custom light pipes. So I'm just like, Yeah, where is this? So this is something I you know, is kind of missing from the Lego ecosystem that we're, we're, we're adding on to the site, but it's still good to have a big pile of Legos to build into all this stuff. So yeah, I see it's complimentary. Where are we? So we're drilling Legos and there were a milling them. And then I even had a machinist do some of the first when I was still in my first iteration, like helped me with trying to mill out just basically raw plastic. Because yeah, building injection molded injection molds before you're ready is like, deadly, you can't pay for that that's and even more so six years ago, they've actually gotten a lot cheaper over that period of time. After iteration two, I looked again, I said, How am I going to make this work? And 3d 3d printing really hit the scene? I mean, at least I found that maybe it's been around for a long time. I remember I remember seeing a million dollar machine in my college like 20 years ago, but you know, now it's like, you can you can order stuff on Shapeways for like three, four bucks. Yeah. And I could just order a whole slew of things. So I use SketchUp and Shapeways and I was getting Shapeways boxes. I could have had my own printer if I wanted to. But I don't think I could have gotten as well as Shapeways. They do an excellent job plug for Shapeways. They're, they're very, it's very accurate down to a 10th of a millimeter. Not any better than that. At least I can tell. But they're they actually had that was for the or like basic plastic version, the flexible version, I think they have some some more expensive ones that you can get down to like three hundredths of a millimeter, something like that. That's that but those are those are pretty pricey. Like if every single one of your parts cost 20 or 30 bucks it starts to get it starts to add up. So I was able to do it with like three or $4 parts over and over again. And we're just I was just getting a stream of Shapeways boxes actually, like my entire office is organized by nothing but small Shapeways boxes, like all my components are in just getting getting everything shipped here, I use SketchUp which I don't if you guys are familiar with that, Oh, is that for a long time? Okay, that's great and all for a while but after you get serious about like really like fighting every little angle and, and everything. It was like it was starting to like kind of weigh down on it. So I moved over for a short while the fusion 360 which I think is still trying to get into primetime and and and then SolidWorks I was actually able to nice enough SolidWorks gave me they put me in their their entrepreneurial program and I have that on the press release. Basically they gave us it gave us a free copy of all their software to be able to design this it was after I showed them pretty late stage prototypes this is like one year ago
and oh my gosh okay, that is a tool meant for people to actually build stuff you know? Yeah actually build stuff and like suffered through all the demand and like rebuild I mean it like recompile everything you can go back to the first sketch and like it'll it'll do it all and I'll never learn it all honestly, it's so many tools because I'm dealing not only with like, you know, the firmware and Id but I'm dealing with the PCB design, I'm dealing with the mechanical design, I have stuff talking with the computer I mean to you just how many tools can a person learn and just after a while, I'm just like, the I can't this is it. I'm maxed out. This is this kind of work with what I got. So I kind of held back from learning more tools because every time you try to pick up another tool, it's like, well, there was a month gone trying to you know, figure out how they really wanted you to do it, how to solve them
how to put a contour in like on a fillets in Shapeways and not Shapeways. Sketch Up. Yeah.
That is login.
No, that is the most frustrating thing. period to do in that software. piece off
It's rough. Yeah, I'm
not gonna I'm not gonna trash SketchUp too bad, they'll probably come back to me or something like that. But honestly, it's great for boxes and rectangles. And like, if you just press things in and out, I could I kind of learned at all, but curves and geometric shapes. It's just not it's not meant for that it's not parametric, it's like just triangles. So, you know, you can't really go back and then rebuild from what you what, you know, oh, the dimensions really not 7.986 and 7.9840. Well, you know, sorry, a month gone.
Yeah, time to redraw. Yeah. So,
so yeah, so SolidWorks is pretty awesome. They have tools for injection molding, too, and seeing like, what's the right draft angle and thickness that you can handle. I haven't gotten into the plastics so much. But the Visualize was, is also been really helpful. Being able to, like make a 3d rendering of your parts and then show them to people, they get super excited, it doesn't take. And Legos always look cool. Anyway. So like, if you have this kind of like, modified thing, this is kind of like tech, Lego electronic thing. Oh, it's just, it's just some of the 3d renderings. They really pop. So. So that's been really helpful getting people excited about this.
So another another challenge that you mentioned earlier in the podcast, was the contacts between different stuff. So how did you explain how the contacts worked? The the electromechanical stuff.
Yeah, so I made a really bad choice, kind of in the middle design choice. And this is always where, you know, you always learn well, and you make a choice, you know, bad design decision early, you pay for it for a long time. Well, I thought for a long time there, I really needed to use copper. Basically, really thin copper sheets pressed over plastic to make this thing cheap enough that you could actually sell it and like give it to you know, make it a real product as opposed to just like, you know, a one off thing. And try I have and I could show you more pictures of this, but I had for the iteration three, I had I have a whole set of copper foil tape and copper sheets that I was trying to stretch over kind of press over 3d printed plastic, and it worked. It worked. But it took me hours and hours to be able to like it looks I mean, it looks like something it looks like this like picture of like like gold foil from like a satellite or something. It looks really weird like saying like this intermediary steps of like building these things with these copper sheets that didn't work so well. So I eventually went to another idea that that started to work better which was I was going to use spring loaded pins everywhere. But I was going to also pull the studs together with magnets so I would have like kind of these ring magnets they wouldn't be in the way they would be part they would be like hidden inside the brick but I'd have rare earth magnets like north and south like snap and pull the parts together. And so that would add extra clutch power to the to the brick and it'd be like you know it can extra extra holding force clutch power super super clutch power. So So I did that for a while actually you can see that in some of the pictures I have I have gold discs on the top there press down exactly on the on the hub and on the jumpers but they're they're they're rare earth gold discs with with gold not gold, but they're gold plated. And then I have I have basically electricity going around them and then down over a spring loaded pin onto the board Pogo pin that Pogo pin i In the end though, I need to make it like a stamped metal part. And so that's like that's where we are right now is having stamped metal parts. Because those you can like you can you can put out if we get the right quantity you those things the price on them just like totally goes down. And we can solder those directly on there like a deep drawn stamped metal part. And that will be the kind of the gold center of each of the studs which will be the contact it'll go down into the board. And then underneath I can either use pogo pins to connect to it or or I can use like a spring finger or another stamped metal part that has some springs to it and that's what's going to be the contact on the bottom. So that's right now use a lot of pogo pins for the for the bottom contacts and so that works fine, but you know, we're just trying to get it to be that right mixture for being able to get this at the right price point. So it's it might be overkill to a degree so we'll see it's no big deal. What's that
quantity will kind of dictate that.
Oh quantity dictates everything yeah. Got a real lesson here. It's like, yeah, it's like every everything is possible as long as you have, you know, X dollars to start with. So you know that that curve going down, you know, really, really dives down. And so you can see, I don't know if you saw the stretch goals, but like, I can really add more to the SATs, if we can get past two $300,000. Once we're, once we're up, you know, past a half million, then the price is really, you know, they become reasonable that we can add more parts to the sets. So like, it's in everyone's best interest to like, show their friends and like get this to a quantity that we can really make a compelling set with. We get to 800 I think we have a rechargeable battery, instead of just plugging in over USB. and then 1.2 We have Bluetooth, so you could like your phone could like see your circuit. And like you could make you have your own digital soap right there on your phone, or your tablet or something. So you could you can kind of like see what's going on. Share with your friends, things like that. So there's some pretty sweet Yeah. Yeah, so but I mean, we got it, we gotta go big here. It's got I mean, it's, you know, it's it. It's one of those things that hopefully it'll it'll catch people's attention, say, okay, these guys have something and, and share it around. So. So that's the trick. I mean, I've been I had a prototype, mostly working at the end of last year, and it's been this like the last six months building up for the lady, the video shoot the summer. And then, like getting everything ready for the crowdfunding. And a lot of times you have like a whole team building this, but it's been mostly on me as a hobby, like on the side building. And you I don't know, Parker, I don't know if you remember Tommy, but I was talking to Brandon Knight like three years ago. And he's like, Well, when's this gonna be done? I'm like, Ah, six months from now. Yeah, I
remember that. I remember that.
Still problem? No problem. How hard can it be? Like, okay, he's one of those guys. he's just gonna drag this on his knee. And you know, so maybe, maybe you had a running? If I was ever gonna finish this or not? No, no,
I'll put it this way is is we started talking to you at our first location, and we've moved McWrap twice since then.
Well, I moved once myself, so it's been Yeah, it's been a bit of a road trip here. Yeah, so I was like, bro, I saw you guys on Wired, like, right when that came out. And they were talking about, you know, you dropped the the, the price for being able to get a suit. So my earlier iterations, I was paying, like, a couple $1,000 for the prototype circuits. And you know, to get 20 of them made. And I'd be like, Well, I don't need 100 I don't need 1000 of money, 20 of them. And they're like, well, that's not you know, it's only an extra $5. You can go from 20. But you can have 1000 Only I'm there's no way it's going to be you know, I need more than that. So, you know, the the cost of, you know, being able to have circuit boards, and then have them populated and shipped to you has, like, been a total enabler for this whole product. I mean, I started without that even be existing. So it would in the middle of it. Thankfully, you guys came in and helped out because it wouldn't be there. Otherwise. Very cool.
I remember that Wired article, mainly because the picture of Chris church who's our CEO, he looks on purposely just like Steve Jobs.
Oh, did they try to do that today? Like, I know, like night cut out? Noise. That's
the picture you sent them. Oh, I see. So that was make fun of one of church for that picture.
Yeah, give him some nicknames for that. I'm sure.
As long as he doesn't wear a turtleneck. I'm fine.
Yeah, well, there's been some other turtleneck wearing executives in Silicon Valley. I don't think they've been you know, they don't get they don't get as much reverence to Steve Jobs. So
no.
So the Indiegogo, when's it gonna launch? Yeah, so
the launch is August 15. on Indiegogo, like 8am We're live we're showing everybody it's gonna be really exciting. I can't wait for everyone to see what I've been working on. All this time. It's, you know, it's we're gonna have stuff on YouTube, obviously, and all the other social media Twitter. But you know, the main thing is Indiegogo, check out the sets. See, see, see what you like there. You can even if you don't want to buy one of the sets, just support we actually have a little the maker group in Madison, Wisconsin suggested I need I needed I need a $25.20 trinket something to kind of get people that you know, don't want to buy a whole side or whatever. So we made a little proto bricks flashlight that you just plug right into a nine volt so it'll look like a two by four brick, and then it'll have one of our little IR dishes on top of that. So it's like a little parabolic dish on top
of that you're in Madison.
Yeah, I'm close to Madison, kind of halfway between Madison and look in lacrosse. Okay.
Um, I know Ben heckendorn who's in Madison.
Yeah, yeah. I know a guy who's been helping him out with some stuff with somebody to
show. Go, go bug them.
Just go by him like punch him in the shoulder kind of thing. Yeah.
Yeah, just show up at his shop.
Have him go. Okay. Well,
I should do that. Yeah. Yeah, I'll bring some prototypes.
Yeah, so So work can see this Indiegogo campaign. We'll put a link in the description for that. Is there a website people can go to?
Yeah, so proto bricks. COMM will point you there so definitely proto bricks comm or if you just type it in and Indiegogo or on Google, I think everything is just going to funnel right into there. So you know, we tried to make unique name that's that. There is a protein bricks that looks like an energy bar, but we're gonna like totally take over the name proto bricks, and every variation of it. No energy bars, we want to be circuit building Lego compatible bricks. on Indiegogo. How many more times gonna say that? I
don't know. Well, it's kind of funny, because you're, you're still kind of fits in the energy bar, like, category in a way. lectrons. There
might be some, you know, in a bar. Yeah, exactly. Yeah, there's something to that. I want to do some co branding.
Well, that's awesome. I hope it I hope it goes really well for you. Yeah. Yeah. So alright, you
said there was some sort of some sort of game or something? Is this the Is this the thing?
Yes. Is this something we've never tried before. It's called Stephens game, where Stephens going to ask a guy a question. And you it's gonna be open any question, and you just have to answer it any way you want. And we will answer. Right, so you will all
we got, we got a thought, you know, it'd be fun to have a little bit where we just kind of toyed around with an idea here. And you're gonna be the guinea pig. You're the first the first guest to play Steve's game. And there's no right answer. Okay. I'm gonna present you well, as long as you answer the question. Well, there has to be an answer. Yeah, there has to be a answer. So, I'm going to present a situation and you present a solution. Okay. Okay. So, for the very first Steve's game, you have a room full of balloons. How do you get rid of the balloons?
Kill them with fire?
Blow. A perfectly acceptable answer for the very first Steve's game. Yeah. Yeah. Cool. Awesome.
That's, that's it.
So how would you spell that bomb? You know? Okay. So it's funny because Parker and I kind of we cheated a little bit. Cuz hopefully in the future, what I will do is I'll present a situation that Parker has you already know it, and you've been thinking about it for like, well, what actually this one we've had for like weeks. But I literally just came up with a different solution than I've had for a couple weeks, I would actually pull a vacuum on the entire room, I would seal the room and pull a vacuum until everything was that bloated.
Oh, blow up.
You're not in the room, hopefully.
Well, I mean, that that wasn't necessarily part of this scenario, but it gets rid of the balloons. So Parker,
yeah. How would you get rid of, I would probably throw cats into the room.
Another acceptable solution,
and then just pop the balloons?
Well, so what I like about this is we have three separate solutions. That guaranteed get rid of all of the balloons.
Can you combine the solutions? That's the question, does that make it more effective?
So a flame throwing vacuum cat? That gets rid of balloons? That would be the fastest
way to get rid of all the there would be certainly.
And that was Steve's game. Yeah, exactly. There we go. Great. Look, look forward to more Steve's games in the future.
And I would like to thank you, Joe, for being on the podcast.
Yeah, thanks. Thanks for having me on. This is great. So we're super I love it. This has been a lot of fun. So I'll close this out here. That was macro fab engineering podcast. I was your guest, Joe Brahms. And we're here with our weary Go ahead, go. No, no, no, you
keep saying this out. You know,
I gotta let you finish it. Otherwise it would be and these are your hosts Parker Parker Dohmen. And Steven Craig
later if you want to work take it easy. Yep. That was perfect. Thank you. Yes, you our listener for downloading the show. If you enjoyed this episode, consider sharing it with your co workers, your friends, your family, and your loved ones. If you have a cool idea, project or topic that you want Parker and I to discuss, tweet us at macro fab or hit us up on Facebook. If social media isn't your thing, the email is podcast at Mac fab.com. If you're not subscribed to the podcast yet, click this subscribe button. That way you get the latest map ever So right when it releases oh come on whenever we don't we don't we don't we don't we don't do that shit here
Jeri Ellsworth joins the podcast to discuss the development of Augmented Reality technology and the process of bringing consumer devices to market.
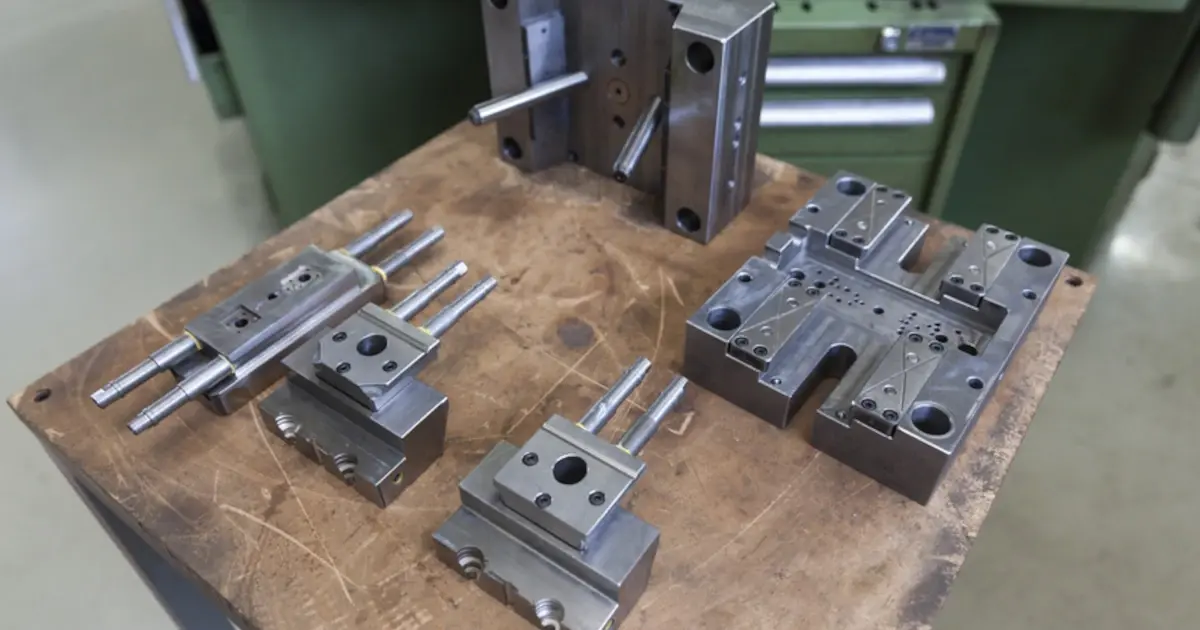
John Teel of Predictable Designs returns to the podcast to discuss designing for Injection Molded Enclosures for MFG.