This week's topics are: Porsche's Synthetic Gasoline, Record Chip Manufacturing Sales for the year 2022, and the Raspberry_Pi Social Media Firestorm.
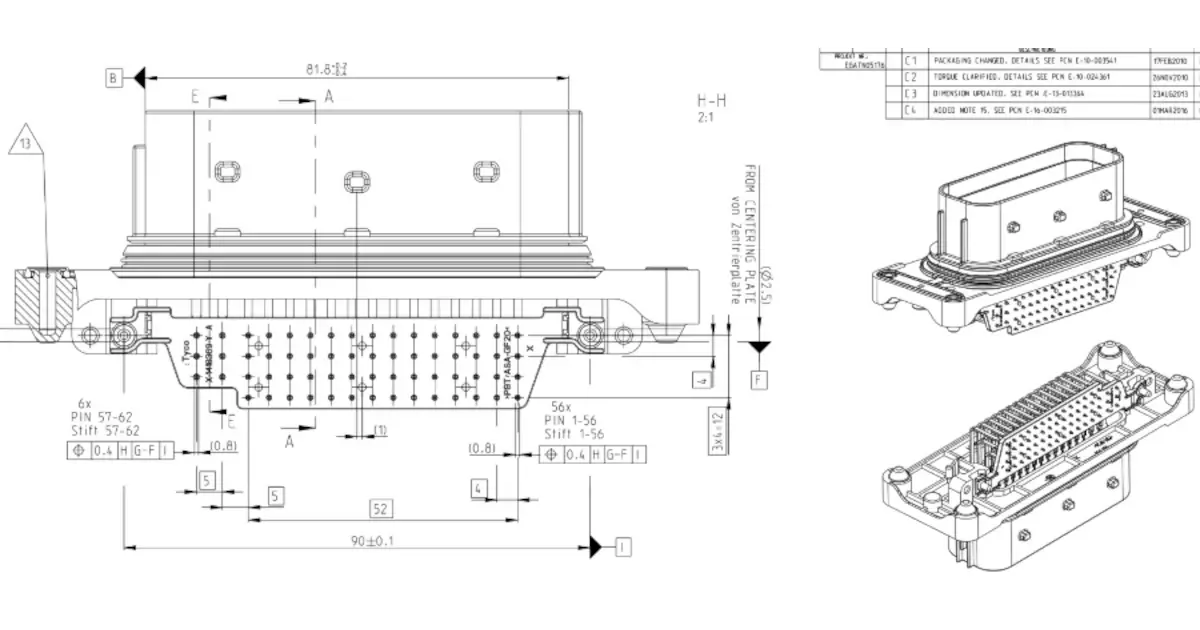
The quest for the right connector for a project! The right of passage for any hardware electrical engineer starts with a connector catalog.
This is the last installment of Stephen's 'Adventures in Injection Molding'. We are going to recap the entire two year sage and close the book on it.
Visit our Slack Channel and join the conversation in between episodes and please review us, wherever you listen (PodcastAddict, iTunes). It helps this show stay visible and helps new listeners find us.
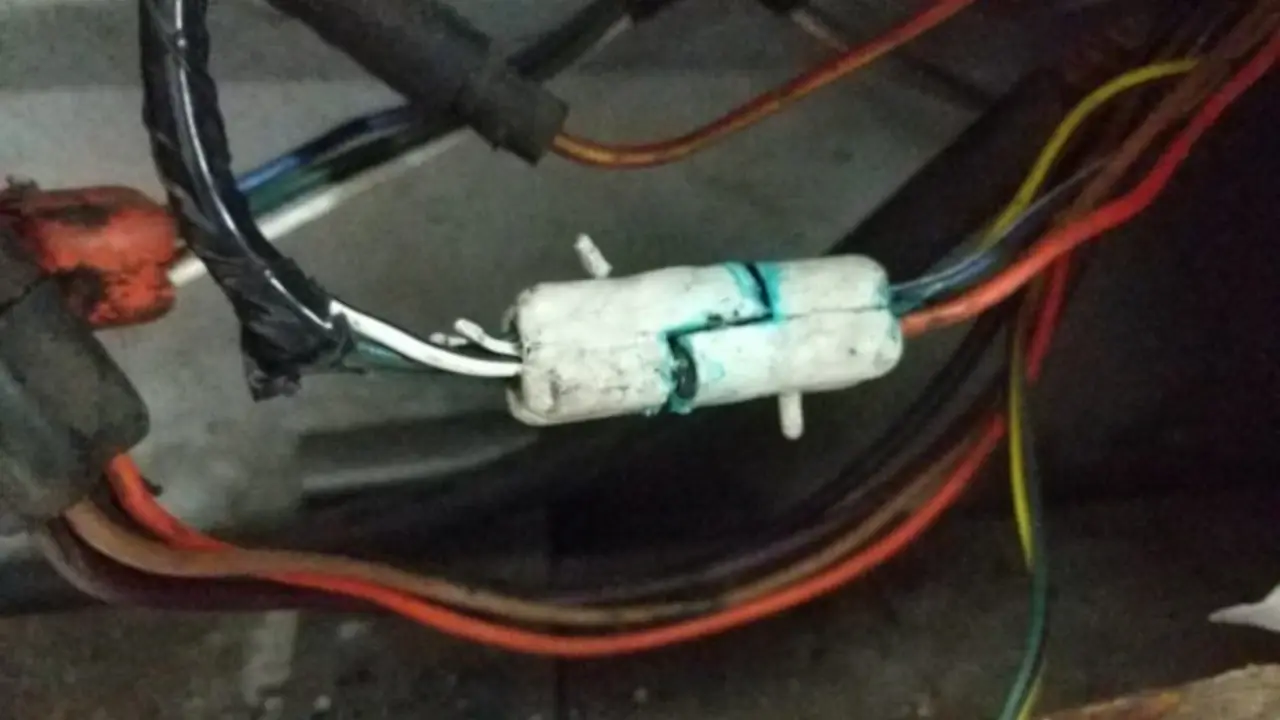
Connector on Parker’s Wagon. This connector sends power to the rear electric windows and was dropping the voltage from 12V to 6V. Green and fuzzy!
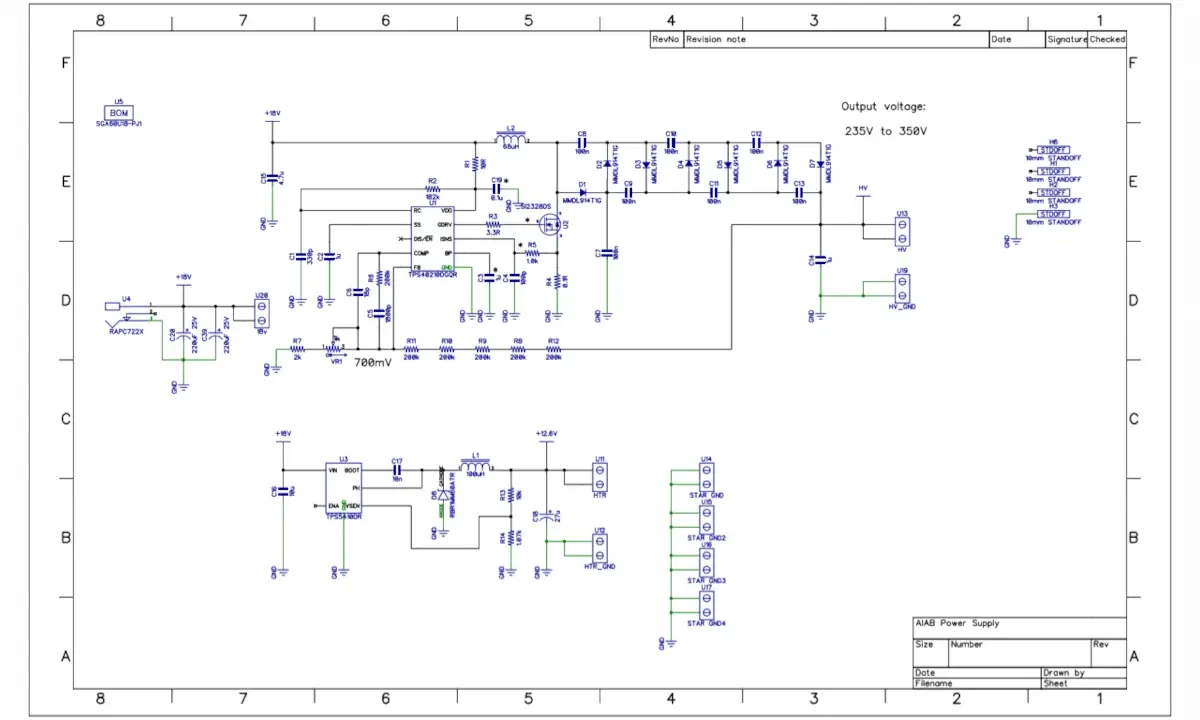
Stephen’s Vox in a Box standalone power supply schematic.
Parker is an Electrical Engineer with backgrounds in Embedded System Design and Digital Signal Processing. He got his start in 2005 by hacking Nintendo consoles into portable gaming units. The following year he designed and produced an Atari 2600 video mod to allow the Atari to display a crisp, RF fuzz free picture on newer TVs. Over a thousand Atari video mods where produced by Parker from 2006 to 2011 and the mod is still made by other enthusiasts in the Atari community.
In 2006, Parker enrolled at The University of Texas at Austin as a Petroleum Engineer. After realizing electronics was his passion he switched majors in 2007 to Electrical and Computer Engineering. Following his previous background in making the Atari 2600 video mod, Parker decided to take more board layout classes and circuit design classes. Other areas of study include robotics, microcontroller theory and design, FPGA development with VHDL and Verilog, and image and signal processing with DSPs. In 2010, Parker won a Ti sponsored Launchpad programming and design contest that was held by the IEEE CS chapter at the University. Parker graduated with a BS in Electrical and Computer Engineering in the Spring of 2012.
In the Summer of 2012, Parker was hired on as an Electrical Engineer at Dynamic Perception to design and prototype new electronic products. Here, Parker learned about full product development cycles and honed his board layout skills. Seeing the difficulties in managing operations and FCC/CE compliance testing, Parker thought there had to be a better way for small electronic companies to get their product out in customer's hands.
Parker also runs the blog, longhornengineer.com, where he posts his personal projects, technical guides, and appnotes about board layout design and components.
Stephen Kraig began his electronics career by building musical oriented circuits in 2003. Stephen is an avid guitar player and, in his down time, manufactures audio electronics including guitar amplifiers, pedals, and pro audio gear. Stephen graduated with a BS in Electrical Engineering from Texas A&M University.
Special thanks to whixr over at Tymkrs for the intro and outro!
Welcome to the Mac fab engineering podcast. We're your hosts Parker
Dolan, and Steven Gregg.
This is episode 139. So last week, we wrapped up the contest, the Mac, fad design contest, blinking LED, sponsored by Melzar. Cheers to all the winners, and thank you to our guests. Judges again, check out the MACRA blog for more information about that contest and see all the details.
Also keep the ears open for some potential contests in the future.
Yeah, and if you have any suggestions for said new contests, let us know in Twitter, Slack email, wherever the Steven the Vox in the box. Any progress on that project?
Yeah, actually. So with the what we've kind of done so far is sort of define what we want the rock solid parts of this project to be. So we know it's a 30 watt guitar amplifier that goes inside of basically a Hammond of enclosures like a ham and pedo box, kind of thing,
are you going to use the wide or the skinny one,
we haven't decided exactly which box we want to because we actually at work, there's like, you know, probably five or six different boxes lying around here and there. So what I mean not, when it's not that we're going to use one of those boxes, it's just we can we can like kind of look at them and figure out which one is the best. Because we haven't really decided yet what the front panel is going to look like. We have some like sketches on a notebook somewhere. But in general, we're right now where we've actually decided to do. And this is actually really fun. We are making a little testbed for the whole amp, because we know the power supplies are fixed, fixed in terms of like, we know they're going to be there.
Yeah, you need you need them. And you know what the specifications are? Right and
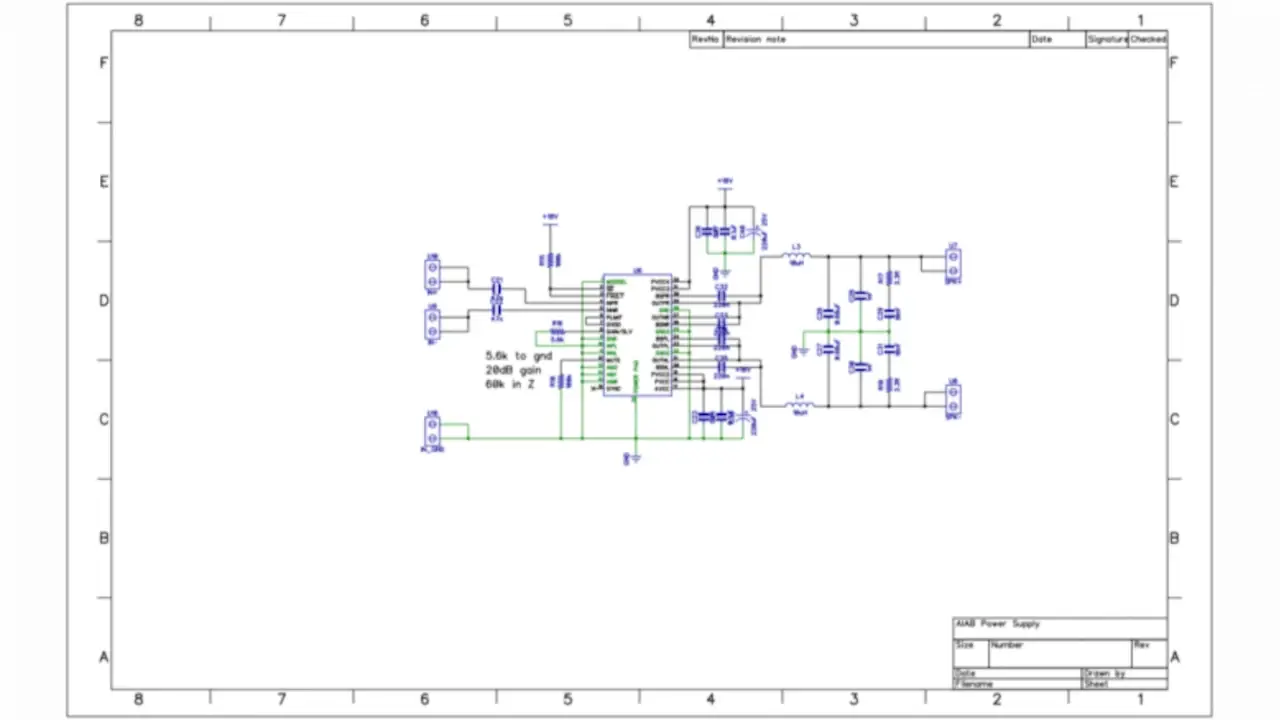
and there's some variability in with like a trim pot and things like that. But in general, I just know what's going to be there. And and the same goes for the power amp to the power amp, I know what voltage I'm running it off of. And I basically I know what the LC output filters and all that crap is. So my thought was like, I was talking to my buddy at work the other day was like, let's just make a little testbed that has the power amp and the power supplies in it, and has a whole bunch of terminal blocks that we can access all the voltages, and ins and outs and things like that. And then we can just breadboard the rest of it. And really the part that we're breadboarding is the part where that actually like modifies the sound of the amplifier. So that makes sense to be the part where you can you know, put in different resistors or caps or blah, blah, blah. So change it around, right? Yeah, so we started designing kind of together this little test box, I guess you could call it, in a sense, it's a little, we put it inside of one of the small enclosures, the small pedal enclosures. So it's like four inches by two inches, it's tiny. And that has a 350 volt power supply and a 12.6 volt power supply, an 18 volt power supply, and a 30 watt power amp inside of it. And it actually fits fairly comfortably. So that's working out pretty well, we're we're pretty happy with that. And one of the one of the main reasons why I wanted to just do that was the since we're dealing with high voltage, I wanted it to be inside of a box. So that when we're actually breadboarding with it, you have to be very intentional about how you're connecting things, you're not going to have a whole bunch of just like goofy wires soldered to the edge of a board that could have a ton of voltage on it, I wanted it to be I well, I also wanted it to be kind of something you could pick up and hold if you needed to add something that has a power switch. So when it's time to turn it on, we can you know it's just a flip of the switch. You don't have to like hold it with two hands and put a barrel jack in or do all this other like funky Dex dexterity based maneuvers to turn on your power supply. I just want it to be a switch.
You don't want to have three arms to prototype this thing.
Exactly, exactly. So So I came up with it with a fun idea for it that I think will make it pretty easy. In the side of one of these enclosures on the long side, the forehand side, I'm going to mill a slot that with an eighth inch bit a slot in the side of the enclosure and I'm just going to slide the PCB through that slot such that you know maybe a quarter of an inch or a half an inch sticks outside the box. And that half inch or quarter inch will have a row of terminal blocks on it sort of like you'd see on the side of a PLC or something like that. Okay, and those are the only ways you can access the internals and externals other than a plug in barrel Jack, which is the main power to the device. So the Like a long one side of this little test unit that we have, there will just be, I think it's something like nine or 10 Different terminal blocks and and each terminal block that I chose is two pins, I guess, is that what you? What do they call it when you have two sections in a terminal block? Oh, you know how you can get them in multiple numbers? What do they call that? Am I Why am i
It's not polls, polls are in switches in breakers but you'd call a two pole three pole. Oh man, I can't remember what I know exactly what I'm talking about if
for some reason I can't I can't it's not coming to mind two places to put a wire in, basically, yeah. So what I've done is for every connection, I chose a double terminal block for that. So you can connect, you know, so you don't have to shove a bunch of wires into one, you don't have to. You have one per right. Right and and so I kind of also got it sense that there's different ways to ground things. So there's one standoff in the middle of my board that that connects directly to the enclosure. And that's my star ground. everything connects eventually to that point. Well, I also have four different terminal blocks, which in other words, I have eight separate connections that are all straight wires to that that star ground. So if I want to, you know, have some star ground and test noise for that I can plug into those terminal blocks. But I also have other terminal blocks that don't terminate directly to the star ground, they terminate to other sections, like, I have a ground that connects to the section inside the box that is for the power ramp that eventually gets to the star ground. But I have it set it's a faster path, I guess you could say or a shorter path for ground. So like, for instance, the signals that get that get sent to the power amp, I may ground them to the power amp as opposed to grabbing them to the star ground. But in reality, all I'm doing is just giving options, so that I don't have to redesign a board to try different methods. It's like oh, if it's noisy, try changing it to the star ground or changing it to another grand and see which one is the best option. And then eventually, once we have the preamp where we like it, you know where we've breadboard it out, all I have to do is basically push it onto a PCB and copy the wiring basically. Yeah, just just a fun little little side thing. And it's sort of educational in a way. It's, it's, it's just a fun project between the two of us the the other guy, his name is Phil, he's helping me out with it. And he's working on on some of the preamps stuff right now while I'm doing the layout, and he's never really done a layout before. So I'm gonna step him through that. And he's really interested in finding out how to actually order a PCB because he's never, he's never done that either. He works on PCBs every single day. He's like, but I don't even have the first clue as to like, what buttons do you press? Who do you talk to? What do you do to actually go from? I don't have a PCB to I do have a PCB, you know?
Is he right at college? No,
actually, no, no, he's the he was the first employee at at WMD. Okay, well, I've been the first employee other than the owner. So he's been at WMD for 12 years and been working on electronics he does a ton of tube stuff he does a does a lot of work on the on the side. In fact, he was he told me last weekend, he was a breadboarding up some power supplies just because he's never done a switch mode power supply. And now that we're both doing one together, he he's kind of teaching himself switch mode stuff, but he's never just, he's never got around to actually making a PCB. So this is his first his first little little PCB thing. So yeah, he's real excited about it.
So you don't have anything physical yet. You're just still planning this box.
I have the schematic all the way done. And I've got maybe 20 30% of the layout done. That's all I know what the PCB shape should be like, I don't know all the exact dimensions because I'm not entirely sure how far outside of the box I want it to protrude or anything like that. So I'm expecting in the next couple of days I'll just kind of work on it here and there after work and and then eventually get it so I'd love to get I'd love to get everything on order such that we can build one next week sometime, so probably won't have something by next podcast, but the one after that. Yeah. Cool. Yeah, it's a bunch of fun.
So I've been working more on the wagon. Shock I guess. This is mostly Wait Wait, wait, wait, wait,
what's wrong with it?
Well, this is I'm still working on the doors. Oh, like all the electronics and the doors are basically trying to figure out why like just the rear windows suck, I guess is a good way to put it because they were really slow. And I'd taken them all apart, clean them, cleaned the motors out tested. The motors motors test fine. They are powerful when you hook 12 volts up to them. But when you put it all back in the door, they're only receiving that, like half their voltage when they get turned on. So I started, you know, going through the schematic trying to figure out okay, where are the wire junctions? Like, where am I losing six volts? Something is burning like 12 The 20 watts of power in this wiring harness somewhere Whoa, cuz you gotta think six volts at like, you know, three amps is what that motors pulling?
Yeah, where's he where's it going? So
I started, I finally found all the like connectors on the schematic and it has all the locations of where those connectors should be. So I started tracing them and you know, doing a resistance tests on the wiring harness to make sure it's not the wire is bad. And I eventually came to a, a connector that was in the driver door. So basically all the wiring goes to the driver door because the driver door has four switches control each door or each window door individually. So everything goes into that. And then they go to their vigil to the doors, and then to the switches and the doors and then to the motor. So it's a long chain of wire to get there. And I started looking, I started pulling the connectors apart. And they they were looking all fine until I got to one that was kind of like sitting in the bottom. And it looked like the color of it was like the Statue of Liberty. Ooh, it had that fuzzy copper green just all in crusted inside the connector. So it became a resistor. Oh, yeah, that thing was probably it was dumping, you know, 18 Watts and that connector. And so I pulled the connector apart. And it's toast. I tried cleaning it and made it a little bit better. But man, you turn on the motor and just leave the motor on from it. That connector just started burning up. So I guess I caught I caught a fire hazard there.
Wow. Okay, I get it, did it just get wet or something like that?
Yeah, the inside doors on your car, routinely get wet. Because the seal between the glass and the door is not perfect. And so water will always go down there. And basically what happened is whoever last was in this door or before that basically didn't put the wiring harness back on it's clips. And so it just was sitting in the bottom of the door. And so when water would go in the door and get on the connectors. And
yeah, yeah, they might have been sitting in a pool of water. Yeah. Because that
like half the drain holes and the doors are clogged up too. So I had to clean those out.
You're gonna have to fix everything on Oh, yeah.
Oh, goals. I'm gonna eventually do a restore on it. So.
But yeah, I'm not doing that right now. No, I'm
basically just fixing stuff. So I can, you know, enjoy it as is, huh? Wow. It's like I'm not worrying about paint, like, I'm like, I find rust and I just grind it off and just spray paint primer over it and I'm like, that's fine. It's that kind of restore well for now. And then eventually I'm going to do a full tear it all the way down to the frame and get it all properly fixed up. But right now it's like let's just take it apart. Make sure everything works. Everything safe. Rust isn't going to go crazy on it. You know? I'll get there. Cool. And then more on the wagons that RTL SDR signal Defined Radio.
Yeah, you've had seen a little bit of success with that right?
Yeah, so I installed most of last time I was just running last time we talked about this I was just running like a Windows application to just like look at the spectrum and you know listen to signals and stuff. I actually tried to run it on the Raspberry Pi and I was successful. There's the application RTL SDR, put a link in description but you can just do like sudo apt update or sudo apt install RTL SDR and you can like install all the software you need. But you still need to do one more step which is to add like a USB description basically to the to like ECE was it etc. Something something something all the Linux people like ah, but I'm not
exactly what that is. Yeah.
I'm just gonna get an email. That's a our Yeah, so yeah, it's It's doing pretty good. I'm thinking about doing like, a live Twitch session, kind of like how we did with your code. Yeah, but do the same thing with this code and like this, get something working. Ooh, I'd like to see that. Yeah, so like, maybe some people can help me out getting the Python written down. Actually, like, do proper control with it.
Yeah, when you just schedule that, that the the code review that we did was sort of impromptu in a way. Yeah. And it actually turned out to be really fun and super useful because we actually got stuff working in a short period of time.
So I'm hoping we can have the same kind of thing like okay, let's just bang out a Python control scripts for for the RTL SDR device, and maybe get our a serial device talking to the Raspberry Pi to control it. Yeah, so like, oh my god, it's gonna be so random basically had the Raspberry Pi. Or the Raspberry Pi plugged into USB to the Arduino. Right? Mm hmm. And then have a button on the Arduino. And then a basic kind of like a when the button is pressed Arduino says something to the terminal. Yeah, man, this is gonna be what you can, like, use the terminal to Oh, man, this is me crazy. Yeah, it
sounds sounds really roundabout. Yeah, cuz
we're gonna develop it on the Raspberry Pi. I know, I know, we can use like the IO on Raspberry Pi to do it. But the video I'm not gonna use an Arduino I'm gonna use a parallax propeller. Because I already have all the software I need to like, written to control the screen I want to use, right. And it's also going to have I want to really, you know, fast updating interface. And Raspberry Pi's are kind of slow on IO. And no, they it has gotten better, but still not like embedded system style.
I've never tried to use the the GPIO on a Raspberry Pi other than a temperature sensor one time, but it wasn't anything that I wrote it was it was some kind of just basic plugin where it says plug your temperature probes into these three pins, and then stuff start showing up on the screen works. And I never really liked doing. I shouldn't say I don't like doing it. That's fine and all but I have no clue what's happening. So I don't feel like I, you know, learned anything I just, I just followed a manual and plugged things in, you know. So I don't even know like, what do you do to access the GPIO pins on a Raspberry Pi? I mean, can you just access the pins, right from a terminal?
Kinda yeah, there's a built in application that allows you to do that. And but how it works is actually writes it's kind of think about like how in an embedded system or microcontroller, you've write to a register location like our one. Yeah, right. So how this works is the Linux system writes to a file. And then the hardware subsystem, if I'm, if I remember correctly, and basically what the hardware subsystem, when it gets around to it will look at that file and update the GPIO. So you don't actually even control that at all. That's a some binary blob does that thing. Really? Yeah.
So so just has like a watch. Watchdogs, not the right word, because that means something else, but it has, it has some code that sniffs that file on occasion, and updates, its output registers. Correct? Ah, okay. I didn't know that. That doesn't sound. I don't know. That doesn't sound. I don't like the idea that you don't have control over that, you know? Or maybe maybe it's fast enough that you don't care.
I think that's what it is, is moat it's fast enough for most people, so they don't care. Yeah, but it won't be fast enough to basically BIGBANG drive the display I want to use.
Sure, though, sure. I don't know, they see. That's why I always like about writing firmware for microcontrollers is, when you tell the microcontroller to do an action. You're saying like a low level action, and the duty of that microcontroller is to execute that action. There's not a lot of crap in between that action and the result. You know,
you only have one function, this code.
Yeah, exactly.
Cool. Oh, my God. So on to the RFO. Yeah, let's do it. RFO quite a bit our photos this week. Yeah. So the first one is on Twitter. I saw this and it was really cool. There's this group called SQF moi. I don't know if that's a person or group. I don't really know too much about the people who design this but this is really cool. It's called watchI. And it is a eek like smartwatch that hasn't that runs off a ESP 32 has an accelerometer is supposedly has 25 days of battery life. Has Arduino support, and it's open source. And it's uh, they said that they're working on it and this should be out soon ish. The there's more details in that Twitter thread. which is really cool. And they have these are the same guys that made the badji which is like an open source conference badge design. Can I correct? It's their stuff kind of looks like reference designs from like a company. Yeah. How it's set up in the documentation. So I'm actually looking forward to this watch just the just to see where it goes.
I like the the display it looks really nice. At least I guess there's only one image of it so far. This is their Twitter. sampler image, I suppose. Yeah. But yeah, I like the way they did that eating display. It looks really nice.
And it looks like cuz most time when you look at like, home grown DIY, smartwatches there tend to be kind of bulky. And I even think like, like the Apple Watches are too bulky. Like the too thick.
They have a lot of stuff crammed in there.
Yeah. Whereas this thing looks pretty, like low profile and, like, thin, like a watch should be.
It does. Yeah, it really does. But I think they're probably be able to get away with that. Because there's not nearly as much stuff. Yeah, probably. And really, this the the decision to go to an E Ink display, really probably, you know, is conducive to making it a lot thinner. Because you don't have to have as much crap to drive the screen. That's cool. Yeah, let's keep an eye out for that, I would like to see that. And I would actually really like to play around with that screen. I would love to, I would love to do a tear down of it.
One of the things that they want to do SQ F EMI wants to do is they want to make it really low cost, like their big thing. So I you know, if it's like 3040 bucks, I might pitch in and grab one. Just to see, you know, what it's like?
Oh, for sure. Yeah. I would totally grab one of those.
So our next RFO is productivity, unfinished product projects and letting go. I saw this article on Hackaday. And like, Oh, my God, this guy talks about this.
Yes, yes. Someone finally wrote an article directly to us.
And it's so it's got some interesting sections, but the ones that I picked are like the doing only the interesting parts of projects. Mm hmm. I, I personally don't have a big problem with that. Except building circuit boards. I really hate building circuit boards. It's kind of like, oh, that's why I started a company to build circuit boards to build circuit boards anymore.
Yeah, that's right.
Cuz that's because that's it, because we're the opposite. You like building your circuits? Like, you're like assembling your PCBs. And I, I've done that for too long.
Yeah, well, I love it. I think that's it's just, that's a completely different. Once I've gotten to that part in the project, in general, I know in my mind that I'm like, 99% of the way there. So it feels like I'm kind of walking across the finish line when I'm actually assembling my project. It's just I don't know, there's something like I said multiple times. It's therapeutic.
Yeah, most most of your projects don't involve firmware, though. That's right. That's right. A lot of mine do. So um, when I get to like building the circuit board, that's like the halfway mark. Yeah, right. Right. Right. And so I'm like, I'd rather just toss that to someone to make, and then I'm just gonna start working on the firmware.
Right, right. In so many of the projects I've worked on the, the PCB, if I've already gotten to the PCB, then there's a really good chance I've proven everything on that board already. And I know it already works, because I've already built it in some other way. The PCB to me is like, I'm, I'm committing to this project in reality, you know?
Yeah, I don't think I have a big problem with doing the only interesting parts basically, if I get to the point where I have to order the material. I'm already halfway through the project and I'd love to do is code and I actually like doing embedded code. I just don't like hand placing parts. Yeah. Understandable. So is there any parts of projects that you don't like
a parts of projects I don't like let me think about well, I can I can tell you guaranteed my favorite part of a project is layout I just PCB layout. I think that's PCB is a lot of fun. The layout is just amazing. And I love doing that. The probably the part that I don't like and maybe this is more towards the analog side of things is the initial like the schematic figuring out all the all the values doing all the calculations and things Like, it's just, it's just not as fun. It's all right. But there's just, I like to, to as I go along, start eliminating as much uncertainty as possible in the schematic part always makes for the most uncertainty. You know, it's like, well, you could do it 15 trillion different ways. What's the one way you're gonna pick it? You know, pick to do it and narrowing down as to like, what Steve has chosen for his, you know, method of accomplishing a task. Sometimes I find that a little bit, first of all daunting, and because of that, not fun. That makes sense.
And so the the next next one I liked on his list, him as in Steven, different see different SNI so how you pronounce that?
Do fresney? Oh, no.
You said same way I did it. So we're close, I guess you actually
do for him? What do you do for him?
It's getting lost on a tangent. And I'm like, Oh, my God, he's like speaking to us. And that happens all the time for the My Projects. Now. I don't think it's ever killed a project. But it's definitely has expanded the scope of projects, like 40 fold. Oh, for sure. I mean, example is like working on on this wagon in, I was gonna, like, Okay, I was going to put new door door panels on the inside of the doors, okay? Because the old ones are mildewy and moldy. They got wet a lot, and they don't look good. So I ordered some door panels, and some fresh door panels. And I'm like, okay, when I'm pull the door panel off, I want to clean no the door, the door down, remove some of the Rust with the grinder and and vacuum out the doors so that there's you know, all the water can come out of it. And basically like freshen up the door. Get into it. And basically find out is like all the mechs and the doors are crusty and need to be clean. And I'm like, oh, that's probably why they don't work too well. So then you end up disassembling the door all the way, right? Yep. Now you got the doors all disassembled, you're like, Well, I'm already in here. And it took like, you know, it takes like three hours to fully disassemble a door. I should replace the seals one here. Right? Right. And just so now I'm replacing the seals. And I'm like, Oh, I have the glass out. I should probably clean the glass really well, because it's you know, you can't clean underneath the seals when the glass is installed. And so I'm like, Oh, I'm just gonna clean the glass and I should polish it wants bomb here. So basically ends up instead of being like a two hour job per door. It's like, four afternoons per door. Oh, yeah,
for sure. For sure. And it gets worse when you start doing that kind of thing where you're like, you're saying replace the gaskets. When you start saying like, well, I could make a mold and mold my own gaskets. Like make it you know,
I'm not. I'm no, I can like, the thing is I can order the parts. Yeah, well,
and in this guy's article, he's mentioning things like, Well, you could make a CNC machine, a laser cutter and a 3d printer before you get to the real project, you know, using those tools to make what the real thing is.
And then he's going to smell. He's going to order his own aluminum to make the brailles. Right? And then before that, he's got to create the aluminum, like the actual atoms, and then he's got to create the universe,
wasn't it? Carl Sagan, that's it. In order to make an apple pie, you have to first invent the universe, or something like that. I probably butchered that. Yeah, same concept. Yeah. And I know I've totally done the exact same thing. Like, especially even with the CNC, I have a CNC Well, I have pieces of a CNC that are in a storage facility, right. And I could just reassemble my CNC because I got okay results for the kind of things that I was doing. And in the future, the kinds of things I'm doing, it would probably serve me fine. But I do have this idea of buying a welding machine and designing a frame and changing things over to ball screws as opposed to chains and you know, all of these things. But in reality, the whole reason I even want would want to do all of that is so I can get back to doing the project that the CNC is used for. So is the CNC of the project itself, or is it just a stepping stone to complete whatever the next project is? Yes, this this. This is Chicken Soup for the Soul right here for the engineering soul.
So go check out that article by Stephen. Not the Steven. Steven. Like every single one. I'm like, yep, Mm hmm. Oh, yeah. It's almost like going to a therapist. This article
You know, actually with that with that exact same. So for the next topic, that exact same emotion that you just gave applies. So think of think of like king of the hill, you know, when, when the television show King the hill when they're all standing outside drinking a beer, and everyone's just like, yep. Hmm. So what happened to me today? You know what, we're going to cover a topic here of something that happened to me today. And I bet you most of our listeners are just gonna stand back and be like, yep. You know, because it has happened to them, too. So I was I was on the CNC mill today, just cutting some really simple aluminum. It wasn't soft stuff. It wasn't even real hard aluminum. And I'm doing some drilling and tapping. And anytime anyone starts with a story where it's like, Hey, I was doing drilling and tapping. Everyone goes, well, I know what happened. You broke a tap, didn't you? Yep. I broke a tap today. And for anyone who's broken a tap, which I'm sure a lot of our listeners have. It's awful. It is like the worst thing you can possibly do with a piece of metal is breaking
outside. Breaking the tap? Could be one of the things in that article from Stephen. Breaking it top have sunk.
Absolutely. There is a there is a split decision when you break a tap, where you stop and you go, Okay, do I try to do anything? Or do I just give up? And both options are valid? When you break it? Yes.
Yeah, it depends. It's like, so my decision there. If I break a tap, I'm like, okay, is this something I can immediately replace? Or should I spend time trying to figure out how to get this tap out? Yeah, yeah, exactly. So if it's, if it's raw stock, like, I'm just like, building a bracket or whatever, I fucking just throw that thing in recycling. It's done and start over again. I'm like done. I'm not gonna mess with it. Let's just start over. Make that new thing. But if it's something old, like, like a bracket, or a very special, like housing or something. Yeah, you guys spend time trying to get that? Oh, yeah.
Yeah, well, and here's the thing. That's funny. Okay, so the stuff I was, I was just modifying the jaws to our vise that goes in the mill, I was adding some some screw holes for some workholding that we're doing it, it'll make workholding a lot easier for us. And I just, I broke one tap, and one of the holes, I was doing a 632 Tap. And got, I'm not even joking. Just like 1/8 of an inch of the tap in there. So it's like, just at the top, and it's really soft aluminum. It still took me two hours to dig that stupid tap out of soft aluminum. And the best part was yesterday. Just before I left work, I was having a chat with my boss. And we were kind of like discussing what we want to do with the the jaws on the vise. And we both came up with those ideas like, okay, we can just drill and tap it. That'll be an easy little project and things and I was joking with him just at the end of the day. And I was like, you know, it really sucks breaking a TAP device, but we're gonna be really careful. That's not going to happen. And he came and visit me today after I broke device. He's like, Hey, how's it going? I was like, Oh, I broke up. It's awful. But yeah, no. So I had to spend two hours with like a screwdriver, trying to like, dig my way through there. And the whole reason why I want to bring this up is a little bit because if you know it's one of those kind of topics where everyone's like, yep, been there before, you know nostalgia kind of thing. Terrible nostalgia. But also, I brought it up because I wanted to ask the question.
There's got to be a word for that. For the opposite of nostalgia,
bad nostalgia. Like nightmare. Yeah,
there's got to be a certain well nightmare is a dream. A bad goal. It's actually saying like a dream is typically used as a good thing that you think about when you're sleeping nightmare is a bad thing. So what's the opposite of histologia net regard?
I'm there is a Reddit post about this. asking is there a word for nostalgia in the negative sense? painful memories How about regret is fun also? Yeah, yeah. trauma.
Mao Marie's you know because the prefix Mao means bad. So bad memories. Well Marie's
traumas are better is the best because it's at because Because the thing about nostalgia is it explains a lot of different kinds of emotions mixed up and and it's an explaining events, whereas like regret doesn't really do that. That's true.
True. Well, and and actually, I think in this situation, well, maybe maybe in other situations also, but hindsight also works pretty well, too. Because hindsight allows me to look back and be like, well, although I don't really think I could have done anything different because it just it broke very, very easily. And I was like, Oh, you got to be kidding me. I wasn't doing anything.
We're using a. We're using tap boy. Yes. Oh, yeah. Plenty of it. Okay, so, yeah, probably not. As far as just the bad tap or tap oil.
I was, I was not doing it by hand. I actually had it chucked up. So it was held vertically, like on the hole, so it wasn't going in at a weird angle or anything. It's just it might have just been it's time. But one of the questions I wanted to kind of bring up with that is, do you have a method for removing a broken tap?
The hopes and prayers?
Yes, sending all the thoughts and prayers, good vibes.
Press, like, give me all the lights on Facebook. And that will help the tap come?
Because, you know, okay, so I've what I've seen before, is, you know, you can take a screwdriver, and if you if you hit the meatiest part of the tip, if you're lucky, you might be able to count our clockwise, hammer it out. But on a 632 Tap, it's so tiny, you know, you might be able to do that on like a half, you know, half inch tap or something like that. But on a 632, you just start munging things up. And on top of that, it was stuck in aluminum, which at first might sound like Well, that's better, because it's softer. But as soon as you hammer it, it deforms. And then it Yeah, so that's like, that doesn't help out. That makes it actually harder.
I haven't tried to get tapped that small out. Because usually when a tap like that, for me breaks, it's like farther down. And your best option is just to just drill it out. But
taps are so damn hard. Oh, they're so hard. And when they when they share, they don't ever tend to shear like flat. They're always at some like really sharp angle. So if you try to put a drill bit through it, the drill bit just walks and chatters like crazy. And
yeah, you gotta you have to grind it flat. I've also welded stuff, two taps and pull them out that way. Like, you know when like, if you shear bolt head off, you can weld a stack on top and back. And I've done that before. See what other weird ways I've tried. There's an acid meth method. You can dissolve it. I've never had that work for me.
I saw Avi had a video about that. And he it looked like it worked for him but at the same time,
plausible. I think it was plausible. I could never get that to work. Maybe because I was too like I was hoping it would work faster. What other ways have I gotten taps out? I still think my favorite. The fastest way ever though, is if you can is Susie just drill it out. And then put like a heli coil a new insert in it. If you have to keep that thread size is like the fastest way. Yeah. But if it's big enough, getting the a chisel in there to back drive it so to speak like you were saying with the screwdriver. That works really well. If it's big enough to Yeah, but you have a nice flat, you can hit on and have some some tools. Like if you have like a i a three flute tap, which is like the common top there make a tool that has like three prongs that come out of it. And you can and you slide that down the tap and then you can back it up. I don't know if they make any that small. But I've seen that definitely for like quarter 20. Okay,
yeah. I think I've come to the conclusion that you just have to accept that. If if you're trying to tap something, it's just it's a possibility. It could happen. You know, you could you could do everything right. And it still breaks on you. Yep,
especially I've had brand new, you know, $20 taps just break on me before and I'm like, well, that sucks.
Yeah, so I finally got the 632 Tap out after like two hours of digging at it. And I just bumped it up to an eight and went with an eight. But that means but I had already drilled and tapped other holes so I had to open them up and then re tap them with a new tap ah sucks.
Yeah, the some of the fixtures at work. We originally designed them with 248 taps that ended up being like we would breaking those taps off like crazy. Oh I remember you are you are kind of pissed. Yeah. And then I basically redesigned the jig to use was a 430 to 440. Yeah. Yeah. 444 40 I can't remember. Yeah. So use 440. And that solved that problem. Basically.
440 is pretty small. For a tap still. But
yeah, I have no problem. What I do on the fixtures when I build them is I just actually chuck for 40 tap into the drill and just right, yeah, right. The 256 is can't You can't do that.
Well, okay, so my, the holes I was tapping were blind holes. So I can't just go straight through it. There. They were one inch deep. So they're pretty deep. But I was, I don't want to, you know, drill a blind hole with a with a hand drill your tap, tap it? Yeah, drill. That's kind of scary. That's an even better way to break it.
If you bottomed out, you'd either you would pull your threads I'd guess i that that tap would break all the way down or shear or shear? Yeah, you'd share it at the surface. Or you told the threads.
All of it is a no go. All of it is a restart. Yeah, it's bad.
So the last topic is also kind of in the same genre, I guess, is a Raspberry Pi development. So this is something I noticed. I've been working on this. RTL SDR for the Reigen. Is Raspberry Pi development is messy. How so? It's just, it's not clean. Like you have this little tiny board. Yeah, sure. That looks really cool. But then you have a you have to have a USB hub that's powered. So you have enough power for all your devices. And then you have cables everywhere. It's just, it's just a mess. Yeah. Because like, because what the thing was a computer, like a big computer is a computer gets set up and has enough weight to stay there. And so all the cables just kind of get, you know, you just zip tie all the cables behind it. So all like stays there. Where the Raspberry Pi. So light just flies around everywhere. It just it just bugs
me. You should make like an iron plate for it that it mounts to.
Oh, yeah, like I like it. I really need like a keyboard that the Raspberry Pi just plugs into. Yeah, or something.
I know exactly what you're talking about. There's some projects I've done in the past where I was having a Raspberry Pi that was powered Power over Ethernet. So that required its own dongle. And it had, you know, multiple wires coming out of it. And then that went off to multiple outputs. And I had a Wi Fi connector thing. And I had a keyboard connected to it. And yeah, you're right. It is messy. It's just awful.
Yeah. So if anyone out there knows a way to clean that up.
You could go to my top right. Yeah, those laptop 99. And you get the screen, the keyboard and the pie. Does it come with a pie? I think it does. Then you have like the whole development station, you know?
Yeah, that'd be cool. This is.
And now the same. Oh, yeah. And you can slide the keyboard down and you have access to all the all the actual connections on there. Yeah, all of our hardware. That might be a good solution for you. Although, I mean, it's a $300 solution. It's not it's not like an iron plate. Like I said,
it's not a cheap solution. No. I can iron white tonight. And the cool thing is I have a I don't think I've ever talked about this on the podcast is I have a I think it's an iPad three screen with an HDMI adapter on it. And I've actually worked it works with the pie. So you
can make your own pie top.
Remember should make my own man. Yeah, put a mechanical keyboard.
Oh, yeah, dude, we're doing exactly what that article said. Don't do. Yeah.
I already have the screen and everything and I just need a mechanical keyboard. Oh, we have to design the keyboard and 3d print the key caps and then yeah, and then.
And then you can start development.
Yes, I'm my RTL SDR. Right,
which that in and of itself is a project for your bigger project.
Yes, I know. Oh, so I just remembered going back to the broken taps being sucky. So I'm putting those door skins into the wagon. And so how am I doing it is I'm cuz they're just plastic and so I'm drilling holes into them, and then putting rivet nuts into the doors right? And then I'm having these really nice No button had Allen, like bolts I guess is a good way to put it into the door. And so I'm like zipping up all the door panel because I was old done with my electric ratchet. And the they use a 330 seconds. Allen Okay. socket. And I, I guess I just like stayed on the gun a little too long here in it right off. And the thing is the it broke off and it stayed in the head of the Allen socket, really. And there's a button head so it doesn't have any edges. So how I got it out is I took the I took my four and a half inch grinder with a with a death wheel on it and then made a slot and then use a flathead screwdriver to get it out. And I have that right here.
Yeah, no lie. Oh, that sucks.
And there's another thing. Oh man. Another big gripe of mine is this was part of a kit of like 50 Allen sock Allen ratchet sets. So one out of 50 is broken. It'll never be complete. So I had to go online and find someone that was selling just yet one. It's like when you lose your 10 millimeter socket. socket wrench. Oh, yeah. Which you do your whole entire kit? Yeah. 10 millimeter. And oh my gosh. Okay, so
one one more quick tangent. I lost the 10 millimeter out of my set. And the 10 millimeter was the exact right size for potentially ometer nuts on guitar amps. And when I was doing repairs full time back in the day, you know, a single guitar amp I might have to pull 20 or 30 nuts off and it was fury ating
do you think you'd go to like harbor freight and buy Well,
I did but like for a few days I was like I'm just gonna find it. I know it's just floating around somewhere and then I had to break down a bike. No, I didn't I did not find it even after I moved out of the shop I did not find net 10
You never find those things. You want to wrap up this podcast?
Yeah, yeah, let's go ahead and do that. So that was the macro fab engineering podcast we were your hosts Stephen Craig
and Parker Dohmen take it easy Thank you. Yes, you our listener for downloading our show if you have a cool idea project topic or horror stories with taps. Let Steven I know Tweet us at Mac crowd or email us at podcast at Mac fan comm or suggest a topic on the Slack channel. We're looking for new ideas for a contest for next spring. So yeah, let us know if you have an idea. If you're not subscribed to the podcast yet, click that subscribe button. That way you get the latest episode right when it releases and please review us wherever you listen as it helps us show stay visible and helps new listeners. Find us
The quest for the right connector for a project! The right of passage for any hardware electrical engineer starts with a connector catalog.
This is the last installment of Stephen's 'Adventures in Injection Molding'. We are going to recap the entire two year sage and close the book on it.
This week's topics are: Porsche's Synthetic Gasoline, Record Chip Manufacturing Sales for the year 2022, and the Raspberry_Pi Social Media Firestorm.