How low can the power consumption of the Cat Feeder Unreminder go? Parker and Stephen discuss leakage current on this episode of the podcast!
What is the worst thing about the Analog Devices and Linear Technologies merger? The incompatible color schemes of course.
How do you know if an electrical component is inexpensive? When it says "Cost Effective" as a main bullet point on the datasheet!
Parker
Stephen
Parker is an Electrical Engineer with backgrounds in Embedded System Design and Digital Signal Processing. He got his start in 2005 by hacking Nintendo consoles into portable gaming units. The following year he designed and produced an Atari 2600 video mod to allow the Atari to display a crisp, RF fuzz free picture on newer TVs. Over a thousand Atari video mods where produced by Parker from 2006 to 2011 and the mod is still made by other enthusiasts in the Atari community.
In 2006, Parker enrolled at The University of Texas at Austin as a Petroleum Engineer. After realizing electronics was his passion he switched majors in 2007 to Electrical and Computer Engineering. Following his previous background in making the Atari 2600 video mod, Parker decided to take more board layout classes and circuit design classes. Other areas of study include robotics, microcontroller theory and design, FPGA development with VHDL and Verilog, and image and signal processing with DSPs. In 2010, Parker won a Ti sponsored Launchpad programming and design contest that was held by the IEEE CS chapter at the University. Parker graduated with a BS in Electrical and Computer Engineering in the Spring of 2012.
In the Summer of 2012, Parker was hired on as an Electrical Engineer at Dynamic Perception to design and prototype new electronic products. Here, Parker learned about full product development cycles and honed his board layout skills. Seeing the difficulties in managing operations and FCC/CE compliance testing, Parker thought there had to be a better way for small electronic companies to get their product out in customer's hands.
Parker also runs the blog, longhornengineer.com, where he posts his personal projects, technical guides, and appnotes about board layout design and components.
Stephen Kraig began his electronics career by building musical oriented circuits in 2003. Stephen is an avid guitar player and, in his down time, manufactures audio electronics including guitar amplifiers, pedals, and pro audio gear. Stephen graduated with a BS in Electrical Engineering from Texas A&M University.
Special thanks to whixr over at Tymkrs for the intro and outro!
Hello, and welcome to the macro crab engineering podcast. We're your host, Parker, Dolman.
And Steven Gregg.
This is episode 234. We're getting there, we're getting really close to the eight bit number two and 55.
We're gonna have to have some kind of a special. Yeah, some kind of special.
We're always looking forward like to do, we'd like to find excuses to do specials.
Well, in terms of in terms of like, ranking on the bits, like, it'll be a while till we get to the nine bit episode. So like the eight bit is special.
Yes, yes. So to start off the day, or the podcast, so I did not get to work on the cat feeder on reminder. Well, you you may not have but it seemed like the Slack channel did. Yes, the Slack channel definitely has lots of ideas and very interested in the project. Basically, the reason my excuse though, is it was my sixth my, my dad's 60th birthday. So I had to do a lots of drinking and lots of eating. With him. So
unacceptable, you should have all of your projects done.
So yeah, I'm gonna go down the list of kind of the ideas that were thrown out in the Slack channel.
Just real quick, why don't you give just like a one second, what is the cat feeder on reminder?
Okay, so for those that decided to pick this episode, to be the first episode, you've ever listened to the microwave engineering podcast, the cat feeder, and reminder is a hardware device that I want to build and develop. That will basically remind me or not remind me when I need to feed the cat. And this is not an IoT device, where like it pings your phone or whatever. This is like an indicator on the food or on like the food bin. That is like green beans feed, it's okay to feed the cat and red means don't feed the cat something like that.
Right. And one of the one of the aspects is that there's multiple people involved here. So you don't want double feeding is what
Yeah, that's the biggest problem is cats, especially my cat will always complain about its food bowls empty. And the problem is there's multiple people that live in the house and multiple people feeding the cat at different times. So what I want to do is just have like a timer that resets every, like 18 hours or something. And so there's a window that you can feed the cats. And then when you feed the cat, you just press a button on it, and it resets the timer for another 18 hours. That way the cat does not get fat, or chunky, as we've discussed in previous episodes. The cat feeder and reminder because this is this way, you don't have to worry about the cat. Right. And but yeah, a lot of people seem to be very interested in this project, which I'm very happy about the stumbler found a 12 hour egg timer, which work this is a this is actually if you if I was going for the simpler solution and cheapest solution, this is the way to go. It's 10 bucks on Amazon free Prime shipping, you feed that feed the cat and you turn the dial always 12. When you walk by and the timer is not running anymore, it's safe to feed the cat. It doesn't require any power doesn't require any power, besides your hand turning the knob.
You know, I wonder what the long term time drift is on something like that. You know, if you had that going for a year, would it? Would it be? Would it slowly drift? inaccurate?
Well watches. It probably uses similar mechanisms watch. Yeah, I
mean, it's a mechanical spring system of some sort. Right. So I mean, eventually those were in some way. So I would think that but you know, that would be interesting to take a guess like, what does it were longer or shorter? Probably shorter. Probably because you're putting energy into it for longer. And the the spring probably gets weaker. So I would think it would get shorter.
I don't know if a softer spring would make the clock tick slower or faster? I don't know.
I don't know argue about selection.
So this is actually a really good solution if anyone's listening is like, oh, I need a cat feeder and reminder right away. Go do that route. But the whole purpose of this project is to kind of build something and learn a new embedded skill, which in this case is going to be like low power. So I'm not gonna go that route. But thank you for finding that the stumbler actually, it was one thing I'm like at a timer setup, but that lasted longer than 30 minutes would be perfect, right. Eric McFaul came up with the idea of using E Ink display for persistent display which is a brilliant idea because they don't use any power Um, except when you're switching to display. And this way you can act, you can actually put like a clock on it, or a timer. So whenever you walk by it, you can see that it's actually running because that's actually one thing if you just had one LED on the device that told you it was okay to feed while the battery ran out. You would you would never feed your cat because the LED would no light up.
Because the the cat feeder and reminder is the the grand arbiter of feeding the cat. Yes.
Well, that's that's the goal with the project. Right? Right, right. So I'm going to look through my parts bin after the podcast, for an E Ink display, if I do have one, I'm probably going to use one. I'm going to look at the power consumption to make sure it's the contest and power draws really low, they should be. I mean, they're kind of designed for that environment. That's the That's the purpose. Yeah, Tony Wu had the idea of using a jacket, a box, which I actually really liked, because it might scare the cats if it goes off. So the whole purpose
is for you to feed the cat. But then the cat gets so afraid of the food that it just never, he
never eats ever again. And then last episode, we came up with the idea of using flip thought displays, like as an indicator just using one dots, which is a flip that displays an electromechanical indicator which one side of it is painted in a fluorescent color, other sides like usually black, so that use a little usual solenoid to kind of flip the display over so that you can see what state is in. So TJ has been working with flipped out this place for law for quite a while. And he says they're actually kind of power hungry in short bursts. And depending on the size, it can be like four amps for five microseconds, which is a milliseconds. Yeah, milliseconds, which is not a lot of actual like joules. But you do have to like, like, if this is a low power system, you'd actually have to charge up something like a super capacitor to be able to discharge that really quickly. Yeah, a little coin cell
batteries not going to give you four amps. No,
well not instantaneous. We basically what's your instantaneous amperage, which is going to be like what one see probably on a coin cell, which is gonna be like 300 milliamps, maybe? Oh,
I don't even think they do that much. I don't I don't know. I
don't know what this is. But that seems high. Yeah, what was the most lithium can do one seat? I don't know what a coin sale deuced does. Yeah. And then bomb was a bomb, bled monk. bumbled monk, bumble monk. Okay, he's had to go solar. And I think this is actually the best idea. So I think combining E Ink with solar with a little tiny, you know, like sleepy microcontroller is probably where I'm gonna go with this. And then making it fully solar power. So like, no battery. Oh, nice. Yeah. So and actually put on like, a rechargeable cell. So it has to make sure that it's powered up enough to flip the display.
Okay, here's the problem with that. I mean, that's super cool. And and I actually think you should go that that route. The problem with that is that opens up, like feature creep beyond belief. Yeah. Because you could go super capacitors with power management, ICS and things like that for, like gathering, you know, harvesting data, I mean, power and things like that. And, and if you went that route, then you could go with a flip dot display. Because you could like have timers, and like charge up over a period of time, you know, like, so. It allows for a lot of feature creep that you initially, like set hard boundaries on.
Yeah. That's actually really funny comment, because Derek said doesn't count as feature creep at the project is still doing the same thing. But it's way more complicated in how it accomplishes that said goal. And I think it's not so feature creep is you adding more features, the feature set still the same thing? We're not adding anything extra? It's more of a? It's the way of going about it is more complicated me,
man, that is some politician bullshit right there on getting your way around feature creep. We have to define what is means. So yeah, I mean, I think honestly, I think the solar panel idea is cool, especially with the idea of like, not having a power source on it like a battery, you know,
basically you have to put it together and then shine a flashlight on it. And that's how you bring up your circuit. Yeah. Nice. So I've never done solar before. I've used e inks before but never in a product is kind of like one off kind of things. This is gonna be a lot of fun, I think And I'll probably use like an E FMH. Sleepy B, I think is one going to end up using.
So E Ink displays draw very, very little power when they're just static. They draw all their power when changing, right? Yeah. So I've never really dealt with one. Do you have any kind of gut feel as to what their power draw generally is when they're changing? Is it significant? Or it's no it's not. It's still it's still pretty good.
It's still really low. And they change really slowly. They don't have a really high refresh rate.
Right. That's why they work well for for books and things like that. Yeah. For Kindles.
So it's really interesting because um, yeah, just never tried something like this before. And I'm looking forward to it. Probably 3d print a little box.
Because of course, yeah, because of course,
have a big Feed Me button on it.
What size eating displays Do you have?
I don't know. I have to go through the parts. Ben. Got it.
Who sells those are like I'm assuming fundament, like SparkFun. And things like Yeah,
I think SparkFun sold some out of fruit sell some. There's some suppliers out there too. I think digit key and Mauser also have parts. If you're actually going to build them into your product, I would take chalk to like, the manufacturers displays directly. Because basically, like any distributor, they're pretty pricey.
What kind of communication? I mean, I'm assuming if they're so slow, can you just like do SPI Yeah, it's usually spy. Yeah. And you can you can probably pretty quickly and easily. Address any.on The End.
Great. Yeah. And I, one I've used in the past was ice wear see as well. So most of them have multiple different ways you can communicate with them. I did use one in the past that was like an old character display. Was it what hierachy? What's the name of that protocol? It's the standard like 16 by two character display.
Just a lot of translation layers in your code to make it work, right?
Well, they have their own built in. Yeah, Hitachi HD 44780 LCD controller, which is like, people have cloned that out the wazoo. And that's like, what do you have, like, you have like four or eight parallel bits, and then a control signal and a clock and a command line, a command signal line. But a lot of LCD controllers will have that as kind of like, a way like, oh, you could also use this LCD controller to upgrade old equipments, right? Because old equipment uses this protocol. I would probably not use that I probably would use spy or a ICRC.
Well, okay, but initially, you were not going to put a brain box on this thing. But with an eating display, you're gonna have to,
yeah, it's mainly because of the solar. We kind of want to try to see can I get a screen of Warren like that on on solar?
You know, wait, wait,
what you want, you want to really, hey, this isn't feature creep, hang on. This is not feature creep, because of your rule that you made up earlier. Because this, the end result still remains the same. Implement writing to an E Ink display without a processor. Just have it all in logic. And after a timer hits, it would just the logic is already hard coded to spit out whatever it needs to spit out in order for the E Ink display.
This board would be
ginormous,
yeah. But if you use low low power logic gates, you might be able to
actually burn it into a ROM. Yeah, and then have a clock a decade count or a counter I own over a decade counter could do but I have a counter that you you would have like the old idea we had, which is basically a counter that counts up. When it hits an overflow bit. It hits the ROM and then it has a clock that just spits out all the ROM on it on the addresses. And that probably would work.
See, I'm saying implemented entirely in discrete logic.
So you would have to basically write out your entire the SPI transfer. Yeah, the spy transfer, and then reverse. basically go back and turn that back into Logic.
Yeah. Yeah. And then And then you'd have to you'd have to create a clock circuit that would clock that out properly.
You could do that in FPGA a lot easier.
Yeah, but that but like that was one of the original stipulations is he didn't want to have a brain box in this.
Yeah, but Uh, but we could come on, we could just go solar and solar not do that BrainBox?
Yeah, no, I mean, I think I think the eating display and a solar panel is like, honestly, the best way to go.
Yeah, cuz then you can have a graphic. I'm like a cat's mouth open and it's pointing in its mouth when it signed the feed,
right, yeah, the important things.
The memes.
All right, so you got to I guess you got to go search for some parts now.
Oh, yeah.
Also, a bumble monk was suggesting indoor lighting solar panels, which that's kind of interesting.
Yeah. And apparently like Sanyo, or I think he said Panasonic bought them out, or bought those. So that line out? Yeah, they're designed for indoor lighting.
It'd be cool. I wonder what? What exactly does that mean that they're designed for their light? Like, they're tuned, I guess for,
like, whatever indoor lighting frequency? Because it's not the entire spectrum? Like, right, like sunlight is?
Yeah. So okay. Maybe Maybe they have less? Maybe the glass is not as bulletproof, you know? Because maybe it's gonna be used indoors. Cool.
So what do you been up to? Steven?
So I've got I've got actually an interesting question that maybe you can help out with. Because I have a, I have a design that I'm working on right now that has some a fair bit of uniqueness to some footprints on a PCB. So I'm migrating some product or some I shouldn't say migrating, I'm trying out, moving from tactile switches to snap domes, on a on one of our products, because I want to, if I can move away from tactile switches, we can actually save a good bit of money and save a bit of heartache, because one of our products has like, I think 93 tax switches on it. Which these texts, which is unfortunately their datasheet calls out a failure rate on them. And we've seen a failure rate that's like 50x, what they call out on the on the data on the attacks, which is, well, these switches have integrated LEDs and the LE go bad on them. But I'm just considering them. Because it's a it's an all in one package. Yeah, to me, it's a tax which with an LED.
That's, you know, what's interesting is, back when I worked with dynamic reception, this is before macro fab is we had, like, you know, what's the standard tax which like a six millimeter by six millimeter tax, which Yeah, about Yeah. But these were slightly longer stem, so they could hope through the product, casing. Those had an insane failure rate as well. So I think there's something there. I don't know what it is, but maybe, yeah,
well, and so the thought here is like, Okay, well, our pick and place has to drop a gazillion of these per board. You know, they they're not the smallest thing. So when when you look at them on a real weed, you don't get 10,000 of these on a real you get like 300 of them. I was about to say 300 is about one. So if you have 93 per unit, every fourth unit that goes through the pick and place you have to stop the machine and replace the real right.
You have a product that has 93 tax switches on it. Yeah. Chivas?
Yeah, I mean, it's a it's a matrix, you know, trigger sequencer. So, like, I mean, it shows time in a grid, and you can like activate things based off of time and stuff. So regardless, yeah, it's got a bunch of text, which is we've noticed failure rates that cause heartache, let's put it that way. So we were looking at Hey, maybe we go snap dome buttons, which you what's cool about SNAP domes is you kind of define their feel, you can say like, I want this many grams to press it and this many grams to release it with a force that is and then I also want it to have this much throw like I want it to move 20 1000s of an inch when I press it. So we can actually take the tech switches that we already have measure those things and then have someone make a snap dome that's exactly like that.
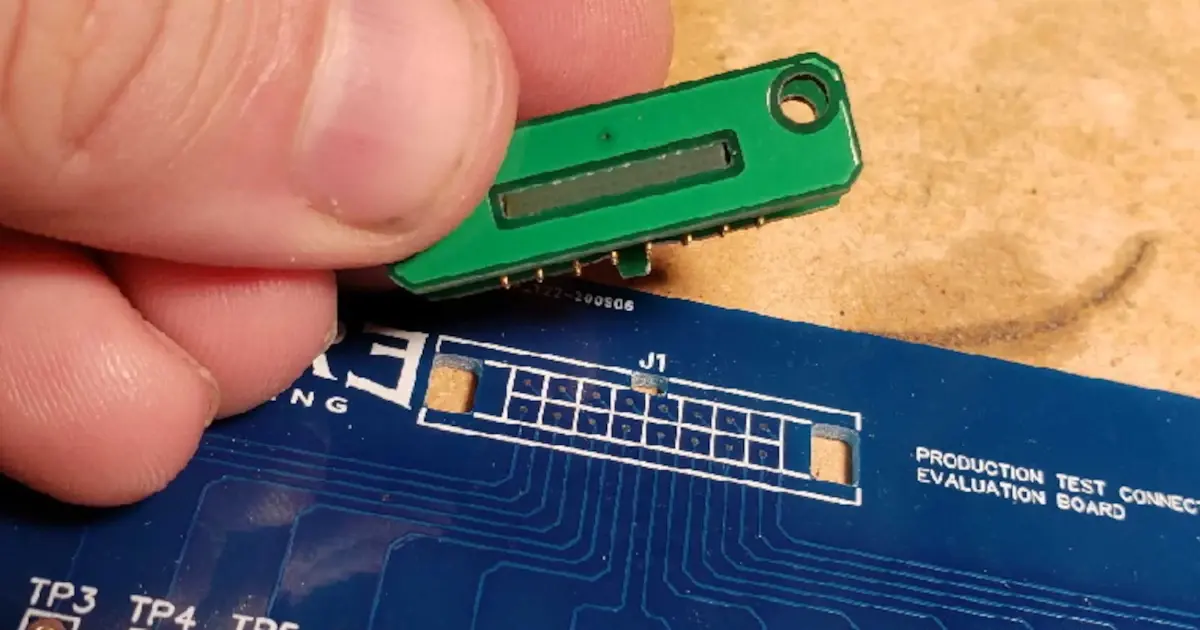
So I found a company actually surprisingly enough I was just searching for companies and I ended up finding one online and then looking up where they are and they're like an hour north of me which is kind of field trip time you know field trip but COVID is like nope, mail them all of our stuff. I would I would totally go up there and meet with them which would be really cool. But but regardless when it comes to like shipping them things like I shipped the one of our products for them to like touch it and feel it and you know you It takes a day to get there, regardless. So I got I got samples in, I feel these snap domes, everything feels great. So I'm cool. The unique thing about these snap domes, it's the company's name is snap Tron, and they do the series of SNAP dome that when looking at is the BL series. It's like a four legged snap dome that has a hole in the middle. That hole means you can put an LED underneath the snap dome. Or in the case that I have, you can actually put a hole through the PCB and put a rear mount LED to shine through the hole, which is nice. And the reason why I want to go with rear mount LED is because the you still have to have an actuator, like some kind of cap that fits on top of this naptime. Like the user is not actually going to physically touch the does not own itself, there's gonna be some plastic piece in between. And if there was an LED on the top of the board, I would have to design like a pocket in the rear side of the actuator, such that it doesn't just, you know, you know, just bash into the top of an LED every time you press a button. Yeah, so that's why I like the idea of a rear mount LED. So it can shine through the hole in the PCB, and then shine through the hole in the snap dome. And you know, then the user can see it. Okay, all great, like I've been, you know, I've been investigating this and researching and designing around it. But I've run into an issue here. So get this, the snap domes themselves have a hole of about point one inch in the middle of it 100 mil guide 100 mil. So the the, we have a rear mount LED that we've been using for quite a while that we like now, and it has a hole in the PCB that is 90 Foul. So difference of 10,000 there, the requirement for the the PCB footprint,
all of the everything is defined except for the copper that's inside the hole. And what I mean by that is if you look up the footprint on SNAP Tron, they suggest that the copper that is, you know, inside the the hole of the snap dome, just be less than the hole, the hole diameter, right, so in other words, my copper has to be less than point one inch, but the hole in the PCB is point o nine. So I have a difference of 10 thousandths of an inch there. Well, the problem with that is is I start to get into an issue where I'm violating all my DS DRC rules of copper to whole you know, what is it clearance? Yeah. So even if I give it like five thousandths of an inch, that's not a whole lot, you know, in terms of like drill hit, positioning and things like that. And then the actual copper, what do they call it? The, I guess aperture size is what would they would call like the actual hit, if the tolerances are all off. And I can get a little bit funky on that. So one thought I had was, well, instead of worrying about all of that, what if I made the hole that the backlight led shine through? What if I just made that a plated through hole, right like just make it a full on plated through hole and who cares as long as the center diameter is, you know, what I needed is point o nine inches, which would totally work. The only problem is I have a rear mount LED on the other side of the board. And now the annular ring on the backside of the board has to be so tiny to allow for the pads of that led that now I'm violating clearances over there, too. So I get into this issue where it's like, okay, how small of an annular ring can I do on the backside? And I was looking up some PCB vendors and they suggest what is it six mil minimum annular ring, so you would double that. And so I'm already violating I can't do, you can't do that, I can't do that it doesn't work. So the hole doesn't need to be played. It doesn't matter if it's if it's not plated, but I'm violating my clearances on the top side of the board to try to make this work
that so go ahead. Right.
Well, the question the question here is, is to everyone in PCB land. Can I just put a surface mount pad that is a big circle on the top side and put a drill hit in the middle of it that's not plated?
Yes, you can. You do have to call out to the PCB manufacturer though for that saying that because I'm assuming on the bomb site, you don't have an SMD pad or it does go through copper on the back. So well on the backside I have I have the LED pads. Yeah, but you're gonna have to basically say you the best way to do this is to have an assembly drawing to go with your PCB and you say this hole is not played it because a lot of times is
No really I'm serious. This is serious, not plated,
even though it goes through copper do not play. Yeah, this hole, right. But yeah, you won't run into copper board edge clearance issues, because usually that's in regards to when they're actually routing. Yeah, the board edge with its with a different machine instead of a drill hit me because I'm going to hit this with, you know 100 mil drill.
Right? Well, okay, so is it so here's the thing, okay, and I was thinking that is the solution, because if you look at the way a PCB is made the steps, they apply copper, and then they do drilling. So if you apply copper as like a just a big circular pad and then tell someone to drill it, there'll be a copper on the top, and there will be a non plated hole, they just have to, you know, process it such that it doesn't get plated later on, which that's fine. And I don't even really care too much, if there's a little bit of a small bit of a burr or flashing because of the drilling, which there probably shouldn't be anyway. So I think that's the best, it does kind of mean that I have to do extra work every time we ordered this board to just absolutely 100% make sure that they don't plate that. Because then it might mean that my reverse mount LED doesn't fit in the hole that it needs to fit in, if they do played it, or the or you violate a bunch of other things.
Well, the if they do played it, they will drill it larger. And then because usually when you provide a drill, it's finished hole size. So it would still fit with the planing except that it would short out your LED pads.
That's the problem because the internal pad of the snap dome on the top side is either power or ground effectively. Right? And then the LED is going to have something that would be not so great to short to. Yeah, so like we're dealing with, there's a lot of things that have to go right for this to go right. And, and I spent my god I spent a long time today trying to figure out like, is there a way around this? I mean, honestly, the one way around it is what I mentioned earlier is abandoned the idea of a rear mount LED and put a top mount. Oh 402 led in the pads. And Parker shaking his head here. I was shaking my head too, because like, I don't like that idea. Maybe I tried whatever is mentioning what the actuator because the actual led if I were to put an A on the top side of the board, the LED will sit proud above the snap dome, especially when snap dome is depressed such that my actuator would have to have a pocket for the LED No, no that no, that sounds like a lot more work. If I put the LED as a reverse mount through the board than the bottom of the actuator that touches the snap dome can be flat and can just be a stud effectively, which that is significantly easier than dealing with other things. Like I think that they the the LED in the on the top side of a snap dome is fine if you say have like a sticker membrane that goes over it. And it has a clear spot for the LED to poke through. Because, you know, that's fine for like a control panel surface. But my my application is significantly different than that. So
I'm looking forward to seeing how this turns out.
Yeah, yeah, it'll be it'll be interesting for sure.
Cuz, I mean, if this, if this works, it'll save us a lot of problems and make manufacturing a ton easier. Which is something I've been on a kick
lately. So I'm looking at the pictures of this and it's basically the snap dome. And then they have an adhesive square that goes over it. And then these are not reflowed or pasted no so do you have to have another machine plume because that's coming after pick and place and after reflow
actually, here's the thing that's really cool this company snap Tron, they you send them your entire PCB layout and they'll create what they call a sticker and it has all of this
Oh, and you apply that after the entire thing is done. It comes down it's gone. You cut out all your parts and shit it has Yeah.
And they create no get this this is this is pretty sexy. They create a jig for you that has guide pins, you flip your board upside down and push it down onto the sticker and it's presser pressure sensitive adhesive.
Yeah PSA.
Yeah. And so like you just push it down on and all of your snap domes are right where they need to go. Yeah, so So what I've been trying to not trying to I've already sold it to the to the rest of guys at the company I was like look, we can take 93 switches 93 part numbers and make them one. Let's do that. We don't even have to consider the each dome and into visual part number, the sticker itself
sticker is the part number. Yeah, yeah.
So it makes life a lot easier if, if it works
out. If this works out. It would be cool if you could delve into like the economics of it too. Yeah. If possible. I know it's company secret stuff, maybe. But it would be cool to have some numbers that going forward with this, because I've always seen these before, but always in like the individual style. Yeah. Like they they show on their website. And actually, the funny thing is Atari 2600 controllers are the regular snap domes with the adhesive PSA sticker over them. Yeah, it's not a full sheet, like someone individually put them on their back in the 70s. Right? Yeah, but they still work. So that's kind of, you know, the longevity is there.
You know, okay, yeah. So these these particular ones, you can you can order them in different grades, and like the low grade ones are more than a million presses. And I think there's, there's some coding you can get on him to get 10 million presses, which I mean, we don't need 10 million presses. But the one thing though, is Parker's actually you're exactly right, you don't reflow them, you don't paste them, because they actually physically move like the legs are in one position when they're not being pressed. And when you press them, they spread out. So they're, they're physically scraping on the PCB itself, which means that your, whatever your touch, what he call it, finish on the copper is matters a whole lot. So you know, hassle is going to give you very few presses, it's going to fail in egg is kind of a little bit better. But hard gold is how you get to 10 million presses. So you do have to treat your PCB.
But you have to spend a little bit more on your PCB than getting the hard gold option on those pads. And that's actually one thing is, you'd also have to specify that to your vendor. Because a lot of times when you just say hard gold, they look for like, current hard edge connectors. Yeah, you probably don't have one. And they'll be like, Okay, where do you want us to put that? Right?
Yep, it this. This is one of those solutions that like, it sounds really great. But it comes with not necessarily a price tag, but but a price tag in terms of like babysitting, there's more characteristics about your board, you have to, but you know, it could make things a hell of a lot easier. We actually we implemented a, a test in our manufacturing process, where both. So typically, in our process, we boards go on our pick and place machine and we do the surface mount. And then they immediately move on to through whole processing. Well, because we noticed issues with these particular switches, we implemented a full test in between there, those two steps, because it's nice to be able to fix any broken switches before, you know, moving on and going further with boards. So I mean, even even in just labor costs and parts sitting on the shelf, you know, we're adding that so, you know, I'll talk to I'll talk to the owner of the company, and you know, I probably can't share like numbers, but I bet you I can share percentages of Yeah. Saving 15% Or are we spending 15%? More? Yeah, and volumes
would work to Yeah, I can build my show, like, 100 of these a month or 1000 of these or whatever. Yeah, and so that people can get the idea of like, does it work out?
You know, you know, what's one thing that's really cool. So, before I got quotes for the snap domes, or even before I got sampled from this company, I actually took one of the tax, which is I was like, I want to figure out the characteristics of this tax which such that I can tell them, hey, a guy, you know, guide them and say like, I want something within this range in terms of feel and throw and things like that. So the way I got it, the way I figured out is I took out a scale. And I we have we have a pretty nice scale at work for for counting. You know, you can put like 10 hertz 10 parts in measure how much 10 is and then throw a bazillion in there, they'll tell you how many parts are in there. Yeah. So I took that scale, and I put a text which on it and then I made a I got like a big steel ruler and I made a lever off of it and put a pivot that was on a table somewhere I don't know. And when I say put it a pivot it was probably like a stack of books with a pencil on or something like that. And then I had known weights that I would that I would slide across the ruler and slide them closer and closer to where the tax which was on the scale until I heard the tech switch, click and then measure that. Whatever that was and then slide them away until I heard it unclick and I could measure the force that it would take to push the thing down And the force to release it. And what was awesome was I gave these actual tech switches to this company, and they have like a force gauge leader like a CNC one that goes. And I was like, hey, out of out of curiosity, how close was the numbers that I actually got? And I got within like, 2% of the actual Nice.
Could you tell them how you did it?
No, no, I didn't what I was just like, yes. So that's awesome. Yeah. So y'all, you know, as I go along, I'll, I don't know, I'll share whatever I can. Cool. So, you know, kind of in relation to what I was talking about earlier, like changing some manufacturing things. I so in the last week, I designed well, okay, so I had a problem at work, I got pissed off enough about this problem, that I actually designed an entire product, wrote the code for it and built 15 of them within one week. Just that's one of the things that I love about kind of being in an engineering job, where you have some flexibility with with things. If, first of all, for management out there, if you ever want an engineer to, like perform, like really, really get some stuff done, just give them a problem that pisses them off. And like you will get results immediately.
So is that what Bill Gates said? Wouldn't be says he likes hiring lazy engineers, because they always find a solution to Oh, yeah,
they'll put in more work just to not work. Yeah, yeah, for sure. So so get this. In synthesis world, there's, there's a particular control scheme called one volt per octave, which is, so most control voltages that you use to actually like, adjust parameters on your synthesizers are not necessarily calibrated. I mean, they're calibrated isn't like you put something in and you know, something's going to happen. But there's a few of them, where you put something in a very known signal, and you want a very known result out, like take, for instance, you press a key on a keyboard, you want it to play that frequency, and then you go up one octave, you want it to play exactly double the frequency before. If you want something that you have, like a known amount in an unknown amount out, you typically have to calibrate that, or you just buy ridiculously expensive components that are already doing that right 99% of the time, it's cheaper to calibrate yourself. So specifically, when it comes to one volt per octave, anything where you're dealing in octaves, you have to calibrate stuff. And typically, the way the calibration scheme goes is you turn on your device, you measure the frequency, set it to something that is, you know, reasonable. And then you inject reasonable. Well, reasonable as in like a low frequency that's like a known like calibration standard, like 55 hertz is typically 165 hertz is, is one, you typically go low, because you're going to try to calibrate upwards because most people are not going sub audio, they're going higher. So you go at a low frequency, and you start moving upwards. So So you, you put out one of these frequencies, and then you put known signals in and you say, Hey, did I read reached my, you know, if I put one volt in, did I double my frequency out. And chances are you didn't, you know, your low or your high. So what you do is you you put in a known number of frequencies, like say you you put in, you start with zero volts in and then you go four volts up, you should expect a certain frequency on the output. And if you don't have that, you adjust a trim pot, and you go back down to zero volts. The thing about that trim pot that is interesting is because we're talking about the world of exponentials. Here, zero volts isn't a fixed thing. So it's not like you're starting at zero and adjusting what happens at four volts. If you change that trim pot, you're tipping a curve on an exponential, so you've adjusted both the four volts and the zero volt position. So you start at zero, go to four, adjust, come back to zero, and then you have to reset zero because you're not back at the frequency that you're originally wanted. That's where the problem comes in. Because with most musical instruments, there's a knob somewhere on the device that allows you to change the frequency 99% of the time, these are not precision knobs. These knobs cover a really, really wide span. And so the traditional way to calibrate is to just take that knob and barely nudge it so you're back to where you want to be at zero volts. Well it's a giant pain in the ass and most of the time you spend almost all your time I'm just barely tapping that knob to get it back to where you want to be. Yeah, back to zero, I was dealing with a product two weeks ago that I was just like pulling my freaking hair out, because I would go to calibrate, I put in three volts or four volts and go up, and then come back down to zero. And I'd have to just finally tune that, that knob. And I got to the point was like, there's a better way to do this, we're going to do it different here. So I went and designed an entire module, that is literally just a processor with an encoder and a 14 bit DAC on it. And into that deck, I put a 2.048 volt reference voltage. So that 14 volt 14 bit DAC has the ability to go from just a little bit over negative one volt to just over one volt. So it has a two volt span. And that's it. The encoder has a little press button on it, where I can change scales. And basically all the module does is I can adjust the output by either one millivolt 10 millivolts, or 100 millivolts per click on the encoder. And so what I've done is I is my calibration, my actual calibration standard that I use, what it's it's another module, it can step one volt at a time, you know, it can go from negative four, negative seven to positive seven volts in one volt increments. Basically, I plugged my new module into that one, and it allows me to go from negative seven to positive seven in one millivolt resolution steps. So now instead of having to like try to barely tap this analog potentiometer to get things into into play, I can just go back down to my zero volts, put this put my new module into one millivolt resolution and just click it and I'm there. It's like so much faster. And it's actually way more accurate because for the most part, we're not like reading frequencies on a frequency counter. We actually have Peterson tuners, which are strobe tuners, they so they actually spin up and so you can, you can determine if you're doubling your frequency based off of the rotation of this little spinning dial. So the way you the way you actually set a frequency on that thing is you you turn a knob until the thing stops rotating and then you know you're at that frequency. Well with my little thing I can I can spin it and make make this Peterson tuner dead nuts stop. And then I can go up a couple of octaves. And see if it's turning to the right then I'm a little sharp. If it's turning to the left, I'm a little flat, I can adjust my trimmer and then tap my little calibration module and get it all back to rock solid. And so like instead of like jacking with knobs on my unit, you can now just basically have the unit sitting on the table away from you. And you can calibrate it separately. And all it took was me getting pissed off about turning knobs and you're like God dammit, I can't do that.
I bet you that week you spent working on it. You probably didn't spend the whole week doing Oh, no, no, not is you will save that time. Next week. Oh, yeah.
Yeah. Well, and it's funny because one of the one of the reasons why I went so fast on it is because we actually have a product that's going into production right now, that could use it. Like right this minute. In fact, I gave a handful of modules yesterday to the, to the tester, and I'm developing a product right now, that will be ready in a few weeks that also could use it. So it's just like, Okay, this is I don't know, and that's none of this is like, you know, toot my horn or anything like that. But I think it's just a funny story of like, you get an engineer. He just, they'll fix it.
No. And you in one week, he just got it done.
Yeah. And luckily, the the firmware is super easy on it. You know, it's just, it's an encoder that has to write things based off of clicks. So, actually, you know, that's a little bit of like a, you know, cheers. I'm holding up a beer for STM 32. Like, they have timers on there that have just encoder mode, and it takes care of all the quadrature and everything like that. And that's cool. You literally like if there's, you just, you write to a register, and it's like you went up or you went down and it just tells you you know, it's super nice. So it makes doing encoders and stuff like that really, really easy.
Cool. I think that's going to wrap up this episode. I think it will. Yeah. So that was the Mac fab engineering podcast. We were your host, Parker, Dolman and Steven Greg. Later everyone take it easy.
How do you know if an electrical component is inexpensive? When it says "Cost Effective" as a main bullet point on the datasheet!
How low can the power consumption of the Cat Feeder Unreminder go? Parker and Stephen discuss leakage current on this episode of the podcast!
What is the worst thing about the Analog Devices and Linear Technologies merger? The incompatible color schemes of course.