PCB Mounting Holes and What to Watch Out For
Mounting holes are one of the most popular ways to attach PCBs inside enclosures and on other flat surfaces. Mounting holes are rarely thought about beyond making sure they are at the corners of a PCB. However, there are a couple of things to watch out for when you are using mounting holes in your product.
Pick A Fastener First
Picking the fastener you will use first is the most important step. This might already be chosen for you if you are using a preexisting enclosure. The fastener used will dictate the size of the hole needed and how much keepout/clearance you will need around the mounting hole area for the head of the fastener.
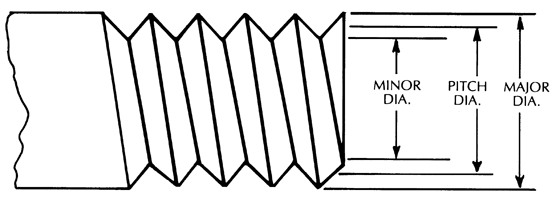
Diagram showing the different diameters of a fastener.
For the hole diameter, look up the major diameter of your fastener and then round up to the nearest normal drill size. This should give your mounting hole enough slop. FR4, the material that PCBs are made out of, does not like to be force threaded and could result in the mounting hole cracking or splitting open if there is not enough clearance around the fastener.
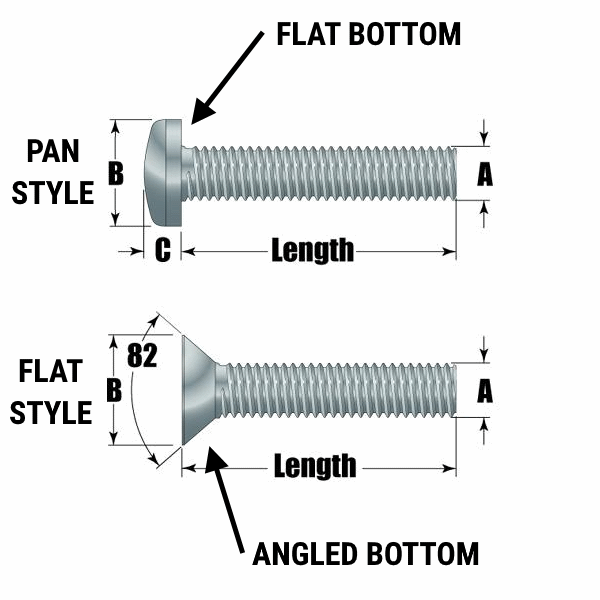
Difference between “Pan” and “Flat” style heads.
The head of the fastener should be flat on the bottom instead of angled. This is slightly confusing as the naming conventions for fastener heads relates to the top of the fastener instead of the bottom of it. A “flat” style fastener is designed to be countersunk into the material and should be avoided when using mounting holes. The angled bottom of the head of a “flat” style fastener can cause stress fracturing on the printed circuit board.
Head Room
Clearance around your fasteners head is another aspect to look at. Sure the head of the fastener is a known diameter but other things to look out for is what is the tool used to attach the fastener. If it is a Philips or Allen style fastener you will not have to worry too much as usually the screwdriver is smaller then the head of the fastener but this might not always be the case with smaller screws and fasteners. A Hex style fastener that requires the tool to go on the outside of the head will call for more clearance.
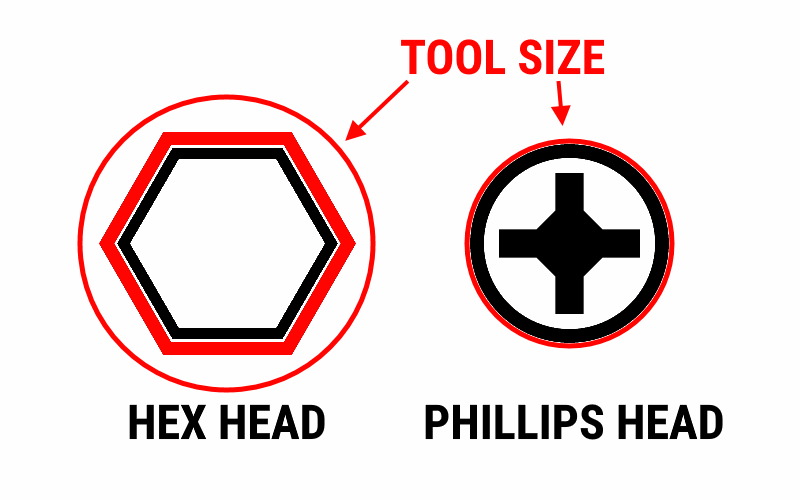
Tool size can change between different fastener head types.
Making sure components on your PCB are out of the way for easy tool access is overlooked often. Heatsinks, TO-220 style ICs, and large capacitors need to have adequate clearance away from the mounting hole to enable easy tool access. This area should also be devoid of signal traces, both on the surface and on inner layers.
The solder mask is not a very robust layer to physical damage so a fastener’s head may scrape the solder mask and bridge the signal layers on the outer, surface layers. Inner layers may be crushed and broken as well as the fastener torques down on the FR4.
Cracking Ceramic Capacitors and Board Flex
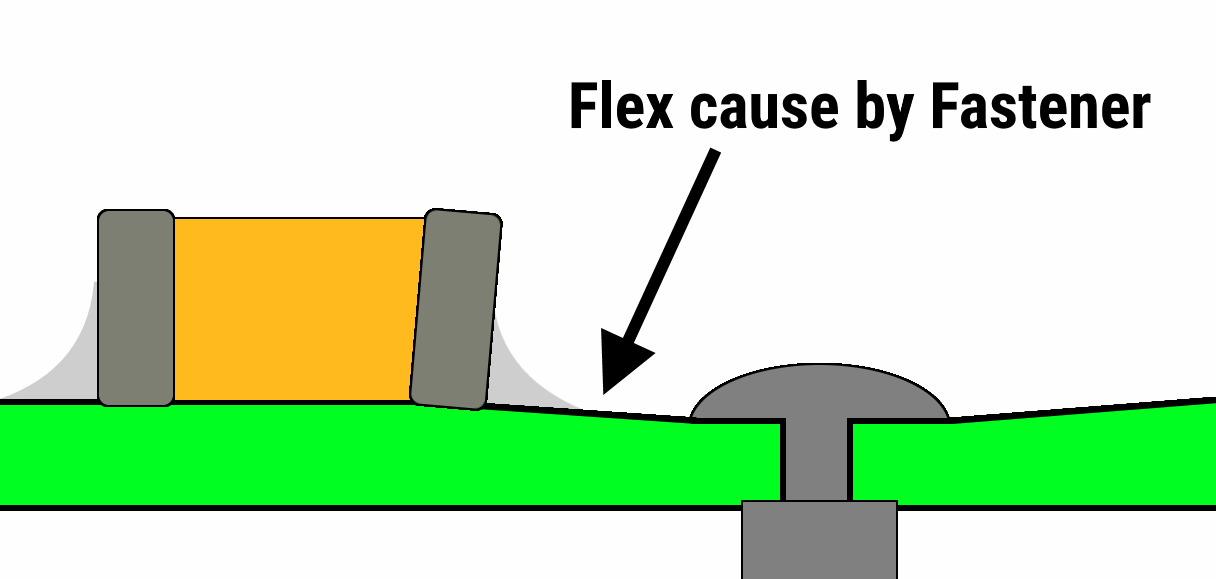
Board and capacitor flex caused by screw fastener in a mounting hole.
When a fastener is installed into a PCB and tightened it will cause a slight amount of board flex as the fastener crushes the FR4 into the standoff. This slight amount of flex is enough to cause micro fractures in solder paste and inside ceramic capacitors. TDK has a great video about flex cracking inside ceramic capacitors. It is advisable to keep ceramic capacitors and other brittle components (ferrite beads) away from board edges and mounting holes for this reason. If you have to place a ceramic capacitor near a mounting hole find one with flexible termination caps to help mitigate any issues.
Grounding Your Enclosure
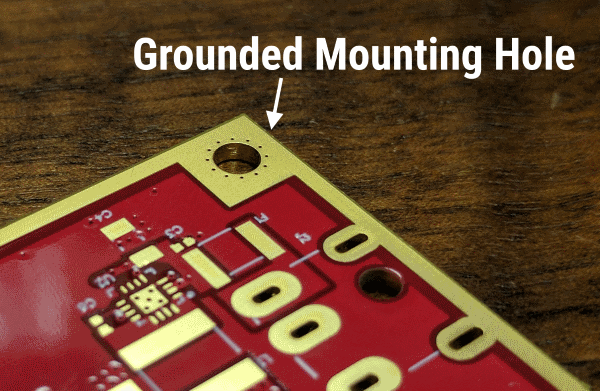
Groundedmountinghole
Using mounting holes to ground your PCB to the enclosure.
An easy way to ground your enclosure you your PCB is to actually leave copper exposed around the mounting hole. This way the fastener can contact the copper and then connect the PCB to the chassis. This is faster then having a separate wire for doing so. To improve reliability you can use fasteners that have serrations on the bottom of the head. Then paste the copper around the mounting hole which will create a layer of solder on the exposed copper. When the fastener is turned into the paste it will grab into and resist vibration better.
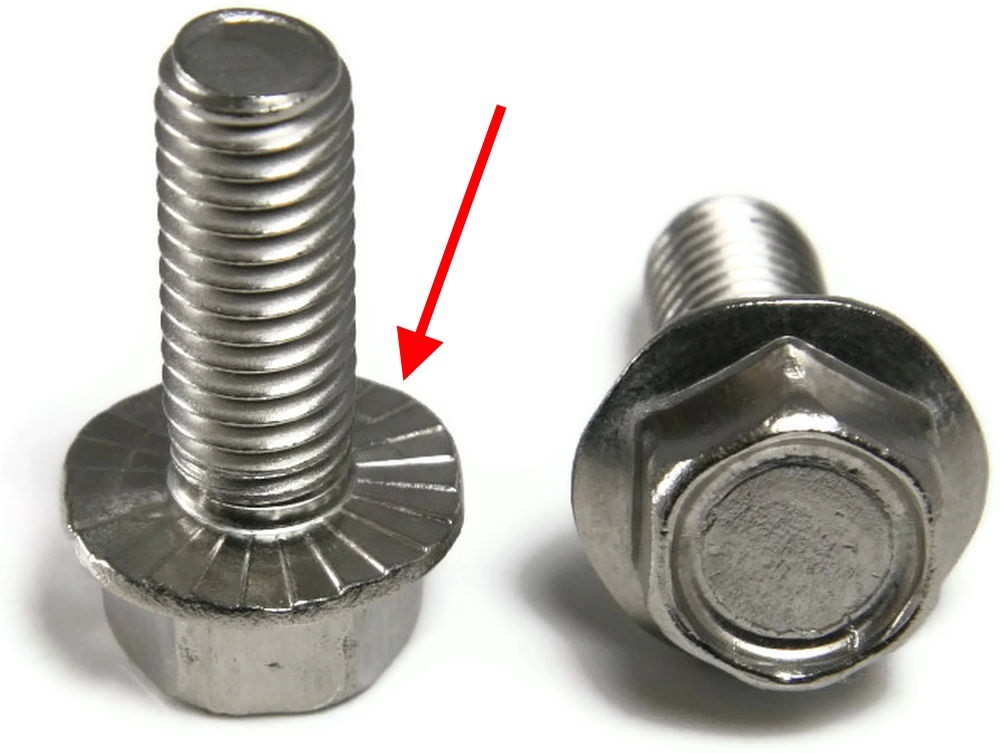
Serrations on the bottom of the head of a fastener.
Tightening Up
Want to know more about mounting holes? Listen to Stephen and Parker talk about this topic on Circuit Break Podcast No. 51: No Flex Allowed now.
Related Topics
MacroFab vs. PCB Manufacturing Brokers: Why Direct Matters
This blog explores the key differences between MacroFab and manufacturing brokers, and why direct manufacturing is the optimal choice for PCBA needs.
Ultimate Guide To PCB Schematics: Concept to Prototype
A comprehensive guide for navigating early design phases and utilizing schematics alongside Gerber and drill files during the PCB creation process.
How MacroFab Uses Clear Communication to Improve Your PCB Production Experience
This blog will discuss how MacroFab can help customers in their PCB production experience through clear communication in a high-octane environment.
Build What You Want With MacroFab
Get an Instant Quote NowAbout MacroFab
MacroFab offers comprehensive manufacturing solutions, from your smallest prototyping orders to your largest production needs. Our factory network locations are strategically located across North America, ensuring that we have the flexibility to provide capacity when and where you need it most.
Experience the future of EMS manufacturing with our state-of-the-art technology platform and cutting-edge digital supply chain solutions. At MacroFab, we ensure that your electronics are produced faster, more efficiently, and with fewer logistic problems than ever before.
Take advantage of AI-enabled sourcing opportunities and employ expert teams who are connected through a user-friendly technology platform. Discover how streamlined electronics manufacturing can benefit your business by contacting us today.